When you click on links to various merchants on this site and make a purchase, this can result in this site earning a commission. Affiliate programs and affiliations include, but are not limited to, the eBay Partner Network.
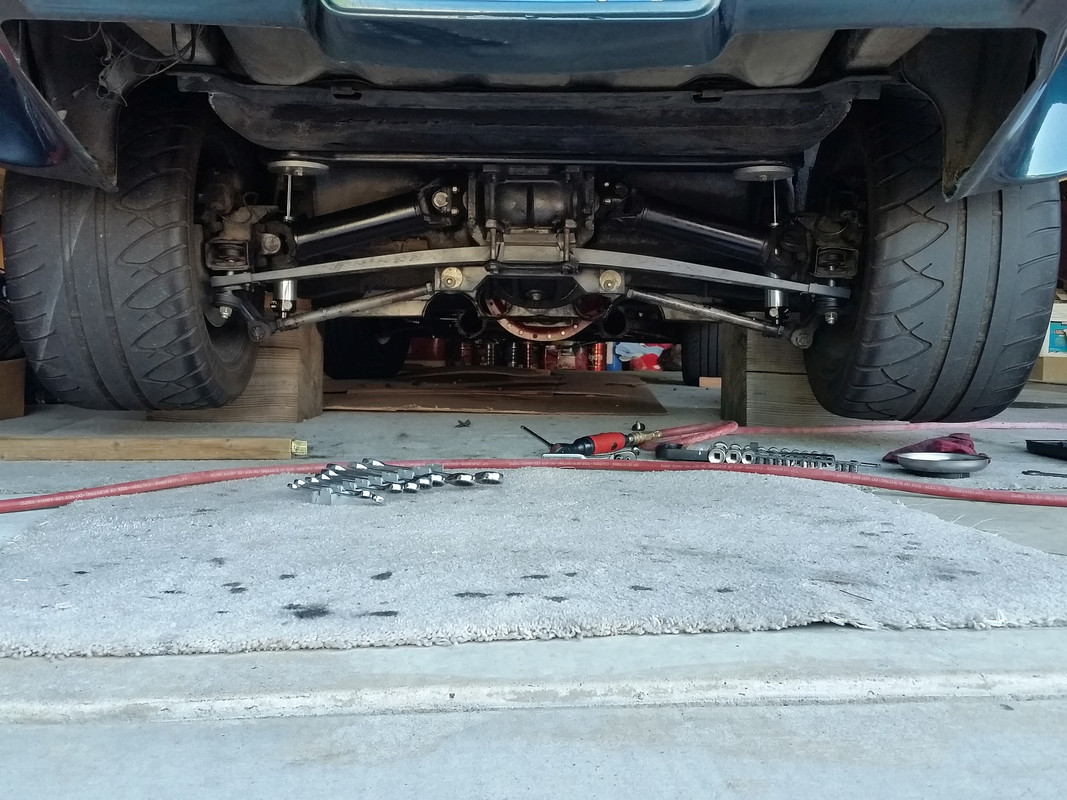
I acquired a spare differential and I'm using good parts and 4.11 Richmond gears. I'm waiting on my billet main cap from Tom's and my $325 yokes from Corvette International. So I took off the exhaust and getting ready with the air tools to go to work here in my garage. I used to wonder if 4.11 really meant 4.11 because I changed the gearing in my 94 vette to 4.10 4.11 uses 37 ring gear and 9 pinion.
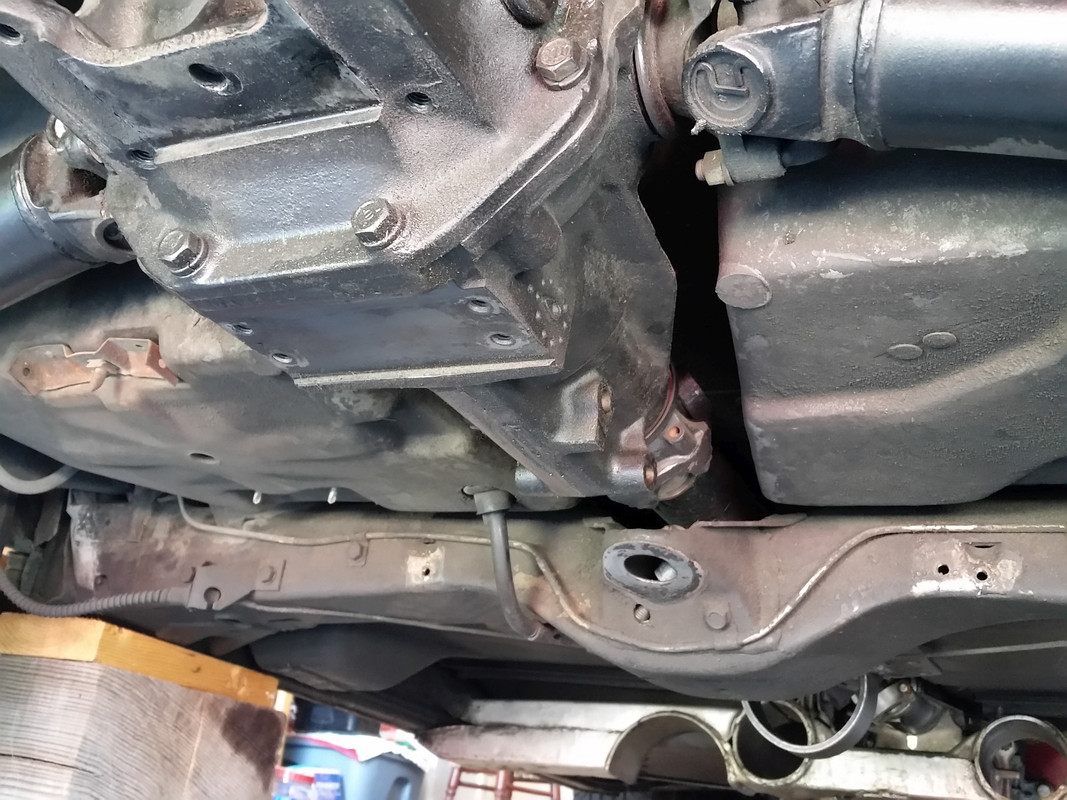
You can see my exhaust pass under the tranny cross member that I made back in the 80's
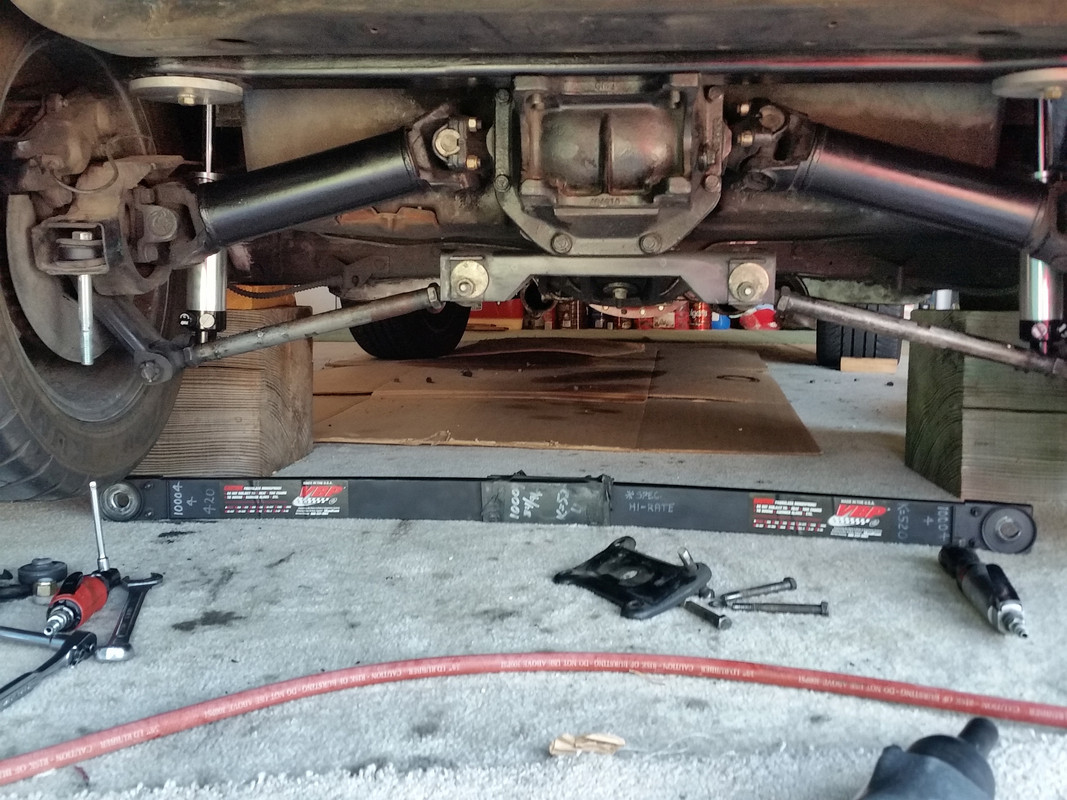
335 width tires, QA1 dual adjust shocks, 520# custom VB&P mono spring, already removed my 3/4 spring end link sway bar, VB&P smart struts with poly ends, solid aluminum diff cross member mounts, blow proof bell housing
Will your carrier "roll" out without dropping the cross member and rear cover? The PO of my 69 said he had done it, but it looks real close to me.
The ratio thing is kind of weird- doing the math, 37/9=4.111111111. I'd call that a 4.11 all day long. 4.10 gears are listed as 41/10- that works. Makes me think the gear people did some fuzzy stuff. How in the world would you be able to tell by the seat of your pants the difference? The gears are going to generate heat regardless, so that can't be the issue.
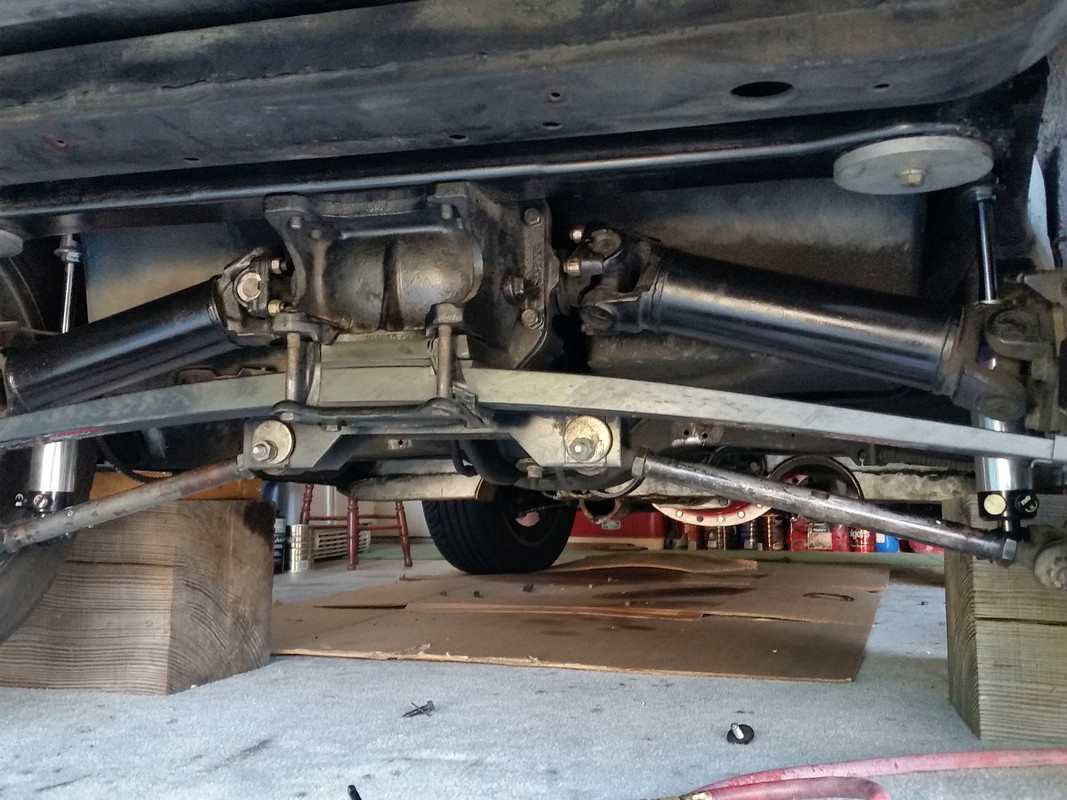
You remove the rear spring by taking off the end nuts and the 4 vertical center bolts. Remove the smart strut from the diff. Un bolt the 2 cross bolts from the diff to the snubber mount. Un bolt the half shafts. It is then almost ready to come out. Place a floor jack under the differential and then remove the diff. cross member end bolts.
Lower the diff down and the cross member. 4 bolts come from the top to unbolt the cross member from the diff
You never have to remove the rear diff cover. I have replaced the posi unit numerous times with the diff still in the car. Just remove the diff cover and pull the yokes out of the case. unbolt the ring gear main caps and pull the ring gear and posi unit out and do a bench repair.
The cross member has the 4 bolts from the top which you can't get to unless you drop it.
The spring bolts look pretty short. I'm running 8 inch bolts with my 360 lb spring, and was thinking about maybe going to a 420 lb, and at the same time get it shortened a bit. I know you have flairs, but with my 295s the tire pokes out past the fender an inch, and I'd like to pull them in some. Do you think that could work? A stiffer spring shorted a bit, with shorted spring bolts I mean. do want to keep the 15 inch wheels,...like the old school look better.
The plan would be to get a set of 15x10's with a deeper backset then.
All looks good, but yeah thats a interesting spring, ive got the 500 spring from vbp/vansteel and my springs get more of an arch going on, i ended up having to get 9 or 10 inch bolts, end of bolt spring nearly touches the wheel inner rim - to get car to sit low enough
pic
Last edited by corvettedave383; May 18, 2018 at 01:46 PM.
Money Pit I've always used a net back spacing of 4.5 inches. when you get up to 5 or more BS you have to use a shorter spring. I took off the VB&P 420# and I used 6 1/2 inch spring. The 420 had more arch than this new 520#. These are 5 1/2 inch bolts
Spring removed
Mark the smart strut so the alignment stays the same.
Removed the snubber Arm and Smart Strut center bracket.
GTR1999 gave me this advice. you follow the same procedures for lash and pattern. I am setting up new Tom's 411's now in fact. 026-026" shim will get you close to dial in. Lash 5-7, lash should be within 002" but sometimes you may see 003". If you do all the proper prep work the lash will be within 002" through 360*
After mucking with it again and again. I ended up with a great pattern, but only .0045-.0065. tighter than suggested. GTR was right! after reinstalling it you can hear a light howl cruising down the highway at light throttle in OD 5th gear. The noise goes away off the throttle or on the throttle.
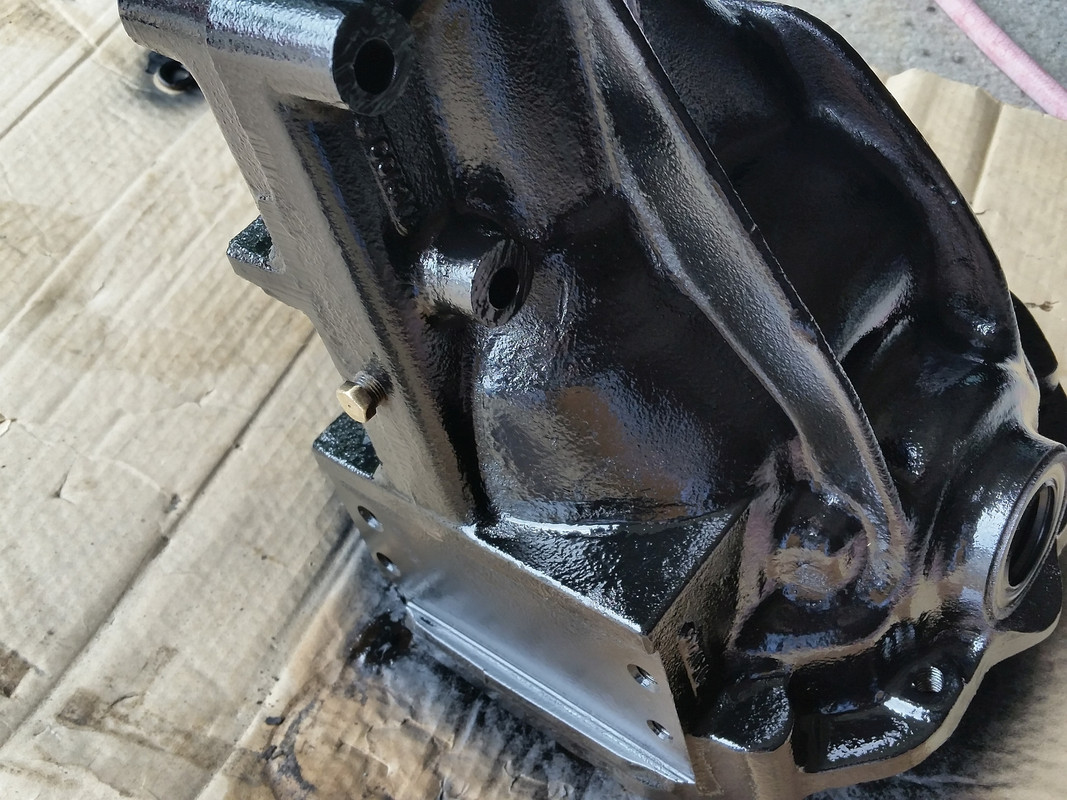
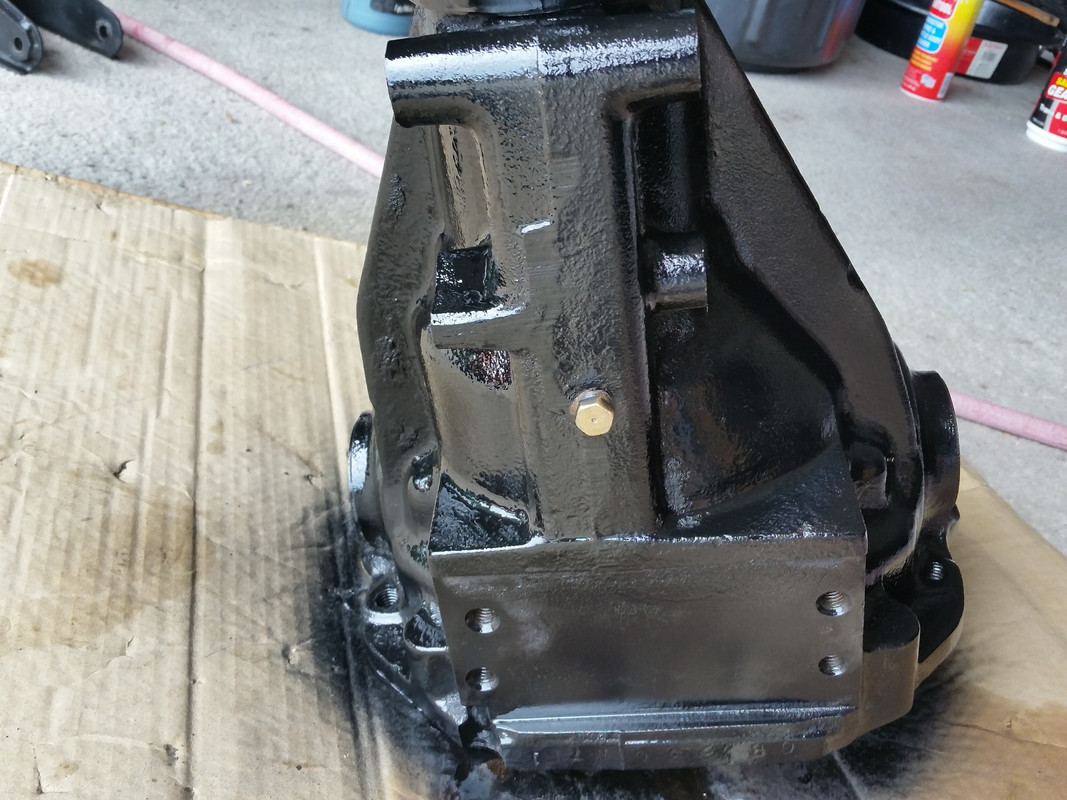
I rebuilt the posi unit that came with the 77 diff. It got the super spyder gears, steels, and friction plates kit from the local drive line shop kit. From tom's the billet main cap. From Corvette International the $325 yokes. I used the heavy duty rear differential cover. It uses 13/16th spring bolts compared to the stock 5/8th's. I polished out the inside of the case and installed a drain plug. I painted it with epoxy paint. GTR1999 suggested cryo treating everything. It was a time to get everything done and running, so I didn't.
drain plug
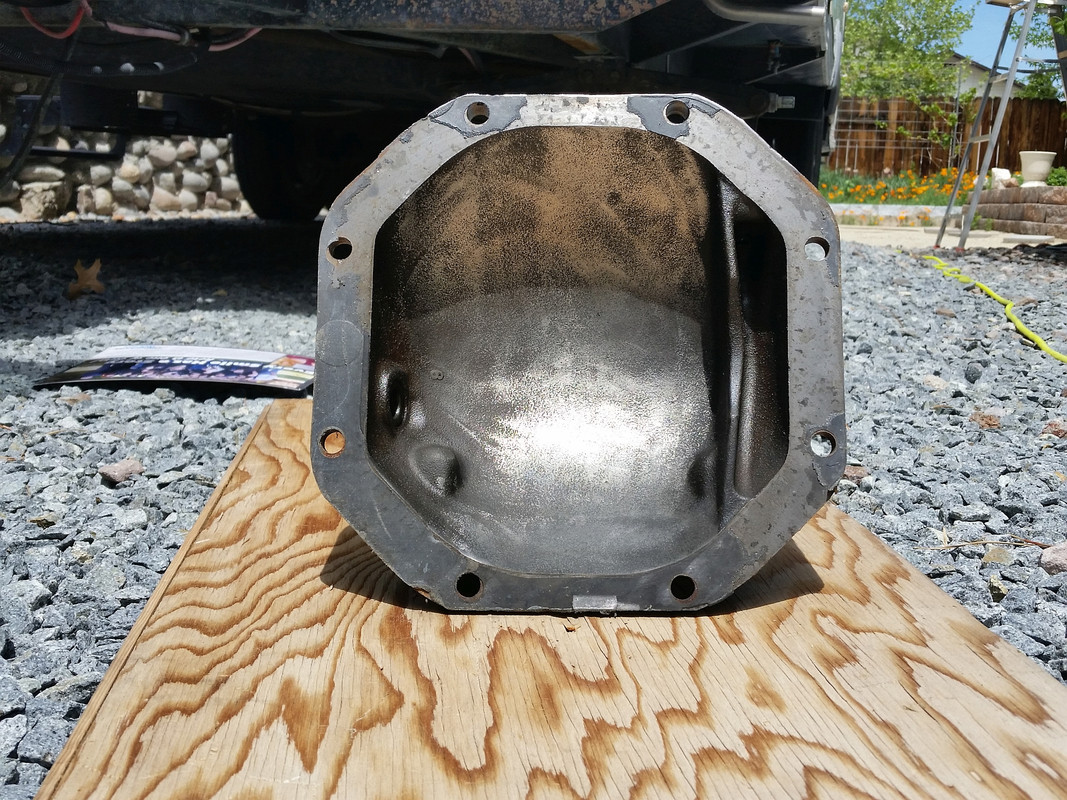
Start of polishing out the case and HD diff cover.
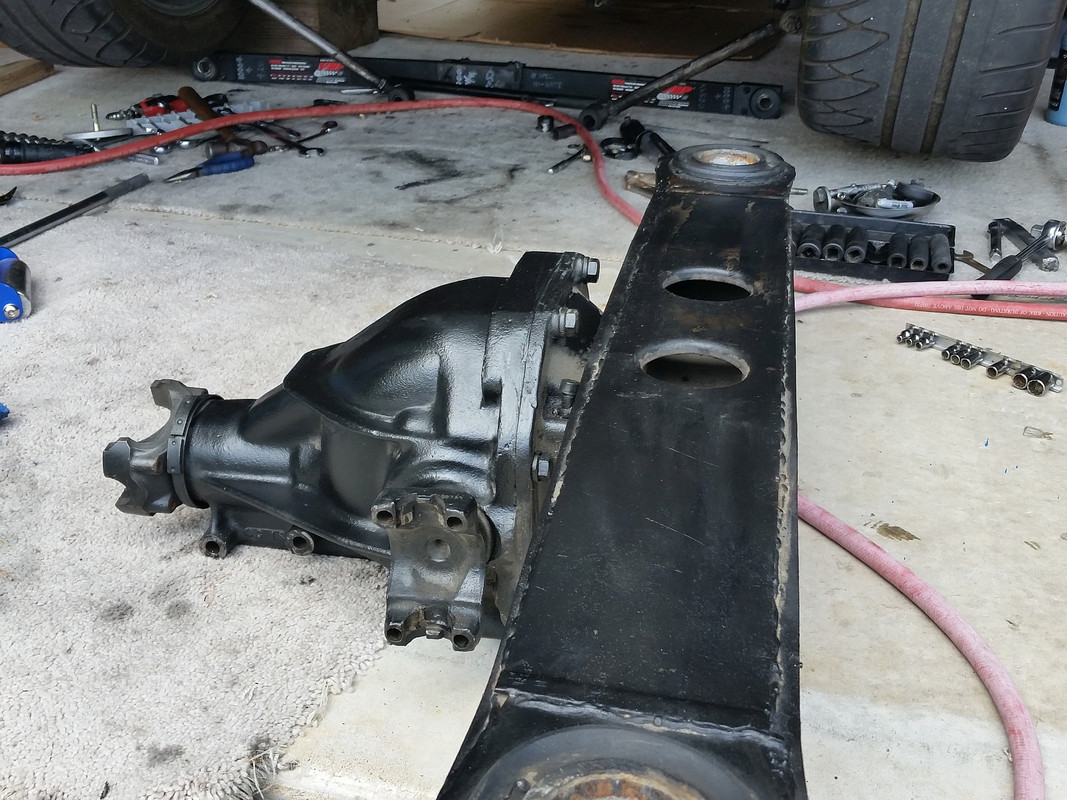
Ready to throw back in. What PITA to do alone on the garage floor. You need 4 hands to line up the drive shaft u-joint with the differential input side.
No, doing a rear end Remove & Replace by yourself sucks.
When I was young and poorer I didn't have the money to really race competitively. I had always attended all kinds of races. So I thought that I needed to jump in with both feet. Instead of walking around in the pits and gawking I walked up to a very professional traveling sprint car team and said that I would like to join the team for free and do what ever they wanted me to do. I traveled and paid for my own hotels just to learn at first. Within a year I was hired and sent off to a race engine shop to become a valuable team member.
I have never been a car mechanic working at a shop or car dealership. I have only done the race shops and traveling race team mechanic as fun job. You just have to start somewhere and learn as much as you can. Years later I was setting the valves on my own alki injected dragster in the pits at a NHRA event one day and a top alcohol funny car team manager came over and ask if I would work for them because they were in a jam rebuilding their motors between rounds. You just have to say, "I can do it!"
Things are so much easier when done with friends and a team!
Designer Imagines A Corvette That Looks More Like a Corvette Than the Corvette
Slideshow: A Jaguar designer's personal project imagines what a modern front-engined Corvette might look like if Chevrolet revisited the golden age of the Stingray.