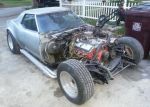
When you click on links to various merchants on this site and make a purchase, this can result in this site earning a commission. Affiliate programs and affiliations include, but are not limited to, the eBay Partner Network.
I just received my new Dewitts Radiator with dual fans. and its a beautiful radiator. but the fan shroud hits the drivers side control arm. I did some mesureing and if I move the bottom pins over 1 3/4" the fans will be centered between the left and right control arms. and every thing will be fine. I think the plate on the bottom of the radiator with the pins mounted on it is pop riveted to the radiator. does any one know how the pins are attached to the bottom plate. if they are removeable I can just drill new holes and move the pins over. but if there welded on i'm stuck. any info on how the pins are mounted would be appreciated. thanks
You need to post good photos. I do not know what you are describing as 'pins'
Also what year is your Corvette???
All I can ASSUME is that your Corvette is an early C3 where it has two guide pins on the bottom plate that index into the holes in the radiator support.
1971 corvette it came with the peanut aluminum radiator with the pins mounted on the bottom. 2 pins are attached to a plate that is riveted to the bottom of radiator. i can remove the plate and relocate the pins ? I was just wanting to know if anyone on here new how dewitts attach the 2 pins on the plate on radiator plate. I cant see any welds by looking at the pins so the maybe there bolted on. geuss I will have to get the plate off and see. thanks
4139026M 71 corvette conversion radiator. if I can move pins it will fit great. thanks
Ok, just so everybody understand what you purchased, the 4139026M is an aftermarket conversion package to fit a larger radiator with dual fans into the stock small block support.
If you move the pins, that will move the whole radiator and fans over but the upper brackets will move as well. Do those line up now?
No the Brackets will not line up. but I can drill new holes in the core support and brackets will be fine. I would like to no how the pins are attached the plate ? if I can simply take them off and move them over 1 3/4" towards the drivers side. thanks
Corvette Stories
The Best of Corvette for Corvette Enthusiasts
10 Reasons the C6 Z06 is Still A Performance Benchmark After 20 Years
Joe Kucinski
How Much Horsepower Every Corvette Engine "LOST" in 1972
Joe Kucinski
Top 10 DOs and DON'Ts for Protecting Your Convertible Top!
Michael S. Palmer
Top 10 Most Explosive Corvettes Ever Made: Power-to-Weight Ratio Ranked!
Joe Kucinski
150 hp to 1,250 hp: Every Corvette Generation Compared by the Specs That Matter
Joe Kucinski
8 Coolest Corvette Pace Cars (and Replicas) of All Time
Verdad Gallardo
Top 10 Corvette Engines RANKED by Peak Torque (70+ Years of Muscle!)
Joe Kucinski
Corvette ZR1X Will Be Pacing the Indy 500, And Could Probably Race, Too!
Verdad Gallardo
Top 10 Corvettes Coming to Mecum Indy 2026!
Brett Foote
Top 10 C9 Corvette MUST-HAVES to Fix These C8 Generation Flaws!
No the Brackets will not line up. but I can drill new holes in the core support and brackets will be fine. I would like to no how the pins are attached the plate ? if I can simply take them off and move them over 1 3/4" towards the drivers side. thanks
You can re-drill the pin holes. Remove the three bolts from the bottom of the fan and the lower bracket will come off. The pins are simply tee shaped and fit into a 1/2 hole in the lower plate. They must be 11" apart on center. When you finish moving them, re-assemble the upper and lower brackets loosely but do not tighten the bolts. Open the brackets wide and over the radiator. Clamp them tight on the radiator and tighten the bolts.
You can re-drill the pin holes. Remove the three bolts from the bottom of the fan and the lower bracket will come off. The pins are simply tee shaped and fit into a 1/2 hole in the lower plate. They must be 11" apart on center. When you finish moving them, re-assemble the upper and lower brackets loosely but do not tighten the bolts. Open the brackets wide and over the radiator. Clamp them tight on the radiator and tighten the bolts.
Ok thanks Mr Dewitt I will remove the lower plate today and see what this t thing is about on the lower pins. and relocate them and everything will fit perfect. thanks for your time (I will post back my results)
I am completely lost here on where term : 'pins' is being used.
The only 'pins' I know of on a Corvette radiator would be those ' guide pins' used generally on a mid year radiator that go into the bottom area of the core support.
But on a 1971 I have not seen GM use that design. They use the outer 'U' shaped saddles that are welded onto the core support to hold the radiator and insulate it with rubber cushions.
I guess you have it figured out but I am just lost due to the wording,
I Got my radiator in the car today. I took the bottom plate of the radiator and cut the pins off and relocated them 1 3/4 towards the drivers side. now the radiator fits great. Dewitts radiator Makes a Quality Radiator im very happy with it. thanks mr Dewitt
This thread tosses my mind for a loop, my '72 vert came with the OEM SBC, and of course I put in a later/better engine....and the 3 radiators I have had in it, original and two replacements, ALL have had rubber saddles/brackets the bottom fit in, and the top also, they rode on the tank/core welded seam....when I installed the SPAL fans instead of the stock shroud and various fans, I just took two lengths of angle aluminum and tied the ends off to the rear of the steel brackets, put a aluminum shield from the fans/lower bar and positioned the fans to clear....put pipe wrap insulation all around the install as nesessary, from HD...like for insulating home plumbing pipe/HVAC lines, etc.....
never ever seen any brackets on the radiators, or pins under/top of them......hard to believe my '72 is all that different than a '71 shown above......
my 71 did not come with power steering, a/c or a automatic trans. therefore it came with a small aluminum radiator known as the peanut radiator. and they have the 2 pins on the bottom of radiator that set into 2 brackets on frame with holes in them with rubber bushings. the peanut radiator does not come with a cap it has the surge tank mounted on the fender well and it has the big steel fan shroud on it. if your car came with power steering or a/c or automatic it did not come with a peanut radiator. it came with a normal radiator with a cap. the conversion radiator I ordered from Dewitts is a big block size radiator made to mount in the peanut radiator mounts. and I had Dewitts add a cap to the new radiator so I could get rid of the ugly aluminum surge tank.
Last edited by jpattt24; Nov 23, 2018 at 11:39 AM.
GM part number 3155316, used on all sb Corvettes 63-67 and base car sb C3's (68-72) (no air, no auto, and no RPO motor)
This radiator utilizes the aluminum surge tank on the fender skirt because it has no filler neck.
Last edited by Tom@Dewitt; Nov 23, 2018 at 05:19 PM.
There is a lot of confusion and misnomers regarding this 31355316 radiator, and calling it a peanut doesn't help. Yes, it is smaller than the copper units but still a very high performance unit.. It's not a so-called four core or four row but a stacked plate design. This forms one single large passage way 3' wide. You also should note that this special radiator has no end tanks, which means it is all core. Radiators with end tanks look bigger but sometimes they are not as good. In example this 22.5" aluminum radiator has a higher btu rating than the 22.5" copper unit used on 68 BB engines. To remedy this, GM increased the BB radiator in 69 to 27.5".






 Dewitts Radiator Bottom pin ? help