When you click on links to various merchants on this site and make a purchase, this can result in this site earning a commission. Affiliate programs and affiliations include, but are not limited to, the eBay Partner Network.
Sounds like you installed a new flywheel.
Did you measure the flywheel disk surface to the crankshaft flange?
It needs to be at .910 to .960"
If it's out of spec the pivot ball needs adjustment to compensate.
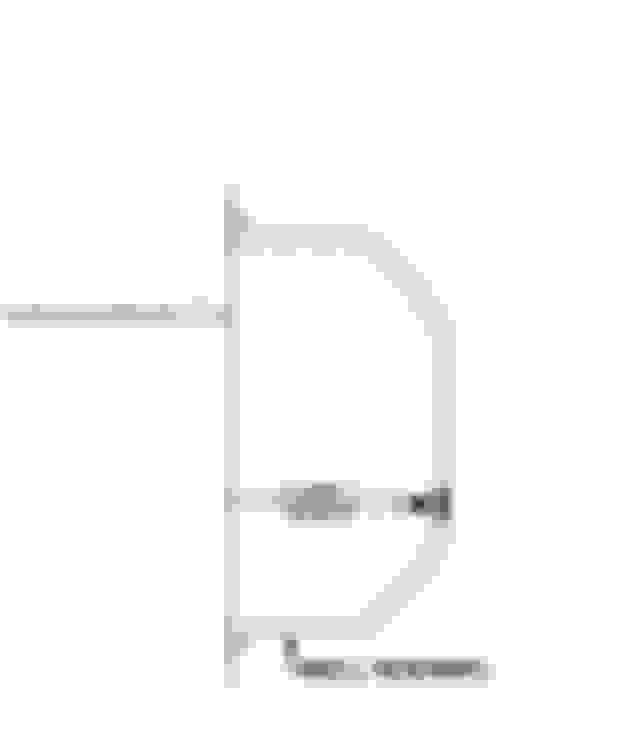
Pivot ball should be at 4.750" from the top of the pivot ball to the engine flange surface of the bell housing if the flywheel spec is .910 to .960 These pictures should do the explaining:
Thanks gents... this is indeed a new clutch kit. I do not know what throw out bearing is in there, either passenger car or corvette. Neither do I know anything about the pivot ball. It sound like one of these days I am going to have to drop the trans; not my favorite task.
The clutch rod is adjusted all the way to the end in order to get full release. The pedal has what seems like close to three inches of play before beginning engagement. However there is no bump-stop for the pedal.
I will once again go through the adjustment procedure... but methinks drilling a second hole in the Z-bar would work. It will be a temporary solution. That should ensure a full release of the clutch and some clearance when disengaged.
My plan is to replace the Muncie with a T5 this winter... cruising at 70 MPH @ 3000 RPM is for the birds.
If I hate the T5, I will restore the Muncie and check out all of the above before reinstalling.
3 inces of free play? Adjusted all the way out? You are not doing something right.
The free play is measured at the pedal. Only light finger pressure. You should only be pushing against the return spring pressure. The further out you adjust the rod, the tighter the adjustment gets.
3 inces of free play? Adjusted all the way out? You are not doing something right.
The free play is measured at the pedal. Only light finger pressure. You should only be pushing against the return spring pressure. The further out you adjust the rod, the tighter the adjustment gets.
Yes. But remember, my pedal stop is missing.
Yet still, adjusted till the end of the rod seems weird. On the other hand... on the original clutch kit, it was adjusted quite far out as well. With a new thicker clutch plate, it makes sense that it the clutch pedal needs to be depressed further.
The only thing else that I can think of is installing the clutch pedal rod upside down. Tho� I�m quite sure I didn�t. I angled it down.
Old post but would like to know if this worked out... e.g. excess play.
I have all the other elements and measurements corrected following all the guidance/experience wrt flywheel and pivot ball measurements etc, and the clutch does release but a lot of play before throw out bearing just makes contact with the pressure plate.
As this was a auto to manual swap I was also thinking the there is a geometry issue in the linkage. My clutch pedal rod is riding high in the hole through the firewall and had to open up the top of it (egg shaped) so as not to scrape.
My pedal assembly was from a '79 and I have another from a '74 and the distance from the the pivot point to the clutch rod connecting stud is the same. I do see that there is an 80-81 clutch pedal but I thought that was only for shape and not function.
I have an extra Z bar and maybe drill a second hole (a la "gkull") and see what happens.
I used this.... its from a C2. The space between the spring holes is longer than stock for C3. This effectively moves the adjustment on the clutch pedal rod up so you are not at the very end. My issue was north of this rod with the linkage and pedal.
Again, my clutch was releasing it was just at the very end of the clutch rod
Funny you say that. I got sent a C2 linkage pushrod (piece with the 2 spring holes) by mistake from SST and it drove me crazy for a few days. I could not get the clutch to adjust right no matter what I did. I looked at an online catalog to notice that I had been sent the wrong (C2) pushrod. Replaced it with the proper C3 pushrod the adjustment fell right where it is supposed to go in the middle of the threaded adjustment rod. If you have trouble you need to compare those parts to the ones you have.
I can't be the only one who got the mislabeled linkage parts.
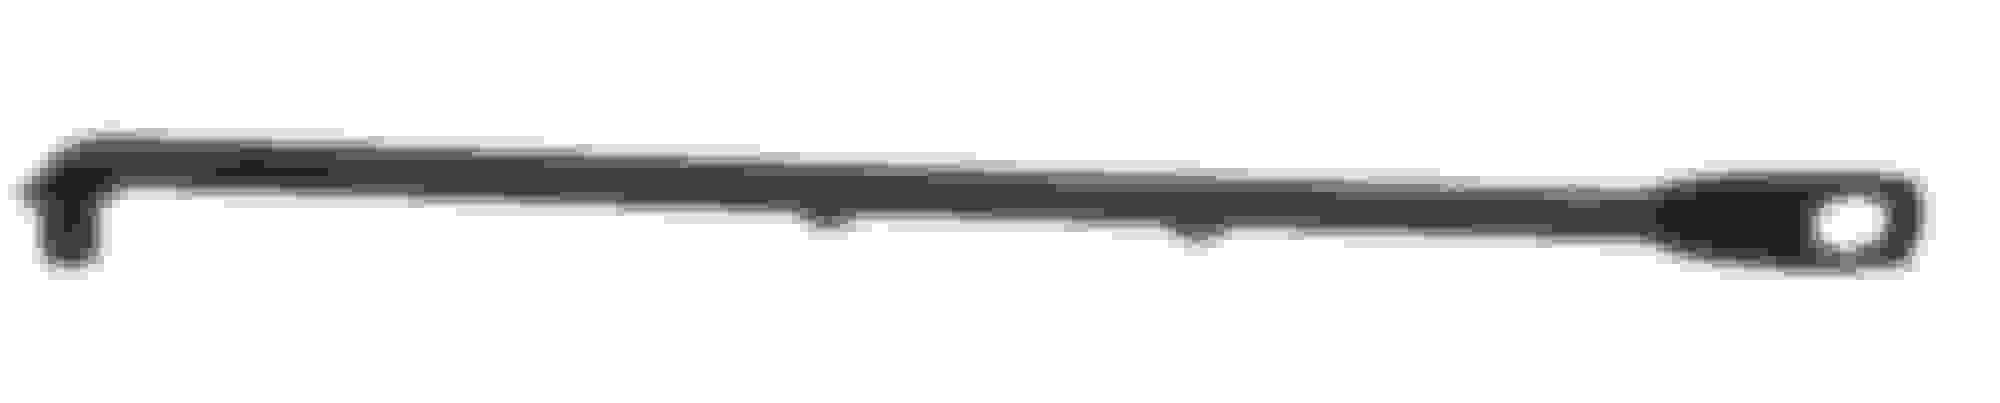
This is the C2 '64-'66, 327 , about 10.25" center to center pushrod. GM# 3844209. It has the wider spring hole spacing. This is what SST sent me in the kit and I could never get the adjustment right. It was mis-tagged as it had the C3 part number on it.
This is the correct '67-'81, C3, about 9" long pushrod. GM #3872960

 09-10-2019, 01:44 PM