






1980 Instrument Lighting Issues

Thread Starter
Advanced


Joined: Feb 2014
Posts: 95
Likes: 1
 1980 Instrument Lighting Issues
I recently acquired a 1980 C3 which the previous owner never drove at night. They didn't know, therefore, that most of the bulbs in the instrument cluster, as well as other bulbs, are burned out.
Is there a list, somewhere, of ALL the light bulbs that are supposed to be there? I can't find the A/C controls in the dark. The "high beam" light is out... most of the lights in and around the speedometer and tach are out. I would like to find a COMPLETE list of all bulb locations, along with part numbers, so I can obtain them all, before I start trying to replace them. Also, any information about disassembling the dash (I need to remove the speedometer to send it in for re-marking and re-calibration).
Thanks!
Is there a list, somewhere, of ALL the light bulbs that are supposed to be there? I can't find the A/C controls in the dark. The "high beam" light is out... most of the lights in and around the speedometer and tach are out. I would like to find a COMPLETE list of all bulb locations, along with part numbers, so I can obtain them all, before I start trying to replace them. Also, any information about disassembling the dash (I need to remove the speedometer to send it in for re-marking and re-calibration).
Thanks!
Racer

Joined: Mar 2018
Posts: 394
Likes: 51
From: wilmington Ma
I recently acquired a 1980 C3 which the previous owner never drove at night. They didn't know, therefore, that most of the bulbs in the instrument cluster, as well as other bulbs, are burned out.
Is there a list, somewhere, of ALL the light bulbs that are supposed to be there? I can't find the A/C controls in the dark. The "high beam" light is out... most of the lights in and around the speedometer and tach are out. I would like to find a COMPLETE list of all bulb locations, along with part numbers, so I can obtain them all, before I start trying to replace them. Also, any information about disassembling the dash (I need to remove the speedometer to send it in for re-marking and re-calibration).
Thanks!
Is there a list, somewhere, of ALL the light bulbs that are supposed to be there? I can't find the A/C controls in the dark. The "high beam" light is out... most of the lights in and around the speedometer and tach are out. I would like to find a COMPLETE list of all bulb locations, along with part numbers, so I can obtain them all, before I start trying to replace them. Also, any information about disassembling the dash (I need to remove the speedometer to send it in for re-marking and re-calibration).
Thanks!

Melting Slicks

Joined: May 2015
Posts: 2,365
Likes: 428
From: Cape Girardeau Missouri
Actually the '78+ gauge pack and instrument cluster aren't very difficult to remove. That said I do suggest you remove the carpet center console sides, the emergency brake cover and loosen the shifter plate (moving it to the rear) before removing the gauge pack. This takes some extra time but there's less chance of damaging anything and it's easier to get everything lined up when you reassemble. Removing both seats makes the job easier.
Hidden fasteners you will encounter: 1) the ones in the carpet sides (front, middle and rear) that are mainly concealed by the carpet pile and 2) underneath the front of the shifter place where there are two screws (each in plastic tabs) that go up into the gauge bezel at an odd angle. You really have to contort around to see them.
You need three different bulbs:
#192 (three candlepower) These are the general illumination lamps for the cluster, gauge pack and transmission shift (auto only).
#194 (two candlepower) These are for the indicators/warnings (like turn signals, high beams, seatbelt reminder, etc.) and the windshield wiper/washer switch. If you use the higher power #192s in these you risk deforming the plastic after extended use.
#558 (three candlepower) This one is for the "lantern" at the top of the gauge pack that lights to HVAC controls. I heard they were discontinued fairly recently and are getting hard to find. They have a small lens cast into the very front center. If you slightly drill out the metal piece just ahead of the lamp and slightly enlarge the rectangular aperture in the plastic piece you will get FAR better lighting of the controls.
I'm not sure of the exact number of #192 and #194 lamps needed but as they come in boxes of 10 you need two boxes of the #192s and 1 box of #194. As long as you can make a minimum order to get free shipping you'll get the best deal ordering lamps from sources that specialize in in them like 1000bulbs
Hidden fasteners you will encounter: 1) the ones in the carpet sides (front, middle and rear) that are mainly concealed by the carpet pile and 2) underneath the front of the shifter place where there are two screws (each in plastic tabs) that go up into the gauge bezel at an odd angle. You really have to contort around to see them.
You need three different bulbs:
#192 (three candlepower) These are the general illumination lamps for the cluster, gauge pack and transmission shift (auto only).
#194 (two candlepower) These are for the indicators/warnings (like turn signals, high beams, seatbelt reminder, etc.) and the windshield wiper/washer switch. If you use the higher power #192s in these you risk deforming the plastic after extended use.
#558 (three candlepower) This one is for the "lantern" at the top of the gauge pack that lights to HVAC controls. I heard they were discontinued fairly recently and are getting hard to find. They have a small lens cast into the very front center. If you slightly drill out the metal piece just ahead of the lamp and slightly enlarge the rectangular aperture in the plastic piece you will get FAR better lighting of the controls.
I'm not sure of the exact number of #192 and #194 lamps needed but as they come in boxes of 10 you need two boxes of the #192s and 1 box of #194. As long as you can make a minimum order to get free shipping you'll get the best deal ordering lamps from sources that specialize in in them like 1000bulbs
Thread Starter
Advanced
Joined: Feb 2014
Posts: 95
Likes: 1

Le Mans Master


Joined: Jun 2019
Posts: 7,649
Likes: 2,466
From: Indiana
Here is that stupid hvac bulb..mine went out again..waiting for stereo rebuild before that..yes pita but doable..take out seats and side panels as mentioned..just a thought that that stupid to bulb fits in but it does...
i think that is the bulb...many say they have it but send you the wrong one..its about 10 bucks a pop
i think that is the bulb...many say they have it but send you the wrong one..its about 10 bucks a pop
Thread Starter
Advanced
Joined: Feb 2014
Posts: 95
Likes: 1
Corvette Stories
The Best of Corvette for Corvette Enthusiasts

Top 10 Most Explosive Corvettes Ever Made: Power-to-Weight Ratio Ranked!
Joe Kucinski
150 hp to 1,250 hp: Every Corvette Generation Compared by the Specs That Matter
Joe Kucinski
8 Coolest Corvette Pace Cars (and Replicas) of All Time
Verdad Gallardo
Top 10 Corvette Engines RANKED by Peak Torque (70+ Years of Muscle!)
Joe Kucinski
Corvette ZR1X Will Be Pacing the Indy 500, And Could Probably Race, Too!
Verdad Gallardo
Top 10 Corvettes Coming to Mecum Indy 2026!
Brett Foote
Top 10 C9 Corvette MUST-HAVES to Fix These C8 Generation Flaws!
Michael S. Palmer
10 Revolutionary 'Corvette Firsts' Most People Don't Know
Joe Kucinski
5 Reasons to Upgrade to an LS6-Powered Corvette; 5 Reasons to Stay LT2
Michael S. Palmer
Le Mans Master


Joined: Dec 2006
Posts: 8,837
Likes: 1,028
If you take out the glove box liner, and reach in and around up top, it can be changed.
It's a developed skill. Someone will have a picture of what you would fumble for.
Le Mans Master
Joined: Jun 2019
Posts: 7,649
Likes: 2,466
From: Indiana
Mine works. In the desert on a moonless night you can tell. Pretty sad. I will drill it out (Pin hole) next time.
If you take out the glove box liner, and reach in and around up top, it can be changed.
It's a developed skill. Someone will have a picture of what you would fumble for.
If you take out the glove box liner, and reach in and around up top, it can be changed.
It's a developed skill. Someone will have a picture of what you would fumble for.
Burning Brakes

Joined: Jan 2012
Posts: 943
Likes: 73
Mine works. In the desert on a moonless night you can tell. Pretty sad. I will drill it out (Pin hole) next time.
If you take out the glove box liner, and reach in and around up top, it can be changed.
It's a developed skill. Someone will have a picture of what you would fumble for.
If you take out the glove box liner, and reach in and around up top, it can be changed.
It's a developed skill. Someone will have a picture of what you would fumble for.
Melting Slicks
Joined: May 2015
Posts: 2,365
Likes: 428
From: Cape Girardeau Missouri
The #558 goes top, front center of the gauge pack bezel. You'll see a narrow wedge shaped piece with a little rectangular hole at the end--the light shines through that hole and that's why it needs the special lamp with the lens cast in the end.
Thread Starter
Advanced
Joined: Feb 2014
Posts: 95
Likes: 1
Race Director

Joined: Mar 2017
Posts: 11,931
Likes: 4,497
From: Virginia
The entire gauge cluster can be removed easily. It may not be bulb related (but certainly change them!). The sockets can have issues, the rear connector may be loose, and the flexible printed circuit board may need to be replaced.
I switched to LEDs. SuperBrightLEDs.com has a list of all of the bulbs you need. I went with soft white, to maintain the period glow. LEDs have the added fun of having an orientation when installed, so if you can, test with a bench power supply.
Willcox has a good writeup on how to remove the cluster. If you loosen the steering column, be sure to loosen the bolts at the firewall first, so you don't wreck your lower bearing, and don't let the column hang freely.
http://repairs.willcoxcorvette.com/1...-instructions/
I switched to LEDs. SuperBrightLEDs.com has a list of all of the bulbs you need. I went with soft white, to maintain the period glow. LEDs have the added fun of having an orientation when installed, so if you can, test with a bench power supply.
Willcox has a good writeup on how to remove the cluster. If you loosen the steering column, be sure to loosen the bolts at the firewall first, so you don't wreck your lower bearing, and don't let the column hang freely.
http://repairs.willcoxcorvette.com/1...-instructions/
Burning Brakes
Joined: Sep 2013
Posts: 1,206
Likes: 365
From: The Motor City
Originally Posted by Big2Bird
Mine works. In the desert on a moonless night you can tell. Pretty sad. I will drill it out (Pin hole) next time.
If you take out the glove box liner, and reach in and around up top, it can be changed.
It's a developed skill. Someone will have a picture of what you would fumble for.
If you take out the glove box liner, and reach in and around up top, it can be changed.
It's a developed skill. Someone will have a picture of what you would fumble for.
1. Push a toothpick up through the down-fire bulb's hole and mark its toothpick depth with a pencil. It will stop when it touches the bulb.
2. Lay the marked toothpick next to the drilling end of a drill bit with a slightly larger diameter bit than the current down-fire light's hole (roughly 25% larger, though I used the brighter soft white LED bulbs) - then, mark a stopping point on the drill bit (i.e. piece of blue tape) that just short of contacting the bulb.
3. Drill away. Fixed in seconds.
4. Discard lunar schedule.
Melting Slicks
Joined: May 2015
Posts: 2,365
Likes: 428
From: Cape Girardeau Missouri
If the flexible printed circuits show any sign of delamination or if any of the little "ears" at the main connectors are loose I suggest you replace them as the problems only get worse. While I believe the replacement are actually superior they are thinner and the low fuel module will not fit tightly. You need to use a piece of pastboard (like the back of a note pad) or something similar as a backing to get it to fit snugly.
Le Mans Master
Joined: Dec 2006
Posts: 8,837
Likes: 1,028
If the flexible printed circuits show any sign of delamination or if any of the little "ears" at the main connectors are loose I suggest you replace them as the problems only get worse. While I believe the replacement are actually superior they are thinner and the low fuel module will not fit tightly. You need to use a piece of pastboard (like the back of a note pad) or something similar as a backing to get it to fit snugly.
2 years ago I changed the dash again, and the new one (printed circuit) was failing. I used super glue to repair it.
Melting Slicks
Joined: May 2015
Posts: 2,365
Likes: 428
From: Cape Girardeau Missouri
I also repaired mine with super glue--both delamination and loose "ears". I had to go back in about a year later and the delamination had spread beyond the repair and the "ears" I'd attached were again loose. I glued again and after all the bending a couple ears broke and I even soldered on some copper foil (used in stained glass windows) to replace. A year later I was in there again and guess what? More delamination and more loose ears. I bought replacements but had to go in again when the low fuel module quit working to find the fitment problem due to the thinner replacement.
Burning Brakes
Joined: Sep 2013
Posts: 1,206
Likes: 365
From: The Motor City
I also repaired mine with super glue--both delamination and loose "ears". I had to go back in about a year later and the delamination had spread beyond the repair and the "ears" I'd attached were again loose. I glued again and after all the bending a couple ears broke and I even soldered on some copper foil (used in stained glass windows) to replace. A year later I was in there again and guess what? More delamination and more loose ears. I bought replacements but had to go in again when the low fuel module quit working to find the fitment problem due to the thinner replacement.
Melting Slicks
Joined: May 2015
Posts: 2,365
Likes: 428
From: Cape Girardeau Missouri
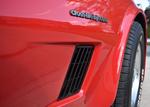
Thanks. That's the original "Corvette Dark Green" color that I believe was '79 only. It has a lot of color shift depending on the ambient light. Combined with the green cloth interior it makes mine a rather rare variant of the most popular year ever.