When you click on links to various merchants on this site and make a purchase, this can result in this site earning a commission. Affiliate programs and affiliations include, but are not limited to, the eBay Partner Network.
Long story short: New calipers, hoses, m/c, and 2 boosters. 3 mechanics (1 Corvette specialist). Checked run out, No air in lines.
Have a decent pedal when bled. start engine and pedal goes to floor. (Car will stop)
I have a new m/c coming and if that doesn't solve problem I have nothing left to try. Plus, no one else is willing to even look at the car.
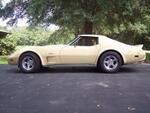
1979 L48 78,000 miles. Rotors are about a year old.
And post some pics..you never know what people spot for parts..or fixes..
good advice above
lot going on and a lot of changes so best to regroup one isse at a time and add details...
fluid ok, no leaks? Just pedal goes to floor and engine stalls? Etc..etc...
Most likely the linkage from brake pedal arm to the Booster...or the wrong length (short) on the pin between booster and master cylinder. Either area can provide excess slop (pedal travel) PRIOR to any force actually getting to the master cylinder apply piston/valve..
Take M/C loose from booster, but leave brake lines attached. The outer end of the booster pin should be protruding from the center of the booster. Now have someone slowly depress the brake pedal in the car to see when that pin begins to move outward. If it begins to move with only 1" or so pedal travel, that linkage is adjusted OK. If the pedal travels down more than 2" before the pin moves, that needs to be adjusted so pedal "slop" is removed. Note: there needs to be at least 1/2" of pedal travel before the pin moves...just so you don't have partial brake apply if your foot is placed loosely on the pedal.
Once the pedal linkage to the booster is adjusted properly, reset the booster pin [manually] to the full depth in the booster. Now, measure the distance from the end of the pin to the mounting face on the booster pad. Also measure the depth of the pin 'pocket' in the M/C from its mounting face. Those two measurements should be almost the same: pin can be short by about .010", but must not be longer or it will partially apply the brakes even though the pedal has not been depressed.
Brake pedal drop at engine start is normal. Its just how it is.
What's more important is, if you can stand on the brake pedal all-day-long with engine off, and pedal does not budge. Then you know everything past the booster is fine. If you can't do that, its not the booster. Look elsewhere.
Most booster rods are non-adjustable. Some have two clevis pin locations on the brake pedal assembly. Some yrs had a threaded rod. If there is absolutely no adjustment of the rod, then it has to be spot-on in the first place. You can't add or subtract to the gap of a non-adjustable unit..
The gap between booster rod and the MC piston should be around 0.060, or a 1/16th of an inch. You must have some play to allow the disc brake pads to retract from the rotors.
2020 Corvette of the Year Finalist (performance mods)
2019 C3 of Year Winner (performance mods)
2016 C3 of Year Finalist
I ended up going with a tuff stuff master and booster combo. The master cylinder piston size can play havoc with the pedal throw as well as an improper pushrod length. I've had mismatches and and the wrong parts so many times it was worth the effort to get it as one piece. Put it in and it was perfect from the get go
The booster pins have ALL been the same length. The original and the 2 replacement boosters. So I don't think that is the issue. Pedal only has one spot for the connection to booster.
The first brake issue happened back in March when a mechanic replaced the 2 rear calipers. The first brake failure caused major heat to the left rear and caused the ralley wheel to look as if it may have caught on fire. Could this failure disabled the combination valve and cause it to fail?
Are you using a pressure bleeder? If not, then get one, or make one..... probably cheaper and quicker to make one.
Do that then report back what you found. Before I made my pressure bleeder I could never bleed the dang things brakes properly. Now I use it when I do brakes on any of my cars.....and to help friends out who couldn't get theirs fixed ..... I recommend it.
Originally Posted by michaelroy
The booster pins have ALL been the same length. The original and the 2 replacement boosters. So I don't think that is the issue. Pedal only has one spot for the connection to booster.
The first brake issue happened back in March when a mechanic replaced the 2 rear calipers. The first brake failure caused major heat to the left rear and caused the ralley wheel to look as if it may have caught on fire. Could this failure disabled the combination valve and cause it to fail?
The booster pins have ALL been the same length. The original and the 2 replacement boosters. So I don't think that is the issue. Pedal only has one spot for the connection to booster.
The first brake issue happened back in March when a mechanic replaced the 2 rear calipers. The first brake failure caused major heat to the left rear and caused the ralley wheel to look as if it may have caught on fire. Could this failure disabled the combination valve and cause it to fail?
could have been e brake too? or bad hose..?
did you do as above and push brake without running vs running?
I went thru a similar situation on my 77 this past spring. I read you stated the mechanics said they got all the air out but you replaced a lot of pieces that introduced a lot of air into the system. I went thru more brake fluid than I care to admit and was convinced there was no possible way any air could be in the lines. I read so many posts on here and had numerous suggestions but the common idea was using some sort of pressure bleeder. I did and can tell you for me it was the cure.
The booster pins have ALL been the same length. The original and the 2 replacement boosters. So I don't think that is the issue. Pedal only has one spot for the connection to booster.
The first brake issue happened back in March when a mechanic replaced the 2 rear calipers. The first brake failure caused major heat to the left rear and caused the ralley wheel to look as if it may have caught on fire. Could this failure disabled the combination valve and cause it to fail?
No. Too far away from the heat and the right rear was still functioning.
Your experience with booster/MC pins is quite different than mine. I don't think I have EVER changed a booster or M/C when I didn't have to change or modify a drive pin. There is no 'fixed' dimension to which all foreign supply sources machine these parts? They are all different. If you've changed three of these systems and never had to modify a pin, you should be out buying a PowerBall ticket right now, because you are surely the luckiest person I've ever crossed paths with.
Gentlemen, I thank you very much for your responses. This Forum has been great to refer to numerous times.
I wish I were that lucky, if so I would have had brakes since March.
It was my belief that when there is a failure in the brake system that the valve activates and sends brake fluid where it is needed. And, if that happens the valve has to be set back to its original state. Is that a correct opinion?
Gentlemen, I thank you very much for your responses. This Forum has been great to refer to numerous times.
I wish I were that lucky, if so I would have had brakes since March.
It was my belief that when there is a failure in the brake system that the valve activates and sends brake fluid where it is needed. And, if that happens the valve has to be set back to its original state. Is that a correct opinion?
Well, yes & no. It doesn't really send fluid where its needed so much as shutting off a portion where its leaking and not needed. The Prop Valve is front / rear control safety valve. It assures you will have a half of a brake system to get you home / shop.
Its kind of like a GFCI breaker in your house. It detects a leak and shuts off the juice to that problem area.
How do you know the prop valve has tripped? The brake warning light on the dash illuminates. (Assuming a 40+ year old bulb still work) It will stay on until the leak issue or loss of pressure is resolved. Then a quick jab to the brake pedal will center the warning switch. (usually)
There is also a little tool that will center the prop valve piston during repair / testing / bleeding. It can be seen in my profile > photo album > brake bleeding.
Here. Before you order ensure that it is the appropriate one for your year.
Have YOU done a pressure bleed or not? Not somebody else. You? Sometimes you just have to do things yourself to get them done correctly.
There are additional photo in the link for how it works and whatnot.
You are [essentially] correct.The shuttle valve inside the brass distribution block needs to be re-set to center position, if it has moved off-center...for whatever reason.
The 'garage' method for this is: once the brake system has been repaired and the brakes have ATTEMPTED to be bled, the owner just stomps the hell out of the brake pedal a couple of times. The differential pressure & pulse shock created by doing this often juggles that shuttle valve back to center. You should be able to determine it has centered by the increased fluid flow in the portion of the brake system which caused the valve to offset. It is of some importance to bleed the brakes (if using the 'pedal method') in a smooth and gentle manner so that the shuttle valve won't trip again.
Do a final brake bleed and you should be good to go.
Ok I installed a new M/C (bench bled it). Didn't have time to bleed all brakes.
Snapped a few pictures. The pin from the original booster and the 2 replacements I installed are aLL THE SAME LENGTH.
See in the manual where the is 2 gaskets between the booster and M/C. Did not know they were required.??????
See pics.
Designer Imagines A Corvette That Looks More Like a Corvette Than the Corvette
Slideshow: A Jaguar designer's personal project imagines what a modern front-engined Corvette might look like if Chevrolet revisited the golden age of the Stingray.








 brake woes