When you click on links to various merchants on this site and make a purchase, this can result in this site earning a commission. Affiliate programs and affiliations include, but are not limited to, the eBay Partner Network.
In the area circled in red, I have a loose connection under the glass fuse holders. It affects everything that the 2 pink wires are plugged into (ign circuit), as well as the gauges. The fuse is good, and the connection of the pink wires into the ign circuit is tight. When I push down on the fuse, power to the windows and the gauges is restored, so I am thinking something is loose underneath that supplies power to both the ign circuit and the fuse for the gauges. Any recommendations before I pull this fuse panel off and check it out?
This is from a late build 1977,
If you split open the fuse panel there are 3 switched power sources on that side.
The switched source for the gauges circuit is #14
The fuse would span to #9 and supply power to that circuit.
Again, this is late build 1977. Early build may differ some...
Hope this helps...
Those clips are pretty tough,
You really need to split the fuse panel to see inside to know what is going on in there.
What a miserable area to work in...
Those clips are pretty tough,
You really need to split the fuse panel to see inside to know what is going on in there.
What a miserable area to work in...
I assumed that I would pull out the entire panel, and then split it.
I would disconnect positive from battery.
There are 2 bolts securing fuse panel to firewall.
Leave engine side harnesses bolted.
On the back portion of the fuse panel there are 2 plastic finger clips that secure the 2 half's near the 2 bolt holes.
They just spread apart unlocking the 2 half's.
Here is the inside of the back half, the left side is your forward lamp harness side, the right side is your engine harness side.
Again, the is a Late Build 1977
Is there something specific your looking for?
Wow bmotojoe thank you. I'm still trying to wrap my head around what would actually be loose between 14 and 9 ign and gauges fuse. When I press in on the ign spade I get power. When I let up power goes off (to power windows and gauges). I have seen conflicting information about removing the fuse box. I know to take out the two bolts in diagonal corners, but do I also have to loosen the bolt in the middle on the engine firewall side? Mine is an early build 77 by the way, since it has the security lock on the fender.
EDIT: After looking over this I think I understand. I will leave the half closest to firewall bolted, and take out the two bolts on the inner side, then undo the clips that you mentioned
Wow bmotojoe thank you. I'm still trying to wrap my head around what would actually be loose between 14 and 9 ign and gauges fuse. When I press in on the ign spade I get power. When I let up power goes off (to power windows and gauges). I have seen conflicting information about removing the fuse box. I know to take out the two bolts in diagonal corners, but do I also have to loosen the bolt in the middle on the engine firewall side? Mine is an early build 77 by the way, since it has the security lock on the fender.
When I push on the single spade in on the ign cavity you can see the fuse side fuse prongs move a little from the back side.
They are locked in there pretty tight.
The center bolt only secures the engine-forward lamp harnesses to the body of the fuse panel.
To actually pull the complete fuse panel further into the cabin you would also have to remove the 2 connector harnesses in the engine compartment.
It may give you a little extra slack to rotate the fuse side around to look it over but then you have all that strain from all the dash harness wires to deal...
To take the inner back photo I actually had the wife hold the dash wiring and I held the fuse side out of the way so I could get a good shot of the back.
I hope you understand,
That is 2 big bundle of wires, and they kinda do what they want.
Ok I contorted myself and split the interior fusebox. The connections behind the ign/gauges connection seemed fine. No loose wires. Two things were out of the ordinary though. There was a mummified mouse trapped between the fusebox and the firewall. Also there was a piece of firewall insulation between the two interior fusebox halves. This prevented them from being tightened together. I assume that piece of insulation should not be between the two halves. Sorry these are the best pics I could get. The gauges worked as they should, but time will tell if they stay that way. Mouse Stray firewall insulation?
I honestly couldn't tell you if that insulation should be in there or not?
I do see where the house fell on the wicked mouse of the East, except it's toes didn't curl up and no rewards of ruby slippers...
Thanks for the photo efforts...
I honestly couldn't tell you if that insulation should be in there or not?
I do see where the house fell on the wicked mouse of the East, except it's toes didn't curl up and no rewards of ruby slippers...
Thanks for the photo efforts...
All I know is that the piece of insulation is the exact same stuff that's on the firewall.
Not that this will help with your current problem, but the #10 RED wire (Arrows Pointing) feeds your entire cabin side.
You will see C115 that is the main bulkhead connector you split open.
This is just one of many differences between Early & Late Build 1977 wiring changes made
Last edited by bmotojoe; Jun 10, 2021 at 11:09 AM.






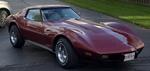

 Need help with 77 fuse panel