When you click on links to various merchants on this site and make a purchase, this can result in this site earning a commission. Affiliate programs and affiliations include, but are not limited to, the eBay Partner Network.
I am almost ready to reinstall my instrument cluster, but I have one final question I am trying to address before I reinstall it.
The device below is related to operation of the headlights. It is mounted inside the car behind the instrument cluster. What I do not understand is what (if anything) is supposed to be attached to the bottom port? What is this? Is there anything that is supposed to be connected to the side pointing down?
Here is another view of the mystery port. What is this? Is there anything that is supposed to be connected to this port?
This diagram shows the port. The pointer seems to show a plug maybe? Pointer shows the device pictured above.
Closeup view of the diagram with the mystery port. Pointer showing the side of the device. Is this a plug or is it open?
So the bottom line question is: Do I put a plug on this port? Leave it open? Plug something else into it?
Short answer, leave it open to atmosphere. It's a vent. The component in question is the wiper door solenoid, not a headlight part. There is normally a small filter attached to the open port, but most are long gone.
That solenoid is not part of the headlight circuit, but is part of the wiper door interlock system. It mounts on the back of the Tach and there are only two vacuum lines attached. I think that originally there might have been some kind of filter, but I have need seen one and they don't show anything on the parts websites.
Short answer, leave it open to atmosphere. It's a vent. The component in question is the wiper door solenoid, not a headlight part. There is normally a small filter attached to the open port, but most are long gone.
Originally Posted by johns_vette
This is from an old Wilcox vacuum trouble shooting document. Pic looks like its just got a filter to keep dust out.
Originally Posted by robertea
That solenoid is not part of the headlight circuit, but is part of the wiper door interlock system. It mounts on the back of the Tach and there are only two vacuum lines attached. I think that originally there might have been some kind of filter, but I have need seen one and they don't show anything on the parts websites.
THANK YOU all for the help - greatly appreciated, as this now allows me to reinstall my instrument cluster. Perhaps I will try to just put a small piece of foam or something "breathable" over it to provide a bit of filtration. Also, my solenoid was just hanging, so as I go to reinstall the instrument cluster I'll need to check the assembly manual and be sure I get this stuff mounted where it needs to be - in this case on the back of the tach.
Again, Thanks!!!
Originally Posted by 509 rat
I went electric .love it
I'm going to try to make sure everything vacuum wise is back to stock on this car, and then see how it behaves/ works. This is actually the cheapest way to get everything functional again. If it seems reliable and works well, so be it. If it continues to be problematic, I may work to change it over, but the over $1000 cost is prohibitive.
Here is a picture of the solenoid mounting on the back of the Tach. Don't forget to mount the two ground connections to the back of the gauges or your dash lights won't work.
Now the real fun begins, getting the harness to fit between the dash panel and the big assembly that supports the pedals. You will probably use or learn some new vocabulary.
I think I tried it close to 20 times before everything fit in place. Do not try to force it in place, you would probably crack the dash panel and that is something you don't want to do.
Here is a picture of the solenoid mounting on the back of the Tach. Don't forget to mount the two ground connections to the back of the gauges or your dash lights won't work.
Now the real fun begins, getting the harness to fit between the dash panel and the big assembly that supports the pedals. You will probably use or learn some new vocabulary.
I think I tried it close to 20 times before everything fit in place. Do not try to force it in place, you would probably crack the dash panel and that is something you don't want to do.
Haha. Well I already speak French fluently in the garage, so maybe we'll start with Klingon when I try to install this!
Thanks for the picture - it is helpful. The AIM was not very helpful for the placement of the solenoid - your picture helped clarify that.
I do have the grounds in place, although mine were (maybe incorrectly?) in a different place than yours. Where your left red oval is shown, I have the wire loom holder. I have the ground spades connected to the small triangular plates (e.g. that the solenoid mounts to). It shouldn't matter as they are electrically the same and my wiring fit these OK previously. I may leave them where they are - once I learn from trial installations I may move them to be sure they in an accessible spot.
Originally Posted by robertea
I colorized the vacuum system drawing. It might help when you are trying to fit everything back behind the dash panel.
This absolutely IS a helpful picture - thank you! I am once again in you debt sir!
HawkRod
If you have not done it then I would suggest just removing the steering column. I have removed my dash maybe a dozen times in 39 years. First time I did it I cracked parts and had to fiberglass repairs. After that I was just extremely careful but it was really, really, really difficult. Last time I finally took a hint from this forum and just removed the steering column. Holy Cow! it's easy to do and all the work is so much easier.
The following is for those that are NOT total purists:
If you are willing to modify (I'm not a purist) then Get some leads and a couple of connectors (weatherpak or generic equivalent). Solder and heat shrink some extensions for the leads going to the tach side electrical and another set for the leads going to the speedo side electrical. That way you can tuck everything in and THEN just plug in the 2 connectors. This also gives you the opportunity to test everything you see before putting it all back together if you leave the leads long enough. One of the better mods that I've made.
For that matter I did NOT reattach that wiper door solenoid to the backside of the tach. I secured it behind the dash but put in a place where I can easily reach and check it..... and it has not had the foam filter for the 39+ years that I've owned it..... if I was really concerned about dirty air i would just make some foamy filter. The reason for me not attaching that solenoid way up high is because my 68 has a goofy circuit that will drain the battery if I do NOT turn the wipers off appropriately..... if I leave it where I can touch it then i can feel if it is not energized when troubleshooting.
HawkRod
If you have not done it then I would suggest just removing the steering column. I have removed my dash maybe a dozen times in 39 years. First time I did it I cracked parts and had to fiberglass repairs. After that I was just extremely careful but it was really, really, really difficult. Last time I finally took a hint from this forum and just removed the steering column. Holy Cow! it's easy to do and all the work is so much easier.
The following is for those that are NOT total purists:
If you are willing to modify (I'm not a purist) then Get some leads and a couple of connectors (weatherpak or generic equivalent). Solder and heat shrink some extensions for the leads going to the tach side electrical and another set for the leads going to the speedo side electrical. That way you can tuck everything in and THEN just plug in the 2 connectors. This also gives you the opportunity to test everything you see before putting it all back together if you leave the leads long enough. One of the better mods that I've made.
For that matter I did NOT reattach that wiper door solenoid to the backside of the tach. I secured it behind the dash but put in a place where I can easily reach and check it..... and it has not had the foam filter for the 39+ years that I've owned it..... if I was really concerned about dirty air i would just make some foamy filter. The reason for me not attaching that solenoid way up high is because my 68 has a goofy circuit that will drain the battery if I do NOT turn the wipers off appropriately..... if I leave it where I can touch it then i can feel if it is not energized when troubleshooting.
Thanks for taking the time to provide some suggestions.
When I removed the instrument cluster I had dropped the steering column, but not fully removed it. My plan for installation was to again drop the column. I have removed several steering columns in my day, but never one from a Corvette. You post will make me look into removing it if it is not too much more work.
I have already tested 100% of the bulbs to be sure they work. I simply provided a separate ground with an alligator clip and tested each one. So that part is behind me. I have not lengthened the leads, but I can certainly understand how that would make a significant difference in the ease of installation. My 62 Corvette is very original, so on that car I am a "purist". However, this 69 coupe is destined to be my regular driver car (but no salt or snow). So for the 69, I am not worried about perfection or 100% originality. I like original looks but I am happy to modify things to make the car truly work well in today's environment.
So the bottom line is I will see if I can get all the bulbs reattached as needed. If I can, then I will leave them as is. If I can't, then I may consider your modification.
Before you try to put everything back together you might want to inspect all of the dash light (grey wires) sockets to make sure that they are still good. I ended up replacing all of mine and lengthening the wires to make it easier to get them installed.
Being that they are 55 years old they tend to come apart. The metal piece separates front the plastic and if it is plugged into the gauge what happens is that the bulb falls out inside of the gauge. Then you pull it apart, open the gauge to get the bulb.
I don't know if you are going to replace all of your bulbs, but if you do don't get them at the local parts store. they are made of chinasium and the retainers on the bulbs are poorly made and do not stay in the socket very well.
If you want regular bulbs get them from your local Chevy dealer. They are cheaper than parts stores and are made correctly. If you are going with LED's you are on your own.
Before you button everything up test that all the gauge bulbs are working and that some have not fallen out. Much easier if you haven't finished and then have to tear it apart again. Ask me how I know.
I have always wanted a '62, but at my age I don't see it happening. Besides I would have to remove something from the garage, can't have a '62 sitting in the driveway.
Before you try to put everything back together you might want to inspect all of the dash light (grey wires) sockets to make sure that they are still good. I ended up replacing all of mine and lengthening the wires to make it easier to get them installed.
Being that they are 55 years old they tend to come apart. The metal piece separates front the plastic and if it is plugged into the gauge what happens is that the bulb falls out inside of the gauge. Then you pull it apart, open the gauge to get the bulb.
I don't know if you are going to replace all of your bulbs, but if you do don't get them at the local parts store. they are made of chinasium and the retainers on the bulbs are poorly made and do not stay in the socket very well.
If you want regular bulbs get them from your local Chevy dealer. They are cheaper than parts stores and are made correctly. If you are going with LED's you are on your own.
Before you button everything up test that all the gauge bulbs are working and that some have not fallen out. Much easier if you haven't finished and then have to tear it apart again. Ask me how I know.
I have always wanted a '62, but at my age I don't see it happening. Besides I would have to remove something from the garage, can't have a '62 sitting in the driveway.




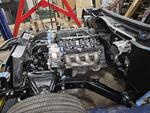


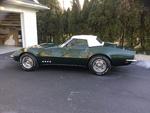


 I went electric .love it





 Help needed with Headlight Vacuum System