

Flaring has begun(pics)
Thread Starter
Le Mans Master


Joined: Jul 2001
Posts: 9,622
Likes: 16
From: absecon nj
 Re: Flaring has begun(pics) (ZD75blue)
well other side is cut off and fitted,but have alot more to clean up on this side then the other,also this quarter fit alot different then the other one,it seems someone cut it short on the front edge but itll work.Im hoping to fit a 325/50/15 under it,unless of course i go to 17's then im not sure.I left my summit magazine open to the rim section next to the wifes computer so when she gets home from work shell see it. :D hint hint for christmas present.


[Modified by patsnitrovette, 3:32 PM 10/28/2003]
[Modified by patsnitrovette, 3:32 PM 10/28/2003]

Safety Car


Joined: Nov 1999
Posts: 4,466
Likes: 0
From: Paducah KY
Cruise-In I Veteran
Cruise-In II Veteran
Cruise-In III Veteran
Cruise-In IV Veteran
St. Jude Donor '03
Re: Flaring has begun(pics) (patsnitrovette)
You're making good headway Pat. As long as you've paid close attention to the wheel being in the center of the well opening, I wouldn't worry about where their cut stopped. Just tie back to the existing panel where ever it mates the best.
Good luck with dropping hints to the wife. Never worked for me. :smash: :jester Never slowed me down either. :lol:
Dave
Good luck with dropping hints to the wife. Never worked for me. :smash: :jester Never slowed me down either. :lol:
Dave
Thread Starter
Le Mans Master
Joined: Jul 2001
Posts: 9,622
Likes: 16
From: absecon nj
Re: Flaring has begun(pics) (Rolling Thunder)
thanks dave,i took some measurements and its centered right on.My wife likes to surprise me every now and then,she bought me a corvette leather jacket for our anniversary this week,i never expected it.Rims are gone to be tough one.
Le Mans Master
Joined: Apr 2000
Posts: 7,562
Likes: 9
From: B'Ville NY
Cruise-In III Veteran
St. Jude Donor '05
Re: Flaring has begun(pics) (patsnitrovette)
Man your making great progress Pat :smash: ! I'm so excited to see the finished product. I would love to have my car flared someday too :yesnod: , but I've given up on trying to fiberglass anything, I suck :bb .
Rock on :thumbs:
Rock on :thumbs:

Drifting

Joined: May 1999
Posts: 1,610
Likes: 3
From: Goulburn, Australia NSW
Re: Flaring has begun(pics) (patsnitrovette)
You're doing a great job there Pat...keep up the inspiring work. I'd cut my car in an instant if I had flares to put on.
Dave...Can you explain a bit for me on what you meant about going too far on the leading edge next to the door as you mentioned earlier please?
Thanks.
Dave...Can you explain a bit for me on what you meant about going too far on the leading edge next to the door as you mentioned earlier please?
Thanks.
Safety Car
Joined: Nov 1999
Posts: 4,466
Likes: 0
From: Paducah KY
Cruise-In I Veteran
Cruise-In II Veteran
Cruise-In III Veteran
Cruise-In IV Veteran
St. Jude Donor '03
Re: Flaring has begun(pics) (Brutus)
Brutus - When I flared mine (using the Ecklers ZL-1's) I took the old panel out all the way to the door jamb. It really wasn't "going too far" but it certainly made for a tough place to work. It appears that Pat is smarter than I was and is beveling the old glass back a couple of inches behind the door opening. His seam will be quicker to make and every bit as strong as mine. One major difference is the flare configuration between what Pat is using and what I used. My flares go all the way to the bottom of the panel where Pat's taper down to zero flare below the shadow line. I just looked at mine and because of the configuration, it would not have been possible for me to use his method. Neither is right or wrong, but if you were installing the same type flare as Pat, his method would be the way to go.
Dave
Dave
Corvette Stories
The Best of Corvette for Corvette Enthusiasts

Top 10 Most Explosive Corvettes Ever Made: Power-to-Weight Ratio Ranked!
Joe Kucinski
150 hp to 1,250 hp: Every Corvette Generation Compared by the Specs That Matter
Joe Kucinski
8 Coolest Corvette Pace Cars (and Replicas) of All Time
Verdad Gallardo
Top 10 Corvette Engines RANKED by Peak Torque (70+ Years of Muscle!)
Joe Kucinski
Corvette ZR1X Will Be Pacing the Indy 500, And Could Probably Race, Too!
Verdad Gallardo
Top 10 Corvettes Coming to Mecum Indy 2026!
Brett Foote
Top 10 C9 Corvette MUST-HAVES to Fix These C8 Generation Flaws!
Michael S. Palmer
10 Revolutionary 'Corvette Firsts' Most People Don't Know
Joe Kucinski
5 Reasons to Upgrade to an LS6-Powered Corvette; 5 Reasons to Stay LT2
Michael S. Palmer
Race Director

Joined: Mar 2001
Posts: 12,577
Likes: 0
From: I live in my Hubby's little world
Re: Flaring has begun(pics) (Rolling Thunder)
I've seen ''that'' kinda picture before!!! :yesnod:
Great job on the fiberglass work!!!! :thumbs:
I know how it feels!!
that first cut is very ''nerve racking'' but once ya do it...piece of cake afterwards!! :lol:
Great job on the fiberglass work!!!! :thumbs:
I know how it feels!!
that first cut is very ''nerve racking'' but once ya do it...piece of cake afterwards!! :lol:

Burning Brakes

Joined: Mar 2002
Posts: 839
Likes: 0
From: Lewiston, Maine
Re: Flaring has begun(pics)
I'll be the first to say your car looks really girly with those flares. I can tell everyone else above wanted to say it, but I'm gonna be blunt!
GIRLY, GIRLY, GIRLY! FLARES ARE GIRLY! NOTHING MAKES A CAR LOOK MORE GIRLY THAN FLARES!!! :jester
(Or is that sexy I'm thinking about? I'm with Metal Wulf, I wish my car had flares...)
-Steve
GIRLY, GIRLY, GIRLY! FLARES ARE GIRLY! NOTHING MAKES A CAR LOOK MORE GIRLY THAN FLARES!!! :jester
(Or is that sexy I'm thinking about? I'm with Metal Wulf, I wish my car had flares...)
-Steve
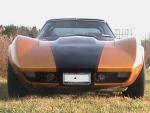
Though I didn't get a choice, they came on my car when I bought it. I'll keep the rear flares, but the bubble glass (and black paint) are out in the future. I'm hiding 295/50-15 rubber in back and have the same size in front... though you can see that even the '70-'72 style fenders don't cover the increase in width up front. I'll step those down to 275 or so and increase the rears to 315s or bigger :eek: :chevy
Let me also add that when my car gets to the stage when it has a 427 SBC based off the LS1/LS6 engine and a T56 that I'll also fabrimacate an aluminum belly pan for the underside of my car. :thumbs: ;)
[Modified by 1969Vette350, 3:58 PM 10/28/2003]