





removing round tail lights...
Thread Starter
Drifting


Joined: Jul 2003
Posts: 1,613
Likes: 0
From: Orlando FL
 removing round tail lights...
well its finally is happening, i am painting the vette. I want this to be done right and I am doing all the prep work myself.
How in the world do you remove the tail lights? not just the bulbs, the actual red lenses/housing. there are no screws facing outward....same question for the fog lamp assemblies.
I was under the car for about 20 minutes last night doing other things, but looking around, it appears that i will have to train a squirrel to use a wrench.
How in the world do you remove the tail lights? not just the bulbs, the actual red lenses/housing. there are no screws facing outward....same question for the fog lamp assemblies.
I was under the car for about 20 minutes last night doing other things, but looking around, it appears that i will have to train a squirrel to use a wrench.
Melting Slicks


Joined: Apr 2000
Posts: 2,793
Likes: 46
From: Elizabeth City, NC
Not sure on the fog lamps, but on the round tail lights you need to remove the license plate and the reverse lights and go in from there. Each light has 2 bolts that hold it in place. Use a 1/4 drive ratchet and a deep socket and you will have no problems. I have very big arms and hands and still got in there (granted I came out with a few cuts and scrapes but still doable)

Melting Slicks
Joined: Feb 2003
Posts: 2,770
Likes: 0
From: Construction Sucks! MI
Cruise-In V Veteran
St. Jude Contributor '03 & '05
remove the liscence plate and work through there and from underneath to remove inner lights. work through the inner taillight openings and under the car to get the out lights. be prepared for scraped-up arms. i just finished painting mine. it's one of the hardest parts of the job.

Team Owner


Joined: Dec 1999
Posts: 34,873
Likes: 487
From: Lacey WA RVN 68-69
NCM Sinkhole Donor
First, remove the license plate, then remove the back-up lamp housings. The tail lamp housings are held in place with two 10mm nuts. Small hands will help in getting behind the housings but it's doable. Remove the bulb holder by pinching the tab and twisting the housing to release it. Then use a 10mm box-end wrench or small socket to remove the nuts on the inboard hoursings.
With the inboard housings out, you can reach thru that hole to get to the outboard housings. They get removed in the same fashion.
As long as you have the bulb holders out, it might be a good time to replace all 4 bulbs with new ones. GM uses a gooey dielectric grease to keep the bulb contacts from corroding and this stuff will harden after time so there is a good chance you may break the bulb in getting the old ones out.
Once the bulbs are out, scrape the old grease out and install new bulbs. You can use some Permatex dielectric grease to keep moisture out.
With the inboard housings out, you can reach thru that hole to get to the outboard housings. They get removed in the same fashion.
As long as you have the bulb holders out, it might be a good time to replace all 4 bulbs with new ones. GM uses a gooey dielectric grease to keep the bulb contacts from corroding and this stuff will harden after time so there is a good chance you may break the bulb in getting the old ones out.
Once the bulbs are out, scrape the old grease out and install new bulbs. You can use some Permatex dielectric grease to keep moisture out.
Thread Starter
Drifting
Joined: Jul 2003
Posts: 1,613
Likes: 0
From: Orlando FL
yea...this all sounds about right....i was afraid of that...well good thing g/f has thin arms and a helpful demeanor! the manual seems to indicate that you have to remove the entire front end to get the actual housing out!! I hope that’s not the case.
Team Owner
Joined: Dec 1999
Posts: 34,873
Likes: 487
From: Lacey WA RVN 68-69
NCM Sinkhole Donor
For the front bumper cover, you do have to remove it to get the turn/fog lamp housing out. It's not that bad a job to do, just lots of screws and nuts.
The paint for the front and covers should have a flex agent added so the paint will not become hard and crack. It's best to shoot them off the car anyway.
The paint for the front and covers should have a flex agent added so the paint will not become hard and crack. It's best to shoot them off the car anyway.
Corvette Stories
The Best of Corvette for Corvette Enthusiasts

How Much Horsepower Every Corvette Engine "LOST" in 1972
Joe Kucinski
Top 10 DOs and DON'Ts for Protecting Your Convertible Top!
Michael S. Palmer
Top 10 Most Explosive Corvettes Ever Made: Power-to-Weight Ratio Ranked!
Joe Kucinski
150 hp to 1,250 hp: Every Corvette Generation Compared by the Specs That Matter
Joe Kucinski
8 Coolest Corvette Pace Cars (and Replicas) of All Time
Verdad Gallardo
Top 10 Corvette Engines RANKED by Peak Torque (70+ Years of Muscle!)
Joe Kucinski
Corvette ZR1X Will Be Pacing the Indy 500, And Could Probably Race, Too!
Verdad Gallardo
Top 10 Corvettes Coming to Mecum Indy 2026!
Brett Foote
Top 10 C9 Corvette MUST-HAVES to Fix These C8 Generation Flaws!
Michael S. Palmer

Advanced


Joined: Aug 2003
Posts: 98
Likes: 0
From: Hudson OH
Dissassembly for paint
Mine goes in for paint in a week or two. Busy removing:
rear bumper cover
body side trim molding
mirrors
headlight covers
door weatherstrip
hatch weather strip
hood and gas door badge
Are there any tips for removal of the front bumper cover? I've about got the rear off. That was a PIA.
rear bumper cover
body side trim molding
mirrors
headlight covers
door weatherstrip
hatch weather strip
hood and gas door badge
Are there any tips for removal of the front bumper cover? I've about got the rear off. That was a PIA.

Advanced
Joined: Aug 2003
Posts: 98
Likes: 0
From: Hudson OH
I have all the body molding off except what's left on the front bumper cover.
I think the only thing left is the rear hatch weatherstrip which I'm leaving on until I do the worlds best car wash before it goes to paint.
I think the only thing left is the rear hatch weatherstrip which I'm leaving on until I do the worlds best car wash before it goes to paint.
Race Director


Joined: Jan 2004
Posts: 18,725
Likes: 709
From: Bergen County, NJ
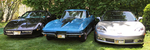
Heres a picture of mine when I put new bulbs in 
The 2 bolts on each housing are 10MM, as mentioned above.
You can slide your arms thru the license plate hole to get the inner one,
then use that hole to get the outer one.

The 2 bolts on each housing are 10MM, as mentioned above.
You can slide your arms thru the license plate hole to get the inner one,
then use that hole to get the outer one.

Le Mans Master

Joined: Feb 1999
Posts: 6,470
Likes: 2
From: levittown pa. usa Even a bad day with my `Vette, is better than a good day at work
St. Jude Donor '10
Hmmm-- there should be some way to modify the tailights, by putting self tapping screws or something, so that you can take the housings out from outside the car. The thechs were probably laughing their asses off when they designed the early C4 tailights 
Thread Starter
Drifting
Joined: Jul 2003
Posts: 1,613
Likes: 0
From: Orlando FL
I got the nose of mine off last night….its really not hard, just a lot of screws and bolts…when you open the hood there are several along that line, there are 5 or 6 below in the open “mouth” portion, and 2 that point outwards. If you haven’t removed the lower skirt and wheels wells, do that too. There are 2 metal brackets, one on each side, that hold a lot of wires, remove the wire holders from the bracket and unscrew the bracket from the top part of the bumper (2 small 7 mm screws) you also have to remove one 10mm nut from each side that holds the belt line to the bracing…
now can you offer any advice as to the removal of the read bumper? I have 3 nuts that are spinning on the studs that hold the beltline molding on, and the only way to work then free is to take off the whole rear bumper….
now can you offer any advice as to the removal of the read bumper? I have 3 nuts that are spinning on the studs that hold the beltline molding on, and the only way to work then free is to take off the whole rear bumper….
Advanced
Joined: Aug 2003
Posts: 98
Likes: 0
From: Hudson OH
I got the rear bumper cover off in an evening and part of the next morning. Remove the license plate. Remove the gas filler door. I removed the rubber bib from around the gas filler to gain even more access. You're making progress and it feels good for now.
Then I'd start on the passanger side. IT's easier. Remove the wheel and inner fender. Work from the wheel well and remove all the 10mm nuts you can reach. You can get them all up to the top of the cover. Also remove the two 10mm head bolts holding in the outer tail light. Then get the inner tail light. All from the wheel well but you may find it easier to get this one from the license plate area.
Threre are a bunch of 7MM hex head bolts along the top edge. These are accessed from any open area you can get to them from.
Replace the pass side wheel and go over to the drives side and repeat it all. One exception...once you remove many of the 10mm nuts up a point you will run into trouble due to the power antenna. Remove it. There are two mounting screws on the bottom of the assembly or you may be able to remove the entire bracket which is held on by two of the 10mm nuts holding the bumper cover. That's what I did.
3 of 4 hours and you're all done!!
Then I'd start on the passanger side. IT's easier. Remove the wheel and inner fender. Work from the wheel well and remove all the 10mm nuts you can reach. You can get them all up to the top of the cover. Also remove the two 10mm head bolts holding in the outer tail light. Then get the inner tail light. All from the wheel well but you may find it easier to get this one from the license plate area.
Threre are a bunch of 7MM hex head bolts along the top edge. These are accessed from any open area you can get to them from.
Replace the pass side wheel and go over to the drives side and repeat it all. One exception...once you remove many of the 10mm nuts up a point you will run into trouble due to the power antenna. Remove it. There are two mounting screws on the bottom of the assembly or you may be able to remove the entire bracket which is held on by two of the 10mm nuts holding the bumper cover. That's what I did.
3 of 4 hours and you're all done!!
