how to change brake booster (92-95) with pics
 10-21-2009, 11:32 PM
#1
Drifting

Thread Starter
Member Since: Dec 2007
Location: woodbury new jersey
Posts: 1,315
Likes: 0
Received 12 Likes
on
11 Posts

ok, im going to show you how i did this, as i see its a common problem with these cars. im not sure if all years are the same, but im pretty sure the 92-95 are. my brake pedal was hard and hissed, so i knew it was the booster.
now, let me start by saying that im only 18 years old, have only worked on cars for a few years, have only had the vette less then 2 months, and i dont claim to be correct about this. i may have done things different from how others do, but this worked for me. ok, so lets get started.
i started by removing the 2 screws (7mm) that hold the ecm down, then i moved it off to the side.
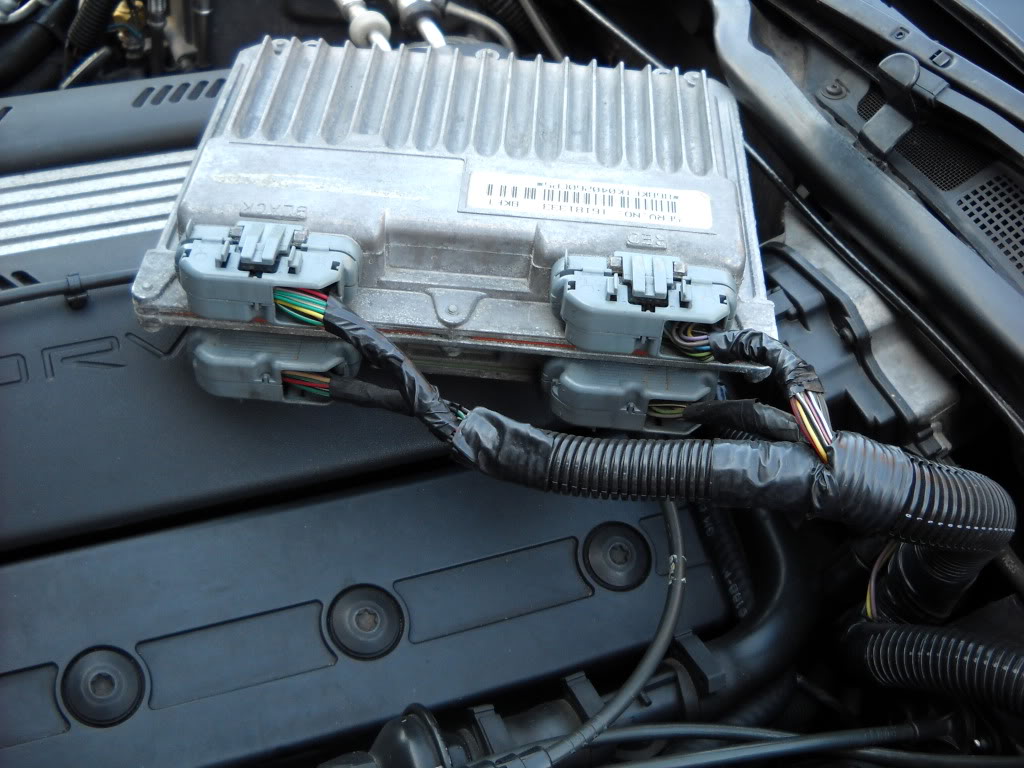
next i removed the bracket for the ecm. it was one bolt where my finger is (either 10mm or 12mm), and then it slides off its peg
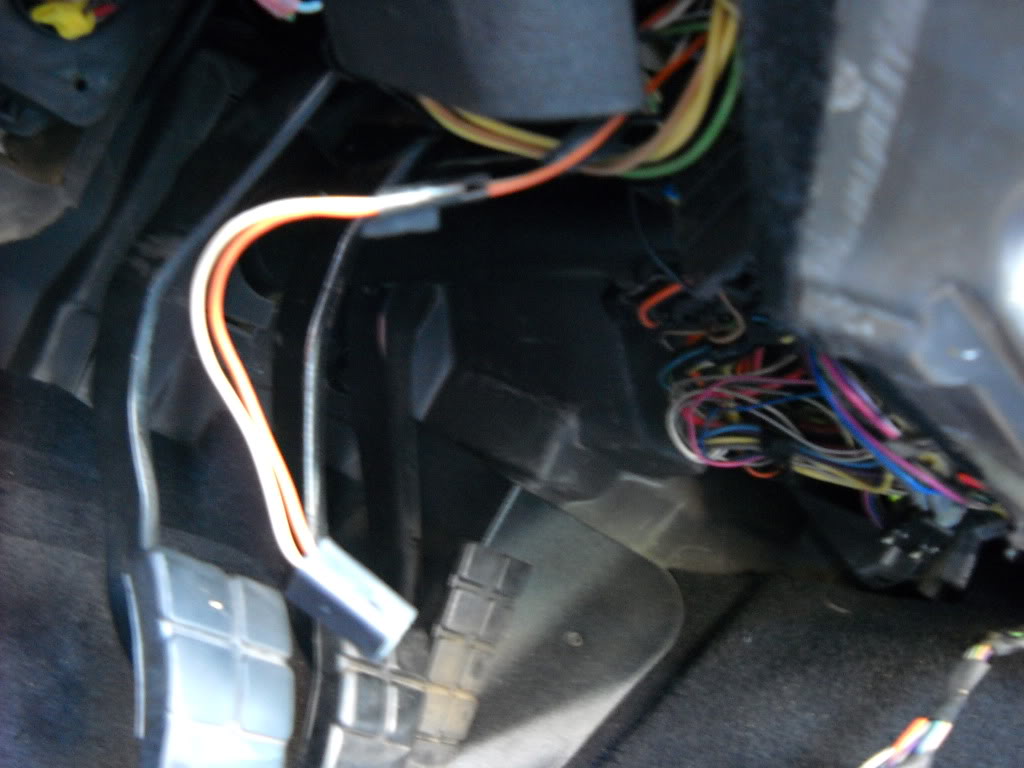
next, i disconnected the cruise control cable. the clip on the end, u just stick a flathead under the tab, then push up and to the side. you should be able to figure it out. then you slide the cable off its holder, which you can see on the left of the pic
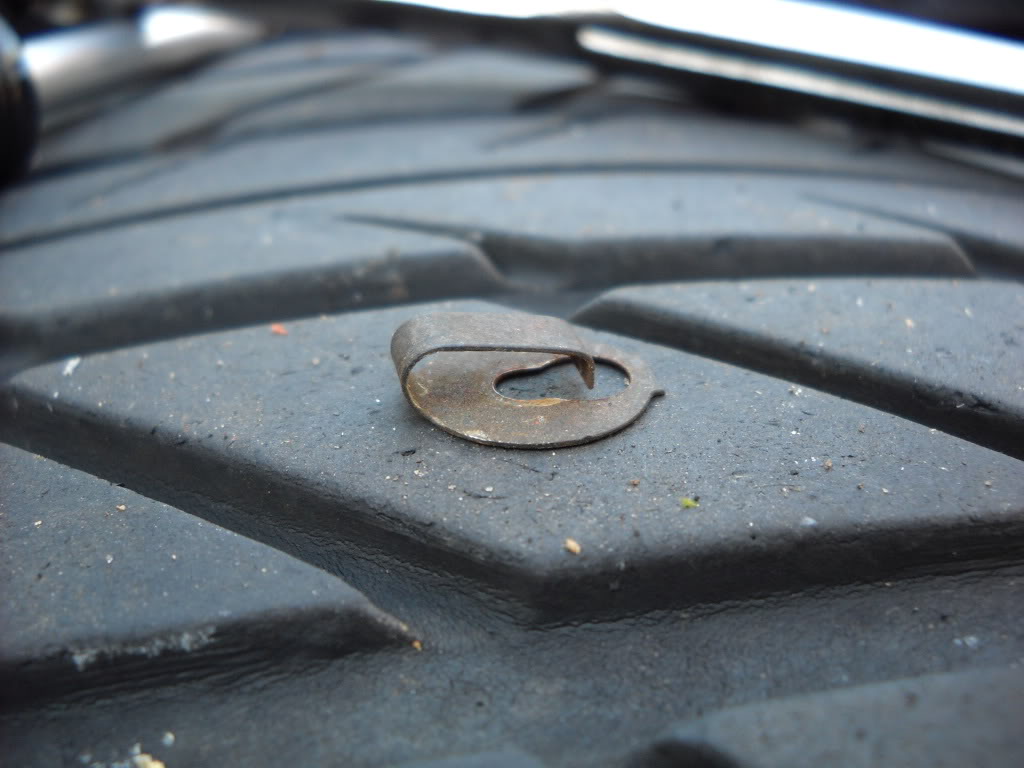
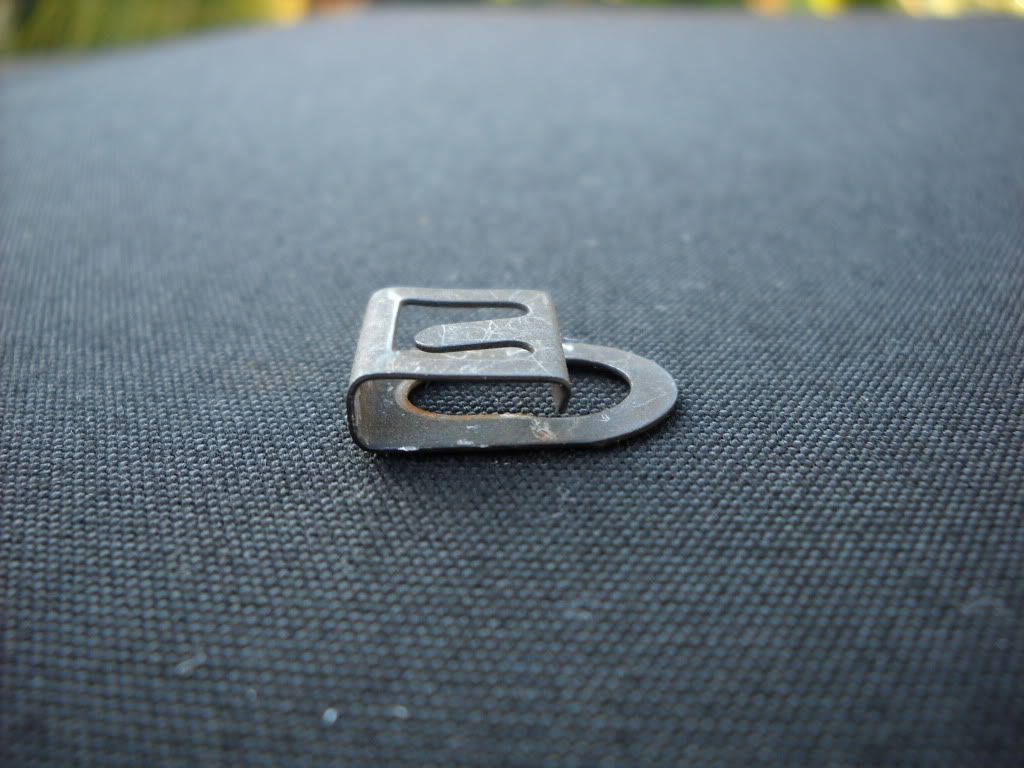
heres a pic of the clip so you can see what i mean
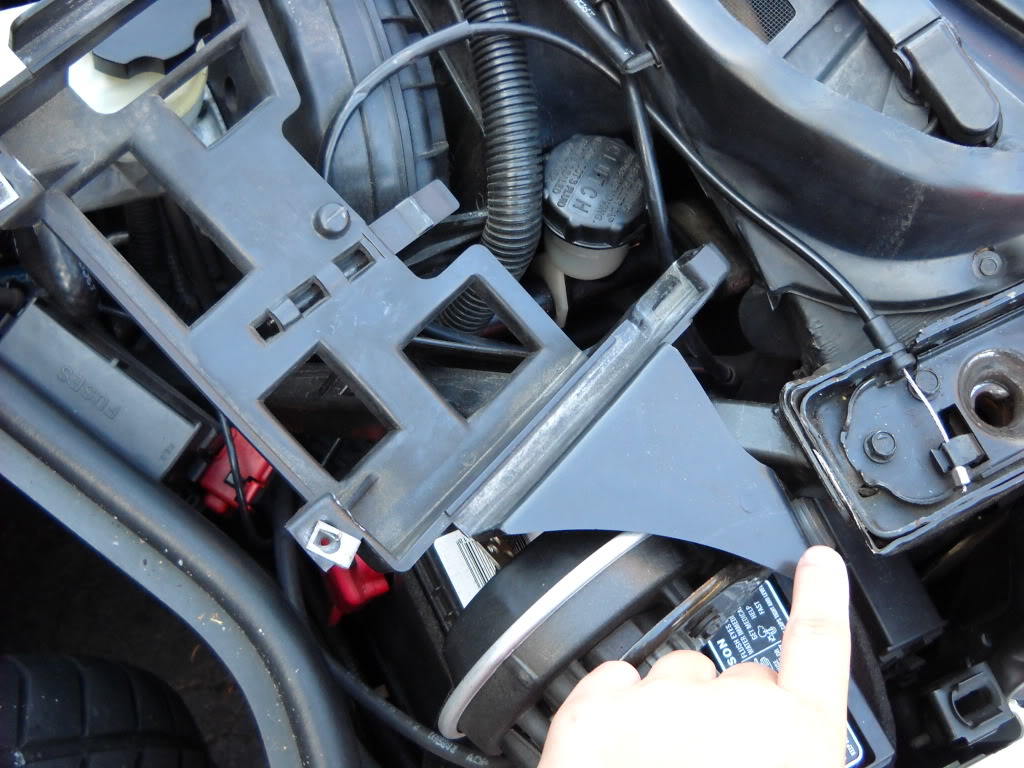
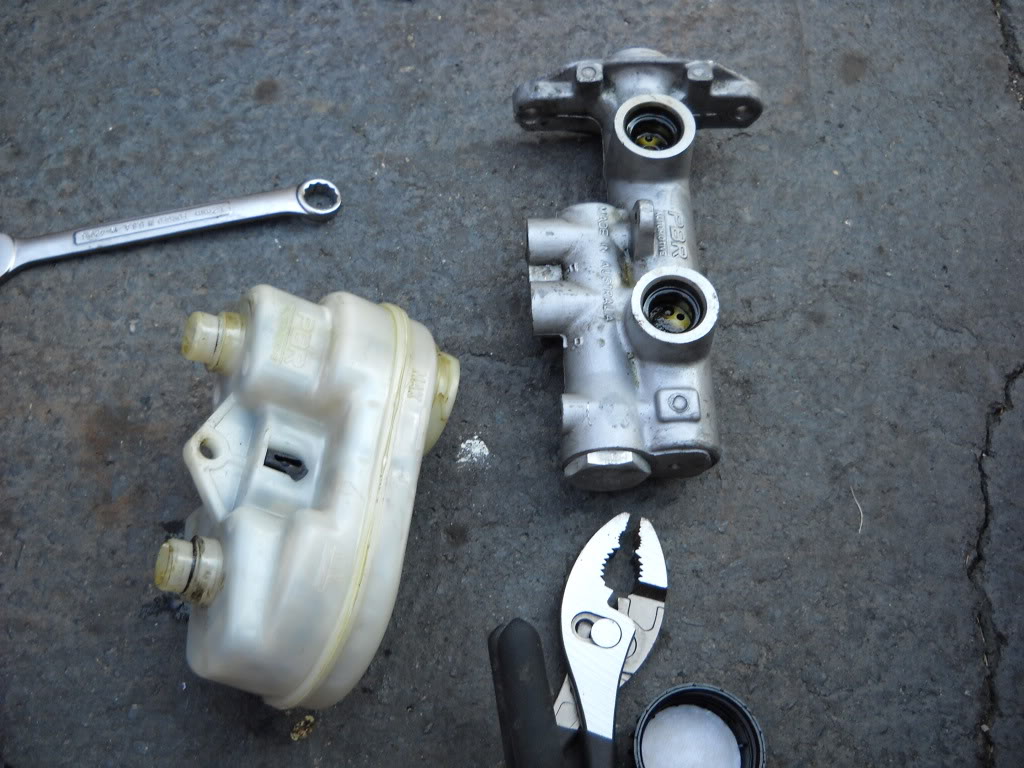
next, i removed the 2 bolts that attatch the master cylinder to the booster. you can see me pointing at the one, obviously the other one is on the other side
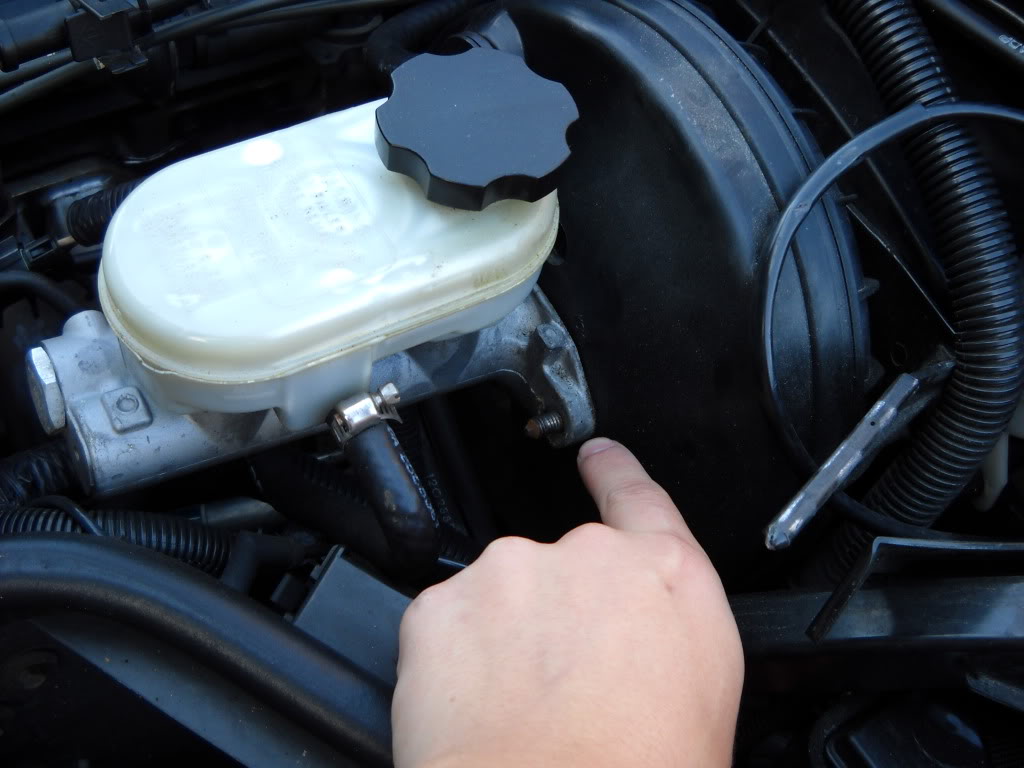
here you can see where i slide the master cylinder off the booster
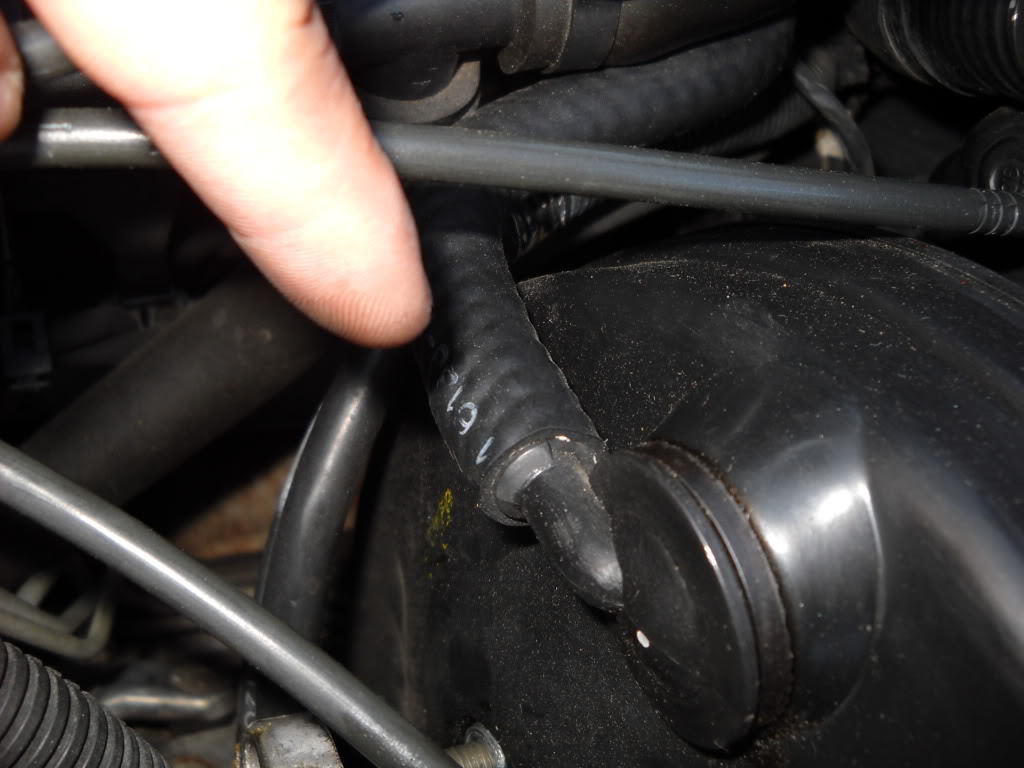
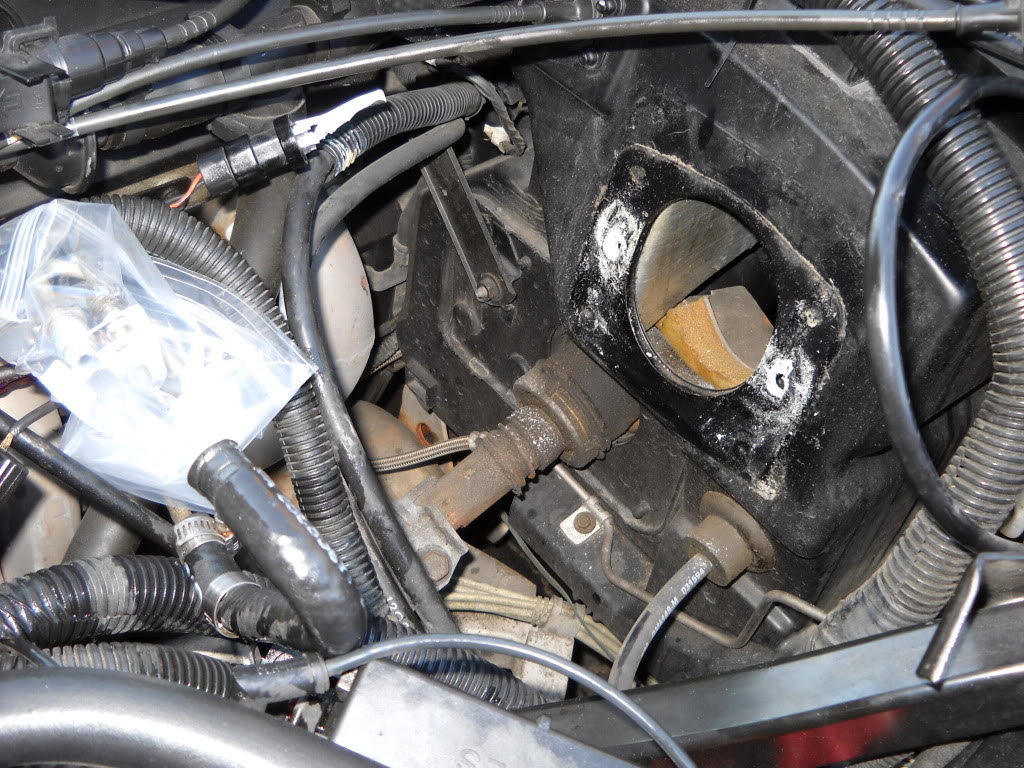
next i disconnected the vacum hose that goes to the booster. it just pulls off, may be a little tight
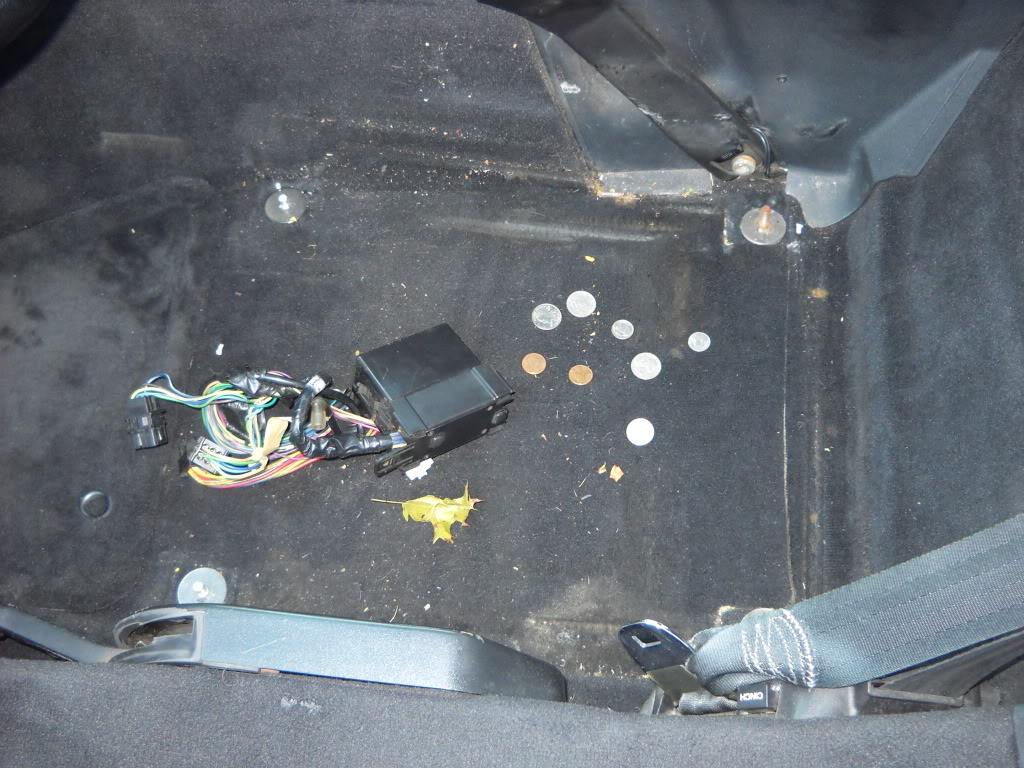
now the next part is optional. some say you can do it without removing the seat, but i think it would be pretty damn hard to get to the boosters mounting bolts without getting in there. so i opted to remove the seat. heres just a pic of that. notice all the spare money i found!
next, i removed the panel under the drivers side dash. this also may not be neccesary but it made the job soooo much easier, so i recomend doing it. its only a few screws, sorry for the bad pic
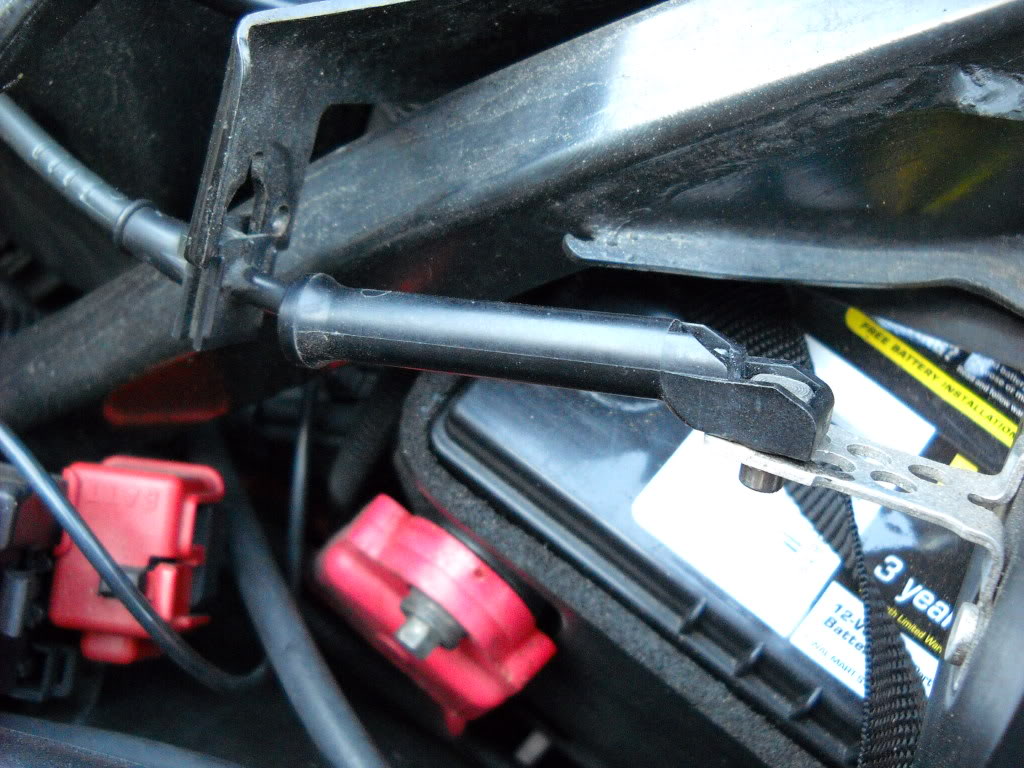
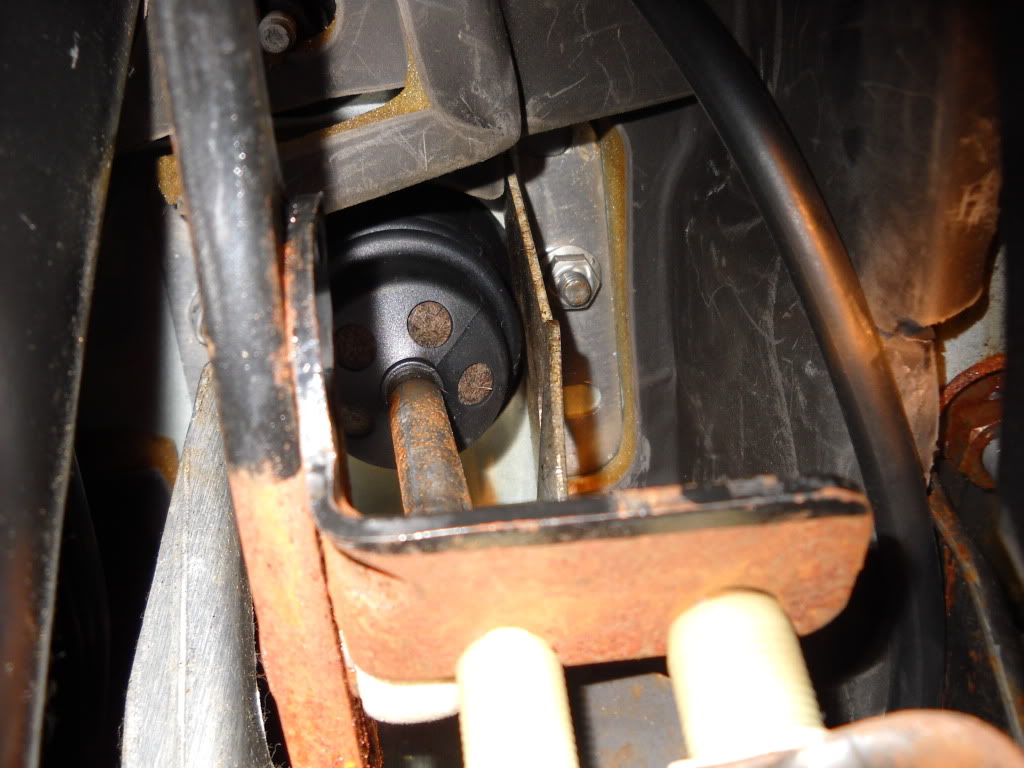
next, disconnect the booster rod from the brake pedal. the clip is just a larger version of that little clip we took off the cruise control cable. once thats off, the rod can be slid off the side
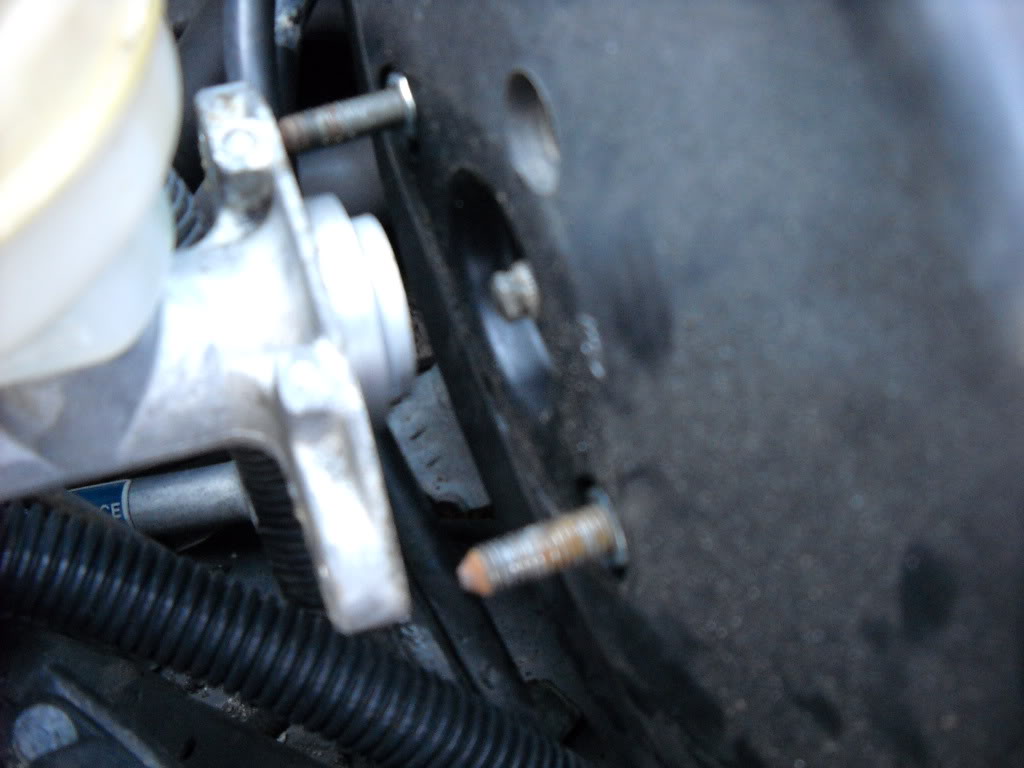
next, you must remove the 2 mounting nuts for the booster. now this is rather difficult, and will certainly test your patience. you have to sort of lay upside down, as pictured, and get to the 2 bolts. i used a long socket with a 3 inch extension. its a 13mm. in the pic you can see the one nut on the right, and part of the left one.
heres how i layed in there

now heres where i ran into trouble. some claim you can remove the booster without removing the master cylinder, others say you cant. in my case, i couldnt. so i had to remove the cylinder. im sorry, i forgot to take pics of this but its pretty easy to remove. so heres after the cylinder and booster are removed.
and heres the cylinder taken apart. the resevoir was FILLED with chunks of crap, so i cleaned the whole thing out till it was spotless
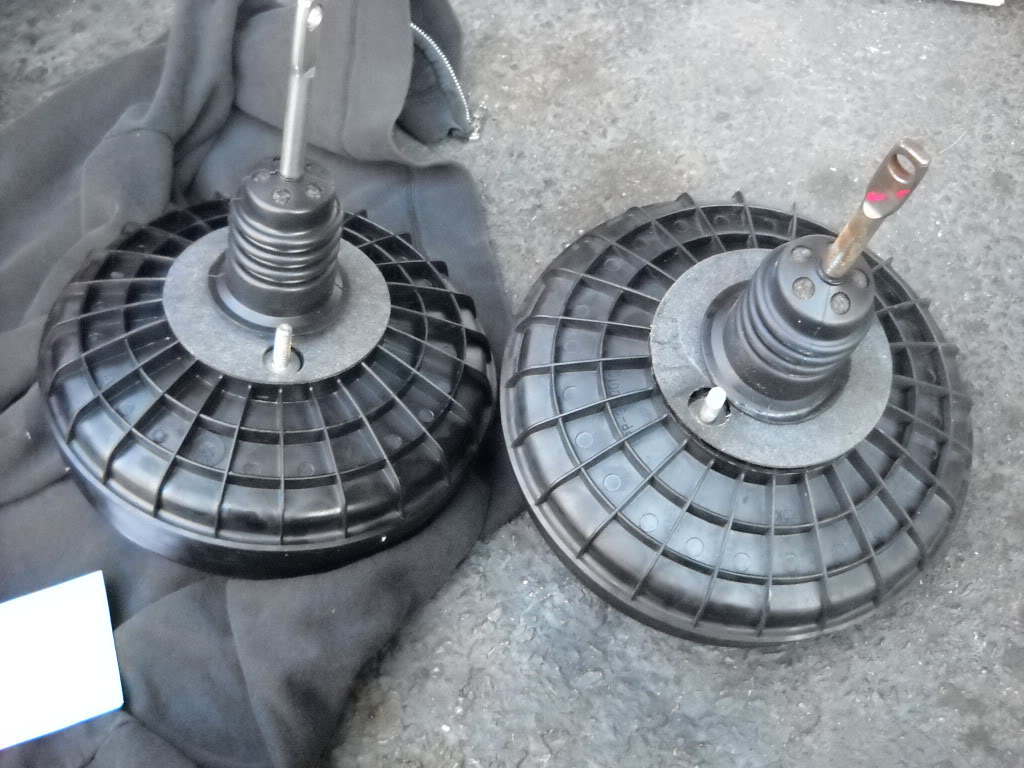
and heres the new booster (left) next to the old one
now, i appologize as i didnt take any pics as i put it back together, i was on a tight time schedule trying to get it back together before the sun went down. but basically, you put the new booster in. i had someone hold it there while i reconnected the brake pedal. once that was in, i put the 2 mounting nuts on. (suprisingly it was easier for me to get them back on then to get them off). after the booster was on, i put the master cylinder on. then i put everything back together (basically the reversal of removal). now its all back together, and tomorrow i need to get new fluid so i can bleed the whole system out, and lets hope it works!!!!
hope this has been a help to some people
now, let me start by saying that im only 18 years old, have only worked on cars for a few years, have only had the vette less then 2 months, and i dont claim to be correct about this. i may have done things different from how others do, but this worked for me. ok, so lets get started.
i started by removing the 2 screws (7mm) that hold the ecm down, then i moved it off to the side.
next i removed the bracket for the ecm. it was one bolt where my finger is (either 10mm or 12mm), and then it slides off its peg
next, i disconnected the cruise control cable. the clip on the end, u just stick a flathead under the tab, then push up and to the side. you should be able to figure it out. then you slide the cable off its holder, which you can see on the left of the pic
heres a pic of the clip so you can see what i mean
next, i removed the 2 bolts that attatch the master cylinder to the booster. you can see me pointing at the one, obviously the other one is on the other side
here you can see where i slide the master cylinder off the booster
next i disconnected the vacum hose that goes to the booster. it just pulls off, may be a little tight
now the next part is optional. some say you can do it without removing the seat, but i think it would be pretty damn hard to get to the boosters mounting bolts without getting in there. so i opted to remove the seat. heres just a pic of that. notice all the spare money i found!
next, i removed the panel under the drivers side dash. this also may not be neccesary but it made the job soooo much easier, so i recomend doing it. its only a few screws, sorry for the bad pic
next, disconnect the booster rod from the brake pedal. the clip is just a larger version of that little clip we took off the cruise control cable. once thats off, the rod can be slid off the side
next, you must remove the 2 mounting nuts for the booster. now this is rather difficult, and will certainly test your patience. you have to sort of lay upside down, as pictured, and get to the 2 bolts. i used a long socket with a 3 inch extension. its a 13mm. in the pic you can see the one nut on the right, and part of the left one.
heres how i layed in there
now heres where i ran into trouble. some claim you can remove the booster without removing the master cylinder, others say you cant. in my case, i couldnt. so i had to remove the cylinder. im sorry, i forgot to take pics of this but its pretty easy to remove. so heres after the cylinder and booster are removed.
and heres the cylinder taken apart. the resevoir was FILLED with chunks of crap, so i cleaned the whole thing out till it was spotless
and heres the new booster (left) next to the old one
now, i appologize as i didnt take any pics as i put it back together, i was on a tight time schedule trying to get it back together before the sun went down. but basically, you put the new booster in. i had someone hold it there while i reconnected the brake pedal. once that was in, i put the 2 mounting nuts on. (suprisingly it was easier for me to get them back on then to get them off). after the booster was on, i put the master cylinder on. then i put everything back together (basically the reversal of removal). now its all back together, and tomorrow i need to get new fluid so i can bleed the whole system out, and lets hope it works!!!!
hope this has been a help to some people

The following 2 users liked this post by littlesk8cracker:
Merlin49 (06-18-2017),
yakmastermax (03-27-2023)
10-22-2009, 12:12 AM
#3
Instructor

Member Since: Apr 2008
Location: San Diego CA
Posts: 240
Likes: 0
Received 0 Likes
on
0 Posts
Excellent write up boss, i love it when people post up pics. (nice to see someone in my age bracket  ) Im gonna save this thread for later when i do this project.
) Im gonna save this thread for later when i do this project.
 10-22-2009, 07:13 PM
#5
Drifting
Thread Starter
Member Since: Dec 2007
Location: woodbury new jersey
Posts: 1,315
Likes: 0
Received 12 Likes
on
11 Posts
glad people appreciate it because it took alot of time to take/upload the pics, and do the whole right up. today i refilled the system with fluid and bled it all out, and the brakes work great now. no more hard pedal and no more hissing.
The following users liked this post:
gman35 (07-06-2018)
The following users liked this post:
gman35 (07-06-2018)
10-22-2009, 08:21 PM
#7
Drifting
Thread Starter
Member Since: Dec 2007
Location: woodbury new jersey
Posts: 1,315
Likes: 0
Received 12 Likes
on
11 Posts
ya i plan on doing this everytime i fix something. the car doesent really need too much, but im constantly changing things on it. next on the list is plugs and wires. not sure if people really need a write up for that, but i figure enough people do them that maybe itll help some people out
The following users liked this post:
gman35 (07-06-2018)
10-22-2009, 10:57 PM
#9
Le Mans Master


Member Since: Feb 1999
Location: Hawaii
Posts: 8,522
Likes: 0
Received 3 Likes
on
3 Posts
St. Jude Donor '03 & '05

Great write up. I couldnt really tell but it looks like your Vette has headers. If so I learned something a while back from a Guldstrand develpoment article while working on the ZR-1/tire program.
They had a 383 making some HP, with long tubes and the boosters were cracking from the heat at #7 header pipe. So, they put a heat reflection cloth, to keep the heat away from the booster which is susceptible from the heat. As you may not know, the ZR-1 have metal boosters.
So, to keep the booster from cracking again from the heat of the header, wrap the booster with something to keep the heat off of the booster by #7 cyclinder.
Steve
Hopefully this pick kinda helps.
The following users liked this post:
gman35 (07-06-2018)
10-22-2009, 11:02 PM
#10
Drifting
Thread Starter
Member Since: Dec 2007
Location: woodbury new jersey
Posts: 1,315
Likes: 0
Received 12 Likes
on
11 Posts
thanks! thats actually a good idea. my car has shorty headers but i plan on going with long tubes within a year. i might go ahead and put some kind of heat shield near mine. i got a lifetime warranty on it but id rather not replace it again


 10-24-2009, 11:09 PM
#17
Drifting
Thread Starter
Member Since: Dec 2007
Location: woodbury new jersey
Posts: 1,315
Likes: 0
Received 12 Likes
on
11 Posts
if you end up having to take the master cylinder off, which im almost positive you will, make sure you bleed the brakes out GOOD. mine got alooot of air in them when i did this


