


Rock Chip

2nd Gear

Joined: Feb 2012
Posts: 2
Likes: 0
Omg too funny. Call me neurotic, but I have a similar chip I want gone lol. I purchased touch-up paint from dealer that is no match. I'll grab one of those tool kits off eBay, but any suggestions on a good match on the Millenium Yellow?
Le Mans Master


Joined: Oct 2004
Posts: 6,314
Likes: 508
From: South-central Missouri
I have had excellent results for that size dhip using the Langka chip repair kit.
(C-LINK)
My black 95 Vette got caught in a sudden summer thunderstorm, complete with dime-size hail. The results were so good, that I couldn't tell where the chips were, and there were dozens of 'em (on the hood) to "practice on".
Same was true for my red 90. Some idiot burned the edges of several panels with a buffer. The Langka kit worked beautifully on edges as well.
Results with the kit seem to be mixed, depending on who you talk to. There is a simple little trick to it - learned during my hail repair experience on my black 95, and it goes like this:
Strip the wax/dirt from the pit and surrounding area; I use Dawn dishwashing soap in water and then rinse and dry.
Now, the trick is getting the drying time "just right": too short and there will be a divit in the pit. Wait too long and there will be a blister and it will require a LOT of rubbing (see kit directions) to get it flush (sometimes easier to dig out the soft paint and start over).
Temperature and humidity affect drying time, I find. at 65-75� F the ideal time is between 20-40 minutes, but you'll have to experiment a bit. Note: If faced with several chips, it is easy to put a blob of paint in several and start with a few at around 20-25 minutes drying time, and if the paint is too soft, you can wait a few minutes on the others before trying to rub them down. Once you have the drying time that works for that day's conditions, you can proceed with fixing a host of nicks and scratches, etc, perfectly and in short order (trust me!).
I've got a few new chips in my red car. Maybe I should do a series of photos and write it up?
P.
Melting Slicks


Joined: Apr 2003
Posts: 3,110
Likes: 6
From: Red Sox Nation! RI
I think I would keep layering the touchup paint until it's level, then lightly wet sand and buff.
I used something similar to the Langka kit Paul mentioned and had real good luck with it. Mothers also makes a kit but w/o the paint.


I used something similar to the Langka kit Paul mentioned and had real good luck with it. Mothers also makes a kit but w/o the paint.
Team Owner


Joined: Sep 2003
Posts: 20,179
Likes: 673
From: Freedom is never more than one generation away from extinction.
St. Jude '03 thru '24

OMG! You'd puke to see my front bumper after 50K on the open road at speed. Even after driving through a sand/debris storm.
Makes me sick too. Gonna have to wait for a new paint job.
So your one chip.....


Le Mans Master


Joined: Oct 2007
Posts: 9,699
Likes: 3,468
From: Akron Ohio
2025 Corvette of the Year Finalist - Modified
2024 C5 of the Year Winner - Modified
2023 C5 of the Year Finalist - Modified
2022 C5 of the Year Finalist - Modified
St. Jude Donor '09-'10-'11
Do you want to do it right, or do you want to do again in 3 months when all these suggestions dont hold up?
To do it right you are going to have to paint about an 8 inch circle around that whole area. Sand the chip and an inch or two around it in all directions with 350-400 grit paper. Smooth the corners of the chip and make sure no other paint will peel off. Use an SMC approved body filler and apply a slight amount to the area making it as smooth as possible. Sand the filler with 400 grit until smooth, but do not make a divit. To make it nice and smooth you may need to fill it again and sand it again. Once the filler is sanded use a spray can primer and spray the area just larger than the filler. Sand the primer with 600-800 grit without going through it. If you sand until you see filler in some areas, spray more primer and sand again. Make sure you sand an area larger than the primer covers because you will be putting color and clear over it. You can get small spray cans of the proper color code from a local body shop. You will need one can of color and one of clear. Spray the color over an area slightly larger than the primer until the primer if fully covered. Wait about half hour for the color to dry some, and then apply the color over it but DO NOT SAND THE COLOR. Spray and area larger than what you sprayed with color. Wait about an hour or two for the clear to harden and then wet sand the whole area with 1500-2000 and then polish it. Make sure you are very careful to keep everything as clean as possible between every step. Clean all sanding dust before applying more material.
To do it right you are going to have to paint about an 8 inch circle around that whole area. Sand the chip and an inch or two around it in all directions with 350-400 grit paper. Smooth the corners of the chip and make sure no other paint will peel off. Use an SMC approved body filler and apply a slight amount to the area making it as smooth as possible. Sand the filler with 400 grit until smooth, but do not make a divit. To make it nice and smooth you may need to fill it again and sand it again. Once the filler is sanded use a spray can primer and spray the area just larger than the filler. Sand the primer with 600-800 grit without going through it. If you sand until you see filler in some areas, spray more primer and sand again. Make sure you sand an area larger than the primer covers because you will be putting color and clear over it. You can get small spray cans of the proper color code from a local body shop. You will need one can of color and one of clear. Spray the color over an area slightly larger than the primer until the primer if fully covered. Wait about half hour for the color to dry some, and then apply the color over it but DO NOT SAND THE COLOR. Spray and area larger than what you sprayed with color. Wait about an hour or two for the clear to harden and then wet sand the whole area with 1500-2000 and then polish it. Make sure you are very careful to keep everything as clean as possible between every step. Clean all sanding dust before applying more material.
Safety Car


Joined: Mar 2005
Posts: 4,467
Likes: 1,223
From: Fredonia WI
2025 Corvette of the Year Finalist - Unmodified
2024 C7 of the Year Winner - Unmodified
2023 C4 of the Year Finalist- Modified
2020 C4 of the Year Finalist - Modified
2019 C4 of Year Finalist (performance mods)
2018 C4 of Year Finalist

Originally Posted by 93Rubie
I have used this on my car and it works wonders.
Le Mans Master
Joined: Oct 2004
Posts: 6,314
Likes: 508
From: South-central Missouri
In short:
Strip, dry, put paint blob in the chip.
Let sit 20-30 minutes @ 70+ degrees F
Stretch piece of old T-shirt over the plastic scrubber (provided in the kit) with a little of their chemical "sanding" agent in it.
Rub gently - don't push down too hard or you might "dish" out the paint. Keep checking as you rub and stop when the blob is flush. (I use a bright light reflection off the paint, with the car in the dark to see if the repair is perfect or needs more work.)
I found that when all is right, it usually takes only a couple minutes to get it right, and a little longer if the paint blob set up a bit too long. But, if you wait an hour or more, you might play hell trying to get it flush.
This is not really a good photo to show the repairs, but the edge of the hood as it curves around the windshield to the door, and then the veritcal edge of the hood as it runs down along the door ... showed the black primer below the paint when I got the car.
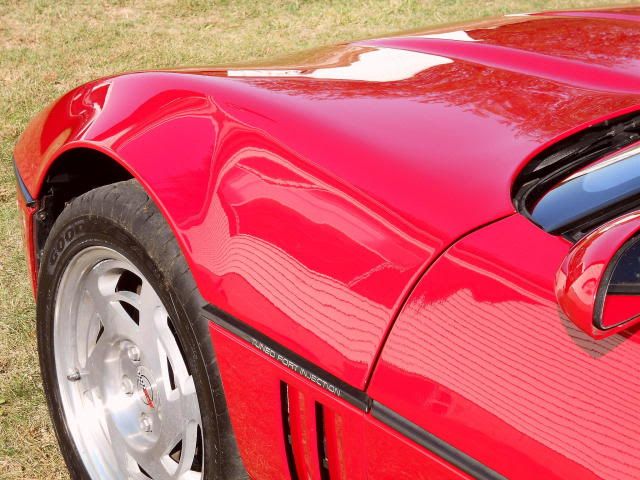
I know where the touch-up was done, but cannot see any edge or color marking the touch-up begins. Not bad for a repair that took less than an hour from start to finish!
Good luck!
P.
P.
Last edited by Paul Workman; Apr 30, 2012 at 08:16 AM.
Corvette Stories
The Best of Corvette for Corvette Enthusiasts

Top 10 Most Expensive Corvettes Ever Sold on Bring A Trailer
Brett Foote
10 Things Every Corvette Owner Needs (2026 Edition)
Michael S. Palmer
8 Most "Only Corvette Owners Understand" Quirks and Problems
Pouria Savadkouei
10 Reasons the C6 Z06 is Still A Performance Benchmark After 20 Years
Joe Kucinski
How Much Horsepower Every Corvette Engine "LOST" in 1972
Joe Kucinski
Top 10 DOs and DON'Ts for Protecting Your Convertible Top!
Michael S. Palmer
Top 10 Most Explosive Corvettes Ever Made: Power-to-Weight Ratio Ranked!
Joe Kucinski
150 hp to 1,250 hp: Every Corvette Generation Compared by the Specs That Matter
Joe Kucinski
8 Coolest Corvette Pace Cars (and Replicas) of All Time
Verdad GallardoSafety Car
Joined: Mar 2005
Posts: 4,467
Likes: 1,223
From: Fredonia WI
2025 Corvette of the Year Finalist - Unmodified
2024 C7 of the Year Winner - Unmodified
2023 C4 of the Year Finalist- Modified
2020 C4 of the Year Finalist - Modified
2019 C4 of Year Finalist (performance mods)
2018 C4 of Year Finalist
Results look good!
Racer
Joined: Oct 2010
Posts: 499
Likes: 0
From: Providence RI
LOL PLRX...garage queeners !!....I am one too..I mean if I owned a c5 or 6 for the kind of cash they cost, I would panic over a rock chip like that through to the SMC. I have used Dr. Color Chip, with no good result, and I have used Langka system with no good result either. I have followed instructions, let the paint dry 24 hours, and the damn system still washes out the filled in chip. Langka also seems to bite into your clear coat around the chip, so I would not recommend it. Also, I have found that any touch up paint for my 1994 DRM is not the correct shade, from any vendor, so having to spend bucks and shipping charges on a mismatch is really frustrating. I have not found one to match perfectly yet, so I gave up, and I guess I will have the entire section I need finished prepped and shot by a pro, to the tune of about $600-1000 bucks depending on the shop. if it sounds like a magic fix, you find that it is not. I have seen many testimonials of both chip fix systems, and they all seem like a miracle, I just have not had any luck, and I prep, and follow to the letter, and my result has always been disappointing. Maybe it's just me, but after six Vettes, and a plastic Saturn SUV, you would like to think I have been around these bodies, and materials long enough to know how to fill a chip. I would recommend following Kubs advice, if you are doing this on your own, and repairing it the long and hard way. Best, Derek
Safety Car

Joined: Sep 2010
Posts: 3,752
Likes: 190
From: Indiana PA
I find the Dr. Colorchip is as easy as they say it is. Just follow the directions. It has worked great for me. I was more than pleased with the results of the product. NO BLOBS.
The only down fall is, up close like with in 3 feet or so, you can still see the chip from 5 ft or back, it is flawless for most chips. Way better than any blob. IT IS NOT A REPAINT OF AN AREA, only doing that will make things PERFECT.
As far as longevity of the repair goes. I have yet to have any come out of the chips. That was two years ago when I used it last. I don't drive it in the rain a lot or wash the car constantly but I do occasionally drive in the rain and wash the car. (I don't need to wash it all the time, a quick dusting and wipe down with instant detailer is all that is needed.)

Instructor
Joined: Jul 2011
Posts: 170
Likes: 1
From: South Haven Minnesota
I havent read all the post's but I worked in a autobody paint shop for three years so what you can do is go to a autobody shop supplier like keystone or a body shop that will mix some touch up paint for you on the spot and then dab some color in the rock chip area only then color sand with 2000 grit and the 3000 wet sand then buff and polish the area lightly. PS DONT USE AN ORBITAL POLISHER they are a joke and wont do the job for this application.