



Header install:Do I really need these brackets?

Safety Car


Joined: Dec 2002
Posts: 3,655
Likes: 24
From: Charleston SC

Originally Posted by FELNGR8
You'll only need them if you ever use the heat or air conditioning. Even using heat sometimes the compressor is kicked in. WIthout the brackets you'll get a vibration at certain rev ranges, maybe 21-2300, maybe around 2800. It will come in at easy throttle in 4th or 5th and annoy the crap out of you.
Man,
I wish I had asked this question a long time ago. I have the exact vibration described at 2800 RPM's and I am missing the bracket that goes from the A/C to the header. I am now going to dig through all my crap and hope I can find them and install them ASAP. Thanks for the great info FELNGR8


Melting Slicks

Joined: May 2002
Posts: 2,670
Likes: 4
From: Severna Park MD
Originally Posted by FD2BLK
Man,
I wish I had asked this question a long time ago. I have the exact vibration described at 2800 RPM's and I am missing the bracket that goes from the A/C to the header. I am now going to dig through all my crap and hope I can find them and install them ASAP. Thanks for the great info FELNGR8
I wish I had asked this question a long time ago. I have the exact vibration described at 2800 RPM's and I am missing the bracket that goes from the A/C to the header. I am now going to dig through all my crap and hope I can find them and install them ASAP. Thanks for the great info FELNGR8
FWIW Superior Chevy still had the GM parts in stock last summer for my 94, including all the mainfold/header bolts. Nothing like new parts to clean up the installation.
Last edited by FELNGR8; Jan 30, 2006 at 02:09 PM.
Safety Car
Joined: Dec 2002
Posts: 3,655
Likes: 24
From: Charleston SC
Originally Posted by FELNGR8
FWIW Superior Chevy still had the GM parts in stock last summer for my 94, including all the mainfold/header bolts. Nothing like new parts to clean up the installation.

Melting Slicks
Joined: May 2002
Posts: 2,670
Likes: 4
From: Severna Park MD
Originally Posted by FD2BLK
I hope I can dig them out of my pile of parts at the house but if not this is great to know. BTW you don't have the P/Ns handy do you? As for the spacers and directions I bout one of the first sets ever sold by Stainless works so none of that was available at the time. I also was dropping in a 383 and had a defective clutch so I just never put 2 and 2 togeather untill this thread. Sure glad I decided to read it though as I am hoping this wil solve my vibration problem. It is a drone like vib at 2800 RPM that goes away by 3000 with the A/C on does this sound like the problem? Again thanks for the tip.
The braces for the A/C are part numbers 10105400 and 10128423. The part number for the manifold/header stud ext bolt is 12550726. My total order was less than 20 bucks.
Here is a picture that shows all three braces that go down to the headers. I did not install the bolt that goes onto the pipe at number 1 cylinder. NCRS will ban me from all concours shows for this oversight, shame on me. The new bolt is holding the braces from the ac by # 2.
Picture hereAC braces
You should be able to save the jpeg to see it at full size.
Safety Car
Joined: Dec 2002
Posts: 3,655
Likes: 24
From: Charleston SC
Originally Posted by FELNGR8
I had the brace from the alternator but not the two braces from the ac support casting. In this state I still got a vibration so bad I wouldn't use the A/C while cruising. I think it came in around 2700 rpm.
The braces for the A/C are part numbers 10105400 and 10128423. The part number for the manifold/header stud ext bolt is 12550726. My total order was less than 20 bucks.
Here is a picture that shows all three braces that go down to the headers. I did not install the bolt that goes onto the pipe at number 1 cylinder. NCRS will ban me from all concours shows for this oversight, shame on me. The new bolt is holding the braces from the ac by # 2.
Picture hereAC braces
you should be able to save the jpeg to see it at full size.
The braces for the A/C are part numbers 10105400 and 10128423. The part number for the manifold/header stud ext bolt is 12550726. My total order was less than 20 bucks.
Here is a picture that shows all three braces that go down to the headers. I did not install the bolt that goes onto the pipe at number 1 cylinder. NCRS will ban me from all concours shows for this oversight, shame on me. The new bolt is holding the braces from the ac by # 2.
Picture hereAC braces
you should be able to save the jpeg to see it at full size.
Thanks a bunch, just got home and I have both braces so all I need is a bolt and spacer. I will probably just pick up a stainless bolt localy and fab the spacer. Again thanks for all th egreat info and i bet this solves the problem.

Thread Starter
Burning Brakes


Joined: Jun 2003
Posts: 936
Likes: 3
From: Prattville, AL. My Dog Thinks I'm Cool!
Originally Posted by Slalom4me
Well, I wouldn't exactly say they were hidden. There is a menu across
the top of the Stainlessworks site and 'Install Instructions' appears
third from the right.
the top of the Stainlessworks site and 'Install Instructions' appears
third from the right.
 I'm considering making a SLIGHT indention in the side of the pipe to gain more clearance.
  What do you think?
Corvette Stories
The Best of Corvette for Corvette Enthusiasts

Top 10 Most Explosive Corvettes Ever Made: Power-to-Weight Ratio Ranked!
Joe Kucinski
150 hp to 1,250 hp: Every Corvette Generation Compared by the Specs That Matter
Joe Kucinski
8 Coolest Corvette Pace Cars (and Replicas) of All Time
Verdad Gallardo
Top 10 Corvette Engines RANKED by Peak Torque (70+ Years of Muscle!)
Joe Kucinski
Corvette ZR1X Will Be Pacing the Indy 500, And Could Probably Race, Too!
Verdad Gallardo
Top 10 Corvettes Coming to Mecum Indy 2026!
Brett Foote
Top 10 C9 Corvette MUST-HAVES to Fix These C8 Generation Flaws!
Michael S. Palmer
10 Revolutionary 'Corvette Firsts' Most People Don't Know
Joe Kucinski
5 Reasons to Upgrade to an LS6-Powered Corvette; 5 Reasons to Stay LT2
Michael S. Palmer
Safety Car
Joined: Dec 2002
Posts: 3,655
Likes: 24
From: Charleston SC
Ok after tearing up the shop I found two of the three brackets and have one of them installed. I have the one that goes from he Alt. To the #2 header bolt but cant figure out how to install it. Am I missing somthing. My headers look just like the pic above by VictorRussell'92 and as you can see the #1 tube will not allow a spacer like the one used on the #3 tube and the bracket won't reach without it. Am I installing it wrong or do I posibly have the wrong bracet? It will fit perfect about 1 1/16 out just like the other one but there is no way to get a bolt that long in there. Any help would be great. Just to make things a little more complicated I found another bracket I have no idea what it is for. Here are the two brackets I have left. The one oon the right is the one I think goes from the Alt to the #2 header bolt (Let me know if I am wrong, the other I dont have a clue about.


Large Impressive Member


Joined: Jul 2003
Posts: 65,811
Likes: 71
From: Good health is merely the slowest possible rate at which one can die
St. Jude Donor '04-'05-'06-'07
Originally Posted by FD2BLK
Ok after tearing up the shop I found two of the three brackets and have one of them installed. I have the one that goes from he Alt. To the #2 header bolt but cant figure out how to install it. Am I missing somthing. My headers look just like the pic above by VictorRussell'92 and as you can see the #1 tube will not allow a spacer like the one used on the #3 tube and the bracket won't reach without it. Am I installing it wrong or do I posibly have the wrong bracet? It will fit perfect about 1 1/16 out just like the other one but there is no way to get a bolt that long in there. Any help would be great. Just to make things a little more complicated I found another bracket I have no idea what it is for. Here are the two brackets I have left. The one oon the right is the one I think goes from the Alt to the #2 header bolt (Let me know if I am wrong, the other I dont have a clue about.
Melting Slicks
Joined: May 2002
Posts: 2,670
Likes: 4
From: Severna Park MD
Originally Posted by FD2BLK
Ok after tearing up the shop I found two of the three brackets and have one of them installed. I have the one that goes from he Alt. To the #2 header bolt but cant figure out how to install it. Am I missing somthing. My headers look just like the pic above by VictorRussell'92 and as you can see the #1 tube will not allow a spacer like the one used on the #3 tube and the bracket won't reach without it. Am I installing it wrong or do I posibly have the wrong bracet? It will fit perfect about 1 1/16 out just like the other one but there is no way to get a bolt that long in there. Any help would be great. Just to make things a little more complicated I found another bracket I have no idea what it is for. Here are the two brackets I have left. The one oon the right is the one I think goes from the Alt to the #2 header bolt (Let me know if I am wrong, the other I dont have a clue about.
Race Director

Joined: Jan 2005
Posts: 10,641
Likes: 13
From: Slidell Louisiana
Originally Posted by Corvette Kid NC
That V shaped one I do not recognize. My '95 never had anything resembling that on it. Are you sure that's from your '94?
 I had three braces on my 95!
I ditched the first brace and used the two braces that are located further back on the head w/o vibration.
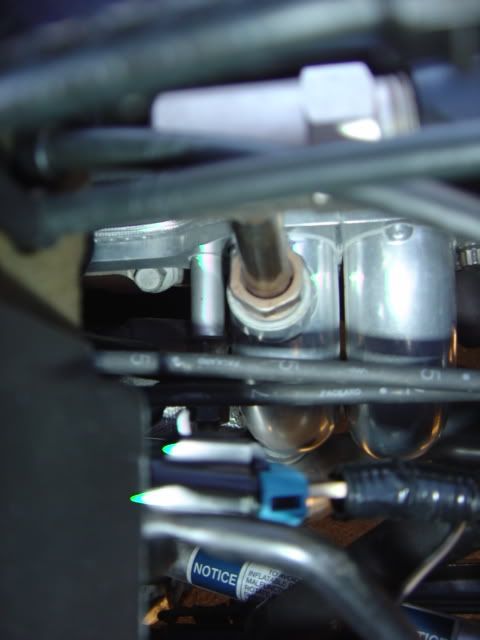
Here's a view of my two remaining brackets from the AC end of the brackets

Look to the left of the air fitting and you can see the stud, spacer and two brackets

I believe the that ceramic coating has been holding up quite well these pics were taken this weekend; and this is my daily through the rain and snow driver.
Mike
Last edited by aboatguy; Jan 31, 2006 at 08:49 PM.
Safety Car
Joined: Dec 2002
Posts: 3,655
Likes: 24
From: Charleston SC
Originally Posted by Corvette Kid NC
That V shaped one I do not recognize. My '95 never had anything resembling that on it. Are you sure that's from your '94?

Burning Brakes


Joined: May 2005
Posts: 918
Likes: 55
From: Muskoka Ontario
I just had the same problem on my 93. That y shaped bracket must be from another year. If you are looking from the drivers side 1 bracket goes from the lower right compressor bolt to the third header bolt. I used a spacer and the regular exhaust manifold bolt. The other bracket requires the removal of the compressor and there is a threaded hole under the alternator. Other end goes to the same exhaust manifold bolt.
Fred
Fred

Team Owner

Joined: Sep 2003
Posts: 25,295
Likes: 4
From: I'm the walkin dude I can see all of the world...
St. Jude Donor '03
92 here. I've never seen the bracket on the left. I've always had the normal 3 brackets and I cannot fit the single one off the #1 bolt.


Large Impressive Member
Joined: Jul 2003
Posts: 65,811
Likes: 71
From: Good health is merely the slowest possible rate at which one can die
St. Jude Donor '04-'05-'06-'07
Originally Posted by VictorRussell'92
92 here. I've never seen the bracket on the left. I've always had the normal 3 brackets and I cannot fit the single one off the #1 bolt.
Le Mans Master


Joined: Oct 2004
Posts: 7,706
Likes: 485
From: Everett WA
C4 of Year Finalist (appearance mods) 2019
1st of Two Sets of Photos
My hat is off to you guys who can do this yourself. I have neither the garage space or the time. The Vette is my only car and a dd and so I paid handsomly to have my local vette specialty shop do the install along with replacing a leaking tail shaft seal and some other routine maint.
Perhaps I am stupid also but for the $ we all paid I feel that it was unacceptable not to have a printed out direction sheet included in with the parts. I ordered the cats & entention pipes and for all the bungs to be welded in as I have to have the car smog tested ever two years.
You might notice in pics by others that there is a weld between the primaries and the outside of the flange. On my set, the pipes are only welded to the inner face of the flange. I called SW and was told that this is how they always do it and that a weld (for strength) to the outside face of the flange is not needed.
My "parts" all came packaged in a nice plastic bag that included spacers for the alternator and cut pieces of tubing for both the compressor brackets and the dipstick on the other side however the shop had several issues with one of the pipes on the passenger side interfearing with the bolts and also had to do a bit of fabrication.
This 1st group of shots is all from the drivers side. I wonder if what we were all seeing as a "Y" bracket is actually 2 brackets laid side by side. These two bolt to either side of the compressor and then meet at the outside of the extention tube on the driver side. The 3rd bracket which is from the alternator is no longer used (as the Kid said) and you can see that there are now 3 spacers on the alternator bracket in its place.
The first & 3rd pic show the spacer and the 3rd clearly shows you the two brackets bolted together. The 2nd & 4th pic show the 3 spacers behind the alternator.
You might notice that the pipes are already turning color and I am a bit disappointed that its happening so soon. I've put about 100 miles on the car since I picked it up last night consisting of 3 heat and complete cool down sessions. I'll post a few from the passenger side in a few minutes.
Perhaps I am stupid also but for the $ we all paid I feel that it was unacceptable not to have a printed out direction sheet included in with the parts. I ordered the cats & entention pipes and for all the bungs to be welded in as I have to have the car smog tested ever two years.
You might notice in pics by others that there is a weld between the primaries and the outside of the flange. On my set, the pipes are only welded to the inner face of the flange. I called SW and was told that this is how they always do it and that a weld (for strength) to the outside face of the flange is not needed.
My "parts" all came packaged in a nice plastic bag that included spacers for the alternator and cut pieces of tubing for both the compressor brackets and the dipstick on the other side however the shop had several issues with one of the pipes on the passenger side interfearing with the bolts and also had to do a bit of fabrication.
This 1st group of shots is all from the drivers side. I wonder if what we were all seeing as a "Y" bracket is actually 2 brackets laid side by side. These two bolt to either side of the compressor and then meet at the outside of the extention tube on the driver side. The 3rd bracket which is from the alternator is no longer used (as the Kid said) and you can see that there are now 3 spacers on the alternator bracket in its place.
The first & 3rd pic show the spacer and the 3rd clearly shows you the two brackets bolted together. The 2nd & 4th pic show the 3 spacers behind the alternator.
You might notice that the pipes are already turning color and I am a bit disappointed that its happening so soon. I've put about 100 miles on the car since I picked it up last night consisting of 3 heat and complete cool down sessions. I'll post a few from the passenger side in a few minutes.
Last edited by Mr. Peabody; Feb 12, 2006 at 12:35 AM.
Le Mans Master
Joined: Oct 2004
Posts: 7,706
Likes: 485
From: Everett WA
C4 of Year Finalist (appearance mods) 2019
Now from the Passenger Side
These pics particularly the middle one shows another piece of supplied spacer pipe is used to mount the dip stick. The fuel lines were also disassembled and shielding put around them as they were less than an inch from the pipe. Booties were also put around two of the plug wires.
Unfortunately when I went to get the car last night I didn't have my camera with me and thus I have no shots from the underside to show you the beautiful job the shop did mating up the cats & pipes up to the resonator. An extention harness was required for the 02 sensor wires and shielding was also put around the cable on the drivers side of the tranny pan.
I agree with Slalom4me, I bought these because they were the only ones that come with 1 5/8 primaries. The car sounds nice .... not louder but deeper .... and from my sensitive butt I would say that it feels like a 20 - 25 HP gain and quite a bit more low end - mid range torqe.
Unfortunately when I went to get the car last night I didn't have my camera with me and thus I have no shots from the underside to show you the beautiful job the shop did mating up the cats & pipes up to the resonator. An extention harness was required for the 02 sensor wires and shielding was also put around the cable on the drivers side of the tranny pan.
I agree with Slalom4me, I bought these because they were the only ones that come with 1 5/8 primaries. The car sounds nice
.... not louder but deeper .... and from my sensitive butt I would say that it feels like a 20 - 25 HP gain and quite a bit more low end - mid range torqe.
Last edited by Mr. Peabody; Feb 12, 2006 at 12:39 AM.
