



L98 air intake
Thread Starter
Instructor


Joined: May 2011
Posts: 164
Likes: 0
From: Bucks County Pa
 L98 air intake
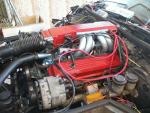
1987 C4 L98 TPI: has anyone found an aftermarket air intake system that will mate up to the 3" round end of the MAF housing to replace the stock air tube and filter box with an elbow and a small cone shaped filter similar to some of the K&N filters. the thing is with the MAF and the oval end of the housing that connects to the TB you have to stay with that and then start any aftermarket filter setup coming off the 3" round end of the MAF housing . thanks
Thread Starter
Instructor
Joined: May 2011
Posts: 164
Likes: 0
From: Bucks County Pa
i can see why you would ask this question, let me explain. this motor was taken out of my '87 C4 to go into an off road racer built on a jeep wrangler chassis. so ive got lots of room to install an elbow on the 3" end of the MAF tube and then a cone filter. Novak Conversions has these air intake kits for C5 and newer but not C4 motors. I can build one with 3" flex duct but am looking for a kit if one is out there somewhere..
Thread Starter
Instructor
Joined: May 2011
Posts: 164
Likes: 0
From: Bucks County Pa

Safety Car


Joined: Nov 2009
Posts: 3,973
Likes: 341
From: Adelaide South Australia

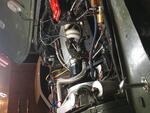
Hi Mountaineer, I made one myself, went on ebay and found plenty of vendors for the silicone hose, bought a length of straight and a 45 degree piece in 3" or 75mm inside diameter, then got some 3" od thin alloy tube to make inside joiners, add a 3" pod filter and some hose clamps and your in business.

Safety Car
Joined: Apr 2011
Posts: 3,660
Likes: 22
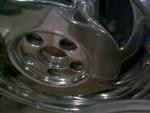
I have done the same as Blkozvette with his orange tubing except that I went like his over the radiator then down to a T where I had a filter to the left and one to the right....cone types.
After all said & done, I reinstalled the stock air box with a cut out polished top, K&N filter and used silicone tube to couple the sections together to the MAF then a big rubber cone to get around the TB. The stock box is more solid and handles just as much air and does not suck up water.
After all said & done, I reinstalled the stock air box with a cut out polished top, K&N filter and used silicone tube to couple the sections together to the MAF then a big rubber cone to get around the TB. The stock box is more solid and handles just as much air and does not suck up water.
Thread Starter
Instructor
Joined: May 2011
Posts: 164
Likes: 0
From: Bucks County Pa
Hi Mountaineer, I made one myself, went on ebay and found plenty of vendors for the silicone hose, bought a length of straight and a 45 degree piece in 3" or 75mm inside diameter, then got some 3" od thin alloy tube to make inside joiners, add a 3" pod filter and some hose clamps and your in business.

Thread Starter
Instructor
Joined: May 2011
Posts: 164
Likes: 0
From: Bucks County Pa
Corvette Stories
The Best of Corvette for Corvette Enthusiasts

10 Reasons the C6 Z06 is Still A Performance Benchmark After 20 Years
Joe Kucinski
How Much Horsepower Every Corvette Engine "LOST" in 1972
Joe Kucinski
Top 10 DOs and DON'Ts for Protecting Your Convertible Top!
Michael S. Palmer
Top 10 Most Explosive Corvettes Ever Made: Power-to-Weight Ratio Ranked!
Joe Kucinski
150 hp to 1,250 hp: Every Corvette Generation Compared by the Specs That Matter
Joe Kucinski
8 Coolest Corvette Pace Cars (and Replicas) of All Time
Verdad Gallardo
Top 10 Corvette Engines RANKED by Peak Torque (70+ Years of Muscle!)
Joe Kucinski
Corvette ZR1X Will Be Pacing the Indy 500, And Could Probably Race, Too!
Verdad Gallardo
Top 10 Corvettes Coming to Mecum Indy 2026!
Brett Foote
Thread Starter
Instructor
Joined: May 2011
Posts: 164
Likes: 0
From: Bucks County Pa
I have done the same as Blkozvette with his orange tubing except that I went like his over the radiator then down to a T where I had a filter to the left and one to the right....cone types.
After all said & done, I reinstalled the stock air box with a cut out polished top, K&N filter and used silicone tube to couple the sections together to the MAF then a big rubber cone to get around the TB. The stock box is more solid and handles just as much air and does not suck up water.
After all said & done, I reinstalled the stock air box with a cut out polished top, K&N filter and used silicone tube to couple the sections together to the MAF then a big rubber cone to get around the TB. The stock box is more solid and handles just as much air and does not suck up water.
Safety Car
Joined: Nov 2009
Posts: 3,973
Likes: 341
From: Adelaide South Australia
glad to help, i got my silicone hose and 45 degree joiner from chracingradiator on ebay, price is good compared to some others,
Just for info in relation to leesvet said the standard box is better in relation to things like sucking up water etc, the reason I did mine is due to the following flow figures if performance is what your after,
TPI airbox - 500 cfm (no doubt due to the restriction above the radiator)
MAF - 518 cfm with screens on
MAF - 658 cfm when de-screened
I figure that a 3" tube must flow at least what a descreened 3" MAF flows.
Just for info in relation to leesvet said the standard box is better in relation to things like sucking up water etc, the reason I did mine is due to the following flow figures if performance is what your after,
TPI airbox - 500 cfm (no doubt due to the restriction above the radiator)
MAF - 518 cfm with screens on
MAF - 658 cfm when de-screened
I figure that a 3" tube must flow at least what a descreened 3" MAF flows.
Thread Starter
Instructor
Joined: May 2011
Posts: 164
Likes: 0
From: Bucks County Pa
glad to help, i got my silicone hose and 45 degree joiner from chracingradiator on ebay, price is good compared to some others,
Just for info in relation to leesvet said the standard box is better in relation to things like sucking up water etc, the reason I did mine is due to the following flow figures if performance is what your after,
TPI airbox - 500 cfm (no doubt due to the restriction above the radiator)
MAF - 518 cfm with screens on
MAF - 658 cfm when de-screened
I figure that a 3" tube must flow at least what a descreened 3" MAF flows.
Just for info in relation to leesvet said the standard box is better in relation to things like sucking up water etc, the reason I did mine is due to the following flow figures if performance is what your after,
TPI airbox - 500 cfm (no doubt due to the restriction above the radiator)
MAF - 518 cfm with screens on
MAF - 658 cfm when de-screened
I figure that a 3" tube must flow at least what a descreened 3" MAF flows.



Burning Brakes

Joined: Nov 2008
Posts: 995
Likes: 1
From: Naples Campania
Hi Mountaineer, I made one myself, went on ebay and found plenty of vendors for the silicone hose, bought a length of straight and a 45 degree piece in 3" or 75mm inside diameter, then got some 3" od thin alloy tube to make inside joiners, add a 3" pod filter and some hose clamps and your in business.
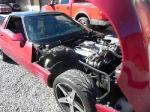
I've been drawing out plans for something similar to the LT "claw" intake. I'm waiting until I can get a set of blr33439's no pop-up headlights.


Basically will use the same upper piece as you have, but shorter and will split out into 2 (vice the 3 with 'the claw') and go down where the headlights should be. It will require elimination, relocation or modification of the overflow tank. Relocation will probably be the best so I don't suck up fumes from the tank into the intake. Haven't figured that part out yet. I know I can get some silicon Y-ducting. It'll take time and patience.
*edit*
One thing that I notice about your setup is that anyone can do it. There is no welding required. It looks nice and anyone can make that bracket in their garage. The only thing I would change is the bolts that mount it to the radiator housing. This would involve some welding, but I would weld a nut onto a plate, set it inside the radiator housing, and rivet it to a plate that is on top, sandwiching the plastic between the plates. This way, the bolt would go down and secure to the nut on the bottom side. This would look a bit cleaner.
But, anyone can armchair a project. Looks great either way.
Last edited by navy_vette; Oct 18, 2011 at 04:12 PM.


Thread Starter
Instructor
Joined: May 2011
Posts: 164
Likes: 0
From: Bucks County Pa
http://intakehoses.com/
Safety Car
Joined: Nov 2009
Posts: 3,973
Likes: 341
From: Adelaide South Australia
The one thing I would change if i made another one would be to move the join for the straight piece to the 45 piece forward a couple of inches, if you look at the photo where the 2 clamps are you can see its slightly ovaled, that is because there is a bonnet subframe that comes down just above the radiator and pushes down at that point.
I should have cut the couple of inches off the 45 degree piece so that the subframe only pushes down on the silicone hose slightly.
but it is the Mark1 version !
also if you measure the surface area of a pod filter and a standard filter you will see the pod filter has a lot more surface area.
I should have cut the couple of inches off the 45 degree piece so that the subframe only pushes down on the silicone hose slightly.
but it is the Mark1 version !
also if you measure the surface area of a pod filter and a standard filter you will see the pod filter has a lot more surface area.
Last edited by blackozvet; Oct 19, 2011 at 10:15 AM. Reason: extra bit
Thread Starter
Instructor
Joined: May 2011
Posts: 164
Likes: 0
From: Bucks County Pa
The one thing I would change if i made another one would be to move the join for the straight piece to the 45 piece forward a couple of inches, if you look at the photo where the 2 clamps are you can see its slightly ovaled, that is because there is a bonnet subframe that comes down just above the radiator and pushes down at that point.
I should have cut the couple of inches off the 45 degree piece so that the subframe only pushes down on the silicone hose slightly.
but it is the Mark1 version !
also if you measure the surface area of a pod filter and a standard filter you will see the pod filter has a lot more surface area.
I should have cut the couple of inches off the 45 degree piece so that the subframe only pushes down on the silicone hose slightly.
but it is the Mark1 version !
also if you measure the surface area of a pod filter and a standard filter you will see the pod filter has a lot more surface area.
