


464 SBC Tall Deck Engine Build
Thread Starter
Melting Slicks


Joined: Mar 2002
Posts: 3,108
Likes: 126
From: S.L.C. UT
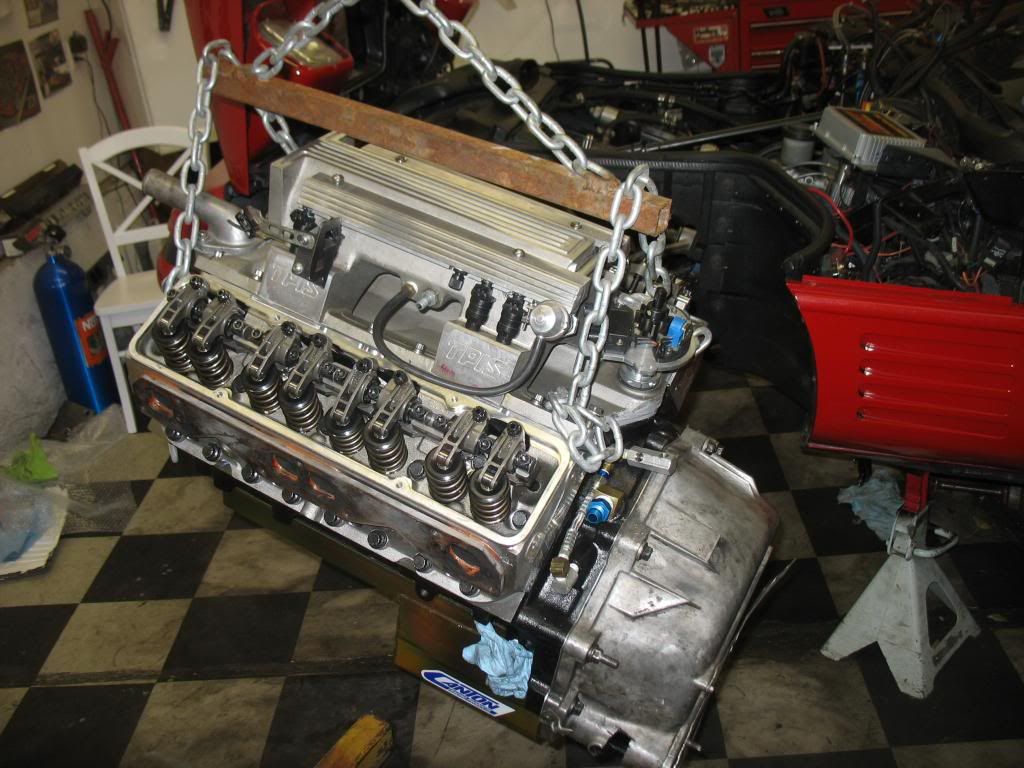
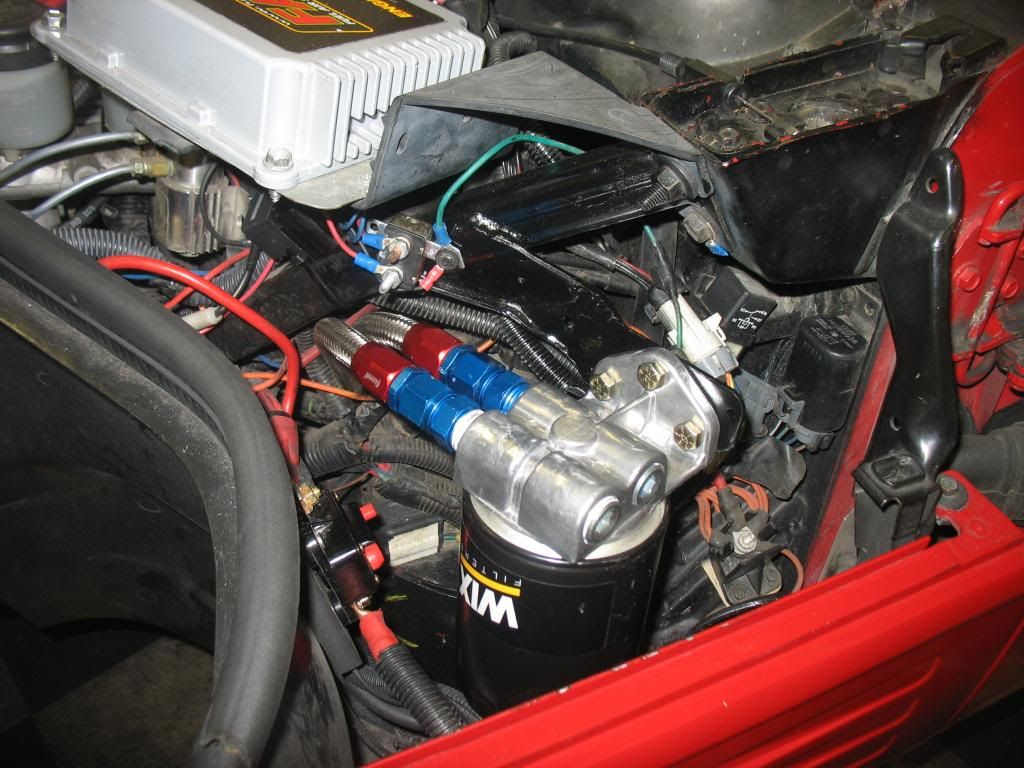
So I got the engine in the car. I had to have the distributor collar machined off and put a adjustable slip collar on the dist housing because the dist didn't go in deep enough. That solved that problem. The headers actually bolted right up. I didn't know how that was going to work out. The alternator bracket I made the holes were off since one end went to the water pump and the other went to the head. So I had to make a new bracket. And I found a place for the oil filter. I modded my old cruise control bracket for that. And with the battery in the back it ends up where the battery was. You can also see I had to make a oil line to hook my sender units to.


Last edited by tpi 421 vette; Nov 20, 2013 at 09:27 AM.
Le Mans Master


Joined: May 2004
Posts: 5,386
Likes: 534
Jim, great pictures and great progress! Do you have a lot of trouble getting the engine back in place with the trans already in car? The whole front end of my car will be off, so I will try the engine/trans combo for install.
Thread Starter
Melting Slicks
Joined: Mar 2002
Posts: 3,108
Likes: 126
From: S.L.C. UT
It's not hard to get the engine back in with the trans in place. I forgot to mention. I had to notch the crossmember for the oil pan. I boxed it in afterwards so there was no loss of strength in the crossmember. I could have modified the oil pan at the front, but decided to do the crossmember instead.
Thread Starter
Melting Slicks
Joined: Mar 2002
Posts: 3,108
Likes: 126
From: S.L.C. UT
Corvette Stories
The Best of Corvette for Corvette Enthusiasts

Top 10 Most Expensive Corvettes Ever Sold on Bring A Trailer
Brett Foote
10 Things Every Corvette Owner Needs (2026 Edition)
Michael S. Palmer
8 Most "Only Corvette Owners Understand" Quirks and Problems
Pouria Savadkouei
10 Reasons the C6 Z06 is Still A Performance Benchmark After 20 Years
Joe Kucinski
How Much Horsepower Every Corvette Engine "LOST" in 1972
Joe Kucinski
Top 10 DOs and DON'Ts for Protecting Your Convertible Top!
Michael S. Palmer
Top 10 Most Explosive Corvettes Ever Made: Power-to-Weight Ratio Ranked!
Joe Kucinski
150 hp to 1,250 hp: Every Corvette Generation Compared by the Specs That Matter
Joe Kucinski
8 Coolest Corvette Pace Cars (and Replicas) of All Time
Verdad Gallardo


Advanced

Joined: Apr 2012
Posts: 52
Likes: 0
From: Salt Lake City Utah
Wow Jim. Great pics. I would love to say what part is my favorite but I can't. I love them all. The Dart Iron Eagle tall deck, The Crower Crank with knife edging (that is the part I am truly jealous of) By far the nicest crank I have had the pleasure to see and touch, the 6.20 inch Crower Maxi Lite rods that look way to big to put in a small block, the Crower shaft system to put the final touch on the AFR 245'S to allow them to breath to their full potential. I can't wait to go for a ride. I'm praying for sunshine in November. Seriously.
Last edited by 1993 Z07; Nov 20, 2013 at 04:58 PM.
Le Mans Master
Joined: May 2004
Posts: 5,386
Likes: 534
Jim, I was wondering if you stick with the ZF, have you thought about a scatter shield? Not sure they even make those for a ZF application but that thought crossed my mind. What's usually the power threshold where one should consider a scatter shield?
Thread Starter
Melting Slicks
Joined: Mar 2002
Posts: 3,108
Likes: 126
From: S.L.C. UT
My bellhousing blanket is basically a scattershield. NHRA rules say you need one to run 11.49 or quicker.
Melting Slicks

Joined: Mar 2008
Posts: 2,141
Likes: 76
From: Santa Maria, CA
My auto shop teacher back in the late 60's was a racer. He was adamant about scatter shields. He had one let go and the shield stopped it from taking his leg or worse. The clutch plate instead went down, hit the pavement and came back up through his back seat.
Thread Starter
Melting Slicks
Joined: Mar 2002
Posts: 3,108
Likes: 126
From: S.L.C. UT
Melting Slicks
Joined: Mar 2008
Posts: 3,022
Likes: 3
From: Chandler Arizona
Jim-
You mentioned that the headers went on without a hitch, so no clearance issues at all? Also, what headers are you running? Please elaborate on the belt driven bracket modifications, this is a big deal when trying to work in a tall-deck block.
You mentioned that the headers went on without a hitch, so no clearance issues at all? Also, what headers are you running? Please elaborate on the belt driven bracket modifications, this is a big deal when trying to work in a tall-deck block.
Thread Starter
Melting Slicks
Joined: Mar 2002
Posts: 3,108
Likes: 126
From: S.L.C. UT
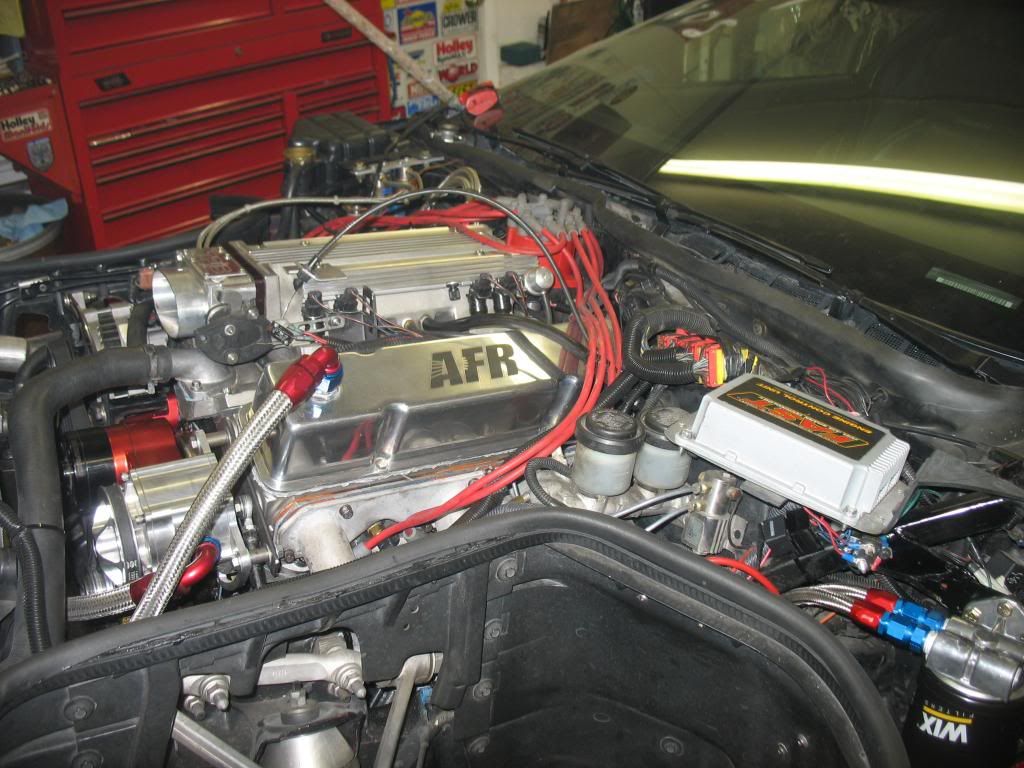
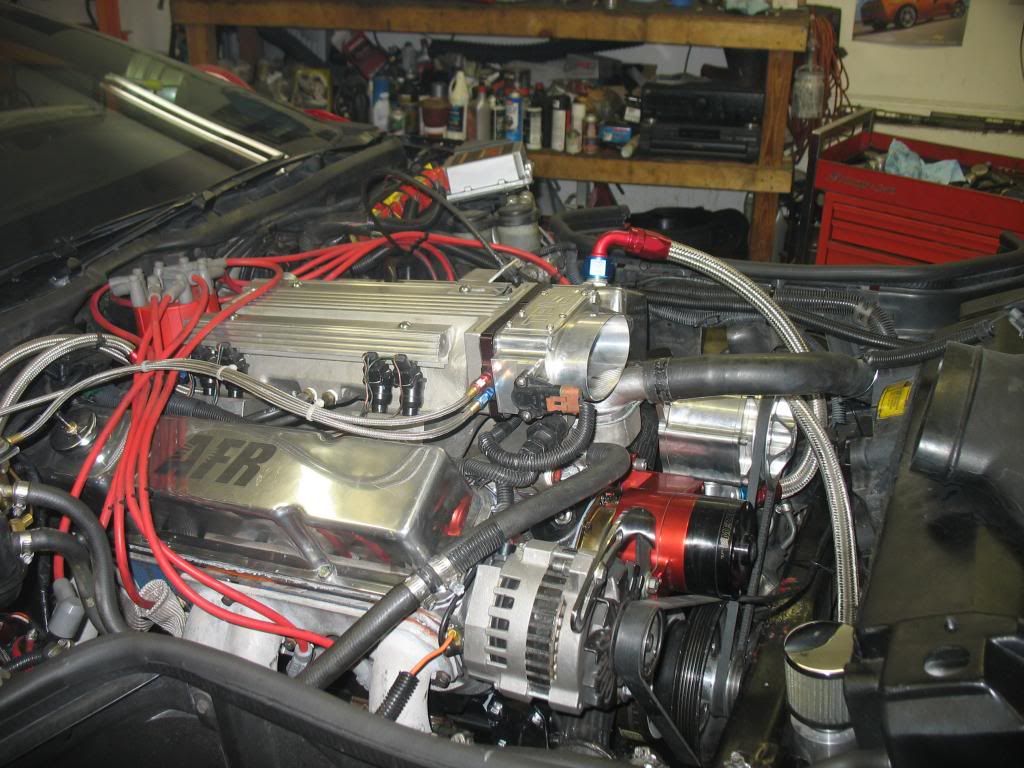
The headers just need a ding in the front right tube to fit. It's now close to the control arm, but everything clears. My headers were hand built. But Tim (The Toy) also put a tall deck in his C4. He had off the shelf Hooker headers, and his headers also fit. So with the obvious potential problems headers could have fitting, they bolt right up. I did have all the bolts started but loose before I tightened everything up.
The bracketry is a different story. Any bracket that goes from the block to the heads, the bolt holes will be off. The deck is raised .300, the heads are higher and wider than stock. I had to make a new bracket from my water pump to the alternator which the lower bolt is bolted to the heads. The bolt holes needed to be farther out.
The bracketry is a different story. Any bracket that goes from the block to the heads, the bolt holes will be off. The deck is raised .300, the heads are higher and wider than stock. I had to make a new bracket from my water pump to the alternator which the lower bolt is bolted to the heads. The bolt holes needed to be farther out.