C4 Tech/Performance L98 Corvette and LT1 Corvette Technical Info, Internal Engine, External Engine

About to start my brake upgrade, is there a tutorial?

Thread Tools
 
Search this Thread
 
Old 03-01-2014, 03:36 PM
  #1  
bassackwards
Pro
Thread Starter
 
bassackwards's Avatar
 
Member Since: Aug 2012
Location: Nashville TN
Posts: 663
Likes: 0
Received 0 Likes on 0 Posts

Default About to start my brake upgrade, is there a tutorial?

It seems that none of my parts came with instructions and I'll be swapping caliper, bracket, rotor.

I have a pin with a c clip in one box, a tube of grease in another, with 0 directions on how it all fits together.

A tutorial would be fabulous if anyone has a link
Old 03-01-2014, 09:58 PM
  #2  
vetteoz
Safety Car
 
vetteoz's Avatar
 
Member Since: Jan 2004
Posts: 3,556
Likes: 0
Received 11 Likes on 10 Posts

Default

Originally Posted by bassackwards
none of my parts came with instructions and I'll be swapping caliper, bracket, rotor.


To what ????????????????

J55 / C5 / aftermarket ...................
Old 03-01-2014, 10:02 PM
  #3  
bassackwards
Pro
Thread Starter
 
bassackwards's Avatar
 
Member Since: Aug 2012
Location: Nashville TN
Posts: 663
Likes: 0
Received 0 Likes on 0 Posts

Default

J55. I think I figured it out. Seems kind of weak with only a single skinny pin holding everything together
Old 03-01-2014, 10:21 PM
  #4  
pcolt94
Le Mans Master
 
pcolt94's Avatar
 
Member Since: Jan 2006
Location: Orlando FL
Posts: 5,615
Received 197 Likes on 172 Posts

Default

Originally Posted by bassackwards
J55. I think I figured it out. Seems kind of weak with only a single skinny pin holding everything together
It's the same as your 12" system. Just unbolt the brackets and bolt on the new brackets (I think about 160 ft lbs). Then remove you old calibers one at a time trying not to let air in line. Use new crush washers and tighten. Installs just like your old system you took off

It's not the one pin that bothers me, it's that one lonely "C" clip
Old 03-01-2014, 10:43 PM
  #5  
don hall
Safety Car
 
don hall's Avatar
 
Member Since: Aug 2002
Location: SANTA CRUZ CA
Posts: 3,841
Received 225 Likes on 178 Posts

Default

http://www.wikihow.com/Replace-Disc-Brakes
Old 03-02-2014, 08:21 AM
  #6  
bassackwards
Pro
Thread Starter
 
bassackwards's Avatar
 
Member Since: Aug 2012
Location: Nashville TN
Posts: 663
Likes: 0
Received 0 Likes on 0 Posts

Default

I found it easiest to install the pads into the calipers and get them into the brackets on the workbench. I planned to install the whole "loaded" assembly in one motion but learned they sent me the wrong bracket
Old 03-02-2014, 11:33 AM
  #7  
pcolt94
Le Mans Master
 
pcolt94's Avatar
 
Member Since: Jan 2006
Location: Orlando FL
Posts: 5,615
Received 197 Likes on 172 Posts

Default

Originally Posted by bassackwards
I found it easiest to install the pads into the calipers and get them into the brackets on the workbench. I planned to install the whole "loaded" assembly in one motion but learned they sent me the wrong bracket
That is how it is done, caliper and pads rotated into the bracket (but you need the right bracket).

I would not put the pads in the caliper and then install on to the brake line. The reason is you might make a mess or drip fluid and get the on the new pads. If you make a mess, the caliper will be much easier to clean. Then install your pads.

When doing a brake job, always work clean. Get the mechanical done, then when all is ready and cleaned up (including your hands), install the pads and rotors.
Old 03-02-2014, 12:00 PM
  #8  
bassackwards
Pro
Thread Starter
 
bassackwards's Avatar
 
Member Since: Aug 2012
Location: Nashville TN
Posts: 663
Likes: 0
Received 0 Likes on 0 Posts

Default

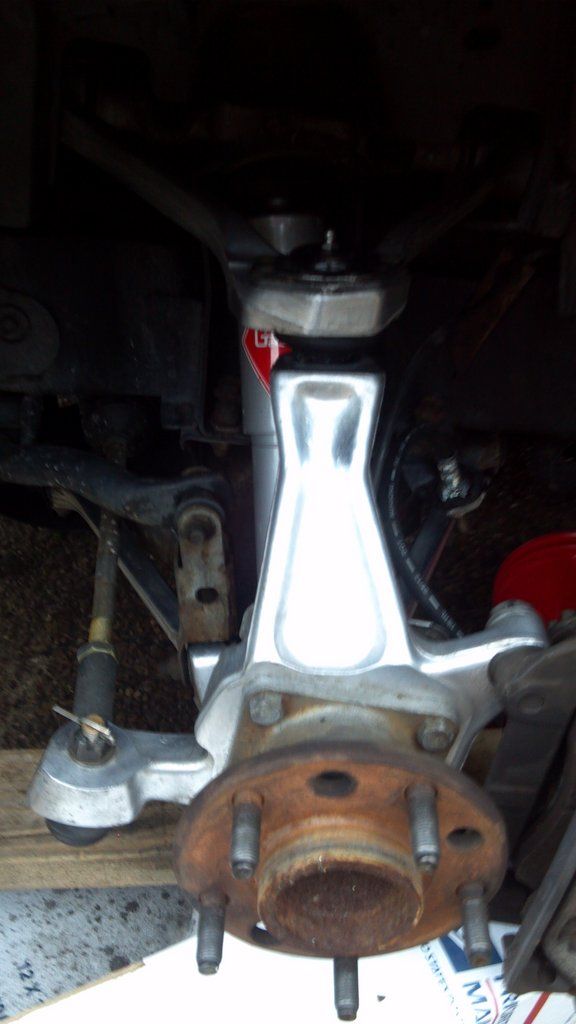
Is this clean enough?


I put the old caliper back on so that the fluid would not drip out.
Old 03-12-2014, 07:23 PM
  #9  
bassackwards
Pro
Thread Starter
 
bassackwards's Avatar
 
Member Since: Aug 2012
Location: Nashville TN
Posts: 663
Likes: 0
Received 0 Likes on 0 Posts

Default

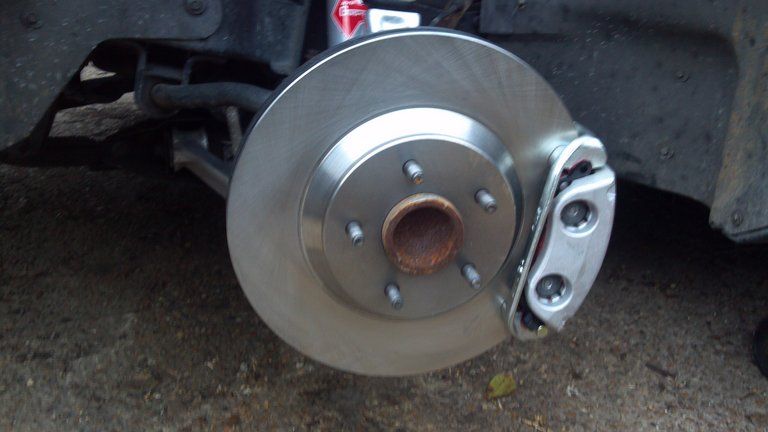
Left side finished! After loads of troubles and direction changes I'm happy with the end result.

Old 03-12-2014, 08:51 PM
  #10  
JimZRyd
Melting Slicks

Support Corvetteforum!
 
JimZRyd's Avatar
 
Member Since: Jan 2008
Location: Florence SC
Posts: 2,601
Received 72 Likes on 38 Posts
St. Jude Donor '12

Default

Looks good! Maybe take an extra couple minutes and sand and paint those hubs...rust is a b*%€#!
Old 03-12-2014, 09:46 PM
  #11  
WVZR-1
Team Owner

 
WVZR-1's Avatar
 
Member Since: Sep 2003
Posts: 23,117
Received 2,270 Likes on 2,031 Posts

Default

Originally Posted by bassackwards
Is this clean enough?


I put the old caliper back on so that the fluid would not drip out.
How did you make out with your re-threading operation to the FOMOCO brackets? I'd think since you didn't mention it again it went well! yes/No?
Old 03-12-2014, 10:01 PM
  #12  
mtwoolford
Melting Slicks
 
mtwoolford's Avatar
 
Member Since: Jan 2009
Location: folsom california
Posts: 3,482
Received 194 Likes on 180 Posts

Default

Originally Posted by pcolt94

It's not the one pin that bothers me, it's that one lonely "C" clip
I put a dab of RTV on the end of he pin and C clip. Pretty much eliminates any possiblity of the C clip dislodging itself.
Old 03-13-2014, 12:22 AM
  #13  
bassackwards
Pro
Thread Starter
 
bassackwards's Avatar
 
Member Since: Aug 2012
Location: Nashville TN
Posts: 663
Likes: 0
Received 0 Likes on 0 Posts

Default

Originally Posted by WVZR-1
How did you make out with your re-threading operation to the FOMOCO brackets? I'd think since you didn't mention it again it went well! yes/No?
It was expensive.

Get notified of new replies

To About to start my brake upgrade, is there a tutorial?


Quick Reply: About to start my brake upgrade, is there a tutorial?


All times are GMT -4. The time now is 12:37 PM.