When you click on links to various merchants on this site and make a purchase, this can result in this site earning a commission. Affiliate programs and affiliations include, but are not limited to, the eBay Partner Network.
I decided that my gauge cluster needed to be redone after I left the cluster on the dash one day and it melted the bezel that seperates the gauges. (The trans am bezel) I went to the junkyard and found a bezel and modified it to fit like I had the old one. I changed the mounting a little bit and tried to make the F-body cluster look a little more factory in the C4. Maybe it will serve as some motivation for those of you who don't want the digital dash anymore.
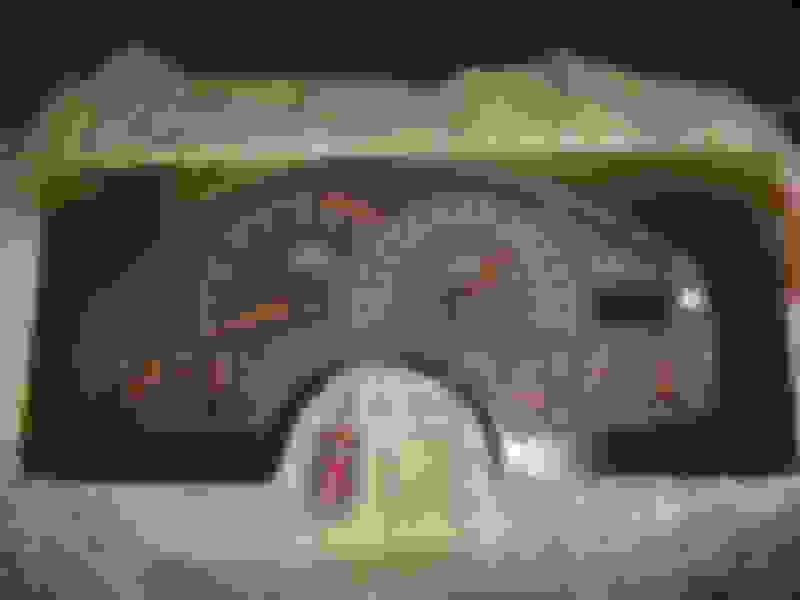
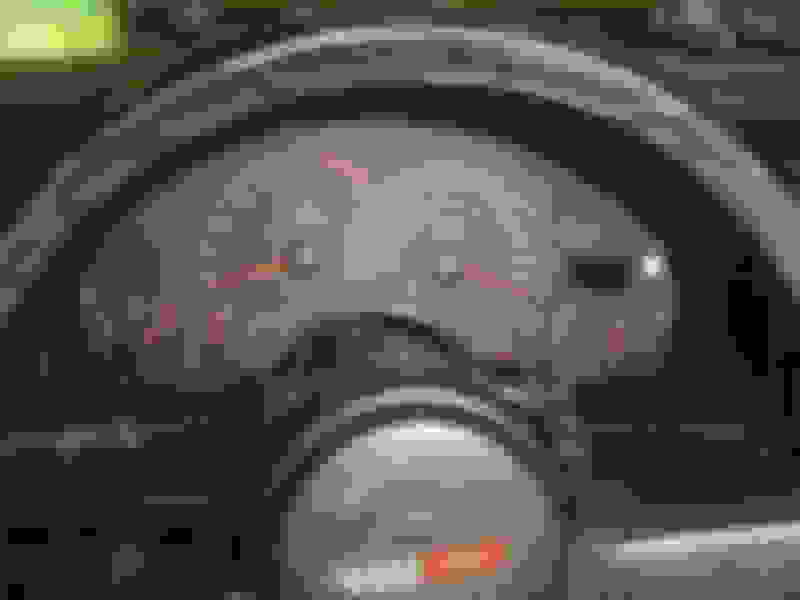
Here are a couple pictures of the 2nd Generation of this cluster installed in the 84'. It was like that until it melted. Had terribly looking mounts for the trans am bezel and the lens was held on with electrical tape.
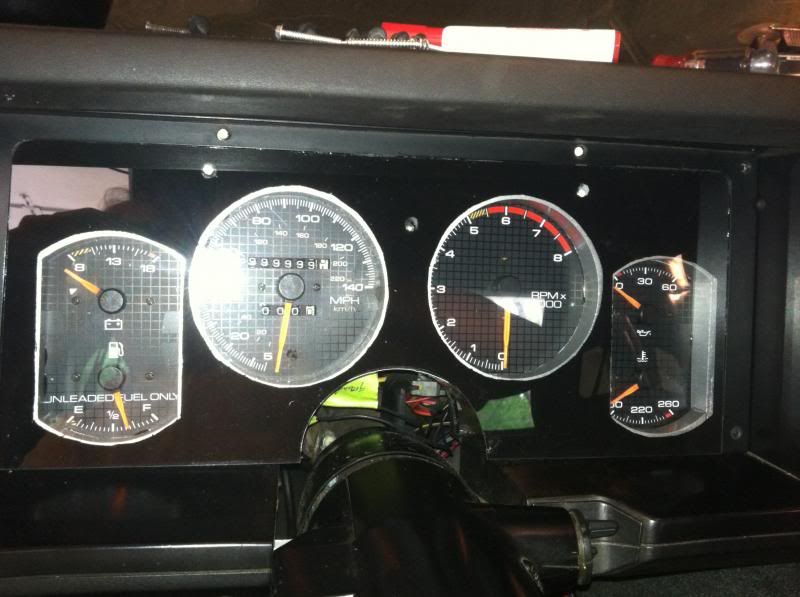
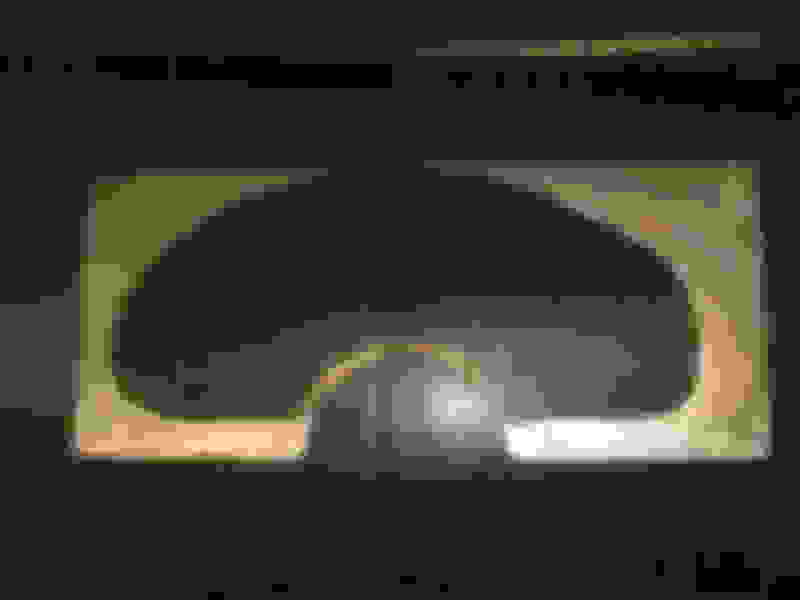
Here is the newly redesigned cluster. I think it looks a lot better. Not 100% what I want but still A LOT better. The original design used a piece of sheet steel. This design utilizes a sheet of aluminum. A little bit thicker but it's lighter and won't rust. (Bought both metal sheets at lowes)
I used clear lexan stuff you can buy at lowes and cut it to fit. The gauges sit deep enough that the lexan can sit flat on the aluminum sheet so you don't have to use any spacers.
**Edited to fix photos and also I'm still using this cluster and I'm very happy with it.
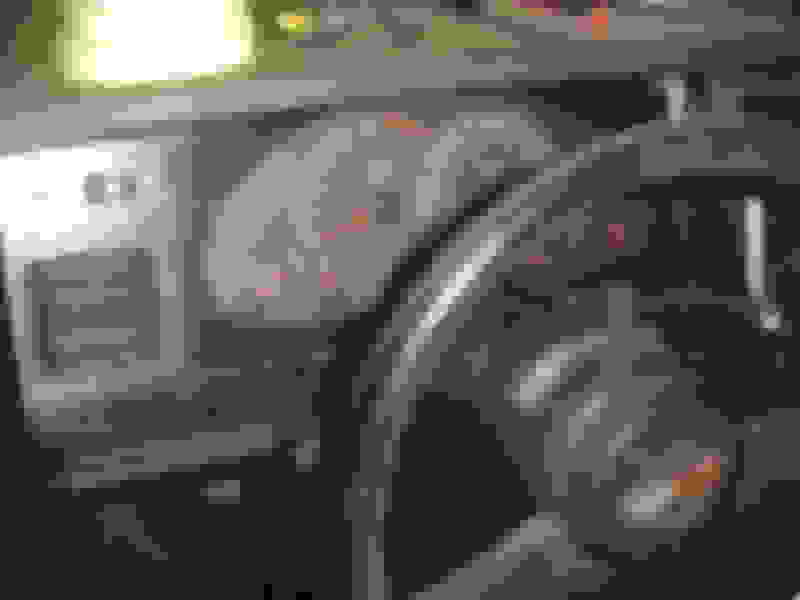
The cluster will be reinstalled in the vette tomorrow after work. I'll take a pic of it installed too. 3 screws, unplug the rear connector and the cluster is in or out. Pretty simple, which is great.
This is a T/A cluster? what yr & other detail for those that would want to track one down...
The obvious question here, does it work?
what had to be done to get the C4 sensors, VSS, fuel alt, etc all to work with the analog gauges? anything? or is it GM universal as far as the sending info ?
I 'get' that you have to make the plug work by IDing the wires in the harness and then locating the proper PIN in the cluster, but is that all?
and finally, what was the total (approx.) cost of the analog cluster, other materials and how much time was invested?
Damn fine work ! That looks like a kit more than a DIY assembly, 1st attempt on top of that !~!
It looks really nice! Did you build it yourself or is it some sort of aftermarket dash panel?
Made it myself, took me about 4 hours to do this one but I also procrastinated, watched TV, ate and had a few beers while working on it. It wasn't too bad. haha At first you are like **** how am I going to make this look even remotly factory. I took a few tips from my old design and took more time making it. Smoother edges and one big thing that irritated me about my old design was the edges on the plexiglass looked like **** from cutting it and I had to put electrical tape over the edges. (No idea why i thought that was a good idea) This time I decided to "mask" the edges by painting them black, and it worked. It's still not what I want but still better than before, I'll probably end up redoing it again this winter. haha
This is a T/A cluster? what yr & other detail for those that would want to track one down...
The obvious question here, does it work?
what had to be done to get the C4 sensors, VSS, fuel alt, etc all to work with the analog gauges? anything? or is it GM universal as far as the sending info ?
I 'get' that you have to make the plug work by IDing the wires in the harness and then locating the proper PIN in the cluster, but is that all?
and finally, what was the total (approx.) cost of the analog cluster, other materials and how much time was invested?
Damn fine work ! That looks like a kit more than a DIY assembly, 1st attempt on top of that !~!
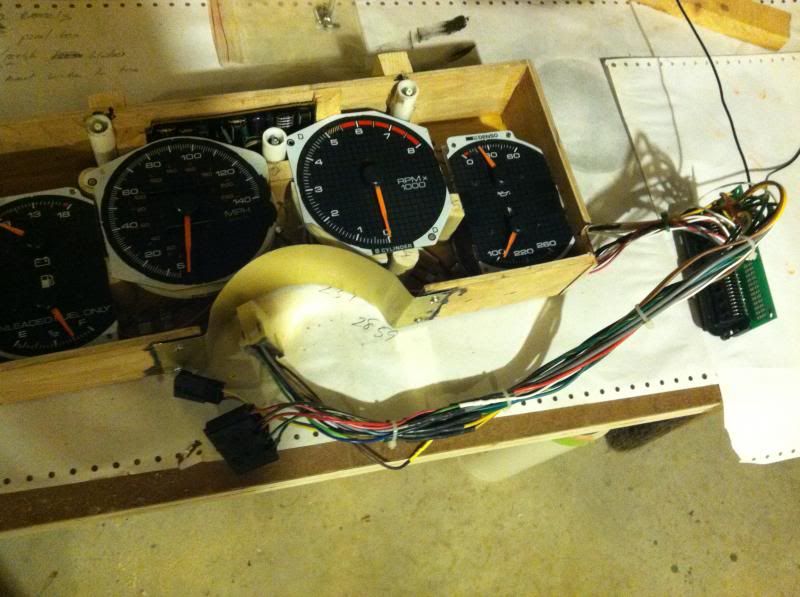
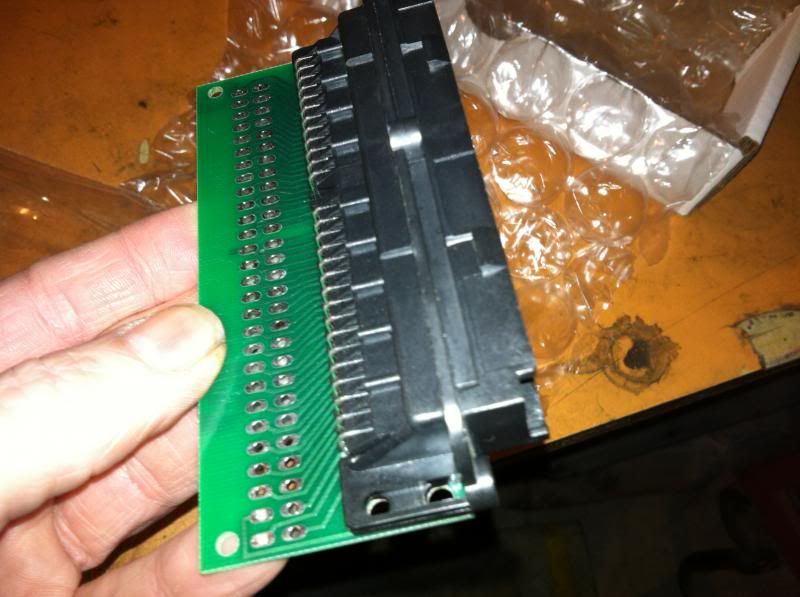
I am using is a 97' Camaro Z28 cluster, you can use any 93-97 Firebird cluster as long as it was from a V8 car. (Or a 98-02 cluster if you have an LS swap) As far as I know 90% of GM cars and trucks used the same sending info for the core gauges up until the LS series then they changed them. I got my 2nd bezel from a V6 98-02 bird. The gauge cluster was only 120mph and the tach would read weird as being from a V6 car and the needles were orange instead of red and the cluster lights up red. I have that cluster in my closet, I liked the Z28 cluster better. (plus I knew it worked) I located a pinout for the switch panel for the cluster gauges and the cluster itself for both the Vette and the Camaro and wired it accordingly. I also snagged the rear connector for the cluster out of a junkyard car as well. I'm not sure about the VSS as I'm running an LT1/T-56 in my 84 but I think most of that can be tuned in the PCM as the VSS goes to the PCM and then goes to the gauges. (LT1 anyways) I have no idea about the L98, crossfire cars. I would guess you would need to convert the signal to get the correct reading but again I have no idea. I bought the Z28 cluster for $50-75 (I don't remeber, if it helps the V6 friebird cluster was $40), 1/8" 1'x2' aluminum plate was $20 on amazon, the plexi glass sheet was $10, paint $5. I would say you shouldn't be over $150 all said and done. If you pay more its probably because you got ripped on the cluster. I did it for like $80-90. I also wanted a 97 LT1 cluster because it was the firebird style and had the digital odometer instead of the mechanical one.
Take analog style over digital any day of the week they just look right
Connections the same meaning plugs or is there hacking involved?
I'm sure you could make it plug any play if you spent the time but I did not want to waste the time plus I knew i would never be using the digital cluster again. I would say hack it up! haha
You don't need the cluster 'bezel" either if you don't like it. I first did not use the bezel then decided I liked it a lot better.
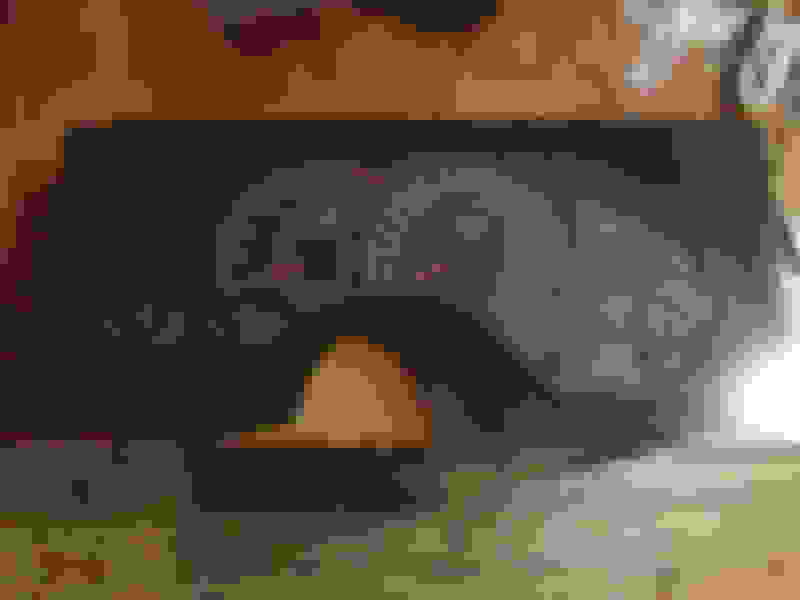
Here is the cluster without the "Trans am bezel" and without the lens as I orginally didn't have one. (The slightest breeze will move your speedo and it's annoying, make a lens)
(This is also the old plate I made out of steel and painted it black, thinner and heavier than the aluminum. Not using it anymore)
Last edited by v8vette84; 09-24-2017 at 09:21 PM.
Reason: Fix Photos
Did not get a chance to install the cluster today. As soon as I got home from work it down poured... figures. I'll post pics when it's in, hopefully tomorrow.
That is not bad, I have heard of people using 3rd gen gauges but haven't seen any done. It doesn't look bad at all. If it was me I would have painted the gauge surround (The aluminum looking pieces around each gauge) black instead of keeping it looking like aluminum, I feel like it would tie the gauges together better. But thats my personal opinion. Nice work though!
all that's needed is a good, clean bezel to make it look like it belongs....
I once did a re-do of the bezels in my car because they were all faded and gone flat, some scratched and just looked tired...
I WAS going to do a "kit" that was like the wood kits, I was thinking carbon fiber or brushed aluminum...
What I ended up doing was taking the bezels off and painting them "Hammered Aluminum"...sort of a textured finish, but hammered looking.
This actually worked quite well. The hammered finish hid all the scratches and flaws, it DID look like an aluminum dash and trans cover, and the pieces all made the whole dash look like it was made that way...not in bits and pieces.
I later got new bezels and took the aluminum looking pieces out and stored them for spares...it did look pretty good, it was different and I did get a few people asking about it and what it was and how I did it.
point is, that you CAN do some tricks like that to mask the home made bezel or trim panels that you'll need to cover the 'hole" around the FB cluster.
If it was me I would have painted the gauge surround (The aluminum looking pieces around each gauge) black instead of keeping it looking like aluminum, I feel like it would tie the gauges together better. But thats my personal opinion. Nice work though!
It was my personal opinion too! I went back (a few times: damn OCD) and repainted the bezel black as I couldn't get a crisp line between the lens view area vs. the (painted) hidden area.
It was my personal opinion too! I went back (a few times: damn OCD) and repainted the bezel black as I couldn't get a crisp line between the lens view area vs. the (painted) hidden area.
You don't need the cluster 'bezel" either if you don't like it. I first did not use the bezel then decided I liked it a lot better.
Here is the cluster without the "Trans am bezel" and without the lens as I orginally didn't have one. (The slightest breeze will move your speedo and it's annoying, make a lens)
(This is also the old plate I made out of steel and painted it black, thinner and heavier than the aluminum. Not using it anymore)
Also here are some photos of the original design if anyone cares. Crude but it was my first go at making a 97' Z28 cluster fit.
This last photo was where I cut down the original bezel so it would mate with the new sheet of steel that was holding the Z28 cluster. I eventually bolted a few small plates to the backside of this piece sticking out to the right and added screw clips for additional mounting for that side of the cluster.
Also maybe DanZ51 will fix his photos as well at some point. Photobucket screwed us all...
 07-08-2014, 03:11 AM


 Interesting....


 (My first attempt was a fail). Good work just the same. I like seeing new ideas.