


How to remove Radiator (Late C4)

Heel & Toe

Joined: Apr 2016
Posts: 17
Likes: 3
Last weekend I replaced my 91 coupe's radiator and bypassed the heater core at the same time (so many hoses and coolant... not the best call). If you know your radiator is going bad, change is ASAP! Mine ended up mixing the coolant and transmission fluid together, resulting in a long engine flush (hopefully no damage) and having to replace the transmission itself and many hoses. The entire mishap was about $1500.
Anyways the hardest bolts for me to reach were the ones that are located at the bottom of the radiator cover towards the front of the car. The trick was the right sized wrench and small hands xD if i rememer correctly, I used something along the lines of a 9/32" wrench for it. And when you disconnect the lower radiator hose, do know that there will be coolant, and it will be messy. Overall, it's a pretty straightforward process though
Anyways the hardest bolts for me to reach were the ones that are located at the bottom of the radiator cover towards the front of the car. The trick was the right sized wrench and small hands xD if i rememer correctly, I used something along the lines of a 9/32" wrench for it. And when you disconnect the lower radiator hose, do know that there will be coolant, and it will be messy. Overall, it's a pretty straightforward process though
Last edited by JamesThatGuyy; Apr 8, 2016 at 11:43 PM.
Drifting


Joined: Sep 2014
Posts: 1,579
Likes: 59
From: Trieste Italy
Last weekend I replaced my 91 coupe's radiator and bypassed the heater core at the same time (so many hoses and coolant... not the best call). If you know your radiator is going bad, change is ASAP! Mine ended up mixing the coolant and transmission fluid together, resulting in a long engine flush (hopefully no damage) and having to replace the transmission itself and many hoses. The entire mishap was about $1500.
Anyways the hardest bolts for me to reach were the ones that are located at the bottom of the radiator cover towards the front of the car. The trick was the right sized wrench and small hands xD if i rememer correctly, I used something along the lines of a 9/32" wrench for it. And when you disconnect the lower radiator hose, do know that there will be coolant, and it will be messy. Overall, it's a pretty straightforward process though
Anyways the hardest bolts for me to reach were the ones that are located at the bottom of the radiator cover towards the front of the car. The trick was the right sized wrench and small hands xD if i rememer correctly, I used something along the lines of a 9/32" wrench for it. And when you disconnect the lower radiator hose, do know that there will be coolant, and it will be messy. Overall, it's a pretty straightforward process though
Heel & Toe
Joined: Apr 2016
Posts: 17
Likes: 3
my apologies for the late reply. Including the time it took to look for the tools I had misplaced, installing the new radiator took me an hour. If you are good at keeping your tools at hand, I doubt it would take more than thirty minutes

Instructor


Joined: Mar 2008
Posts: 226
Likes: 6
From: NY
Anyway to maybe get the pictures posted on this thread again? Saw this about a year or so ago and thought it was VERY informative, especially with the pics. Planning to change out the rad this winter with a DeWitts, and could really use those pics 
Corvette Stories
The Best of Corvette for Corvette Enthusiasts

Top 10 Most Expensive Corvettes Ever Sold on Bring A Trailer
Brett Foote
10 Things Every Corvette Owner Needs (2026 Edition)
Michael S. Palmer
8 Most "Only Corvette Owners Understand" Quirks and Problems
Pouria Savadkouei
10 Reasons the C6 Z06 is Still A Performance Benchmark After 20 Years
Joe Kucinski
How Much Horsepower Every Corvette Engine "LOST" in 1972
Joe Kucinski
Top 10 DOs and DON'Ts for Protecting Your Convertible Top!
Michael S. Palmer
Top 10 Most Explosive Corvettes Ever Made: Power-to-Weight Ratio Ranked!
Joe Kucinski
150 hp to 1,250 hp: Every Corvette Generation Compared by the Specs That Matter
Joe Kucinski
8 Coolest Corvette Pace Cars (and Replicas) of All Time
Verdad GallardoMelting Slicks


Joined: Oct 2016
Posts: 2,024
Likes: 363
From: Central Alabama
I swapped mine yesterday. Really not much to it.
The hard part is the six screws down in the nose.
The radiator is just sitting in there. Once the upper shroud is removed and it is disconnected it pulls up and out.
While the shroud is off swap positions on the nut plates and screws in the nose. Makes removing it for radiator cleaning much easier.
I can't post all the pictures shown above but can take some pics and point out where everything is.
Is your car auto or manual trans?
Last edited by belairbrian; Oct 17, 2017 at 02:27 PM.
Zen Vet Master Level VII


Joined: Mar 2016
Posts: 5,218
Likes: 1,174
From: Southlake, TX
Thread Starter
Team Owner


Joined: Aug 2004
Posts: 21,543
Likes: 3,216
From: Park City Utah
I don't know if this has been posted before, (did a search, didn't find it), so I thought I's put up some pics here. Hope they help someone...
First thing, Start draining the coolant.
Reach under the frame from in front of the right tire, bend your had forward and it will practically hit the drain screw. There is a wonderful plastic "chute" that ensures all the coolant drains into one spot. No mess! My car gave up ~1.5 gallons, emptying the radiator, tank and hoses.
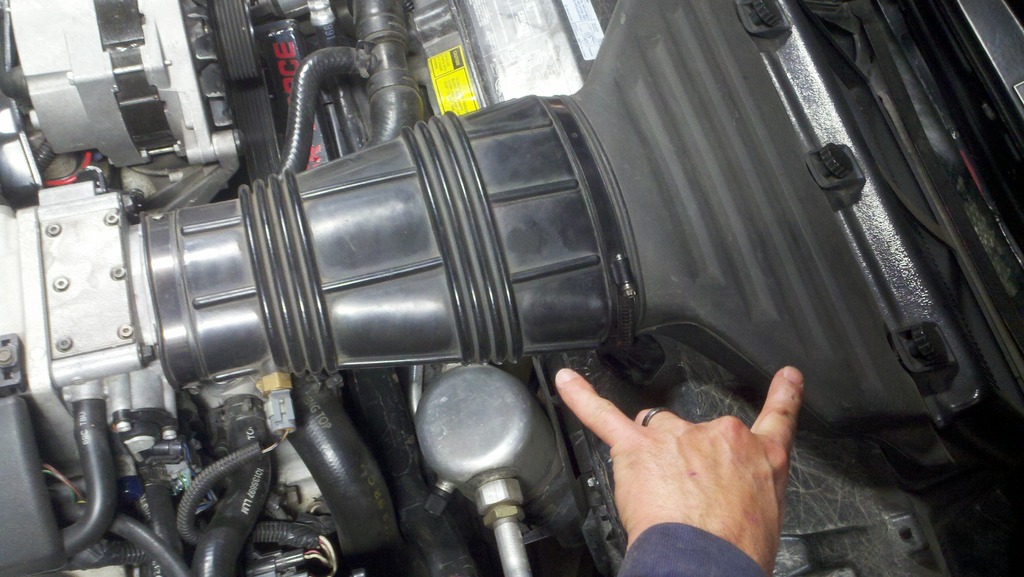
While coolant drains, remove air bridge and filter housing.
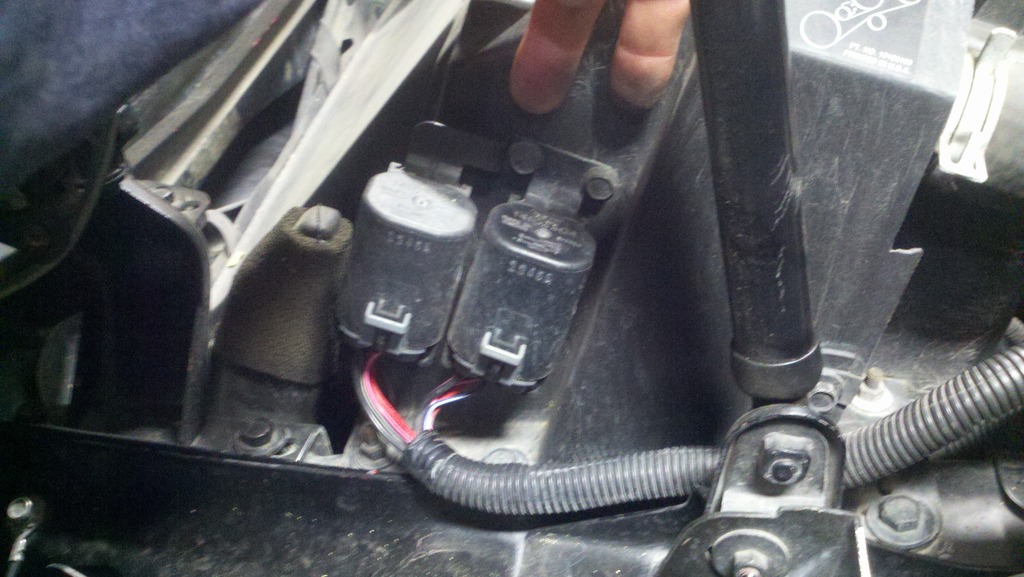
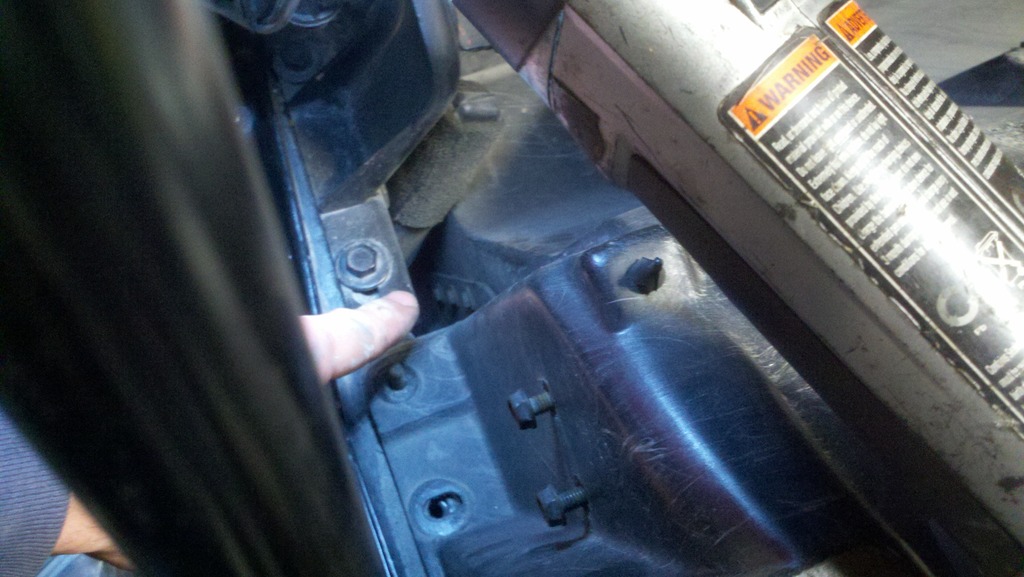
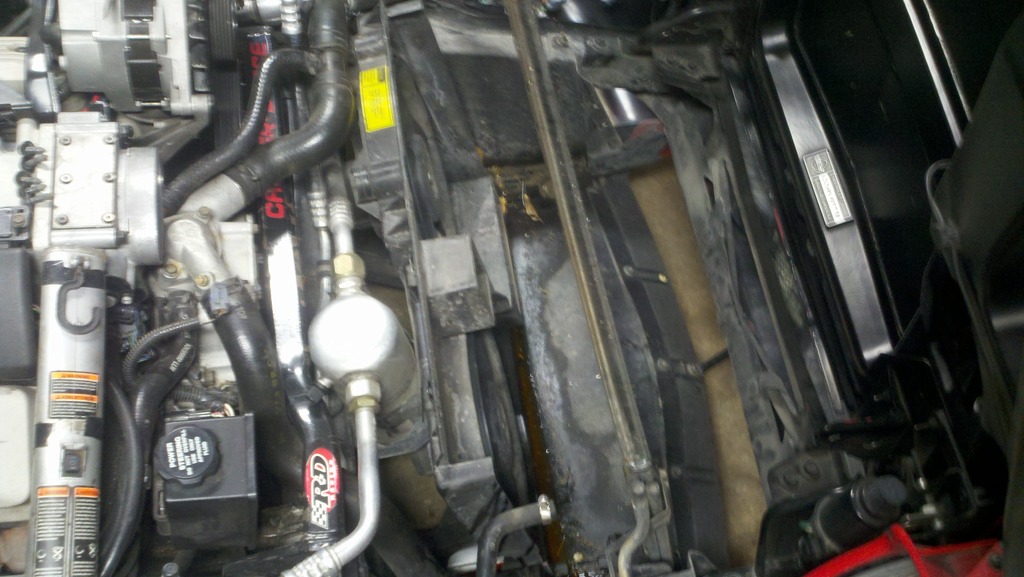
Next, start removing all the shroud hardware. You'll need a 13mm socket, 10mm socket, a 7mm socket and assorted drivers, extensions etc. Starting on the driver's side, remove the two bolts holding the fan relays to the shroud, right here....
Then remove these bolts and nuts, 10 and 13mm....
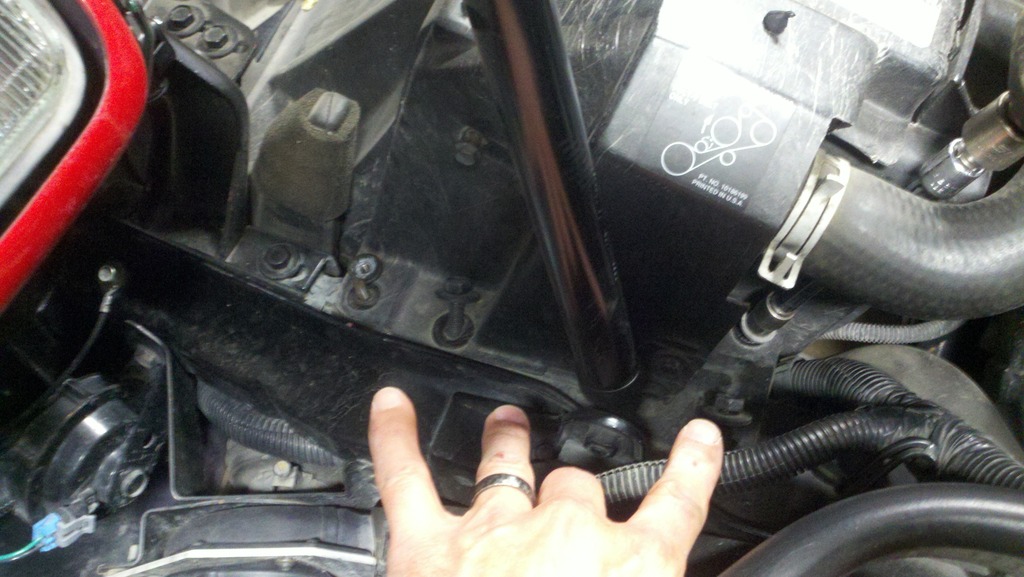
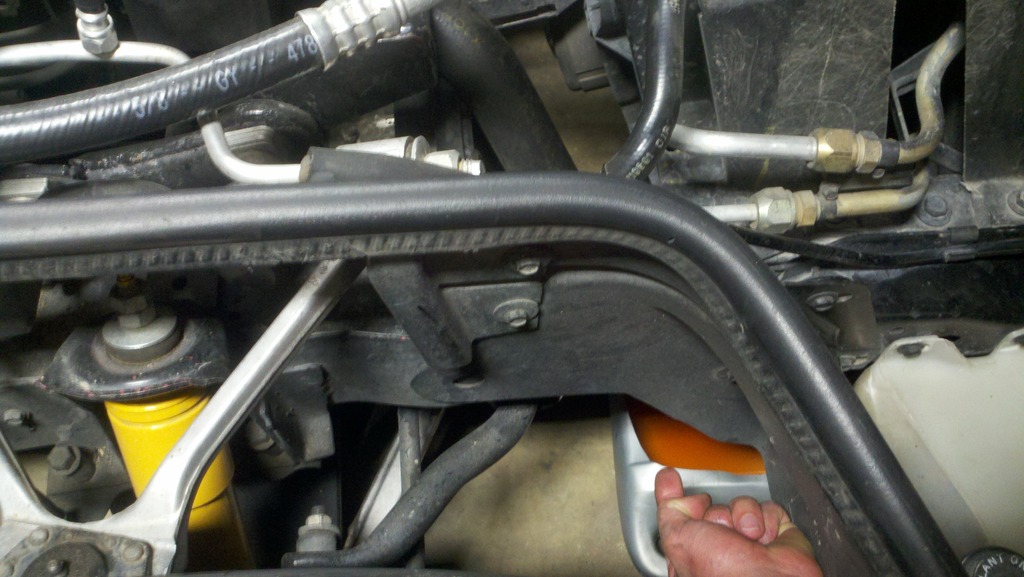
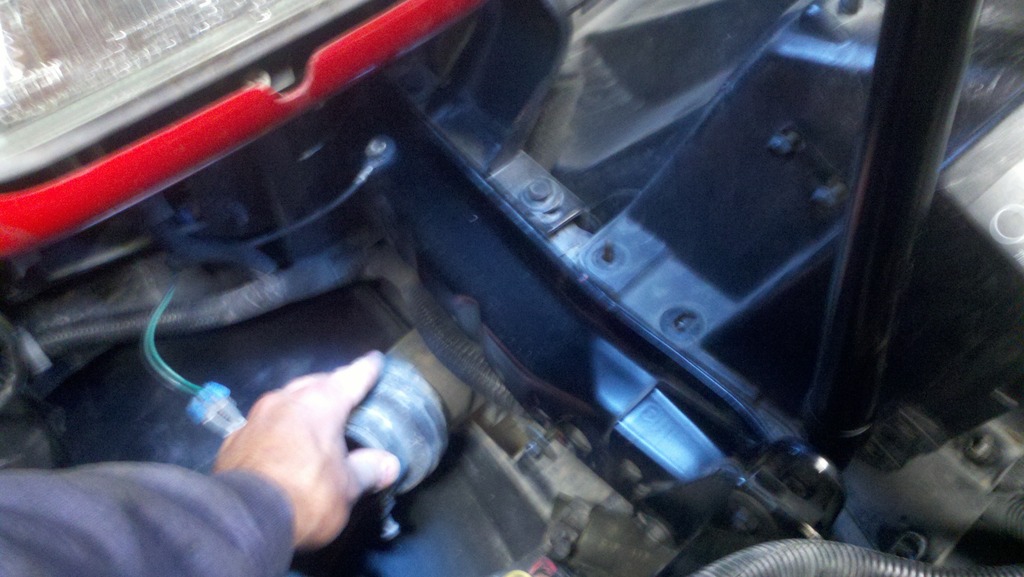
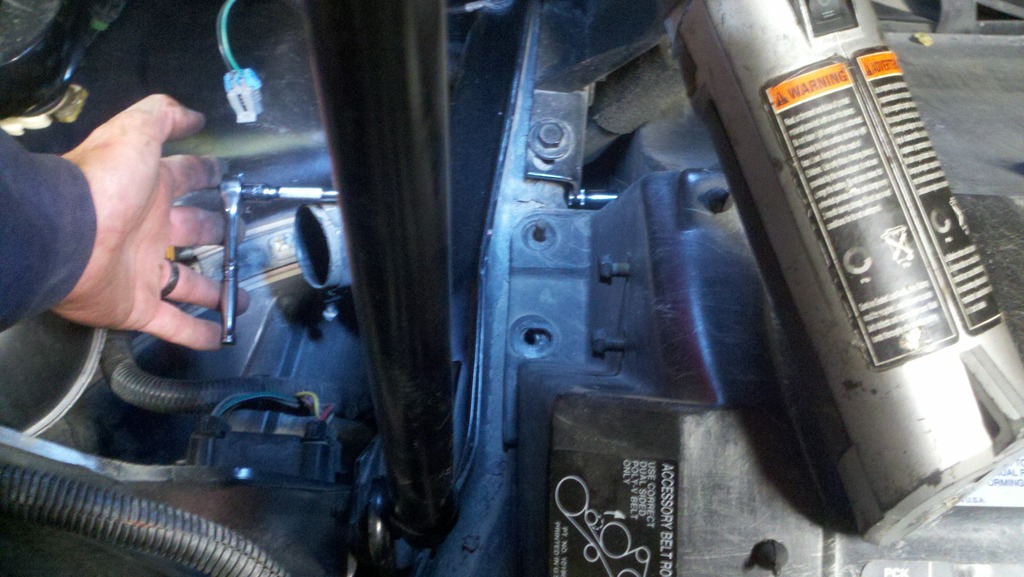
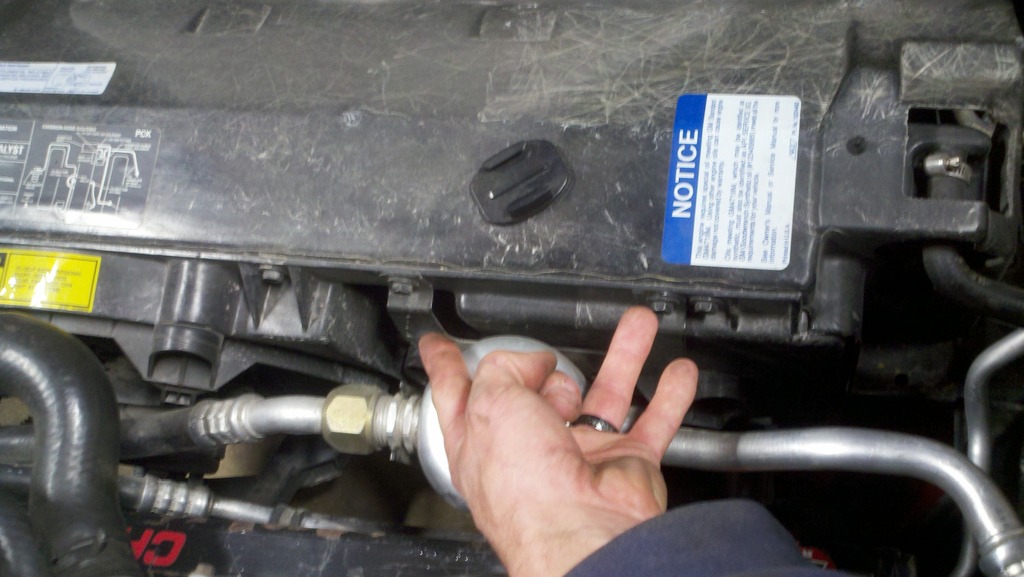
Next, looking down between the frame and the shroud, you can see both the air pump filter/inlet and the three, 7mm head bolts that need to come out....
I chose to access those little bolts by removing the air pumps -only two bolts, one 13mm in the front, 10mm towards the rear, and two hose clamps for the air intake and discharge...
Once the pump was out (very easy) I wiggled the air pump's intake out of there too....
With the air pump removed, access to those little screws was easy with a 1/4 drive, 7mm socket, wobble extension and drive, as seen here...
.
First thing, Start draining the coolant.
Reach under the frame from in front of the right tire, bend your had forward and it will practically hit the drain screw. There is a wonderful plastic "chute" that ensures all the coolant drains into one spot. No mess! My car gave up ~1.5 gallons, emptying the radiator, tank and hoses.
While coolant drains, remove air bridge and filter housing.
Next, start removing all the shroud hardware. You'll need a 13mm socket, 10mm socket, a 7mm socket and assorted drivers, extensions etc. Starting on the driver's side, remove the two bolts holding the fan relays to the shroud, right here....
Then remove these bolts and nuts, 10 and 13mm....
Next, looking down between the frame and the shroud, you can see both the air pump filter/inlet and the three, 7mm head bolts that need to come out....
I chose to access those little bolts by removing the air pumps -only two bolts, one 13mm in the front, 10mm towards the rear, and two hose clamps for the air intake and discharge...
Once the pump was out (very easy) I wiggled the air pump's intake out of there too....
With the air pump removed, access to those little screws was easy with a 1/4 drive, 7mm socket, wobble extension and drive, as seen here...
.
Last edited by Tom400CFI; Oct 18, 2017 at 12:00 AM.
Thread Starter
Team Owner
Joined: Aug 2004
Posts: 21,543
Likes: 3,216
From: Park City Utah
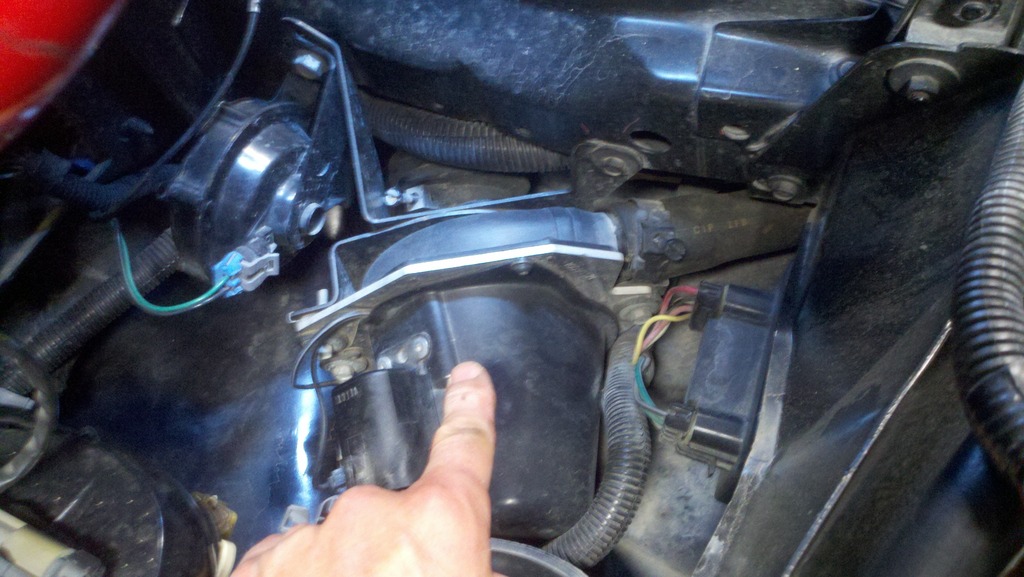
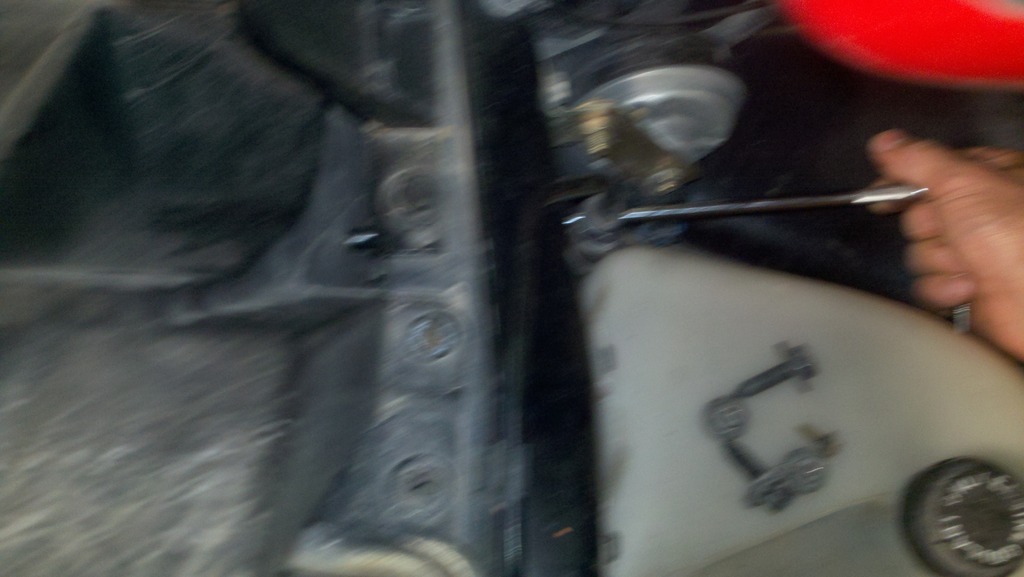
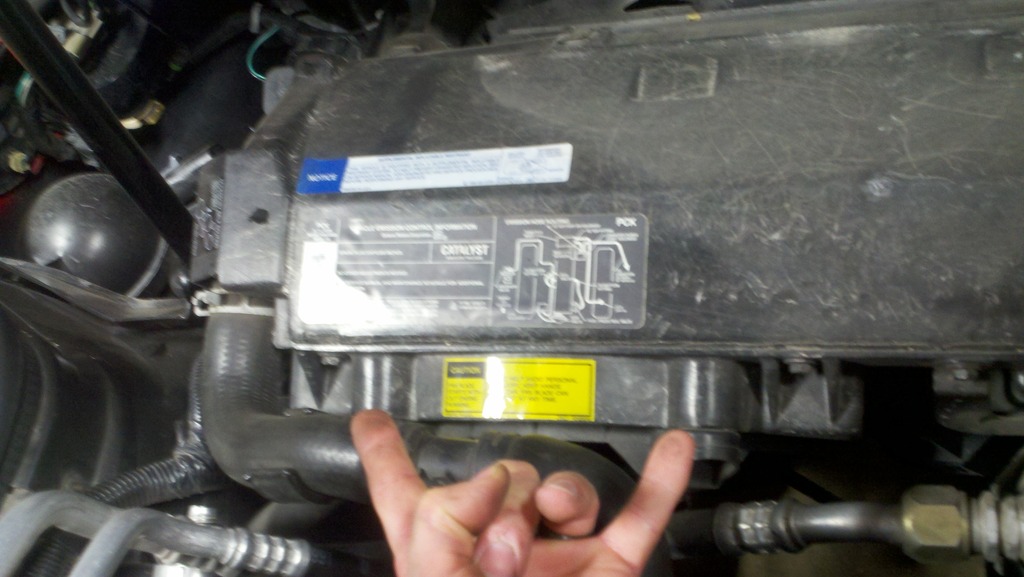
Moving over to the passenger's side, we do the same basic procedure, except that we don't need to move the air pump to access the small screws. Here is a blurry shot of me removing the small, 7mm head screws....
And then the upper, 10 and 13mm hardware here...
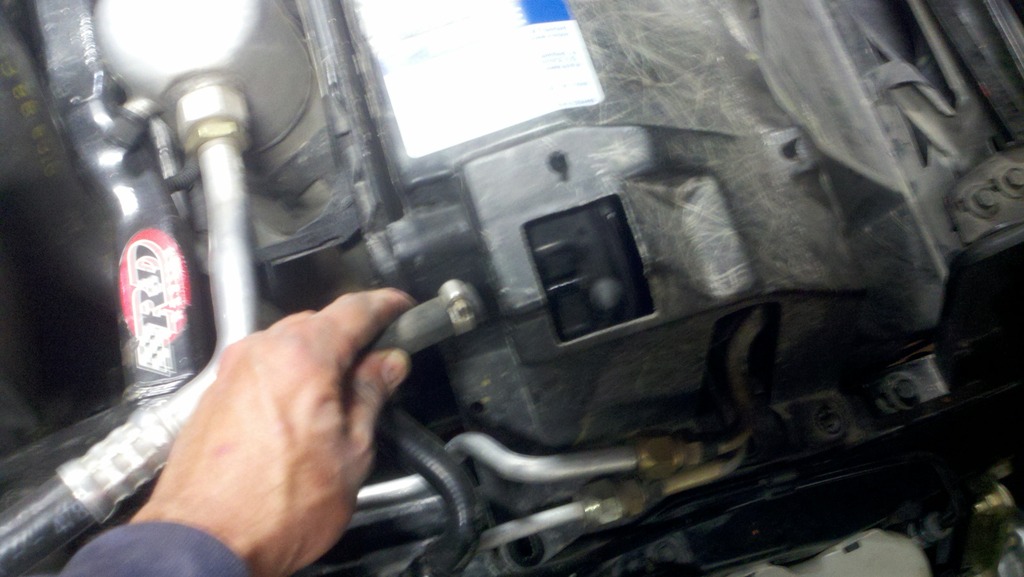
The hose...
After that, there are 5, 10mm headed bolts along the top, that secure the fans to the shroud. Pull them out...
Three here on the passenger's side;
And two on the driver's side;
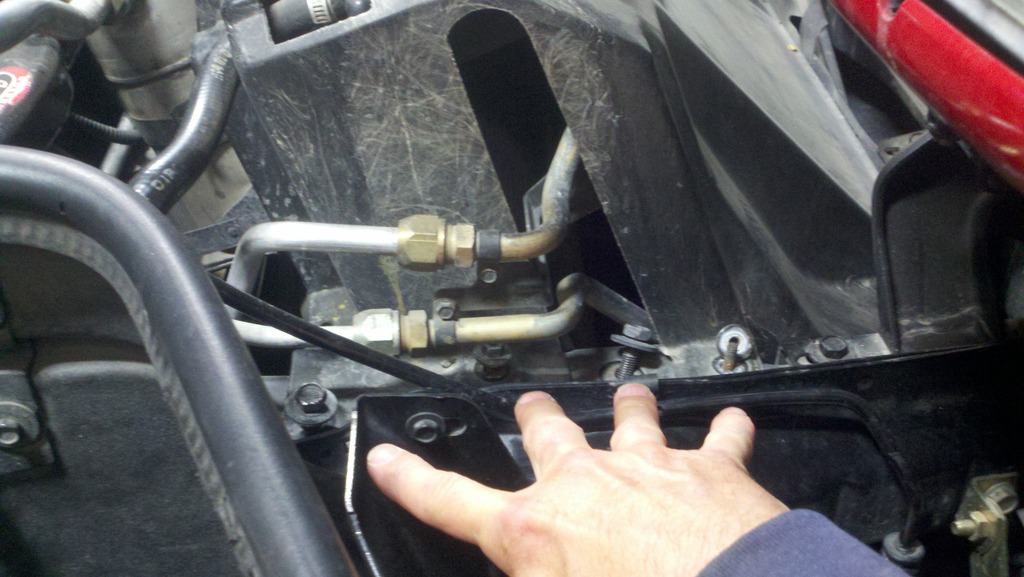
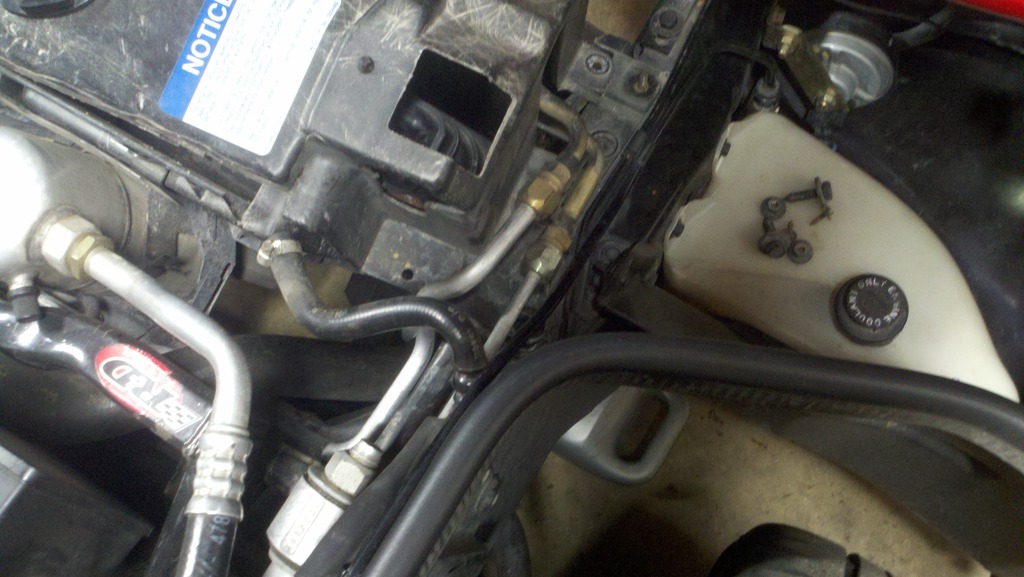
NOW, the shroud is ready to come up and out...however, there is a tab on the passenger's side that interferes w/the AC lines, so the shroud has to come out, lifting the driver's side first. Here is the Tab and AC lines where they'll interfere...
And here is a blurry pic of the shroud being lifted, driver's side first, up and out....

That's the bulk of it. Once you've got the shroud out, it will look something like this:
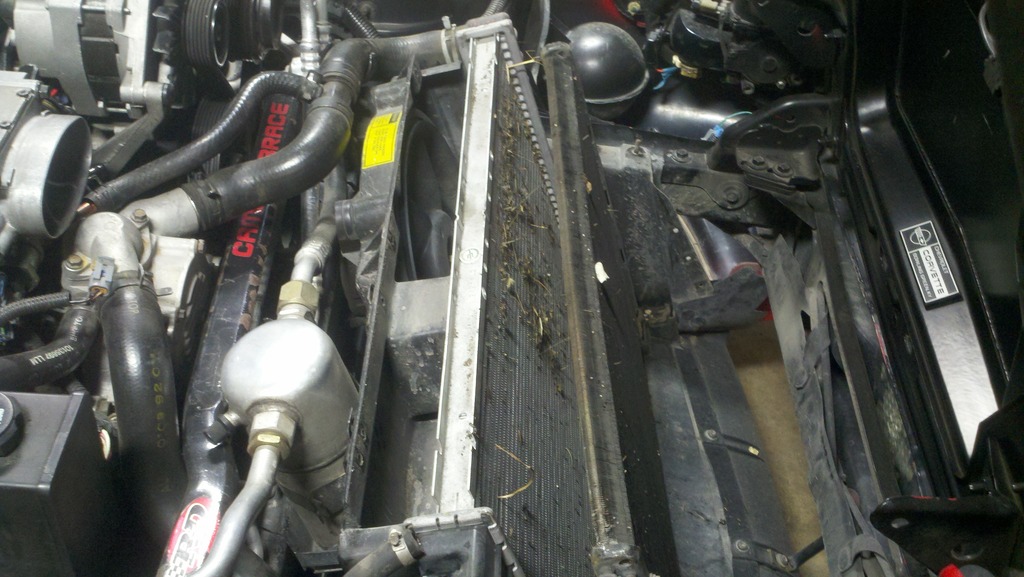
All that is left is to remove upper and lower radiator hoses (coolant should be done draining by this point), and lift the old radiator up and out of it's rubber cradles. Piece of cake!
And then the upper, 10 and 13mm hardware here...
The hose...
After that, there are 5, 10mm headed bolts along the top, that secure the fans to the shroud. Pull them out...
Three here on the passenger's side;
And two on the driver's side;
NOW, the shroud is ready to come up and out...however, there is a tab on the passenger's side that interferes w/the AC lines, so the shroud has to come out, lifting the driver's side first. Here is the Tab and AC lines where they'll interfere...
And here is a blurry pic of the shroud being lifted, driver's side first, up and out....
That's the bulk of it. Once you've got the shroud out, it will look something like this:
All that is left is to remove upper and lower radiator hoses (coolant should be done draining by this point), and lift the old radiator up and out of it's rubber cradles. Piece of cake!
Last edited by Tom400CFI; Oct 18, 2017 at 12:09 AM.
 Thank you so very much!!! God bless!!!
Safety Car


Joined: Apr 2016
Posts: 4,648
Likes: 1,059
From: N.E. Ohio OH
Finalist 2020 C4 of the Year - Modified
didn't see it, sorry if it is here, but don't forget to turn those little screws around when putting them back in. A fellow member here reminded me of that after I had fought with them a long time getting them back in.
Racer
Joined: Jul 2017
Posts: 422
Likes: 53
From: PA
great post. I often wondered if there's room to drop an auxiliary fan in there and it looks like there's plenty of room for a low profile unit
Instructor
Joined: Mar 2008
Posts: 226
Likes: 6
From: NY
Thread Starter
Team Owner
Joined: Aug 2004
Posts: 21,543
Likes: 3,216
From: Park City Utah

He's talking about the little "three on each side", 7mm headed screws that hold the shroud to the frame. I found it quite easy to get to them w/a socket and a wobble extension as shown in my 9th and 10th pics down from the top.
.
Last edited by Tom400CFI; Oct 23, 2017 at 09:09 PM.