


Pulley alignment tutorial
Thread Starter
Tech Contributor


Joined: Apr 2007
Posts: 10,924
Likes: 78
From: Forney Texas
I decided to begin a new thread so you guys would be able to find it more easily using the search function.
I began taking actual measurements this afternoon between the power steering pulley and bracket and the laser mark and the crank pulley. I could see that the laser mark was 1/2 rib off. I measured the distance between peak to peak on the pulleys and it was .125". Being 1/2 rib off, that made it off by .062. I removed the power steering bracket and kept the hoses connected since I was able to raise it enough to place my removal/install tools on the pulley. I first tried to push the pulley further down and discovered it was bottoming out on the pump housing. I removed the pulley and ground it down with a die grinder bit. I measured the housing and discovered that the raised section in the center had too large of a diameter and was most likely hitting the inside of the pump housings' edge. I ground it flush with the pulley and ground the raised center section down just to make sure it wouldn't bottom out before I achieved proper mounting depth. I have some pics for you guys as well.
Before you begin taking measurements, you must calibrate the laser. If you unscrew the end cap, there are 4 set screws to adjust it. It comes with a cheesy cardboard alignment tool, It will be much more accurate if you perform the alignment the way I did. I used the lines on the level as my guide as to where the laser should hit the square at the other end.
Here's the laser sitting against the level's edge.

Here's the laser firing across the level with the square at the other end.

This is exactly where the laser should hit my square. It is now calibrated.

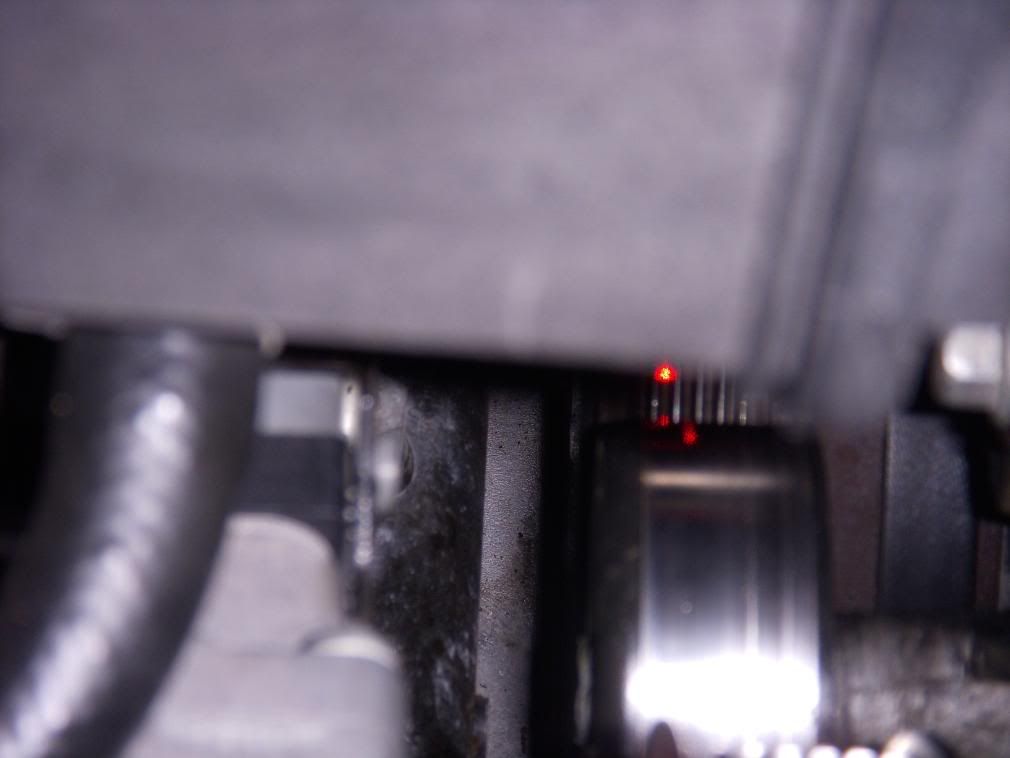
Here is a laser shot from the alternator to the crank pulley.

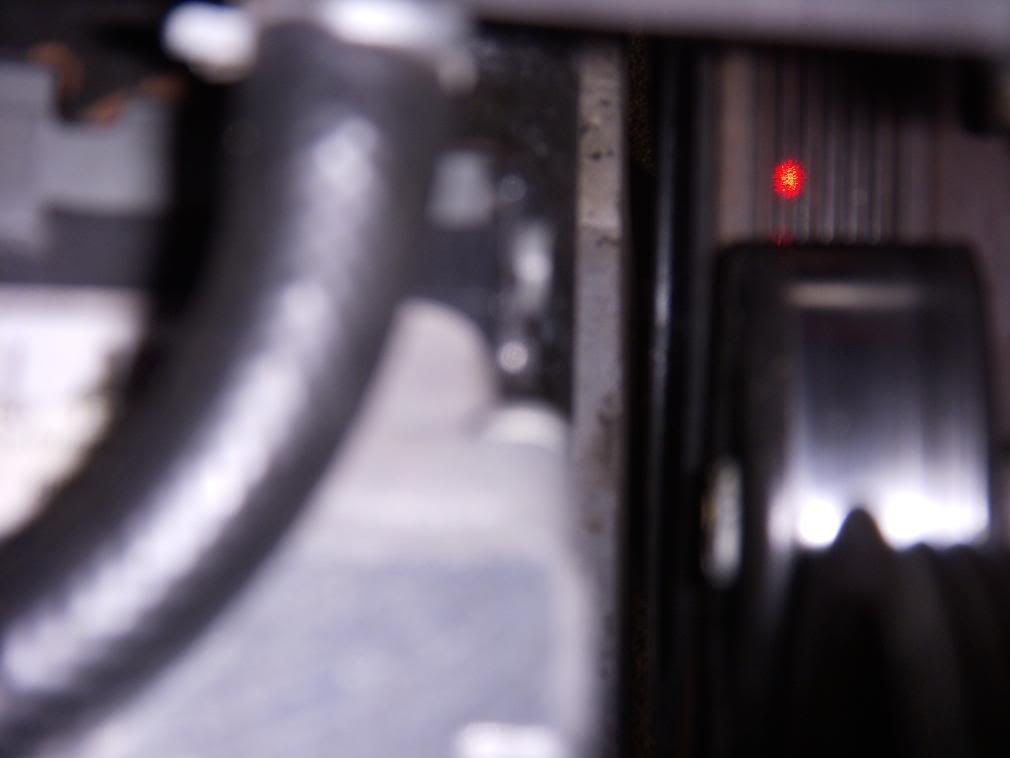
Here's a laser shot from the alternator to the power steering pulley.
When the laser is in the center of the rib, it will shine brightly on the rib and have even scatter to the left and right.

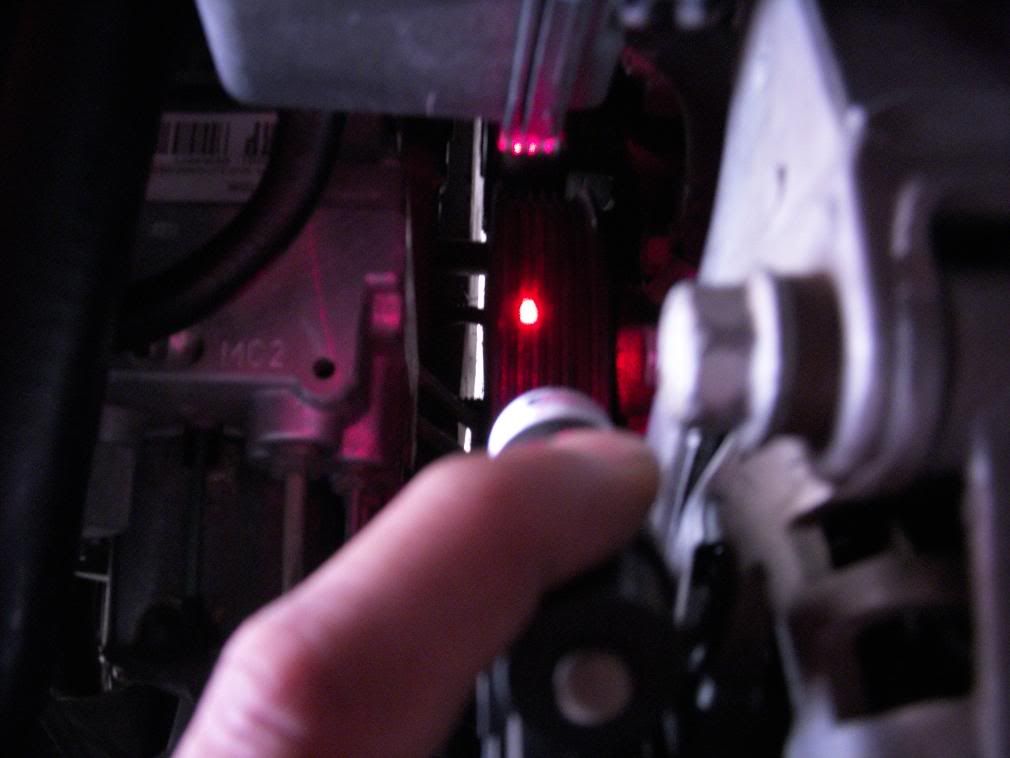
Here is a pic of the PS pulley with the laser in the center of the rib.

I used a dial caliper to measure the distance between the pulley edge and the alternator bracket. It was .310. I needed it to be .062" less than that which is .248"

Here is a pic of the PS pulley after grinding and sanding the back side down. I also ground the high spots and the ridge on the power steering pump body to make sure I could achieve the depth I needed.

Pic of the PS pulley installation tool in the middle of installation.

Pic of the laser assembly strapped to the supercharger pulley firing to the idler pulley.

Pic of the laser firing to the PS pulley from the alternator. It's difficult to see in the pics that the laser isn't in the center of the rib.
More to come.......
I began taking actual measurements this afternoon between the power steering pulley and bracket and the laser mark and the crank pulley. I could see that the laser mark was 1/2 rib off. I measured the distance between peak to peak on the pulleys and it was .125". Being 1/2 rib off, that made it off by .062. I removed the power steering bracket and kept the hoses connected since I was able to raise it enough to place my removal/install tools on the pulley. I first tried to push the pulley further down and discovered it was bottoming out on the pump housing. I removed the pulley and ground it down with a die grinder bit. I measured the housing and discovered that the raised section in the center had too large of a diameter and was most likely hitting the inside of the pump housings' edge. I ground it flush with the pulley and ground the raised center section down just to make sure it wouldn't bottom out before I achieved proper mounting depth. I have some pics for you guys as well.
Before you begin taking measurements, you must calibrate the laser. If you unscrew the end cap, there are 4 set screws to adjust it. It comes with a cheesy cardboard alignment tool, It will be much more accurate if you perform the alignment the way I did. I used the lines on the level as my guide as to where the laser should hit the square at the other end.
Here's the laser sitting against the level's edge.
Here's the laser firing across the level with the square at the other end.
This is exactly where the laser should hit my square. It is now calibrated.
Here is a laser shot from the alternator to the crank pulley.
Here's a laser shot from the alternator to the power steering pulley.
When the laser is in the center of the rib, it will shine brightly on the rib and have even scatter to the left and right.
Here is a pic of the PS pulley with the laser in the center of the rib.
I used a dial caliper to measure the distance between the pulley edge and the alternator bracket. It was .310. I needed it to be .062" less than that which is .248"
Here is a pic of the PS pulley after grinding and sanding the back side down. I also ground the high spots and the ridge on the power steering pump body to make sure I could achieve the depth I needed.
Pic of the PS pulley installation tool in the middle of installation.
Pic of the laser assembly strapped to the supercharger pulley firing to the idler pulley.
Pic of the laser firing to the PS pulley from the alternator. It's difficult to see in the pics that the laser isn't in the center of the rib.
More to come.......
Race Director


Joined: Nov 2001
Posts: 18,682
Likes: 4
St. Jude Donor '05-'06-'07-'08-'09-'10-'11-'12
THANK YOU so much for this! Trust me I have gone thru this process myself (hated it) and wish there was a writeup at that time.
I am least worried now as Dr. Phil is installing and tuning my forged block and 8 rib setup.
I am least worried now as Dr. Phil is installing and tuning my forged block and 8 rib setup.

Burning Brakes

Joined: Nov 2007
Posts: 882
Likes: 2
From: Miami Florida
man this is sweet. this problem that your having is only when you are doing High boost or should I have to worry about it with 8-10 psi ?
now my question is how do you know that the later is aligned in the center of the pulley its on .
Thanks,
Ed
now my question is how do you know that the later is aligned in the center of the pulley its on .
Thanks,
Ed
Last edited by dsmlights; Oct 10, 2008 at 09:34 AM.
Corvette Stories
The Best of Corvette for Corvette Enthusiasts

Every 2027 Corvette Engine Explained
Joe Kucinski
Designer Imagines A Corvette That Looks More Like a Corvette Than the Corvette
Verdad Gallardo
10 Ugly Corvettes That We Still Kinda Love
Joe Kucinski
Top 10 Most Expensive Corvettes Ever Sold on Bring A Trailer
Brett Foote
10 Things Every Corvette Owner Needs (2026 Edition)
Michael S. Palmer
8 Most "Only Corvette Owners Understand" Quirks and Problems
Pouria Savadkouei
10 Reasons the C6 Z06 is Still A Performance Benchmark After 20 Years
Joe Kucinski
How Much Horsepower Every Corvette Engine "LOST" in 1972
Joe Kucinski
Top 10 DOs and DON'Ts for Protecting Your Convertible Top!
Michael S. Palmer
Thread Starter
Tech Contributor
Joined: Apr 2007
Posts: 10,924
Likes: 78
From: Forney Texas
The higher power you make, the more amplified problems become. I am running 15-17psi boost. It's like driving over a hump at 35mph. You'd be fine at that speed, but not necessarily so at 185mph. The laser has feet on it that sit in the grooves of the pulley. It doesn't have to be in the center. You can place it on the outside grooves if you like. You just have to know where the laser is supposed to end up to be able to make the proper adjustments.

Racer


Joined: Jun 2005
Posts: 272
Likes: 0
I dont know what anyone has done as Im sure that many have seen the angles of how the powersteering pulley and the alternator are way off. Im not talking about alignment as far as depth, the actual angles not beeing true. I have also tried different engines. I see that it isnt as big of an issue with a serpentine belt but I am trying to run a cog and you dont have any ribs holding the belt from going side to side. The lips on some of the pulleys are not good enough when the pulleys are off by that much there is so much thrust it just frays the outer edge leading to destruction. I have had three different alt/ps brackets on it 2of which were new, three powersteering pumps, 3 alt's. My z06 has stock six ribs and never throws the belt but a visual can show its way off. A laser at this point is not nessesary. I just dont know what everyones doing about this.
Thread Starter
Tech Contributor
Joined: Apr 2007
Posts: 10,924
Likes: 78
From: Forney Texas
Depending on the angle problem, there's a little bit you could shave off the back side of the alternator bracket to change the entire angle of it. Next, you might be able to open up the mounting holes in the alternator and put one of those threaded rods and end links ( Heim joints) on there to set it where you want it. It wouldn't be easy, but it's just an idea.
Le Mans Master

Joined: Jan 2006
Posts: 6,831
Likes: 4
From: Vacaville Ca
St. Jude Donor '13
Thread Starter
Tech Contributor
Joined: Apr 2007
Posts: 10,924
Likes: 78
From: Forney Texas
116.00 + shipping from Tooltopia.com
I was surprised at how much the pulley needed grinding. I ground about .090 off the back side of it. Thank god it was aluminum. If it was steel, I would have chucked it up in a lathe or something. I was able to do this at the house.
I was surprised at how much the pulley needed grinding. I ground about .090 off the back side of it. Thank god it was aluminum. If it was steel, I would have chucked it up in a lathe or something. I was able to do this at the house.

Race Director


Joined: Apr 2005
Posts: 10,179
Likes: 2,306
From: Wesley Chapel, FL Las Vegas, NV
Were you having belt problem before you did this laser alignment?
Also keep in mind that even if you get it perfect with the engine off it does not guarantee that with the engine running with the multitude of dynamics at work that it will be aligned under load and at high RPMs.
Also keep in mind that even if you get it perfect with the engine off it does not guarantee that with the engine running with the multitude of dynamics at work that it will be aligned under load and at high RPMs.
Thread Starter
Tech Contributor
Joined: Apr 2007
Posts: 10,924
Likes: 78
From: Forney Texas
Yeah, I chewed up my belt and knocked 2 ribs off. I had some chime in on my other thread saying they're able to run 2 years with no belt issues, but not sure if anyone is pushing as hard as I am. I should be well over 900rwhp with the new intercooler since there was a late discovered restriction problem. I may just end up having to pulley down the power to lower 800's
Thanks. I understand that things get torqued and twisted, but you have to fix what you know is wrong and I believe it is best if everything begins aligned properly. That way if it deviates, it might not do so as far as the alignment was originally off.
Last edited by BLOWNBLUEZ06; Oct 13, 2008 at 12:33 PM.
Burning Brakes
Joined: Nov 2007
Posts: 882
Likes: 2
From: Miami Florida
Yeah, I chewed up my belt and knocked 2 ribs off. I had some chime in on my other thread saying they're able to run 2 years with no belt issues, but not sure if anyone is pushing as hard as I am. I should be well over 900rwhp with the new intercooler since there was a late discovered restriction problem. I may just end up having to pulley down to
Thanks. I understand that things get torqued and twisted, but you have to fix what you know is wrong and I believe it is best if everything begins aligned properly. That way if it deviates, it might not do so as far as the alignment was originally off.
Thanks. I understand that things get torqued and twisted, but you have to fix what you know is wrong and I believe it is best if everything begins aligned properly. That way if it deviates, it might not do so as far as the alignment was originally off.