


Mounted CD Changer
Thread Starter
Team Owner


Joined: Sep 2001
Posts: 23,283
Likes: 906
From: Lake Elsinore, CA
I mounted the CD Changer I picked up in the 4-sale section here a couple of weeks ago in Mrs. Patches coupe today. I bought a COR-HAR cable from a web site and ordered a set of rear tub mounting brackets from Gene at Kar Shop, a forum vendor.
Here are the basic pieces I started out with. CD changer, brackets with nuts, pop rivets and riveter, cable and Quick-set JB-Weld.

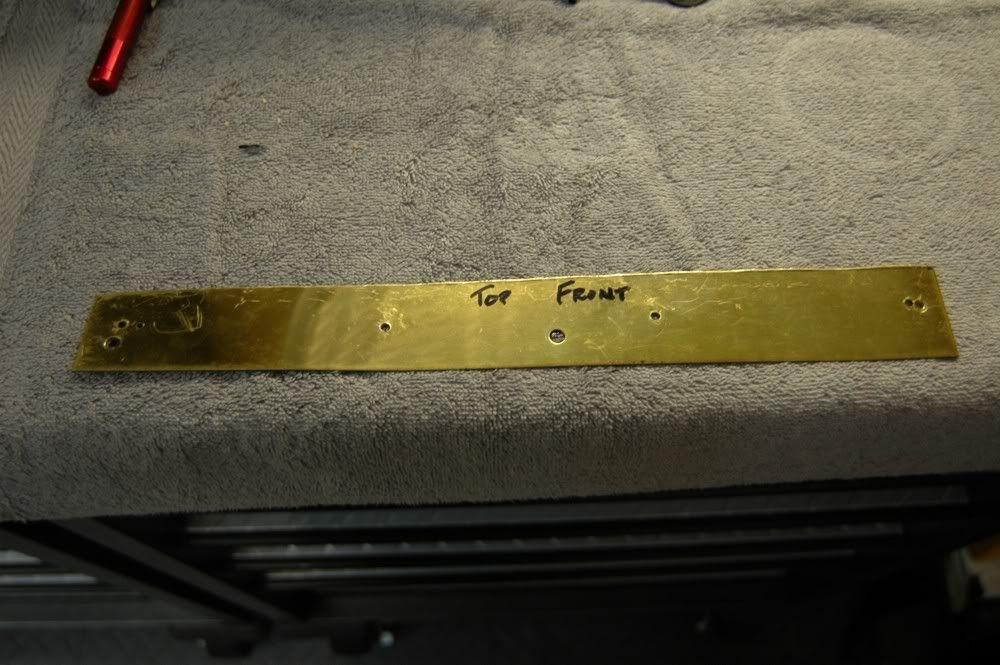
After looking at the standard post-factory/dealer method of mounting the changer, I decided that I wanted a more solid, substantial mount. The method normally involves epoxying the two stud brackets to the inside of the tub and then popping one rivet through the center to hold the weight of the changer. I wanted a stronger backbone supporting the rivets and the changer so I cut a piece of ~16 gauge sheet metal I had to span the length of the changer and drilled four holes sized for 1/8" pop rivets.
Here's the spot where the changer is mounted. There are predrilled holes from the factory. Would be nice if you could slide the brackets in from the outside but there's no room to do that so the holes simply serve as location points for the brackets.

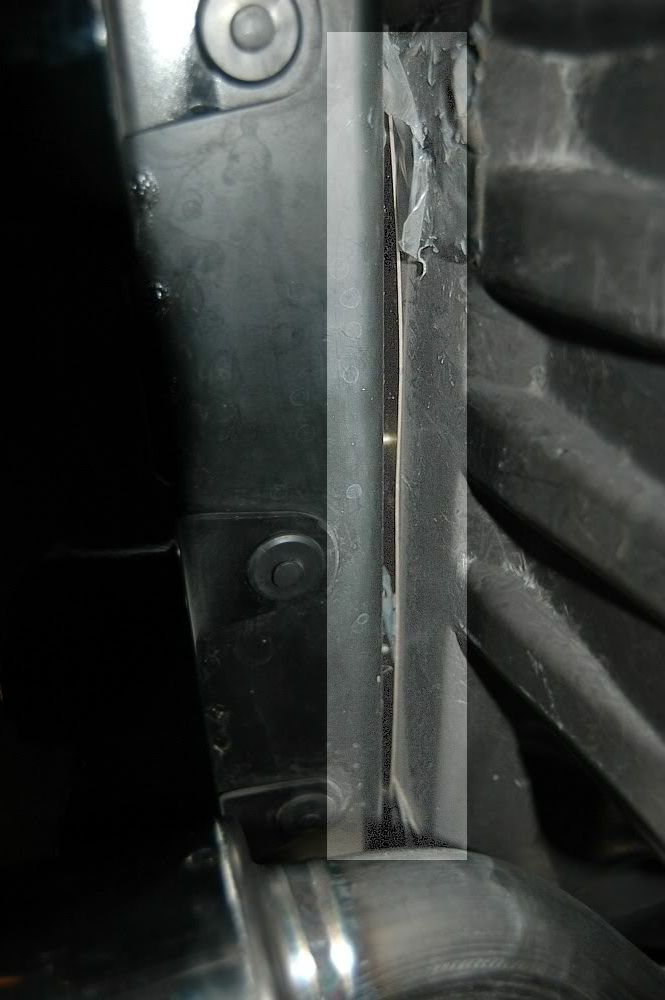
Then I painstakingly shoved the support I fabricated in between the outside back surface and the rear bumper forward vertical surface - not an easy task, as there's only about 1/4" of space to work with. I had to use chisels to position and wedge the support into place while I JB-welded and riveted the brackets and support in place. Took quite a while to get that done. Here's a shot of the bracket from under the rear bumper (highlighted rectangle).
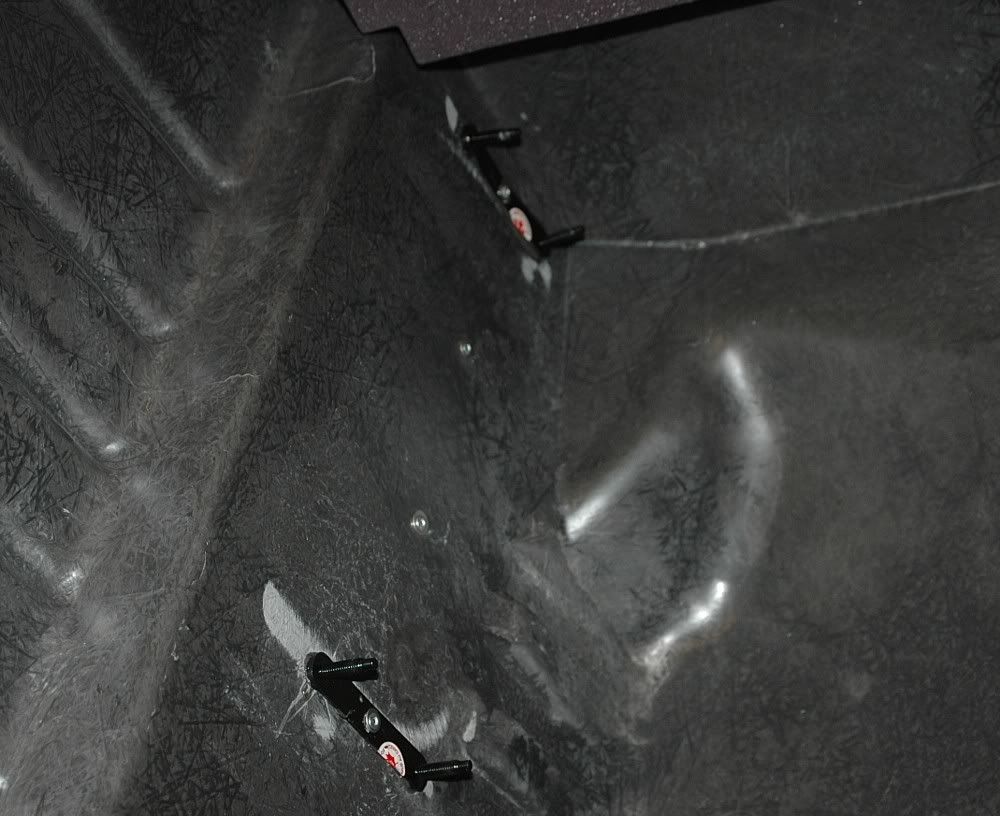
Here you can see the brackets after mounting. Note the extra rivet heads in between the brackets. Substantially stronger than the standard setup.
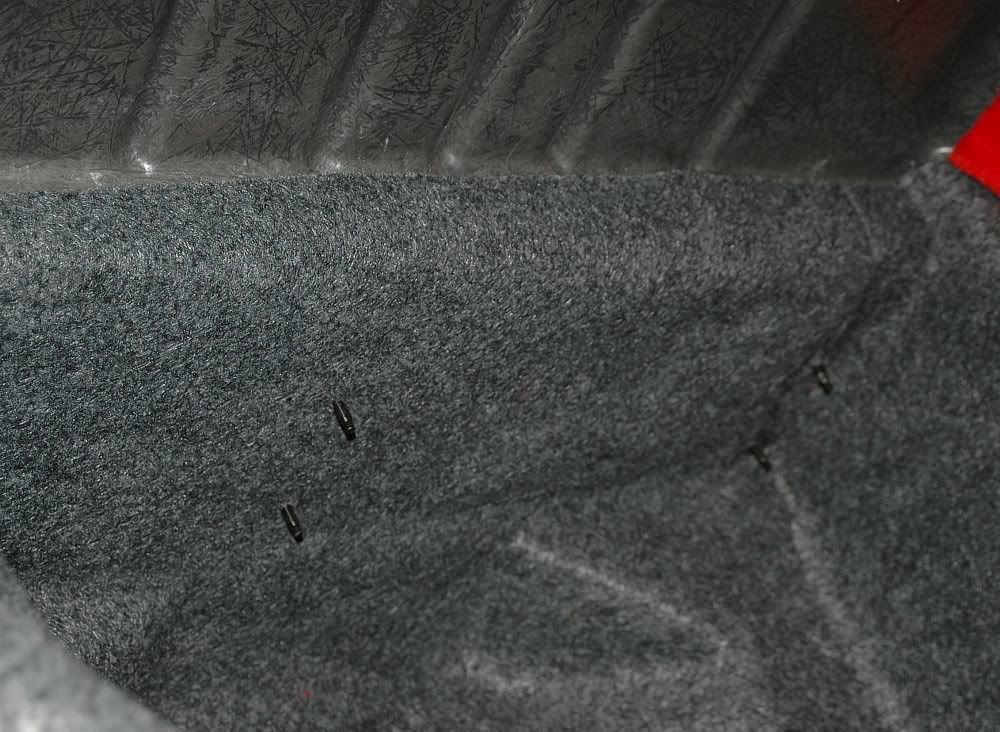
I ran the cable from where it connects to the changer in the tub to the front of the car under the carpet along the passenger side. Here you can see the threaded studs poking thruogh the batting.
And the changer mounted and connected.

The 3-wire and 4-wire connectors in the passenger footwell. Couldn't understand why the 4-wire connector was clipped to the footwell facing towards the front of the car - totally inaccessible until I popped the clip out of it's mount to free the connector.

All buttoned up. The changer works perfectly.

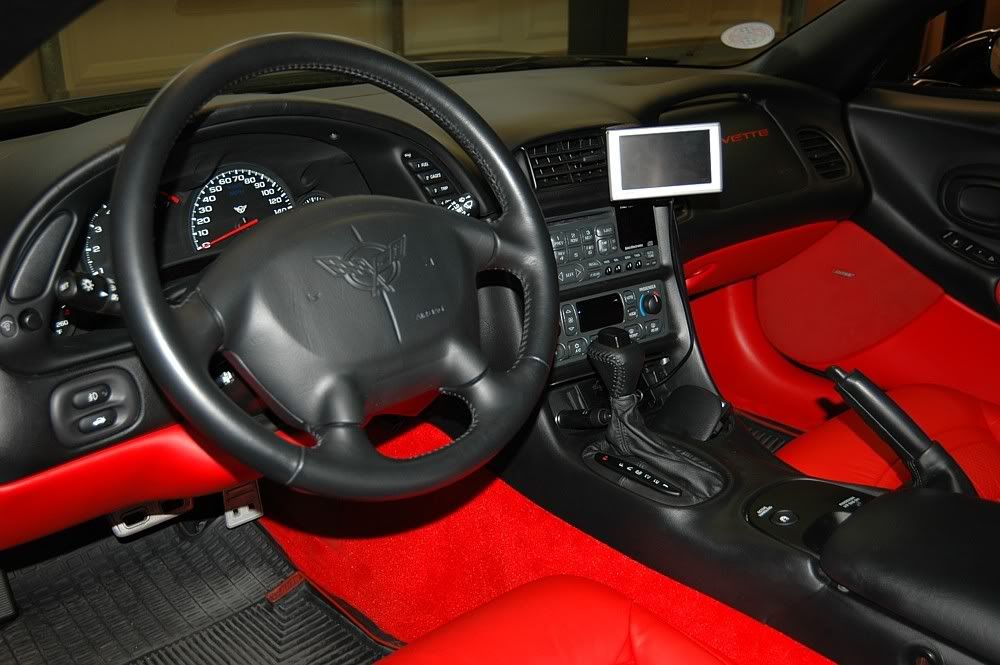
Oh, I also took the opportunity to mount the Garmin Nuvi on the center air vent. I will hardwire it in a couple of weeks when I do the detector hardwire setup.
Here are the basic pieces I started out with. CD changer, brackets with nuts, pop rivets and riveter, cable and Quick-set JB-Weld.
After looking at the standard post-factory/dealer method of mounting the changer, I decided that I wanted a more solid, substantial mount. The method normally involves epoxying the two stud brackets to the inside of the tub and then popping one rivet through the center to hold the weight of the changer. I wanted a stronger backbone supporting the rivets and the changer so I cut a piece of ~16 gauge sheet metal I had to span the length of the changer and drilled four holes sized for 1/8" pop rivets.
Here's the spot where the changer is mounted. There are predrilled holes from the factory. Would be nice if you could slide the brackets in from the outside but there's no room to do that so the holes simply serve as location points for the brackets.
Then I painstakingly shoved the support I fabricated in between the outside back surface and the rear bumper forward vertical surface - not an easy task, as there's only about 1/4" of space to work with. I had to use chisels to position and wedge the support into place while I JB-welded and riveted the brackets and support in place. Took quite a while to get that done. Here's a shot of the bracket from under the rear bumper (highlighted rectangle).
Here you can see the brackets after mounting. Note the extra rivet heads in between the brackets. Substantially stronger than the standard setup.
I ran the cable from where it connects to the changer in the tub to the front of the car under the carpet along the passenger side. Here you can see the threaded studs poking thruogh the batting.
And the changer mounted and connected.
The 3-wire and 4-wire connectors in the passenger footwell. Couldn't understand why the 4-wire connector was clipped to the footwell facing towards the front of the car - totally inaccessible until I popped the clip out of it's mount to free the connector.
All buttoned up. The changer works perfectly.
Oh, I also took the opportunity to mount the Garmin Nuvi on the center air vent. I will hardwire it in a couple of weeks when I do the detector hardwire setup.
Thread Starter
Team Owner
Joined: Sep 2001
Posts: 23,283
Likes: 906
From: Lake Elsinore, CA
 For those who PM'ed me recently about how to do this, here's a TTT.
 One note, the cable I got was a bit short compared when compared to how the factory routing indicated the cable should go so I had to use a shorter alternate route where I ran it between the center and passenger rear tubs and to the passenger-side speaker area, behind the seat belt trim, along the rocker panel and, finally, to the BCM/fusebox area in the passenger footwell. Not a big deal to lift the carpet sections to get the cable run underneath - just take your time.
Thread Starter
Team Owner
Joined: Sep 2001
Posts: 23,283
Likes: 906
From: Lake Elsinore, CA

That's the Nuvi 660 - great GPS navigator with tons of features. The mount is the KUDA model 250005 with the CNM22 adapter. It was recommended by another forum member. It is pricey though.

Race Director


Joined: Jan 2006
Posts: 10,554
Likes: 33
From: Not on either liberal coast.
Corvette Stories
The Best of Corvette for Corvette Enthusiasts

Top 10 Most Expensive Corvettes Ever Sold on Bring A Trailer
Brett Foote
10 Things Every Corvette Owner Needs (2026 Edition)
Michael S. Palmer
8 Most "Only Corvette Owners Understand" Quirks and Problems
Pouria Savadkouei
10 Reasons the C6 Z06 is Still A Performance Benchmark After 20 Years
Joe Kucinski
How Much Horsepower Every Corvette Engine "LOST" in 1972
Joe Kucinski
Top 10 DOs and DON'Ts for Protecting Your Convertible Top!
Michael S. Palmer
Top 10 Most Explosive Corvettes Ever Made: Power-to-Weight Ratio Ranked!
Joe Kucinski
150 hp to 1,250 hp: Every Corvette Generation Compared by the Specs That Matter
Joe Kucinski
8 Coolest Corvette Pace Cars (and Replicas) of All Time
Verdad Gallardo
Race Director


Joined: Aug 2003
Posts: 16,270
Likes: 30
From: "It's 106 miles to Chicago, we've got a full tank of gas, half a pack of cigarettes, it's dark, and
St. Jude Donor '03-'04-'05-'06-'07-'08-'09-'10-'11-'12-'13-'14-'15-'16-'17-�18-'19
NCM Sinkhole Donor
Another great DIY from you Ed. Thank you for sharing.
I hope you and Mrs. Patches have a Merry Christmas and a Happy and healthy New Year!
I hope you and Mrs. Patches have a Merry Christmas and a Happy and healthy New Year!
Race Director


Joined: Aug 2008
Posts: 15,561
Likes: 166
From: Long Island NY
St. Jude Donor '08-'09
can you give me a better picture of were the harness connector would be, thanks, i am in the process of getting the 12 disc installed, and the installer said i dont have those connectors, a better pic would be great, thanks.

Thread Starter
Team Owner
Joined: Sep 2001
Posts: 23,283
Likes: 906
From: Lake Elsinore, CA
My car did not have the factory harness in the back of the car so I had to buy the COR-HAR cable on ebay and run it from the back where the changer was mounted up to the passenger footwell in front. Those two connectors are in the lower right front area of the passenger footwell just to the right and below the plastic cover of the fuse panel.
This picture was taking kneeling just outside of the passenger door looking towards the front of the car under the glove box with the fuse cover panel taking off. Those two connectors are for the CD changer. The picture you posted needs to be rotated counterclockwise 90 degrees to be oriented to match my pictures angle.
This picture was taking kneeling just outside of the passenger door looking towards the front of the car under the glove box with the fuse cover panel taking off. Those two connectors are for the CD changer. The picture you posted needs to be rotated counterclockwise 90 degrees to be oriented to match my pictures angle.
Last edited by Patches; Apr 9, 2010 at 08:37 PM.

Le Mans Master

Joined: Dec 2006
Posts: 7,251
Likes: 16
From: Phoenix Arizona
For those who PM'ed me recently about how to do this, here's a TTT. One note, the cable I got was a bit short compared when compared to how the factory routing indicated the cable should go so I had to use a shorter alternate route where I ran it between the center and passenger rear tubs and to the passenger-side speaker area, behind the seat belt trim, along the rocker panel and, finally, to the BCM/fusebox area in the passenger footwell. Not a big deal to lift the carpet sections to get the cable run underneath - just take your time.
thanks!


