


tiger shark
Melting Slicks


Joined: Jan 2003
Posts: 3,417
Likes: 2
From: Annapolis MD

Sorry - no pics. It was EXTREMELY straightforward to install. Reuse the stock push-pin thingies across the top. You'll need to lift the front of the car to get to the screws (believe they're 7mm) holding everything together on both sides. Remove the access panels underneath the corner lights and you should see the screws that hold everything together. Been a while since I did mine.
Safety Car

Joined: May 2006
Posts: 3,799
Likes: 1
From: Northern Virginia
St. Jude Donor '08
Here is a link to some pics I found through a google search.
http://images.google.com/imgres?imgu...%3Den%26sa%3DN
Look up member Cobra4B. He has some nice pics of his tigershark front. Looks great. My brother is getting one installed on his car over the winter.
http://images.google.com/imgres?imgu...%3Den%26sa%3DN
Look up member Cobra4B. He has some nice pics of his tigershark front. Looks great. My brother is getting one installed on his car over the winter.

Thread Starter
Racer

Joined: Dec 2007
Posts: 298
Likes: 4
From: northridge ca
Sorry - no pics. It was EXTREMELY straightforward to install. Reuse the stock push-pin thingies across the top. You'll need to lift the front of the car to get to the screws (believe they're 7mm) holding everything together on both sides. Remove the access panels underneath the corner lights and you should see the screws that hold everything together. Been a while since I did mine.
Melting Slicks
Joined: Jan 2003
Posts: 3,417
Likes: 2
From: Annapolis MD
Hmmm.. rivets? Not sure where you'd use those. I actually bought mine used (swapped my stocker with someone who bought his vette with a TS front already on and he didn't like it -- also happened to be pewter like mine). There weren't any rivet holes in it when I put it on. Some folks have mentioned using washers underneath the top pins to get it lined up with the hood. Mine lined up just fine though.
I also went the PIAA route, although if I had to do it over again, I'd probably go the HID fog route. One of my PIAA bulbs burnt out after 6 months and they're EXPENSIVE to replace!
Welcome to the TS front end club! Best cosmetic mod there is for the C5 IMO!
I also went the PIAA route, although if I had to do it over again, I'd probably go the HID fog route. One of my PIAA bulbs burnt out after 6 months and they're EXPENSIVE to replace!
Welcome to the TS front end club! Best cosmetic mod there is for the C5 IMO!
Thread Starter
Racer
Joined: Dec 2007
Posts: 298
Likes: 4
From: northridge ca
Hmmm.. rivets? Not sure where you'd use those. I actually bought mine used (swapped my stocker with someone who bought his vette with a TS front already on and he didn't like it -- also happened to be pewter like mine). There weren't any rivet holes in it when I put it on. Some folks have mentioned using washers underneath the top pins to get it lined up with the hood. Mine lined up just fine though.
I also went the PIAA route, although if I had to do it over again, I'd probably go the HID fog route. One of my PIAA bulbs burnt out after 6 months and they're EXPENSIVE to replace!
Welcome to the TS front end club! Best cosmetic mod there is for the C5 IMO!
I also went the PIAA route, although if I had to do it over again, I'd probably go the HID fog route. One of my PIAA bulbs burnt out after 6 months and they're EXPENSIVE to replace!
Welcome to the TS front end club! Best cosmetic mod there is for the C5 IMO!

Burning Brakes


Joined: May 2002
Posts: 1,079
Likes: 1
From: Bradenton, FL
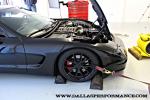
This is the best I can do. Sorry there's no step by step photos, but at least you can see how stuff looks when it's apart.
You can see where you have to remove the screws attaching the headlights and where the clips are located along the bottom of the radiator dam.
It's pretty straight forward as one of the other Forum members mentioned. Once you get started, it will become pretty clear, but if you run into trouble one of us will be glad to help you out.


The rivets are to install the stiffeners that you have to remove from the stock front fascia. They are located where the headlight cut outs are. There should be little dimples to show you where to drill your 1/8th inch holes in the new fascia. You'll need a pop rivet tool.
You can see where you have to remove the screws attaching the headlights and where the clips are located along the bottom of the radiator dam.
It's pretty straight forward as one of the other Forum members mentioned. Once you get started, it will become pretty clear, but if you run into trouble one of us will be glad to help you out.
The rivets are to install the stiffeners that you have to remove from the stock front fascia. They are located where the headlight cut outs are. There should be little dimples to show you where to drill your 1/8th inch holes in the new fascia. You'll need a pop rivet tool.
Corvette Stories
The Best of Corvette for Corvette Enthusiasts

5 Best & 5 Worst Corvette Daily Drivers
Joe Kucinski
The Headlights of Every Corvette Generation Explained
Joe Kucinski
5 Best & 5 Most Overrated Corvette Track Packages of All Time!
Joe Kucinski
Every 2027 Corvette Engine Explained
Joe Kucinski
Designer Imagines A Corvette That Looks More Like a Corvette Than the Corvette
Verdad Gallardo
10 Ugly Corvettes That We Still Kinda Love
Joe Kucinski
Top 10 Most Expensive Corvettes Ever Sold on Bring A Trailer
Brett Foote
10 Things Every Corvette Owner Needs (2026 Edition)
Michael S. Palmer
8 Most "Only Corvette Owners Understand" Quirks and Problems
Pouria Savadkouei
Thread Starter
Racer
Joined: Dec 2007
Posts: 298
Likes: 4
From: northridge ca
[QUOTE=LV_2_XLR8;1563783368]This is the best I can do. Sorry there's no step by step photos, but at least you can see how stuff looks when it's apart.
You can see where you have to remove the screws attaching the headlights and where the clips are located along the bottom of the radiator dam.
It's pretty straight forward as one of the other Forum members mentioned. Once you get started, it will become pretty clear, but if you run into trouble one of us will be glad to help you out.
The rivets are to install the stiffeners that you have to remove from the stock front fascia. They are located where the headlight cut outs are. There should be little dimples to show you where to drill your 1/8th inch holes in the new fascia. You'll need a pop rivet tool.[/Q
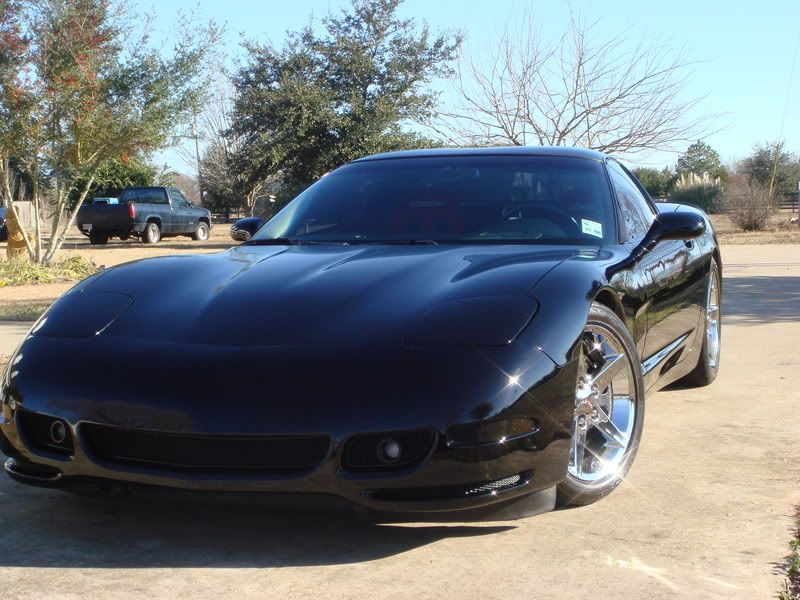
thanks for the pic did not know whole headlight *** needed to come out i guess i will do complete play by play with photos t/s are very popular and if you can save some money by doing it yourself like the nike com just do it.......
You can see where you have to remove the screws attaching the headlights and where the clips are located along the bottom of the radiator dam.
It's pretty straight forward as one of the other Forum members mentioned. Once you get started, it will become pretty clear, but if you run into trouble one of us will be glad to help you out.
The rivets are to install the stiffeners that you have to remove from the stock front fascia. They are located where the headlight cut outs are. There should be little dimples to show you where to drill your 1/8th inch holes in the new fascia. You'll need a pop rivet tool.[/Q
thanks for the pic did not know whole headlight *** needed to come out i guess i will do complete play by play with photos t/s are very popular and if you can save some money by doing it yourself like the nike com just do it.......

Burning Brakes
Joined: May 2002
Posts: 1,079
Likes: 1
From: Bradenton, FL
If you have small enough hands you can probably get away without taking out the headlight assemblies, but it makes it much easier with them out of the way. The fender bolts are a bear to get to otherwise. And don't forget you have to modify the foglight brackets if you got that option. I would hate to attempt this with the headlights in place. There's just no room to work.


Thread Starter
Racer
Joined: Dec 2007
Posts: 298
Likes: 4
From: northridge ca
Advanced
Joined: Nov 2007
Posts: 70
Likes: 0
From: Kernersville North Carolina
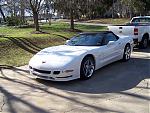
Just finished my Tigershark front end on my 01 vert, very easy install and a great fit. I think someone has already said but the rivets go around the openings for the headlights, you take the ones off of the stock front end and put the stiffeners on the Tigershark.

