





Headlight Adjustment

Former Vendor
Joined: Nov 2005
Posts: 8,995
Likes: 2
From: Spring Texas
St. Jude Donor '08

b) Note the "golden rod". They have a 6-point star tip and there are 2 per side. One is vertical adjustment the other is horizontal. You can use a socket wrench to adjust these. You may need to remove the headlight cover (4 torx-15 screws) to access the other adjuster.
IMPORTANT NOTE: If you car is 2002 or older, I HIGHLY suggest spraying the adjuster gears with WD-40 or similar or you will break off your adjusters.

Tech Contributor


Joined: Dec 2003
Posts: 19,384
Likes: 87
From: Horncastle Lincolnshire, England
2023 C5 of the Year Finalist - Unmodified
Heres a How To I put together from the manual
Aiming Stock Headlights
Preparation
Choose an appropriate aiming area, then prepare the aiming screen.
The aiming area should be darkened and large enough to accommodate the vehicle and an additional 25 feet (7.62 m) measured from the face of the headlamp capsules to the front of the screen. The floor on which the vehicle rests must be flat with the bottom of the screen. If the floor is not level, compensate as necessary. The aiming screen should be at least 5 feet (1.52 m) high by 12 feet (3.66 m) wide with a matte white surface well shaded from extraneous light, and properly adjusted to the floor on which the vehicle stands. The screen should be marked with a vertical centerline, 2 laterally adjustable vertical tapes, and 1 vertically adjustable horizontal tape.
Mark the centerline
Measure the height from the floor to the center of the headlight capsule
Mark a horizontal aiming line on the screen
Measure the distance between the centreline of the right headlight module and the center of the left headlight module.
Position the vertical tapes this distance to the right and left of the screen centreline
Lubricate the adjustment screws before adjusting
Adjustments
Raise the hood
Raise the headlights
Remove the headlamp adjustment screw plug
Turn on the low beam headlights and block the light from projecting onto the screen from the passenger headlight
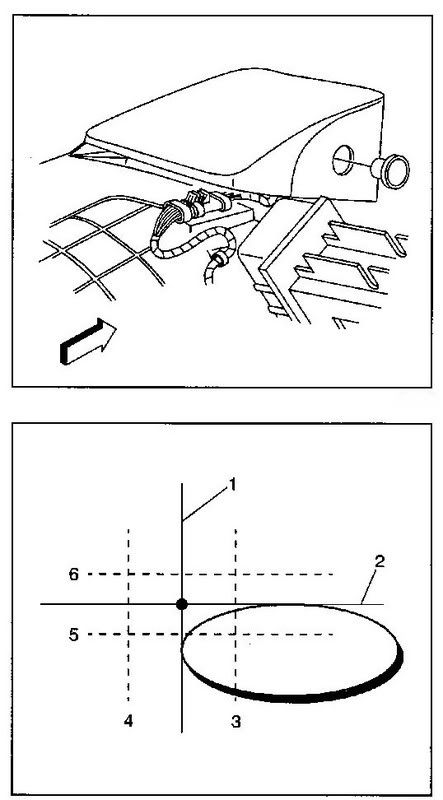
Check the horizontal aim
Adjust the horizontal aim adjusting screw to align the left edge of the high intensity zone with the headlight vertical centreline
The left edge of the beam should lie within 4” to the left and 4” to the right
of the vertical centreline.
Check the vertical aim
Adjust the vertical aim adjusting screw to align the top edge of the high intensity zone with the headlight horizontal centreline
The left edge of the beam should lie within 2” above and 2.5” below the lamp horizontal centreline.
Reinstall the headlamp adjustment screw plug
Repeat for the other headlight
Turn off the lights and close the hood
This is the pattern you're looking for
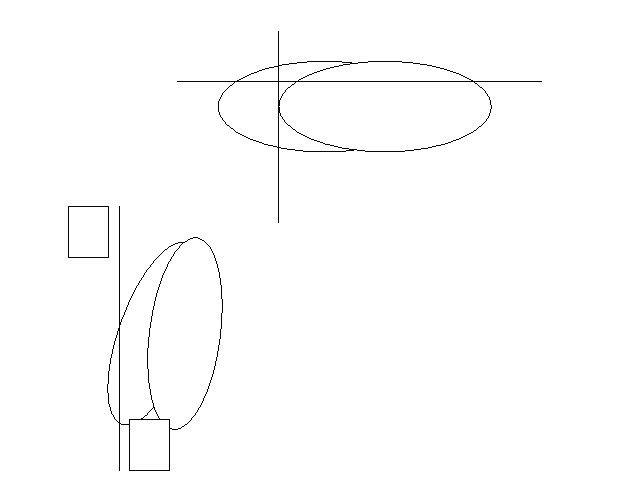
Aiming Stock Headlights
Preparation
Choose an appropriate aiming area, then prepare the aiming screen.
The aiming area should be darkened and large enough to accommodate the vehicle and an additional 25 feet (7.62 m) measured from the face of the headlamp capsules to the front of the screen. The floor on which the vehicle rests must be flat with the bottom of the screen. If the floor is not level, compensate as necessary. The aiming screen should be at least 5 feet (1.52 m) high by 12 feet (3.66 m) wide with a matte white surface well shaded from extraneous light, and properly adjusted to the floor on which the vehicle stands. The screen should be marked with a vertical centerline, 2 laterally adjustable vertical tapes, and 1 vertically adjustable horizontal tape.
Mark the centerline
Measure the height from the floor to the center of the headlight capsule
Mark a horizontal aiming line on the screen
Measure the distance between the centreline of the right headlight module and the center of the left headlight module.
Position the vertical tapes this distance to the right and left of the screen centreline
Lubricate the adjustment screws before adjusting
Adjustments
Raise the hood
Raise the headlights
Remove the headlamp adjustment screw plug
Turn on the low beam headlights and block the light from projecting onto the screen from the passenger headlight
Check the horizontal aim
Adjust the horizontal aim adjusting screw to align the left edge of the high intensity zone with the headlight vertical centreline
The left edge of the beam should lie within 4” to the left and 4” to the right
of the vertical centreline.
Check the vertical aim
Adjust the vertical aim adjusting screw to align the top edge of the high intensity zone with the headlight horizontal centreline
The left edge of the beam should lie within 2” above and 2.5” below the lamp horizontal centreline.
Reinstall the headlamp adjustment screw plug
Repeat for the other headlight
Turn off the lights and close the hood
This is the pattern you're looking for
Last edited by DeeGee; Feb 8, 2011 at 02:43 AM.

Team Owner


Joined: May 2001
Posts: 36,836
Likes: 244
From: Dear Karma, I have a list of people you missed.
St. Jude Donor '08-'09-'10-'11-'12-'13-'14-'15-'16
Important! If you attempt to make any adjustments, especially one involving the up/down adjuster and it doesn't move, or you meet a lot of resistance, stop right there. Do NOT attempt to force things. You will ABSOLUTELY break the long "goldenrod' (gold colored rod about 3" long). This is not an "if" or "maybe". Do NOT force it by twisting your wrench/nut-driver harder and harder. Once broken, these pieces are NOT available as a separate repair piece from GM. They will only sell you the entire headlight assembly.
If yours are frozen up, do a search on this issue. Many many posts about it. "Goldenrods" is one if the terms that may be helpful when doing a search. There IS a way to unfreeze the gear-drive mechanism but it involves removal of the headlight assembly to get access.
Corvette Stories
The Best of Corvette for Corvette Enthusiasts

5 Best & 5 Worst Corvette Daily Drivers
Joe Kucinski
The Headlights of Every Corvette Generation Explained
Joe Kucinski
5 Best & 5 Most Overrated Corvette Track Packages of All Time!
Joe Kucinski
Every 2027 Corvette Engine Explained
Joe Kucinski
Designer Imagines A Corvette That Looks More Like a Corvette Than the Corvette
Verdad Gallardo
10 Ugly Corvettes That We Still Kinda Love
Joe Kucinski
Top 10 Most Expensive Corvettes Ever Sold on Bring A Trailer
Brett Foote
10 Things Every Corvette Owner Needs (2026 Edition)
Michael S. Palmer
8 Most "Only Corvette Owners Understand" Quirks and Problems
Pouria Savadkouei
Tech Contributor
Joined: Dec 2003
Posts: 19,384
Likes: 87
From: Horncastle Lincolnshire, England
2023 C5 of the Year Finalist - Unmodified
That MAY or MAY NOT suffice. The problem usually is that the spray can't actually penetrate to where it's needed. There's a little internal gear-drive mechanism involved.
Important! If you attempt to make any adjustments, especially one involving the up/down adjuster and it doesn't move, or you meet a lot of resistance, stop right there. Do NOT attempt to force things. You will ABSOLUTELY break the long "goldenrod' (gold colored rod about 3" long). This is not an "if" or "maybe". Do NOT force it by twisting your wrench/nut-driver harder and harder. Once broken, these pieces are NOT available as a separate repair piece from GM. They will only sell you the entire headlight assembly.
If yours are frozen up, do a search on this issue. Many many posts about it. "Goldenrods" is one if the terms that may be helpful when doing a search. There IS a way to unfreeze the gear-drive mechanism but it involves removal of the headlight assembly to get access.
Important! If you attempt to make any adjustments, especially one involving the up/down adjuster and it doesn't move, or you meet a lot of resistance, stop right there. Do NOT attempt to force things. You will ABSOLUTELY break the long "goldenrod' (gold colored rod about 3" long). This is not an "if" or "maybe". Do NOT force it by twisting your wrench/nut-driver harder and harder. Once broken, these pieces are NOT available as a separate repair piece from GM. They will only sell you the entire headlight assembly.
If yours are frozen up, do a search on this issue. Many many posts about it. "Goldenrods" is one if the terms that may be helpful when doing a search. There IS a way to unfreeze the gear-drive mechanism but it involves removal of the headlight assembly to get access.


Instructor

Joined: Feb 2011
Posts: 228
Likes: 1
From: eustis FL Saved and blessed; what else matter?
That MAY or MAY NOT suffice. The problem usually is that the spray can't actually penetrate to where it's needed. There's a little internal gear-drive mechanism involved.
Important! If you attempt to make any adjustments, especially one involving the up/down adjuster and it doesn't move, or you meet a lot of resistance, stop right there. Do NOT attempt to force things. You will ABSOLUTELY break the long "goldenrod' (gold colored rod about 3" long). This is not an "if" or "maybe". Do NOT force it by twisting your wrench/nut-driver harder and harder. Once broken, these pieces are NOT available as a separate repair piece from GM. They will only sell you the entire headlight assembly.
If yours are frozen up, do a search on this issue. Many many posts about it. "Goldenrods" is one if the terms that may be helpful when doing a search. There IS a way to unfreeze the gear-drive mechanism but it involves removal of the headlight assembly to get access.
Important! If you attempt to make any adjustments, especially one involving the up/down adjuster and it doesn't move, or you meet a lot of resistance, stop right there. Do NOT attempt to force things. You will ABSOLUTELY break the long "goldenrod' (gold colored rod about 3" long). This is not an "if" or "maybe". Do NOT force it by twisting your wrench/nut-driver harder and harder. Once broken, these pieces are NOT available as a separate repair piece from GM. They will only sell you the entire headlight assembly.
If yours are frozen up, do a search on this issue. Many many posts about it. "Goldenrods" is one if the terms that may be helpful when doing a search. There IS a way to unfreeze the gear-drive mechanism but it involves removal of the headlight assembly to get access.



Burning Brakes

Joined: Jun 2010
Posts: 812
Likes: 2
From: Metairie Louisiana
How much stuff do you have to remove in order to see both of the goldenrod mechanisms so I can spray them and see that I have actually hit the right spot? And do the fog lamps need the same treatment before adjusting them? thanks

Le Mans Master


Joined: Mar 2006
Posts: 7,207
Likes: 312
From: Lino Lakes MN
Remove the black surround at a minimum and the headlight cover if you must, no major issues in adjusting the fog lights. I'd remove the black surround without removing the plug as retrieving them from the inner fender is a PITA. I know this from personal experience, as I just completed it less than 2 hours ago.
