


flush mount taillight kits
Thread Starter
Burning Brakes

Joined: Nov 2007
Posts: 879
Likes: 0
From: Waynesville Missouri
Hello everyone I am going to make my own flushmount taillight kit and I know there have been more than a couple forum members do the same. So I am looking for any info or pics of what they used to do so. I would appreciate any help. Thanks in advance Jason

Instructor

Joined: Sep 2009
Posts: 225
Likes: 0

Melting Slicks


Joined: Oct 2008
Posts: 3,175
Likes: 53
From: DC
St. Jude Donor '09-'10
Don't don't don't spend your money on this. All you get is long screws and spacers. It was the stupidest purchase I ever made.
You can get it for a fraction of the price at home depot or something.
You can get it for a fraction of the price at home depot or something.
Le Mans Master

Joined: Jul 2009
Posts: 9,526
Likes: 12
From: Los Angeles California
Personally I think making them flush removes some of the characteristics of the car. Think about it; what other cars do you see with recessed lights? Hondas, Toyotas, Dodges, etc... Plain cars have flush lights. Corvettes have recessed lights. Anyone can be plain, but you can't fake a Corvette.
Just my opinion.
Just my opinion.
Pro


Joined: Jul 2007
Posts: 590
Likes: 23
From: Orangevale Ca.

and also as SCM_Crash said, i wasn't totally sold on the full "flush" look. and with every kit (DIY or otherwise), i wasn't too happy about trying to flush my taillights with the "curved" rear by using unequal length spacers from inside (near license plate) to outside.
so my design mind said that while i wanted to somewhat flush them somewhere between factory and fully flushed, i also wanted to maintain the "focus" of the lenses by using the same length spacers across all 8 mounting locations.
so i got 1/2" spacers (8) and 1/2" longer screws and essentially "closed the gap" by relocating the lenses 1/2" straight back.
i was looking for black anodized hardware but the only screws i could find were stainless panheads with the stainless finish so after i installed them, i took some touch-up paint and painted the screw heads and they look great.
just my .02.
peace,
rich
Pro

Joined: Jul 2008
Posts: 677
Likes: 1
From: Huntsville AL
Personally I think making them flush removes some of the characteristics of the car. Think about it; what other cars do you see with recessed lights? Hondas, Toyotas, Dodges, etc... Plain cars have flush lights. Corvettes have recessed lights. Anyone can be plain, but you can't fake a Corvette.
Just my opinion.
Just my opinion.

Melting Slicks
Joined: Oct 2007
Posts: 2,798
Likes: 8
From: It's true money can't buy happiness, but it is more comfortable crying in a Corvette than on a bicyc
St. Jude Donor '13
Well I like mine flush because every other Vette is recessed. I bought the nylon spacers at Lowes for chump change and the stainless screws as well. Buy and assortment of 1/2 and 1/4 inch spacers and decide where you like them. The outer lights use spacers 1/4" shorter on the outside to match the curve.
Corvette Stories
The Best of Corvette for Corvette Enthusiasts

150 hp to 1,250 hp: Every Corvette Generation Compared by the Specs That Matter
Joe Kucinski
8 Coolest Corvette Pace Cars (and Replicas) of All Time
Verdad Gallardo
Top 10 Corvette Engines RANKED by Peak Torque (70+ Years of Muscle!)
Joe Kucinski
Corvette ZR1X Will Be Pacing the Indy 500, And Could Probably Race, Too!
Verdad Gallardo
Top 10 Corvettes Coming to Mecum Indy 2026!
Brett Foote
Top 10 C9 Corvette MUST-HAVES to Fix These C8 Generation Flaws!
Michael S. Palmer
10 Revolutionary 'Corvette Firsts' Most People Don't Know
Joe Kucinski
5 Reasons to Upgrade to an LS6-Powered Corvette; 5 Reasons to Stay LT2
Michael S. Palmer
2027 Corvette vs The World: Every C8 vs Its Closest Competitor
Joe Kucinski
Race Director

Joined: Jul 2007
Posts: 18,681
Likes: 47
From: Reno is so close to Hell you can see Sparks , State Of Confusion
St. Jude Donor '12-'13-'14
I had mine mounted flush for about a month or so and ended taking them back off, I liked the look of the stock fit better, All you need is 2 different size spacers and 8 longer screws, I can't remember how long the spacers were. as said above, Lowes is your friend.

Drifting

Joined: Feb 2009
Posts: 1,379
Likes: 1
From: MA
I bought a kit from a vendor on here that is always having 40% off sales and the screw heads rusted. I also got a hood seal from them and it sucked too, peeled off after about one month. I'll not buy anything from them again as it is no wonder they have the stuff for sale, it is just junk.
I took the kit off and left my tailights stock. I wanted to flush them to keep the dirt out of the recession but now I don't really give a hoot.
I took the kit off and left my tailights stock. I wanted to flush them to keep the dirt out of the recession but now I don't really give a hoot.
Drifting
Joined: Oct 2003
Posts: 1,932
Likes: 4
From: Warrenville Il
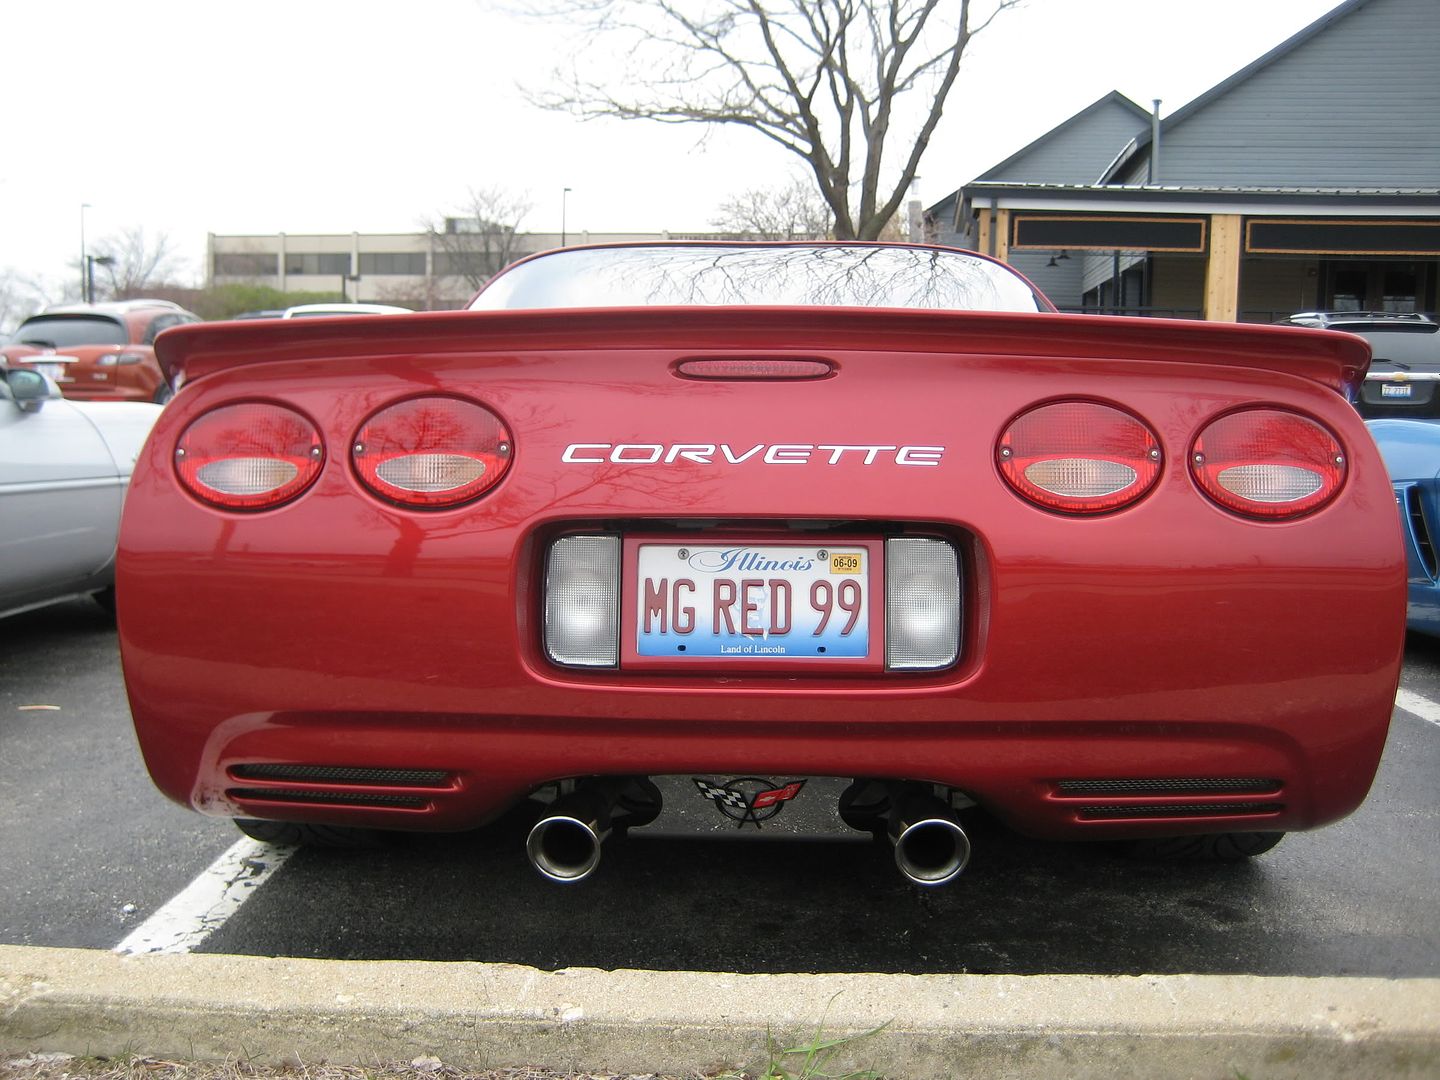
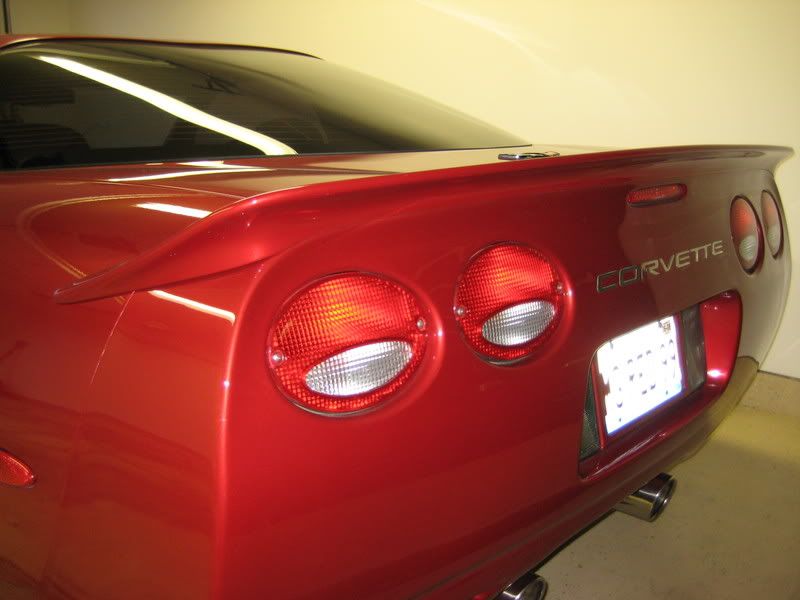
A pic for the flushmount crowd. I believe I got these from PFYC. They are a little overpriced for what you get (8 plastic spacer blocks and longer screws). However I did like the fact the the screws that were provided were stainless. Some people may not like the fact that there not black, but they also don't show any signs of rust inside the screw head which can occur if they've been removed a couple of times and the anodized coating gets scratched off. They can also be touched up with some paint as well I suppose. I have to say that I was split on whether I was going to like them or not, but after 7 years of having them on, I guess I still like them. To the OP, I don't have any pics of the actual kit, but good luck in your endevour.
Administrator


Joined: Mar 2001
Posts: 367,946
Likes: 24,703
From: In a parallel universe. Currently own 2014 Stingray Coupe.
C7 of the Year - Modified Finalist 2021
MO Events Coordinator
St. Jude Co-Organizer
St. Jude Donor '03 thru '25
NCM Sinkhole Donor
CI 5, 8 & 11 Veteran
Personally I think making them flush removes some of the characteristics of the car. Think about it; what other cars do you see with recessed lights? Hondas, Toyotas, Dodges, etc... Plain cars have flush lights. Corvettes have recessed lights. Anyone can be plain, but you can't fake a Corvette.
Thread Starter
Burning Brakes
Joined: Nov 2007
Posts: 879
Likes: 0
From: Waynesville Missouri
I appreciate all the help, but I still need a pic of the kit lol!!!! Hey Jack Yes I have done alot to the vette over the last month. I will be doing a post with all the details and pics of the build and all the mods I done. The whole car has been apart in my garage for about six months while I was waiting on my motor and getting everything I needed. I am very close to being done and I should be firing it up here in the next couple weeks! Give me a call sometime and I can let you know what I have been up to!
Administrator
Joined: Mar 2001
Posts: 367,946
Likes: 24,703
From: In a parallel universe. Currently own 2014 Stingray Coupe.
C7 of the Year - Modified Finalist 2021
MO Events Coordinator
St. Jude Co-Organizer
St. Jude Donor '03 thru '25
NCM Sinkhole Donor
CI 5, 8 & 11 Veteran
Jason - don't have a pic of the kit, but here is what was posted here on the forum a while back in terms of what is needed if you want to create a kit yourself from parts available a places like Home Depot. Sorry I didn't post this earlier, but had to wait until I got home and could look at my files to see if I had the info. And I'll give you a call soon to check out what you've done to the car. 
Here are two different ways of doing the job:
Method 1:
Parts needed:
� 8 each �� x �� round poly spacers with .194� hole.
� 6 each �� x �� round poly spacers with .194� hole.
� 8 each #8 x 2� panhead sms screws.
� 1 package 5/16� x 3/8� auto/marine closed cell foam gasket with sticky on one side.
� Black Sharpie pen.
Step 1 � remove screws from tail lights and carefully let them hang out of the opening by the wire harness.
Step 2 � using the Sharpie, color the heads of the #8 screws black. Push the tip of the pen into the Philips slots to cover the screw with color completely.
Step 3 � Install the foam gasket material onto the taillight housings where the lens meets the black part of the housing, sticking the gasket to the black housing portion.
Step 4 � On the two inboard taillights, install the screws through the holes on the housings and slide 1 each �� spacer and 1 each �� spacer over the screws and slide the taillights back into the openings and tighten the screws.
Step 5 � On the two outboard taillights, repeat step 4 except on the outer most taillight screw only install a �� spacer and then tighten the screws.
The difference between this installation guide and others is that the others used 1� spacers. When the 1� spacers were used, the top of the taillights stuck out a little on the top and just didn�t look like a factory install.
Method 2:
Parts needed:
� Six (6) 1� L x �� W x .194 Hole Size Nylon Spacers ($4.77)
� Six (6) �� L x �� W x .194 Hole Size Nylon Spacers ($3.42)
� #8 x 2� Zinc Pan Head Screws ($0.98)
� One Frost King Rubber Foam Weatherseal 3/8� W x 5/16� thick x 10� long (adhesive backed). I got the black weatherstripping. ($3.98).
Simply unscrew the tail lights, clean the area, put the weatherstripping around the tail light (where the red casing meets the black casing of the light). Then insert new screws and spacers on the back side and screw them back into the mounting hole.
The two center lights get one 1� spacer on each screw.
The outside lights get three �� spacers on each of the outer most screw. ****
The inner screw on the outside most lights gets one 1� spacer.
Fit so the weatherstripping looks good and screw them back in.
*** - Life is simpler if you buy two (2) extra 1� spacers and cut �� off with a Dremel or hacksaw. Then you are not fighting three pieces when you want to take out your lights for detailing or whatever. Then eight (8) screws, eight (8) spacers. The outer shorter ones are easy to spot, but to make it even easier, I sprayed the two outer spacers with some enamel paint I had in the garage to really be able to tell the difference when working with them. And, you can save $1.83.
Burning Brakes
Joined: Oct 2008
Posts: 1,062
Likes: 2
From: Minnesota City MN
As was said above, the "kit" is just spacers and longer screws. Unscrew one of your taillight screws, take it to a hardware store, find the white nylon spacers that the screw will fit in, buy 2" screws, just that easy. When I did mine I also used black screw caps (the screws goes through them, then a cap snaps over concealing the screw head) for a clean look. With the seal, MAKE SURE you lube the seal before you install the taillight back into the car. It will keep the seal from rolling over or comming loose from the housing. I also drilled a small hole behind each taillight so water can drain out. I like the flush look better as it keeps the back of my car cleaner, and with a black daily driver...I need it!

Burning Brakes
Joined: Aug 2009
Posts: 945
Likes: 8
From: Olympia WA
Personally I think making them flush removes some of the characteristics of the car. Think about it; what other cars do you see with recessed lights? Hondas, Toyotas, Dodges, etc... Plain cars have flush lights. Corvettes have recessed lights. Anyone can be plain, but you can't fake a Corvette.
Just my opinion.
Just my opinion.
Think of it as factory option for "Frenched" out tail lights.
Its cool and custom looking, and free.
Andy