


[Z06] Z06 Stereo Overhaul
Thread Starter
Racer


Joined: Apr 2005
Posts: 284
Likes: 0
From: Austin Texas
This weekend I finally finished overhauling the stereo system in my Z06. WOW, what a difference!!! It's like having a house stereo in your car. I researched everything for months before ordering anything. The Audio section (and especially the Audio FAQ) of CF is the essential bible if you're planning on doing this yourself. I was selective in the components I chose to get both a powerful system as well as keeping the extra weight down, because it is still a sports car after all. It took me about 4 light weekends plus a few weeknights to complete.
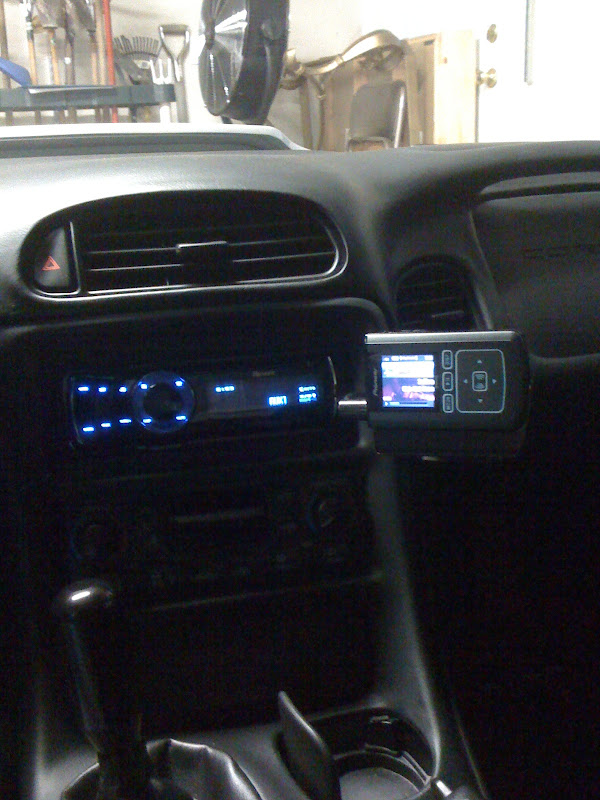
I went with a Pioneer Premier head unit. It had everything I wanted:
The speakers, sub and amps are all Alpine. The speakers and sub are all 'R' series. I went with a 6.5� component system for the doors, 5.25� speakers for the rear, and a 10" sub. The amps are F300/M500. I liked that the amps were matching form factor. For the rear speakers I had to fabricate some spacers out of � plywood. This took a solid 2 hours to do. Without the spacers the speakers wouldn�t mount because the magnets on the Alpines were bigger than the Bose. I made a paper template, transferred it to the wood. I used a jigsaw to cut the holes, and a circular saw to cut outside lines. I�m glad I did the back speakers because they sound great.
I shopped the internet for all my audio components. I ended up getting smoking deals on everything. Most everything was at least 50% less than Crutchfield and MSRP.
I ordered most of my installation gear from MADVETTE. In general I'm happy with the quality of the gear. Dave�s customer support could be better though. Here's a list of what I got from MADVETTE along with my experience using it.
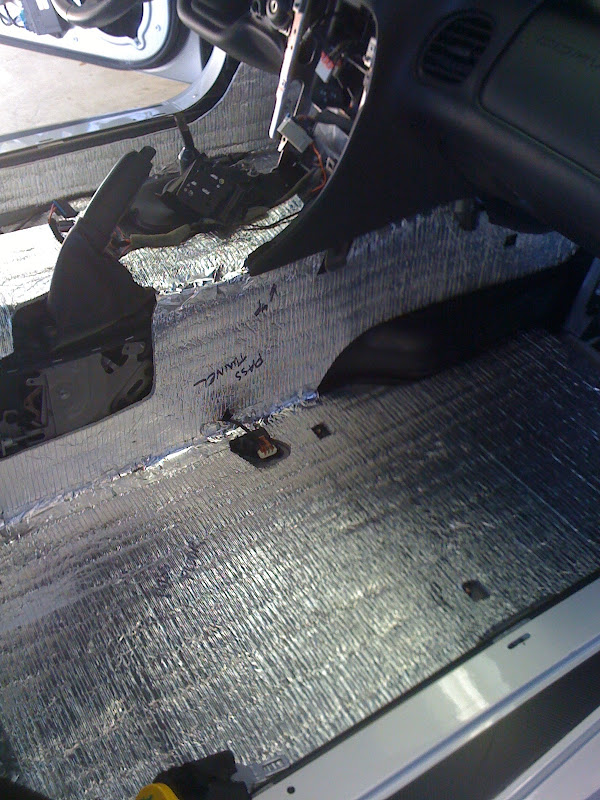
Insulation Kit. This is a very nice kit. I chose it because it is light (3.5 lbs) and it was advertised to cut noise by 19db. Excellent instructions and well thought out kit. Once you get past the jitters of gutting your interior, the kit goes in like butter. Everything is well labeled and the fit is great. The only thing that wasn't pre cut was the buckets in the rear of the car, but there was enough spare material left that I was able to fabricate that easily myself. The result: I can't believe how much quieter my car is, for a lightweight kit like this. I'm thrilled! If road noise is an issue for you, this is a no brainer upgrade.
Here's the interior stripped:
If you look closely at this one, in the center of the dash you can see the center support tab that must be removed:
Here's a pile of my interior :-)
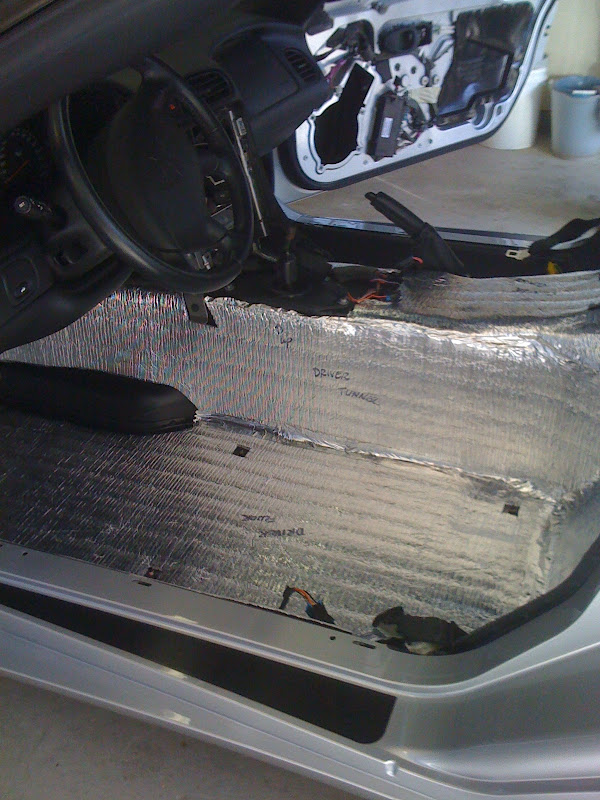
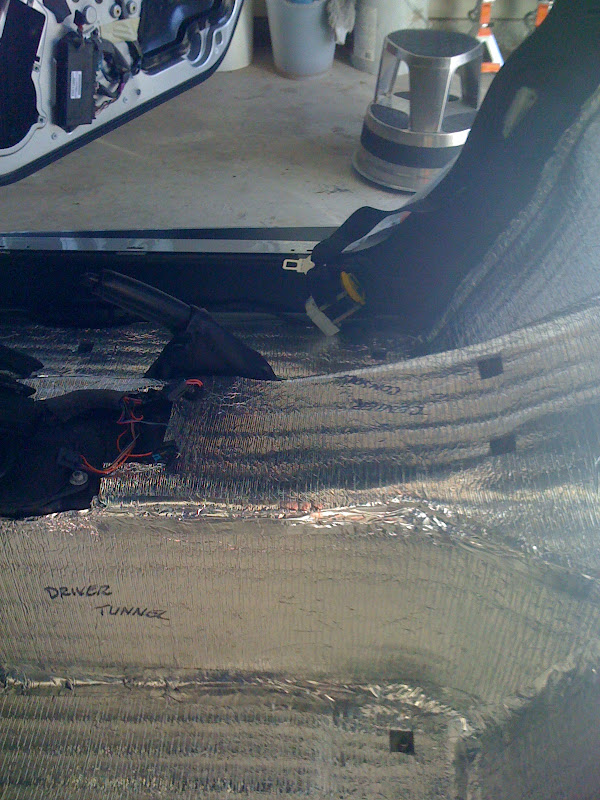
Here's the insulation kit installed minus the door panels:
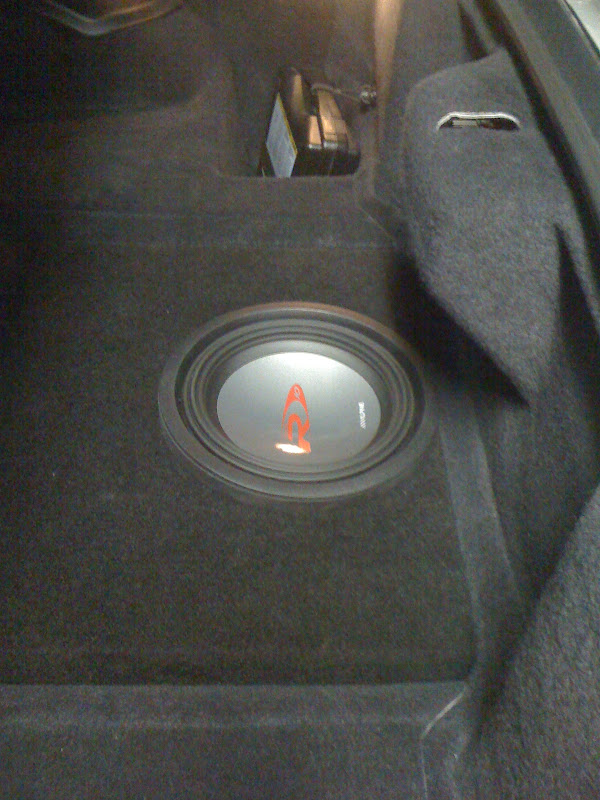
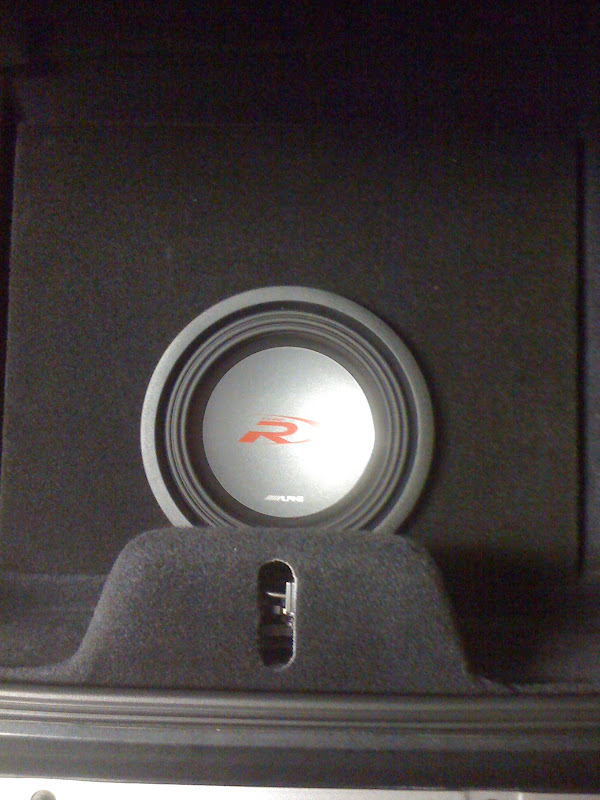
Stealth sub box. Nice box, blends well with the rest of the interior. Only weighs about 12 lbs (plus the sub of course) My only issue on the box was that I had told Dave the depth of my sub to verify it would fit, because my depth was more than the recommendation for the box. He never did verify it before he shipped it. I didn't quite understand that because all it would have taken was 30 seconds with a measuring tape. He did say he'd be willing to work with me if it didn't work out. When I installed the sub the magnet bent the spades on the box connector over because it's located directly below the sub. Good redesign would be to move the connector a few inches right or left. Dave said he would ship me a piece of wood to glue over the hole so I could relocate the connector, but he never followed through. I ended up soldering the wires to the spades and then shrink wrapped over them so I could fold them over flat. Problem solved. My type R sub sounds great in the stealth box, plenty of punch.
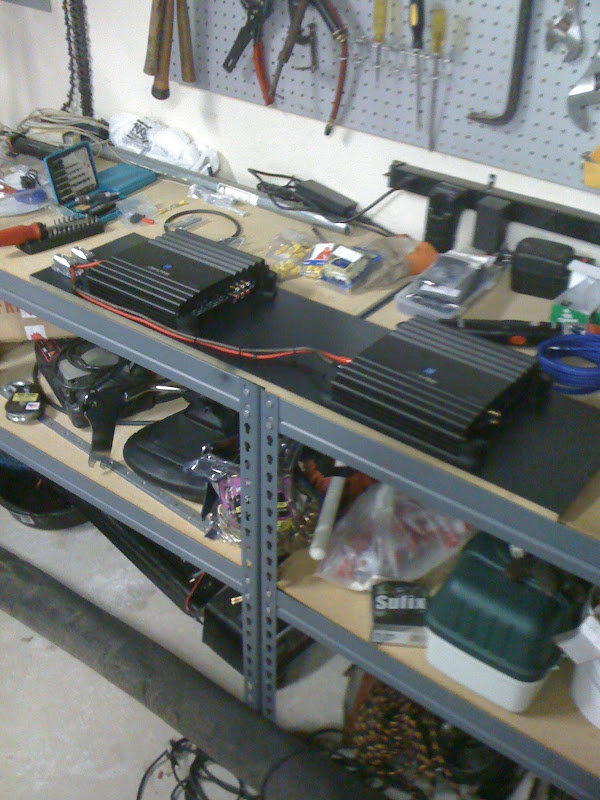
Amp Rack This is another very nice looking product. Dave talked me into going with the Plexiglas windows for the amps and a double wide fan. Maybe it�s just me, but I didn�t realize the amp rack is only the top cover? Fortunately, I had some scrap MDF lying around my garage and was able to fabricate an amp board. My email to Dave asking about the best location to mount the fan never got a reply. I initially screwed the fan to the underside of the amp rack, however, that resulted in an irritating whine from the motor noise telegraphing into the amp rack. The final solution, which worked really well, was to Velcro it to underside carpeted area of the amp rack. The result is the rack looks dynamite and the fan is now silent.
Amp board with distribution blocks and power wired:
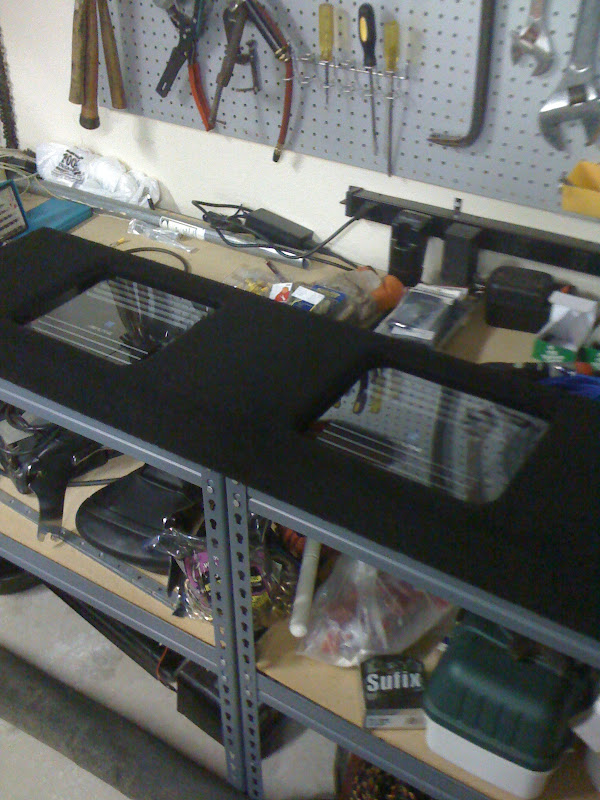
With Amp Rack cover:
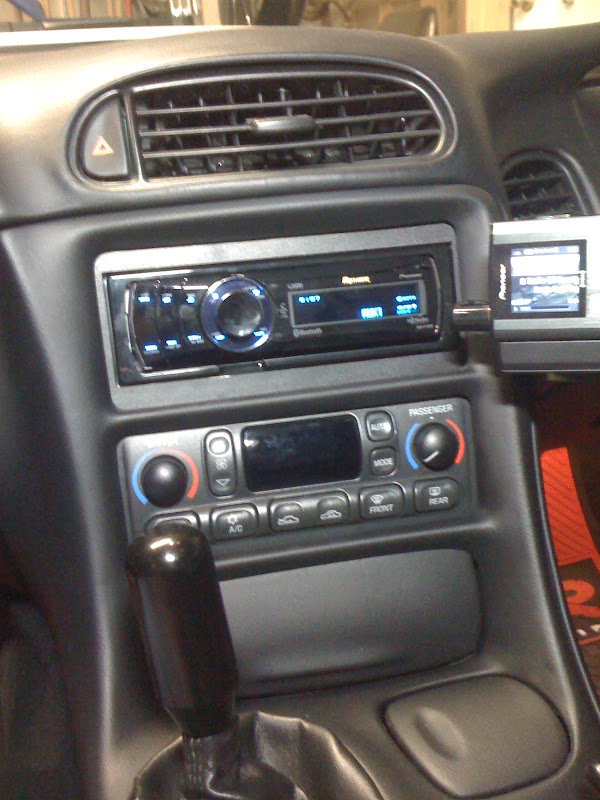
Head unit bezel The bezel looks very nice and was straight forward to install. The tough thing, at least for my install, was that I needed to trim off a big aluminum tab from the center support of the dash. The tab kept the head unit from going far enough into the dash to seat in the mounting sleeve. I used a hack saw to get the job done. Then I filed it smooth. The other thing I had to remove was a plastic cable holder on the upper right corner behind the head unit. Even with all that, the head unit was a tight fit. I cut the heck out of my hands on all the sharp edges in there!
MDF Door plates These were nice pieces and well worth the money. Perfect fit for my 6.5� Alpine component system.
Cabling and distribution blocks All Dave�s cables (audio, power, and distribution blocks) are premium stuff. No complaints there. I had discussed with Dave using a zero gauge wiring kit. He said it would route through the factory firewall grommet, but that my hands would get tired. After fighting with it for a couple of hours I decided to go for plan B. I bought a 4 gauge Fosgate kit from Best Buys, which routed easily. Considering the amps I used, less than 1000 watts, the 4 gauge wiring was more than adequate. Now, it�s my own fault for ordering the zero gauge. Total overkill as usual. But, I wish Dave had told me that. It would have saved me lots of aggravation. Dave never responded to my email asking if he could do anything on returning the zero gauge kit. Not even to say **** off. He had also sent me some 4 gauge cable but no crimp connectors to attach to my amps. I scoured Austin, but couldn�t find anything that would work. I ended up buying some Fosgate 8 gauge cable and matching crimp connectors that worked just fine. Net: for my system, 4 gauge main power and 8 gauge to each amp was plenty of capacity, and it was easy to install. Anyone looking for a nice zero gauge kit? I�ll make you a good deal.
Conclusions:
Thrilled with how everything turned out
Huge improvement over the factory system
Very happy with the quality of everyone�s products
Note: I easily spent at least another $100 on connectors and odds and ends. If you buy from Madvette do so well ahead (weeks, if not months) of when you plan to do your work.
Happy my car is back on the road!

I went with a Pioneer Premier head unit. It had everything I wanted:
- 2 Aux inputs (I use one for my portable XM)
- 2 USB inputs (bought a 16GB memory stick)
- CD (with all the popular format support)
- Integrated Bluetooth (not just BT ready)
- Preamp outs (front, rear, sub)
- 7 band equalizer
The speakers, sub and amps are all Alpine. The speakers and sub are all 'R' series. I went with a 6.5� component system for the doors, 5.25� speakers for the rear, and a 10" sub. The amps are F300/M500. I liked that the amps were matching form factor. For the rear speakers I had to fabricate some spacers out of � plywood. This took a solid 2 hours to do. Without the spacers the speakers wouldn�t mount because the magnets on the Alpines were bigger than the Bose. I made a paper template, transferred it to the wood. I used a jigsaw to cut the holes, and a circular saw to cut outside lines. I�m glad I did the back speakers because they sound great.
I shopped the internet for all my audio components. I ended up getting smoking deals on everything. Most everything was at least 50% less than Crutchfield and MSRP.
I ordered most of my installation gear from MADVETTE. In general I'm happy with the quality of the gear. Dave�s customer support could be better though. Here's a list of what I got from MADVETTE along with my experience using it.
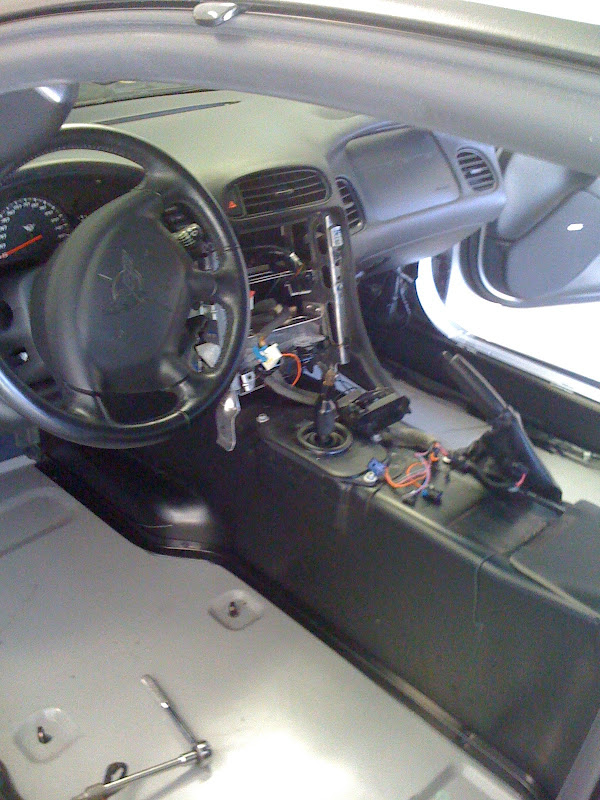
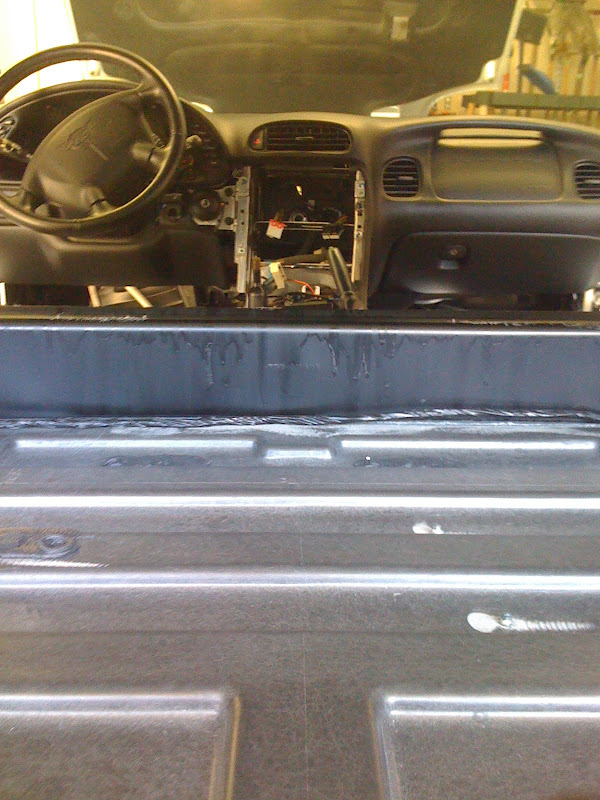
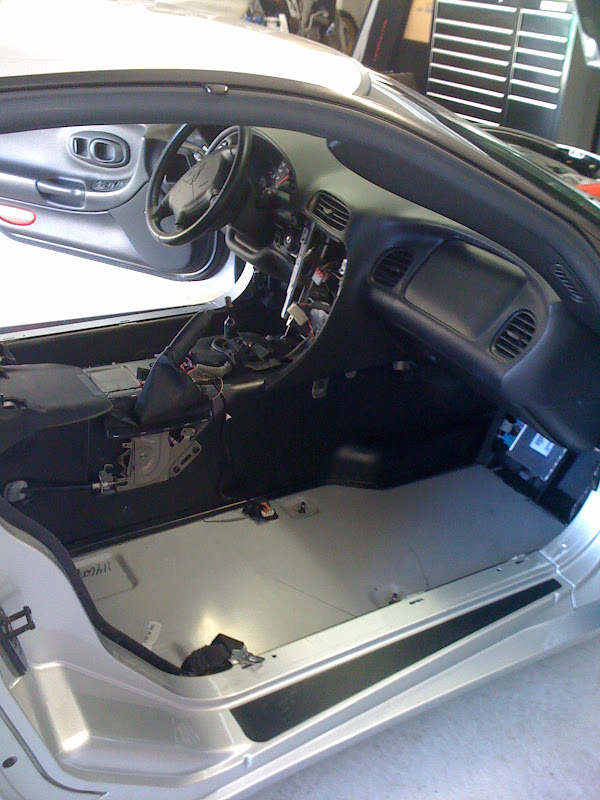
Insulation Kit. This is a very nice kit. I chose it because it is light (3.5 lbs) and it was advertised to cut noise by 19db. Excellent instructions and well thought out kit. Once you get past the jitters of gutting your interior, the kit goes in like butter. Everything is well labeled and the fit is great. The only thing that wasn't pre cut was the buckets in the rear of the car, but there was enough spare material left that I was able to fabricate that easily myself. The result: I can't believe how much quieter my car is, for a lightweight kit like this. I'm thrilled! If road noise is an issue for you, this is a no brainer upgrade.
Here's the interior stripped:
If you look closely at this one, in the center of the dash you can see the center support tab that must be removed:
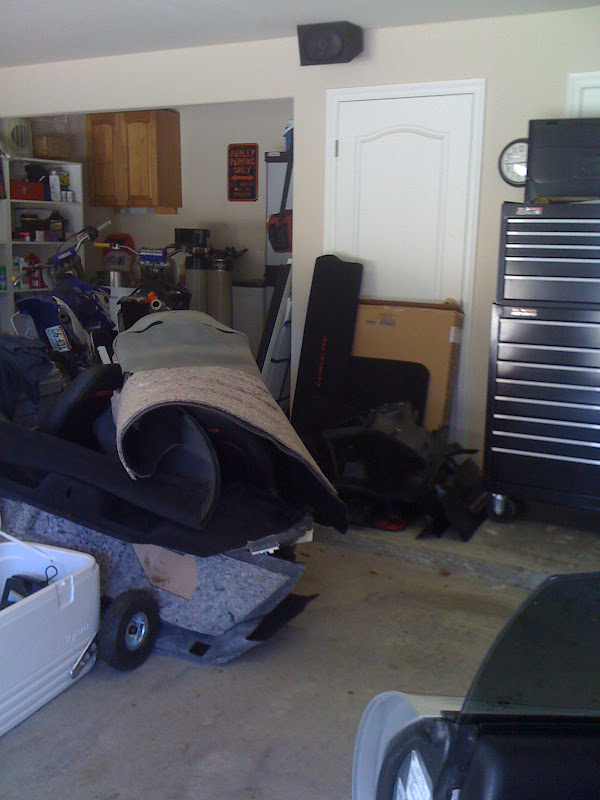
Here's a pile of my interior :-)
Here's the insulation kit installed minus the door panels:
Stealth sub box. Nice box, blends well with the rest of the interior. Only weighs about 12 lbs (plus the sub of course) My only issue on the box was that I had told Dave the depth of my sub to verify it would fit, because my depth was more than the recommendation for the box. He never did verify it before he shipped it. I didn't quite understand that because all it would have taken was 30 seconds with a measuring tape. He did say he'd be willing to work with me if it didn't work out. When I installed the sub the magnet bent the spades on the box connector over because it's located directly below the sub. Good redesign would be to move the connector a few inches right or left. Dave said he would ship me a piece of wood to glue over the hole so I could relocate the connector, but he never followed through. I ended up soldering the wires to the spades and then shrink wrapped over them so I could fold them over flat. Problem solved. My type R sub sounds great in the stealth box, plenty of punch.
Amp Rack This is another very nice looking product. Dave talked me into going with the Plexiglas windows for the amps and a double wide fan. Maybe it�s just me, but I didn�t realize the amp rack is only the top cover? Fortunately, I had some scrap MDF lying around my garage and was able to fabricate an amp board. My email to Dave asking about the best location to mount the fan never got a reply. I initially screwed the fan to the underside of the amp rack, however, that resulted in an irritating whine from the motor noise telegraphing into the amp rack. The final solution, which worked really well, was to Velcro it to underside carpeted area of the amp rack. The result is the rack looks dynamite and the fan is now silent.
Amp board with distribution blocks and power wired:
With Amp Rack cover:
Head unit bezel The bezel looks very nice and was straight forward to install. The tough thing, at least for my install, was that I needed to trim off a big aluminum tab from the center support of the dash. The tab kept the head unit from going far enough into the dash to seat in the mounting sleeve. I used a hack saw to get the job done. Then I filed it smooth. The other thing I had to remove was a plastic cable holder on the upper right corner behind the head unit. Even with all that, the head unit was a tight fit. I cut the heck out of my hands on all the sharp edges in there!
MDF Door plates These were nice pieces and well worth the money. Perfect fit for my 6.5� Alpine component system.
Cabling and distribution blocks All Dave�s cables (audio, power, and distribution blocks) are premium stuff. No complaints there. I had discussed with Dave using a zero gauge wiring kit. He said it would route through the factory firewall grommet, but that my hands would get tired. After fighting with it for a couple of hours I decided to go for plan B. I bought a 4 gauge Fosgate kit from Best Buys, which routed easily. Considering the amps I used, less than 1000 watts, the 4 gauge wiring was more than adequate. Now, it�s my own fault for ordering the zero gauge. Total overkill as usual. But, I wish Dave had told me that. It would have saved me lots of aggravation. Dave never responded to my email asking if he could do anything on returning the zero gauge kit. Not even to say **** off. He had also sent me some 4 gauge cable but no crimp connectors to attach to my amps. I scoured Austin, but couldn�t find anything that would work. I ended up buying some Fosgate 8 gauge cable and matching crimp connectors that worked just fine. Net: for my system, 4 gauge main power and 8 gauge to each amp was plenty of capacity, and it was easy to install. Anyone looking for a nice zero gauge kit? I�ll make you a good deal.
Conclusions:
Thrilled with how everything turned out
Huge improvement over the factory system
Very happy with the quality of everyone�s products
Note: I easily spent at least another $100 on connectors and odds and ends. If you buy from Madvette do so well ahead (weeks, if not months) of when you plan to do your work.
Happy my car is back on the road!
Last edited by z06Maniac; Mar 16, 2010 at 09:38 PM.
Le Mans Master


Joined: Dec 2000
Posts: 5,245
Likes: 25
From: Blue Ridge Georgia
I'm also ready for my install. I've been hanging around the Audio forum as well and I really have got alot of off forum help from markcz. He's really helped me understand the wiring. I'm still waiting on the Z06 faceplate and the door speaker adapters, other than that I have everything. I'm really looking forward to Ipod and Bluetooth. Glad your install went well. It's always funny when someone states that you can do this type of job in "X" number of hours, it's refreshing to hear you say how long it took. I'm the same way, do it once and do it right and double check as you go. Did you retain RAP?
Thread Starter
Racer
Joined: Apr 2005
Posts: 284
Likes: 0
From: Austin Texas
I'm also ready for my install. I've been hanging around the Audio forum as well and I really have got alot of off forum help from markcz. He's really helped me understand the wiring. I'm still waiting on the Z06 faceplate and the door speaker adapters, other than that I have everything. I'm really looking forward to Ipod and Bluetooth. Glad your install went well. It's always funny when someone states that you can do this type of job in "X" number of hours, it's refreshing to hear you say how long it took. I'm the same way, do it once and do it right and double check as you go. Did you retain RAP?
No, I didn't do RAP yet. I may do that in the future. RAP (Retained Accessory Power) requires an after market adapter, unless the head unit has built in GMRAP support. RAP Requires detection/decode of the digital serial port signal. The Peripheral Electronics adapter looks like the most low cost option at around $41. http://www.autotoys.com/x/product.php?productid=8503
I didn't figure out until I was close to wrapping up, and I wanted to start driving my car again.
Last edited by z06Maniac; Mar 16, 2010 at 08:53 AM.
Le Mans Master


Joined: Jun 2001
Posts: 7,331
Likes: 518
From: Admit Nothing, Deny Everything, Make Counter Accusations.
I've always used the Alpine head units. I also used all top shelf Alpine amps in my last install (Jeep Grand Cherokee) and I was happy with them.
Corvette Stories
The Best of Corvette for Corvette Enthusiasts

Top 10 Most Expensive Corvettes Ever Sold on Bring A Trailer
Brett Foote
10 Things Every Corvette Owner Needs (2026 Edition)
Michael S. Palmer
8 Most "Only Corvette Owners Understand" Quirks and Problems
Pouria Savadkouei
10 Reasons the C6 Z06 is Still A Performance Benchmark After 20 Years
Joe Kucinski
How Much Horsepower Every Corvette Engine "LOST" in 1972
Joe Kucinski
Top 10 DOs and DON'Ts for Protecting Your Convertible Top!
Michael S. Palmer
Top 10 Most Explosive Corvettes Ever Made: Power-to-Weight Ratio Ranked!
Joe Kucinski
150 hp to 1,250 hp: Every Corvette Generation Compared by the Specs That Matter
Joe Kucinski
8 Coolest Corvette Pace Cars (and Replicas) of All Time
Verdad Gallardo
Thread Starter
Racer
Joined: Apr 2005
Posts: 284
Likes: 0
From: Austin Texas
Thread Starter
Racer
Joined: Apr 2005
Posts: 284
Likes: 0
From: Austin Texas
I looked at the Alpine. Didn't see one I liked as much as the Pioneer or that had everything I wanted for the price I was willing to pay. I'm very happy with the Pioneer.


Moderator


Joined: Jun 2004
Posts: 22,753
Likes: 943

I've never liked Alpine stuff, Pioneer Premier has always been good to me and had more features and better looks for the dollar than Alpine.
Thread Starter
Racer
Joined: Apr 2005
Posts: 284
Likes: 0
From: Austin Texas

If I was really worried about shedding some weight I could go on a diet

Thread Starter
Racer
Joined: Apr 2005
Posts: 284
Likes: 0
From: Austin Texas
Thanks Paul. I still can't get over the night and day difference between the stock system and how it sounds now.  Don't know how I lived with it before! I just bought a 16GB memory stick for $39. Fits every song in my MP3 library, with lots of room to spare. Amazing! The stock systems can't compare to all the features you get with a premium after market system.
Don't know how I lived with it before! I just bought a 16GB memory stick for $39. Fits every song in my MP3 library, with lots of room to spare. Amazing! The stock systems can't compare to all the features you get with a premium after market system.