Springs in front bumper

Thread Starter
Racer


Joined: Feb 2007
Posts: 299
Likes: 44
I know there is 1 spring on each side that connects the bumper to the side marker. I also found a very similar (same design, 1 hook on each end) but larger spring, does anyone know where that goes? Perhaps connected to the headlight somehow? thanks!

Tech Contributor


Joined: Dec 2003
Posts: 19,384
Likes: 87
From: Horncastle Lincolnshire, England
2023 C5 of the Year Finalist - Unmodified
 There's no spring attaching the bumper to the car
Document ID# 657216
2002 Chevrolet Corvette
________________________________________
Fascia Replacement - Front Bumper
Removal Procedure
1. Raise and support the vehicle. Refer to Lifting and Jacking the Vehicle in General Information.
Pic 1
2. Remove the air deflector and the left and right outer valance. Refer to Air Deflector Replacement - Front Bumper Fascia .
Pic 2

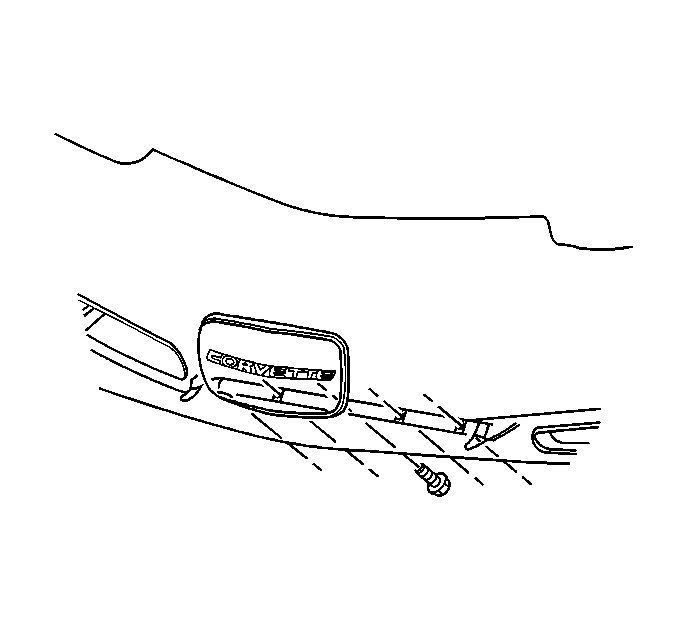
3. Remove the fascia to skid bar bolts.
Pic 3
4. Remove the fascia to radiator support bolts.
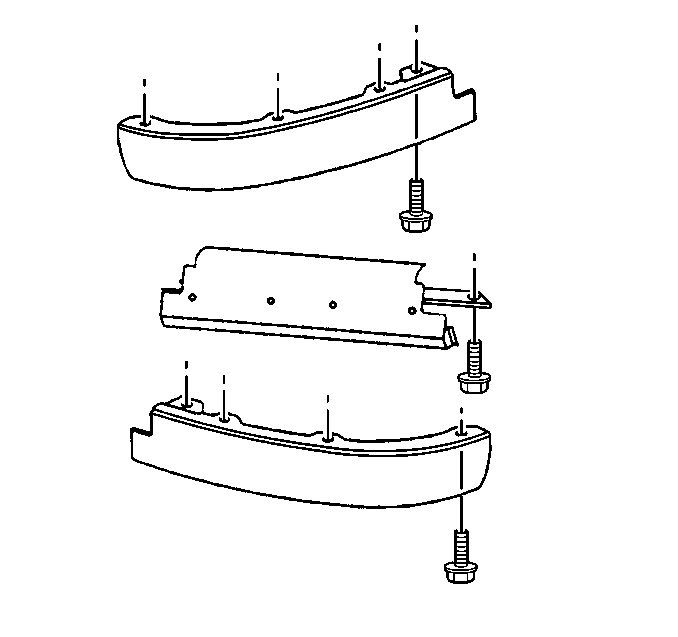
5. Remove the fascia lower close out panels. Refer to Close Out Panel - Front Bumper Fascia Lower .
Pic 4

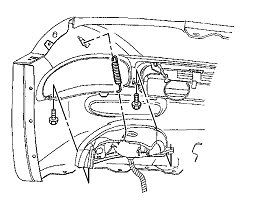
6. Remove the wheelhouse panel to fascia bolts.
Pic 5
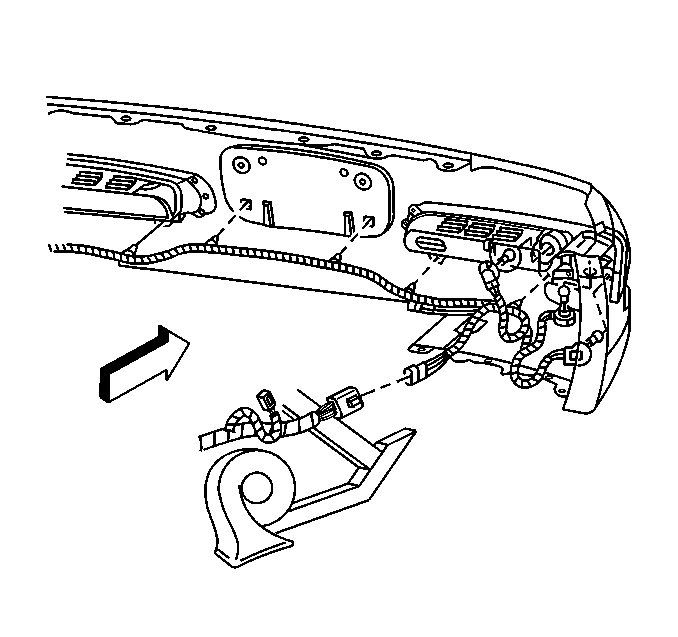
7. Disconnect the fascia harness connector.
Pic 6
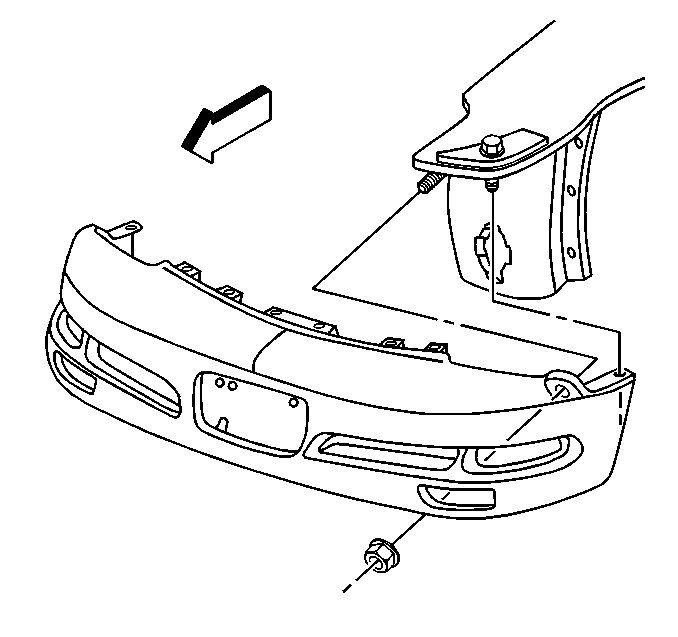
8. Remove the nuts from the fender reinforcement studs.
Pic 7
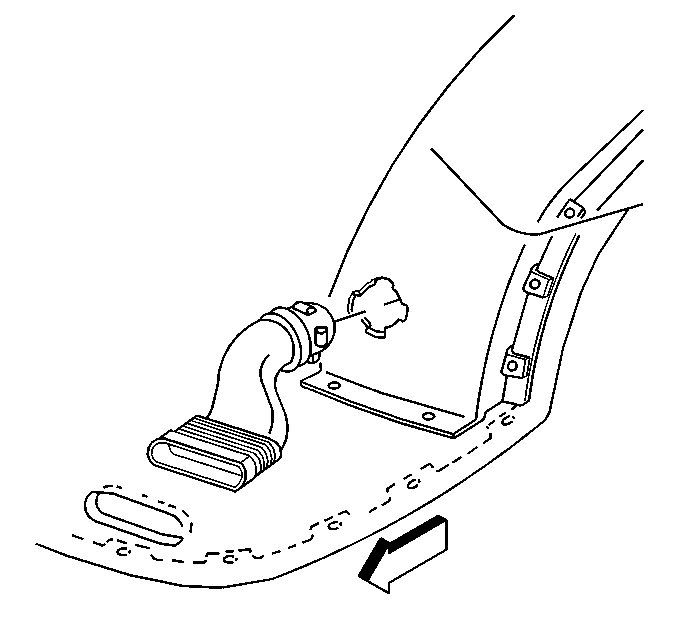
9. Disconnect the front brake caliper cooling ducts from the fascia. Pull the fascia outward slightly to release the tension between the ducts and the fascia.
10. Lower the vehicle.
Pic 8
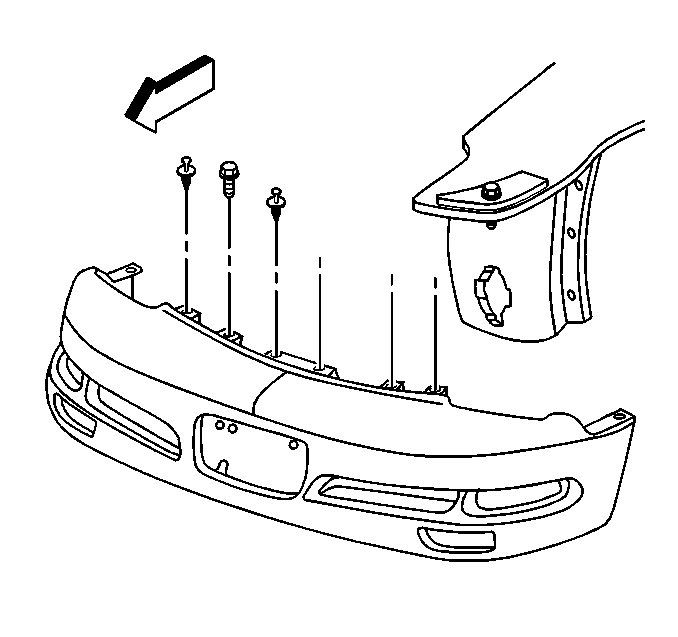
11. Remove fascia upper flange to fascia retainer push-pins and bolts.
12. Remove the fascia.
13. Remove the fascia grilles from the fascia. Refer to Fascia Grille Replacement .
14. Remove the fog lamps from the fascia. Refer to Fog Lamp Replacement - Front .
Installation Procedure
1. Install the fog lamps to the fascia. Refer to Fog Lamp Replacement - Front .
2. Install the fascia grilles to the fascia. Refer to Fascia Grille Replacement .
3. Position the fascia to the front of the vehicle.
4. Secure the upper flange of the fascia to the fascia retainer with the push-pin retainers.
Notice
Use the correct fastener in the correct location. Replacement fasteners must be the correct part number for that application. Fasteners requiring replacement or fasteners requiring the use of thread locking compound or sealant are identified in the service procedure. Do not use paints, lubricants, or corrosion inhibitors on fasteners or fastener joint surfaces unless specified. These coatings affect fastener torque and joint clamping force and may damage the fastener. Use the correct tightening sequence and specifications when installing fasteners in order to avoid damage to parts and systems.
5. Install the upper flange to fascia retainer bolts.
Tighten
Tighten the front fascia upper flange bolts to 5 N•m (44 lb in).
6. Raise and support the vehicle. Refer to Lifting and Jacking the Vehicle in General Information.
7. Connect the fascia harness connector.
8. Align the fascia to the fenders at the headlamp opening and flush the fender to the vertical joint.
9. Install the fascia nuts to the forward studs on the right and left fender reinforcements.
Tighten
Tighten the front fascia to the fender reinforcement stud nuts to 5 N•m (44 lb in).
10. Align and flush the fascia to the fender at the horizontal joint.
11. Install the fascia nuts to the rearward studs on the right and left front fender reinforcement.
Tighten
Tighten the front fascia to the fender reinforcement stud nuts to 5 N•m (44 lb in).
12. Install the wheelhouse to fascia bolts.
Tighten
Tighten the front wheelhouse to fascia bolts to 3 N•m (27 lb in).
13. Install the brake caliper cooling ducts to the fascia. Refer to Brake Caliper Cooling Duct Replacement - Front .
14. Install the fascia close out panels. Refer to Close Out Panel - Front Bumper Fascia Lower .
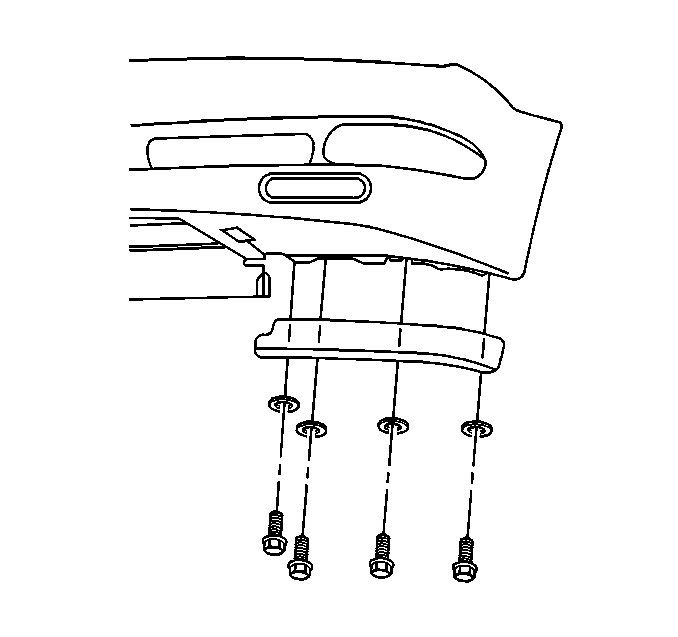
15. Install the lower fascia flange to radiator support screws.
Tighten
Tighten the front fascia lower flange to the radiator support screws to 8 N•m (71 lb in).
16. Install the fascia to skid bar bracket bolts.
Tighten
Tighten the front fascia to the skid bar bracket bolts to 3 N•m (27 lb in).
17. Install the air deflector. Refer to Air Deflector Replacement - Front Bumper Fascia .
Pic 9
18. Install the right and left outer valance. Refer to Valance Panel Replacement - Front .
19. Lower the vehicle.
Last edited by DeeGee; Dec 11, 2010 at 02:51 AM.


Tech Contributor
Joined: Dec 2003
Posts: 19,384
Likes: 87
From: Horncastle Lincolnshire, England
2023 C5 of the Year Finalist - Unmodified