





Radio bezel coating

Thread Starter
Melting Slicks


Joined: Sep 2002
Posts: 3,311
Likes: 8
From: Plano Texas
St. Jude Donor '12-'13-'14-'15-'16-'17
 Radio bezel coating
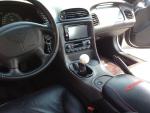
My radio bezel has a coating on it and it is peeling up in a few places, does anyone know what this coating is or what will take it off easily?

Burning Brakes


Joined: Nov 2001
Posts: 1,163
Likes: 19
From: Not far from COTA
I just went through this exercise. It is a GM spec coating.
a real process and you'll spend quite a bit on materials for a one time use
or buy a new one from Fitchner Chev, a forum sponsor, or another vendor if they can get one, for around $230 or so
parts Bob at Fitchner just got me a new one
here is a post I copied from a guy redoing an interior -- all references to part numbers are for C4 I think, not C5, but you get the idea
1. Console refinish
How to Repair & Refinish Interior Plastic Pieces
by Lars Grimsrud
SVE Automotive Restoration
Musclecar, Collector & Exotic Auto Repair & Restoration
Broomfield, CO Rev. New 5-7-01
Having seen some pretty rough-looking ‘Vette interiors, and some rougher-looking ‘Vette interior repair & refinish jobs, I thought I’d put together a little how-to on making your black plastic panels look better than new again.
Supplies needed:
(All supplies are available from most automotive paint supply stores. I have had very good luck with the PPG stores and dealers)
1 qt can PPG Wax, Grease & Silicone Remover (part # DX330)
1 gal PPG Vinyl Prep/conditioner (part # DX103) or -
1 pt bottle SEM Plastic Prep or SEM Vinyl Prep (part# 38348)
1 aerosol can SEM Original Trim Black Trim Paint (part # 39143)
1 aerosol can SEM Vinyl & Plastic Color Spray (part # 452340)
1 kit SEM Rigid SEM-Weld II plastic repair compound (part # 39508)
Lint-free paper towels (available in big, cheap bundles at the paint supply store)
Tack cloth
600-grit wet-or-dry sandpaper
Grey Scotchbrite pad
The black plastic dash and console panels in your C4 are not bare plastic. The are coated with what GM calls “Dulso.” This is what gives them the unique satin black appearance, but it’s also what makes them difficult to keep looking nice: as you rub and clean them, the Dulso wears off, leaving shiny plastic areas. The Dulso also stains if you spill things like acidic soft drinks on it, like Mountain Dew. A good refinishing process is certainly needed…
2. Before starting an interior refinish job, you need to be aware of the single biggest problem with interior parts: Silicone contamination. Interior “care” products, such as Armor-All, Son-Of-A-Gun, and others, contain HUGE amounts of silicone. Once this had been sprayed on interior parts, it is extremely difficult to remove. Silicone is a painter’s worst nightmare: even the slightest amount of silicone will cause primers and paints to “fisheye,” separate, and loose adhesion. Not good. in order to do a good plastic refinish job, we must first address preparation and silicone removal.
3. Silicone cannot be removed by sanding or abrading (like with a Scotch-Brite pad or SOS pad). In fact, any attempt to sand or abrade the parts to clean them will embed the silicone into the parts, and you will be doomed to failure. DO NOT sand the parts before doing a good cleanup on them.
4. First clean the parts in hot water with dishsoap in it. Use a sponge (something non-abrasive) and put some effort into it. Rinse them off and dry them. Dump out the contaminated water and don’t use it again on the parts. I have an automatic parts cleaner at my house: my wife thinks it’s a dishwasher, but I know it’s an automotive parts cleaner. Just turn the drier heat “off” before running your plastic parts through it. I leave the heat “on” and put it on the “potscrubber’ cycle when I run rods and pistons through it (I don’t understand why this upsets my wife: don’t they advertise that these machines remove caked-on grease…?).
5. Next, use your silicone remover, following the directions on the bottle. You will soak a lint-free paper towel, wipe once in one direction, flip it over, and do it again. Then throw that towel away and do it again with a fresh one. If you wipe back and forth with the same towel, all you will do is smear the invisible silicone all over the parts with no gain. So do the one-wipe thing and use up some of those cheap towels you just bought. Once you’ve done this several times to all the parts, give them a wipe-down with the grease and wax remover, using the same technique.
6. The parts should now be about as contaminant-free as they’re going to get. If they have nicks or etched-in imperfections, you can now use some sandpaper or Scotchbrite to smooth them out. If they are cracked or damaged, clean the damaged area with the SEM Plastic Prep and use the SEM-Weld II two-part plastic repair kit to fill the damage and sand it out like body filler. It sands really nice, and is easy to form. If you sand the parts, make sure that the parts do not have a finish any coarser than a wet 600-grit finish when you’re done: anything less (even wet 400-grit) will leave visible scratch marks in the finished product.
7. Final prep step is to clean the parts completely with the SEM Plastic Prep or Vinyl Prep. This stuff actually slightly softens and dissolves the surface of the parts, and makes the surface “fuse” itself to the paint you will apply. So don’t rub aggressively with these prep products: follow the label directions and give the parts a gentle wipe-down. Rinse with water. If your parts are perfectly prepared, the water will “sheen” off the parts and will not separate or “break.” This is known as a “water break free surface condition,” and indicates a contaminant-free, clean surface. Dry the parts.
8. The SEM Trim Paint is actually an exterior trim paint product, but it works perfectly on the ‘Vette metal parts in the dash, like the lid for the cup holder. The Vinyl and Plastic Color Spray is to be used on all of the plastic parts. Lay out your parts and lightly go over them with the tack cloth to remove any dust or particles. Apply the first couple of coats of paint very light and fairly dry, in a criss-cross pattern to assure coverage. Observe if you are getting any fish-eying or separations. If you are, the areas that are fish-eying must be coated with VERY light and VERY dry coats at first until they are covered with the paint, allowing the paint to dry between these coats. Be patient. Don’t try to cover it all with a big wet coat at first. Once you have complete coverage with your light mist coats and this has dried to a tack-free state, lay down two medium, even coats. This will give you a perfect, even, beautiful sheen to your parts.
Install the parts back in your ‘Vette and admire how good of a painter you are! For additional info on SEM products, or for a distributor near you, contact them at:
SEM Products 1-800-831-1122
a real process and you'll spend quite a bit on materials for a one time use
or buy a new one from Fitchner Chev, a forum sponsor, or another vendor if they can get one, for around $230 or so
parts Bob at Fitchner just got me a new one
here is a post I copied from a guy redoing an interior -- all references to part numbers are for C4 I think, not C5, but you get the idea
1. Console refinish
How to Repair & Refinish Interior Plastic Pieces
by Lars Grimsrud
SVE Automotive Restoration
Musclecar, Collector & Exotic Auto Repair & Restoration
Broomfield, CO Rev. New 5-7-01
Having seen some pretty rough-looking ‘Vette interiors, and some rougher-looking ‘Vette interior repair & refinish jobs, I thought I’d put together a little how-to on making your black plastic panels look better than new again.
Supplies needed:
(All supplies are available from most automotive paint supply stores. I have had very good luck with the PPG stores and dealers)
1 qt can PPG Wax, Grease & Silicone Remover (part # DX330)
1 gal PPG Vinyl Prep/conditioner (part # DX103) or -
1 pt bottle SEM Plastic Prep or SEM Vinyl Prep (part# 38348)
1 aerosol can SEM Original Trim Black Trim Paint (part # 39143)
1 aerosol can SEM Vinyl & Plastic Color Spray (part # 452340)
1 kit SEM Rigid SEM-Weld II plastic repair compound (part # 39508)
Lint-free paper towels (available in big, cheap bundles at the paint supply store)
Tack cloth
600-grit wet-or-dry sandpaper
Grey Scotchbrite pad
The black plastic dash and console panels in your C4 are not bare plastic. The are coated with what GM calls “Dulso.” This is what gives them the unique satin black appearance, but it’s also what makes them difficult to keep looking nice: as you rub and clean them, the Dulso wears off, leaving shiny plastic areas. The Dulso also stains if you spill things like acidic soft drinks on it, like Mountain Dew. A good refinishing process is certainly needed…
2. Before starting an interior refinish job, you need to be aware of the single biggest problem with interior parts: Silicone contamination. Interior “care” products, such as Armor-All, Son-Of-A-Gun, and others, contain HUGE amounts of silicone. Once this had been sprayed on interior parts, it is extremely difficult to remove. Silicone is a painter’s worst nightmare: even the slightest amount of silicone will cause primers and paints to “fisheye,” separate, and loose adhesion. Not good. in order to do a good plastic refinish job, we must first address preparation and silicone removal.
3. Silicone cannot be removed by sanding or abrading (like with a Scotch-Brite pad or SOS pad). In fact, any attempt to sand or abrade the parts to clean them will embed the silicone into the parts, and you will be doomed to failure. DO NOT sand the parts before doing a good cleanup on them.
4. First clean the parts in hot water with dishsoap in it. Use a sponge (something non-abrasive) and put some effort into it. Rinse them off and dry them. Dump out the contaminated water and don’t use it again on the parts. I have an automatic parts cleaner at my house: my wife thinks it’s a dishwasher, but I know it’s an automotive parts cleaner. Just turn the drier heat “off” before running your plastic parts through it. I leave the heat “on” and put it on the “potscrubber’ cycle when I run rods and pistons through it (I don’t understand why this upsets my wife: don’t they advertise that these machines remove caked-on grease…?).
5. Next, use your silicone remover, following the directions on the bottle. You will soak a lint-free paper towel, wipe once in one direction, flip it over, and do it again. Then throw that towel away and do it again with a fresh one. If you wipe back and forth with the same towel, all you will do is smear the invisible silicone all over the parts with no gain. So do the one-wipe thing and use up some of those cheap towels you just bought. Once you’ve done this several times to all the parts, give them a wipe-down with the grease and wax remover, using the same technique.
6. The parts should now be about as contaminant-free as they’re going to get. If they have nicks or etched-in imperfections, you can now use some sandpaper or Scotchbrite to smooth them out. If they are cracked or damaged, clean the damaged area with the SEM Plastic Prep and use the SEM-Weld II two-part plastic repair kit to fill the damage and sand it out like body filler. It sands really nice, and is easy to form. If you sand the parts, make sure that the parts do not have a finish any coarser than a wet 600-grit finish when you’re done: anything less (even wet 400-grit) will leave visible scratch marks in the finished product.
7. Final prep step is to clean the parts completely with the SEM Plastic Prep or Vinyl Prep. This stuff actually slightly softens and dissolves the surface of the parts, and makes the surface “fuse” itself to the paint you will apply. So don’t rub aggressively with these prep products: follow the label directions and give the parts a gentle wipe-down. Rinse with water. If your parts are perfectly prepared, the water will “sheen” off the parts and will not separate or “break.” This is known as a “water break free surface condition,” and indicates a contaminant-free, clean surface. Dry the parts.
8. The SEM Trim Paint is actually an exterior trim paint product, but it works perfectly on the ‘Vette metal parts in the dash, like the lid for the cup holder. The Vinyl and Plastic Color Spray is to be used on all of the plastic parts. Lay out your parts and lightly go over them with the tack cloth to remove any dust or particles. Apply the first couple of coats of paint very light and fairly dry, in a criss-cross pattern to assure coverage. Observe if you are getting any fish-eying or separations. If you are, the areas that are fish-eying must be coated with VERY light and VERY dry coats at first until they are covered with the paint, allowing the paint to dry between these coats. Be patient. Don’t try to cover it all with a big wet coat at first. Once you have complete coverage with your light mist coats and this has dried to a tack-free state, lay down two medium, even coats. This will give you a perfect, even, beautiful sheen to your parts.
Install the parts back in your ‘Vette and admire how good of a painter you are! For additional info on SEM products, or for a distributor near you, contact them at:
SEM Products 1-800-831-1122
Burning Brakes
Joined: Nov 2001
Posts: 1,163
Likes: 19
From: Not far from COTA
Not dissing anyone, especially Dennis
I asked the same question, and the answer I got from Dennis in a private email was to use a particular part number SEM product. He said he uses a custom mix product from his local paint supplier but the SEM product would be good for a DIYer. It was great of him to respond to my question so I bought the product and cleaned my bezel with soap/water and then rubbing alchol and sprayed it with the SEM product. Hadn't found the other info on how to refinish at that point.
Got a flat black finish that marred upon any touch and rubbed off at the slightest touch. Upon asking more questions, Dennis said you also need to paint with color coat and then clear coat after the texture coat. With the benefit of hindsight, makes perfect sense now but I was hoping for a one step process and it didn't work that way for me.
Asked Dennis if he would refinish my part and how much, and he never answered that question.
I'm sure he's a great vendor who reworks bezels as part of his core electronics business, but he's apparently not interested in general refinishing work not associated with new radio stuff. I understand that, it's not his specialty or target market segment.
So DIY or buy new.
Not intending to hurt anyone's feelings here, just telling my experience.
I asked the same question, and the answer I got from Dennis in a private email was to use a particular part number SEM product. He said he uses a custom mix product from his local paint supplier but the SEM product would be good for a DIYer. It was great of him to respond to my question so I bought the product and cleaned my bezel with soap/water and then rubbing alchol and sprayed it with the SEM product. Hadn't found the other info on how to refinish at that point.
Got a flat black finish that marred upon any touch and rubbed off at the slightest touch. Upon asking more questions, Dennis said you also need to paint with color coat and then clear coat after the texture coat. With the benefit of hindsight, makes perfect sense now but I was hoping for a one step process and it didn't work that way for me.
Asked Dennis if he would refinish my part and how much, and he never answered that question.
I'm sure he's a great vendor who reworks bezels as part of his core electronics business, but he's apparently not interested in general refinishing work not associated with new radio stuff. I understand that, it's not his specialty or target market segment.
So DIY or buy new.
Not intending to hurt anyone's feelings here, just telling my experience.
Last edited by NealB; Jun 2, 2011 at 08:44 AM.

Administrator


Joined: Mar 2001
Posts: 368,131
Likes: 24,733
From: In a parallel universe. Currently own 2014 Stingray Coupe.
C7 of the Year - Modified Finalist 2021
MO Events Coordinator
St. Jude Co-Organizer
St. Jude Donor '03 thru '25
NCM Sinkhole Donor
CI 5, 8 & 11 Veteran
Thanks for the info, Neal. Putting it in my archives files.

Melting Slicks
Joined: Jun 2007
Posts: 2,704
Likes: 4
From: Lone Star State
Dennis was helping out the best he can and is very busy.
I imagine what it would cost and how much time it takes, you could go Double Din. Do it right, do it once
I imagine what it would cost and how much time it takes, you could go Double Din. Do it right, do it once
Last edited by 4SFED Z; Jun 2, 2011 at 09:29 AM.
Corvette Stories
The Best of Corvette for Corvette Enthusiasts

How Much Horsepower Every Corvette Engine "LOST" in 1972
Joe Kucinski
Top 10 DOs and DON'Ts for Protecting Your Convertible Top!
Michael S. Palmer
Top 10 Most Explosive Corvettes Ever Made: Power-to-Weight Ratio Ranked!
Joe Kucinski
150 hp to 1,250 hp: Every Corvette Generation Compared by the Specs That Matter
Joe Kucinski
8 Coolest Corvette Pace Cars (and Replicas) of All Time
Verdad Gallardo
Top 10 Corvette Engines RANKED by Peak Torque (70+ Years of Muscle!)
Joe Kucinski
Corvette ZR1X Will Be Pacing the Indy 500, And Could Probably Race, Too!
Verdad Gallardo
Top 10 Corvettes Coming to Mecum Indy 2026!
Brett Foote
Top 10 C9 Corvette MUST-HAVES to Fix These C8 Generation Flaws!
Michael S. Palmer
Team Owner


Joined: May 2006
Posts: 21,473
Likes: 356
From: Palmdale, Ca----- 2009 Cyber Gray 4LT A6 F55 452 RWHP 422 RWTQ- RIP 1998 C5 734 RWHP & 585 RWTQ-----
Contact Dennis @ Double D Mods, he does a lot of Bezel mods and he uses a factory looking and quality black coating on them that does not peel.
He is one of our forum sponsors!
Thanks,Matt
He is one of our forum sponsors!
Thanks,Matt

Racer

Joined: Jun 2001
Posts: 261
Likes: 3
From: Elizabethtown Kentucky
What everyone has said previously is true. Cleaning and preping are the most important parts. I have stripped and painted the console and trim pieces in my vert to match the color of the car. I used Sherwin Williams automotive paint with good results. Been three years now and no issues.

Former Vendor
Joined: Sep 2005
Posts: 18,293
Likes: 137
From: Hazel Green, Wi www.doubledmods.com
St. Jude Donor '12-'13
Not dissing anyone, especially Dennis
I asked the same question, and the answer I got from Dennis in a private email was to use a particular part number SEM product. He said he uses a custom mix product from his local paint supplier but the SEM product would be good for a DIYer. It was great of him to respond to my question so I bought the product and cleaned my bezel with soap/water and then rubbing alchol and sprayed it with the SEM product. Hadn't found the other info on how to refinish at that point.
Got a flat black finish that marred upon any touch and rubbed off at the slightest touch. Upon asking more questions, Dennis said you also need to paint with color coat and then clear coat after the texture coat. With the benefit of hindsight, makes perfect sense now but I was hoping for a one step process and it didn't work that way for me.
Asked Dennis if he would refinish my part and how much, and he never answered that question.
I'm sure he's a great vendor who specializes in reworking bezels for his radio products, but he's apparently not interested in general refinishing work not associated with new radio stuff. I understand that, it's not his specialty or target market segment.
So DIY or buy new.
Not intending to hurt anyone's feelings here, just telling my experience.
I asked the same question, and the answer I got from Dennis in a private email was to use a particular part number SEM product. He said he uses a custom mix product from his local paint supplier but the SEM product would be good for a DIYer. It was great of him to respond to my question so I bought the product and cleaned my bezel with soap/water and then rubbing alchol and sprayed it with the SEM product. Hadn't found the other info on how to refinish at that point.
Got a flat black finish that marred upon any touch and rubbed off at the slightest touch. Upon asking more questions, Dennis said you also need to paint with color coat and then clear coat after the texture coat. With the benefit of hindsight, makes perfect sense now but I was hoping for a one step process and it didn't work that way for me.
Asked Dennis if he would refinish my part and how much, and he never answered that question.
I'm sure he's a great vendor who specializes in reworking bezels for his radio products, but he's apparently not interested in general refinishing work not associated with new radio stuff. I understand that, it's not his specialty or target market segment.
So DIY or buy new.
Not intending to hurt anyone's feelings here, just telling my experience.
responded May 19th at 11:32 AM and said it was 75.00 plus the return shipping to the email you sent me with the pics
also noted once i got it even with it having no modifications is would be a couple 4 weeks before i could touch it.
You also sent me a message back on May 21st at 2:26 pm saying you have the SEM texture and was asking about a finish coat on top of it
I replied to that at 4:21 PM same day saying you need to then paint over the top and clear it
I am sorry if you didnt get message. I get over 300 emails and messages a day and its very hard to keep up with all of them and answer as fast as I like to for everyone
right now we are simply burried in bezel orders as I am not even on here for more than a few minutes at a time to glance at the forum so thats why there would be a wait.
The SEM products I told you will work just fine. if you wanted to do it yourself.
You can always try and but a new one as well. I say try as I know GM is out of them as I ordered 30 of them last week and only had 4 show up.
The new bezels from GM just so you know do not come with coating and are not even close to the same color as well. They are more gray in color.
Your more than welcome to call me direct as well
I have my 23 year old daughter now working full time answering phones and messages for me to help out
Dennis

Melting Slicks
Joined: Oct 2007
Posts: 2,724
Likes: 2
From: Holland Landing Ontario
Check the Parts for Sale page. Lots of people have updated to Double Din bezels and have the old one lying around. Mine is in my shed out back with the oem cat back exhaust, blose stereo and a bunch of other stuff.

Team Owner


Joined: Dec 1999
Posts: 174,312
Likes: 1,217
From: Here
Pilot of Beer Force 1
Tampa Regional Coordinator
CI 4-5-6-7-8 Veteran
Organizer St. Jude Fundraiser
I believe in the Beer Fairy
really folks we don't need added drama...a little communication issue is not a big deal.
I think we have it resolved.
back to your regular posting
I think we have it resolved.
back to your regular posting
