


2000 Black FRC Progress Thread!

Thread Starter
Drifting


Joined: Apr 2015
Posts: 1,893
Likes: 295
From: Buffalo NY
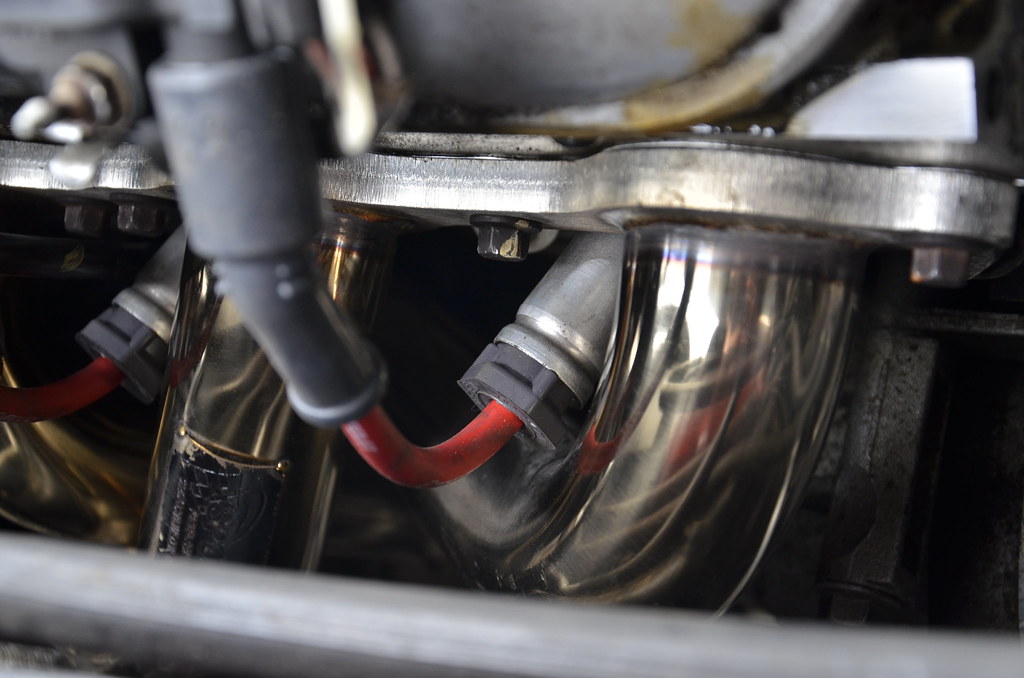
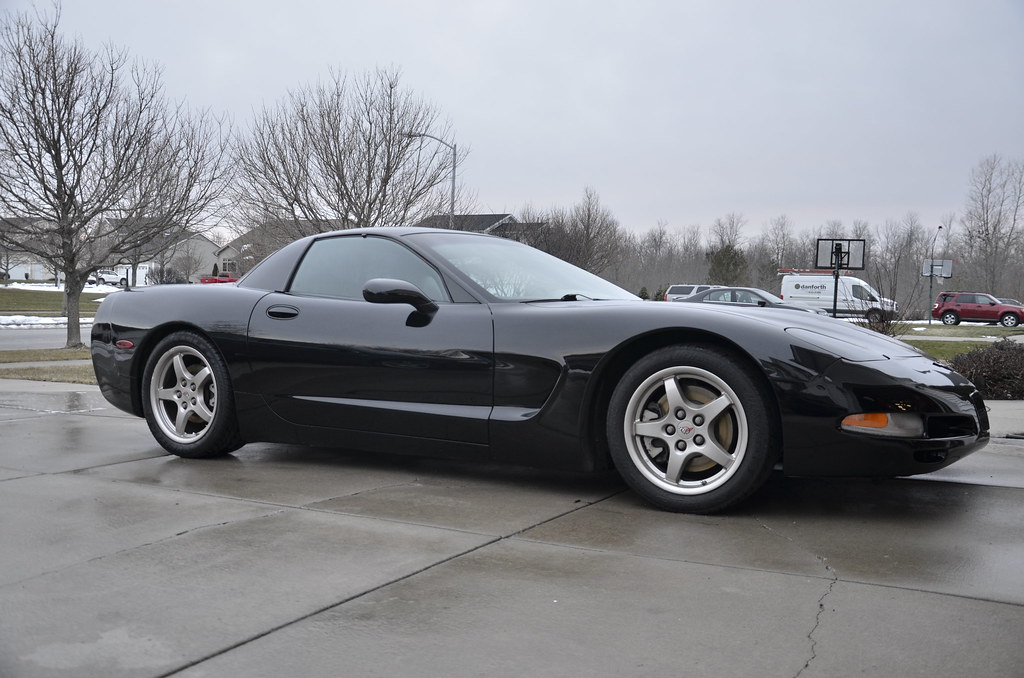
rather than upgrade to the newer 01-04 dipstick I made the older version work by bolting to the AIR fitting. the AIR won't be around for long, will wait until I install the LS6 intake before tuning
 _DSC4752 by Norbert Ogiba, on Flickr
Fired her up, checked for leaks, the band clamps on the intermediate pipes suck, so I'll replace those with proper quality ones
pipes getting nice and golden with heat, paid off to wipe them down
 _DSC4755 by Norbert Ogiba, on Flickr
 _DSC4756 by Norbert Ogiba, on Flickr
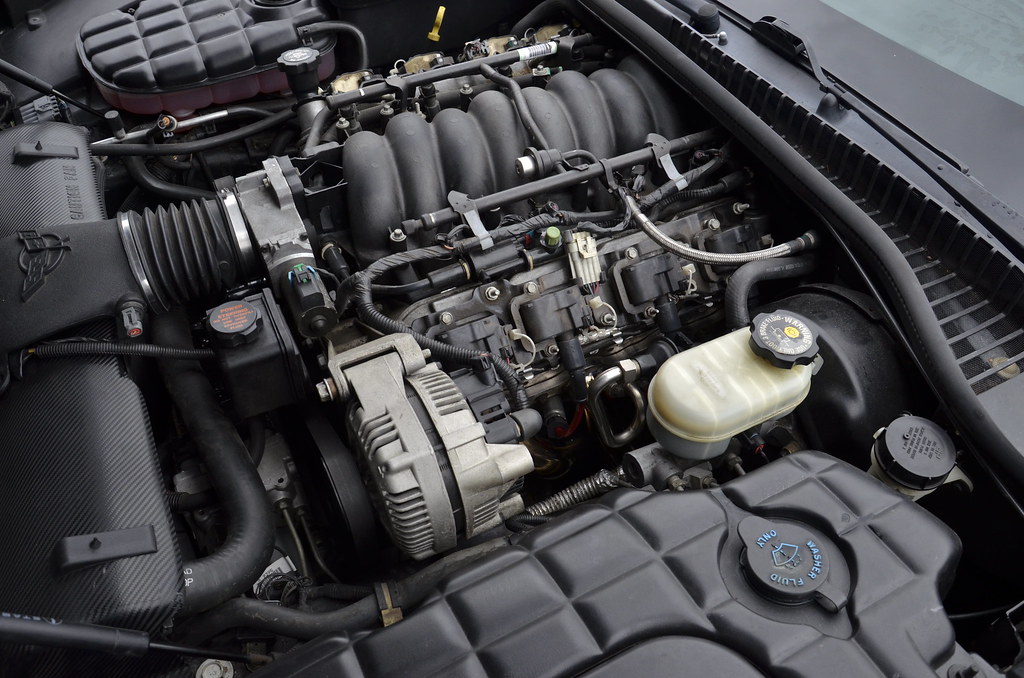
Looks stock otherwise, fuel rail covers are off to get scrubbed
 _DSC4757 by Norbert Ogiba, on Flickr
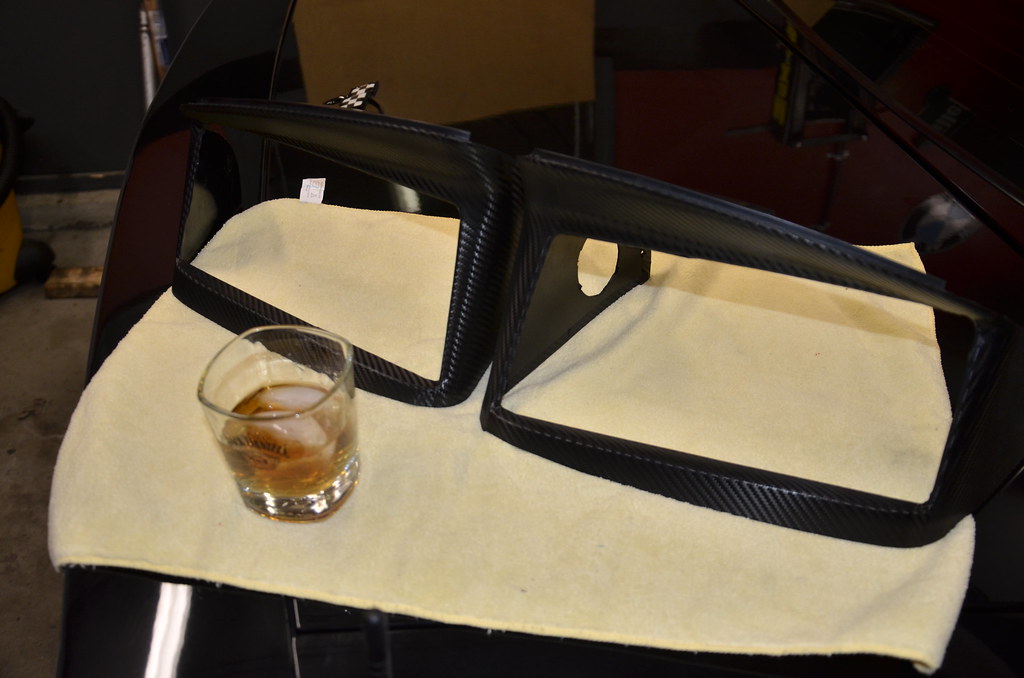
removed the headlight bezels and wrapped in Carbon Fiber Vinyl, with a well earned treat
rather than upgrade to the newer 01-04 dipstick I made the older version work by bolting to the AIR fitting. the AIR won't be around for long, will wait until I install the LS6 intake before tuning
_DSC4752 by Norbert Ogiba, on Flickr
Fired her up, checked for leaks, the band clamps on the intermediate pipes suck, so I'll replace those with proper quality ones
pipes getting nice and golden with heat, paid off to wipe them down
_DSC4755 by Norbert Ogiba, on Flickr
_DSC4756 by Norbert Ogiba, on Flickr
Looks stock otherwise, fuel rail covers are off to get scrubbed
_DSC4757 by Norbert Ogiba, on Flickr
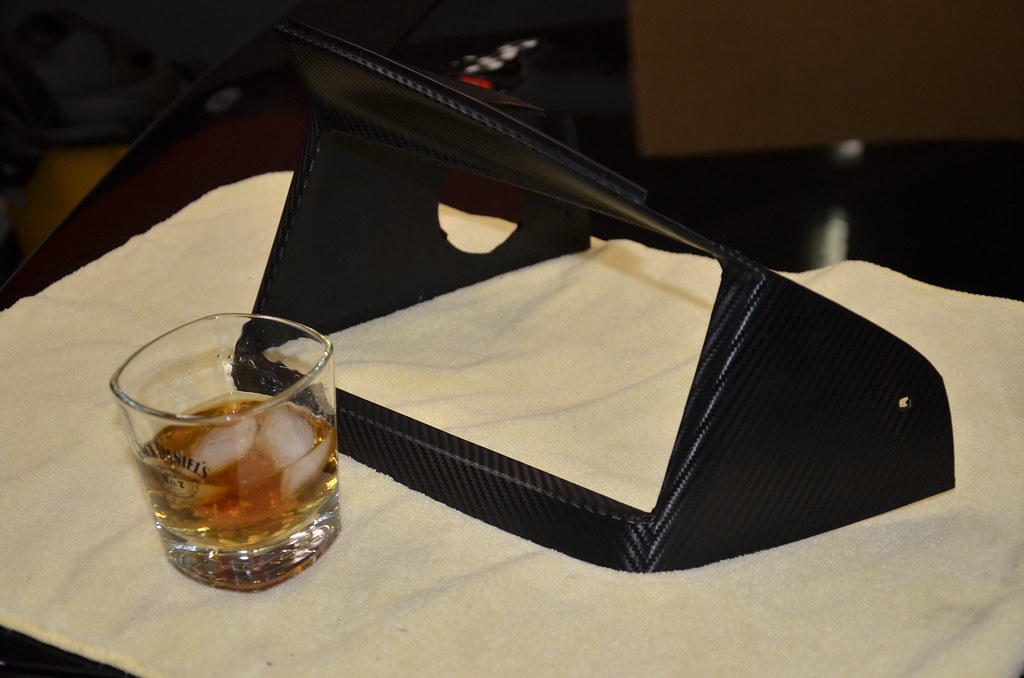
removed the headlight bezels and wrapped with Carbon Fiber Vinyl, ended that night with a treat
 _DSC4759 by Norbert Ogiba, on Flickr
 _DSC4760 by Norbert Ogiba, on Flickr
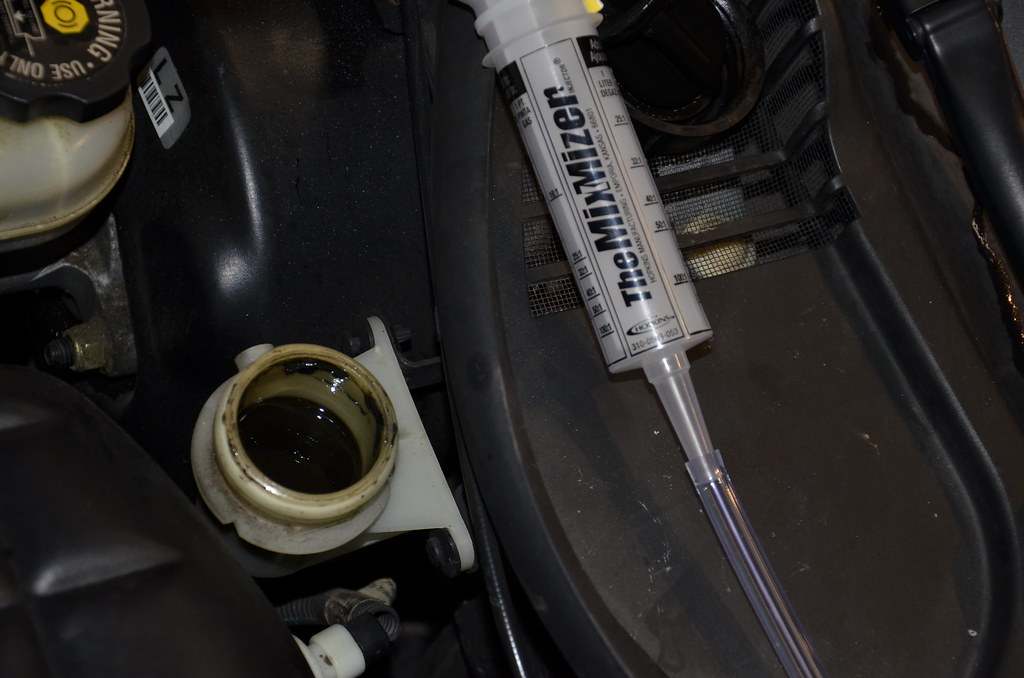
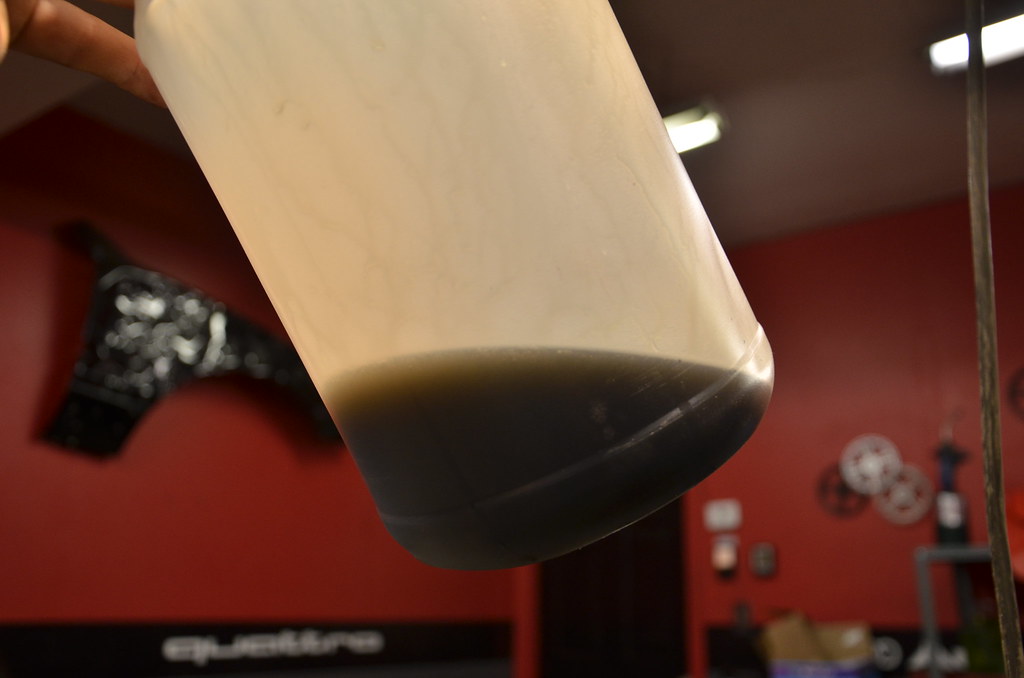
Finished up by doing the Ranger method for clutch fluid. Put 100 miles on it Sunday in the countryside, clutch went to the floor after a couple gear changes at very high RPM. Hopefully this helps.
Fluid definitely original
 _DSC4763 by Norbert Ogiba, on Flickr
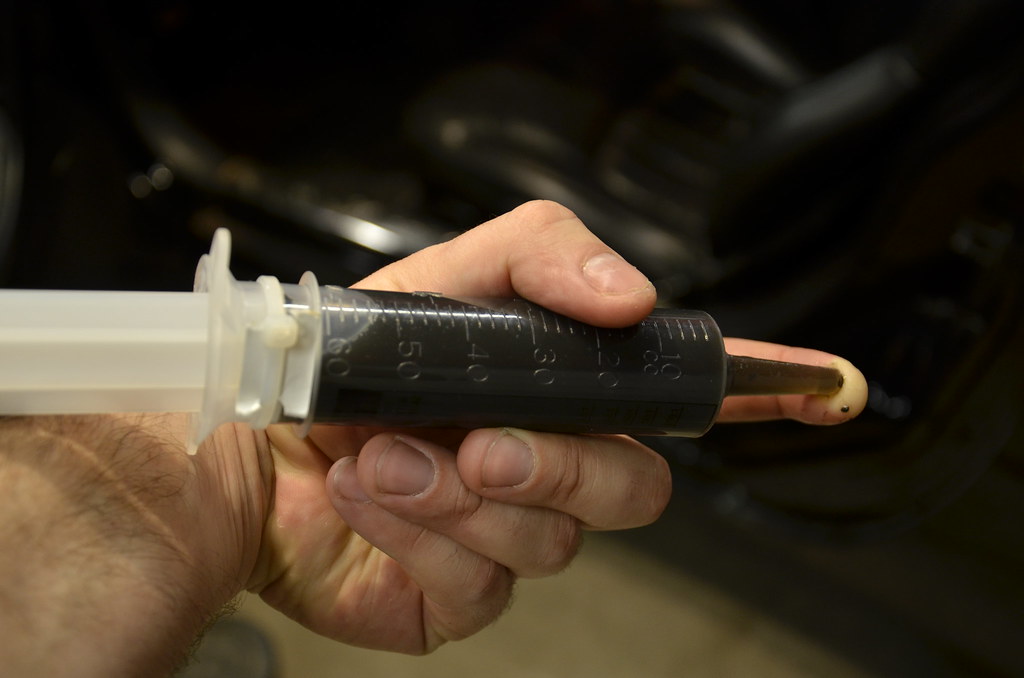
totally opaque
 _DSC4764 by Norbert Ogiba, on Flickr
 _DSC4767 by Norbert Ogiba, on Flickr
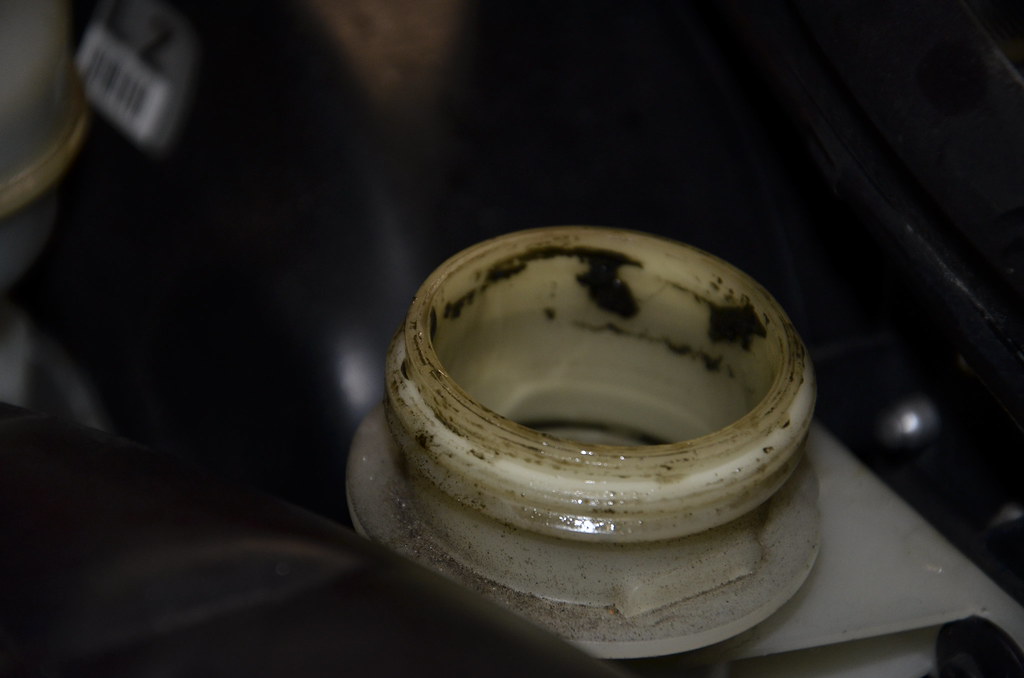
getting there
 _DSC4769 by Norbert Ogiba, on Flickr
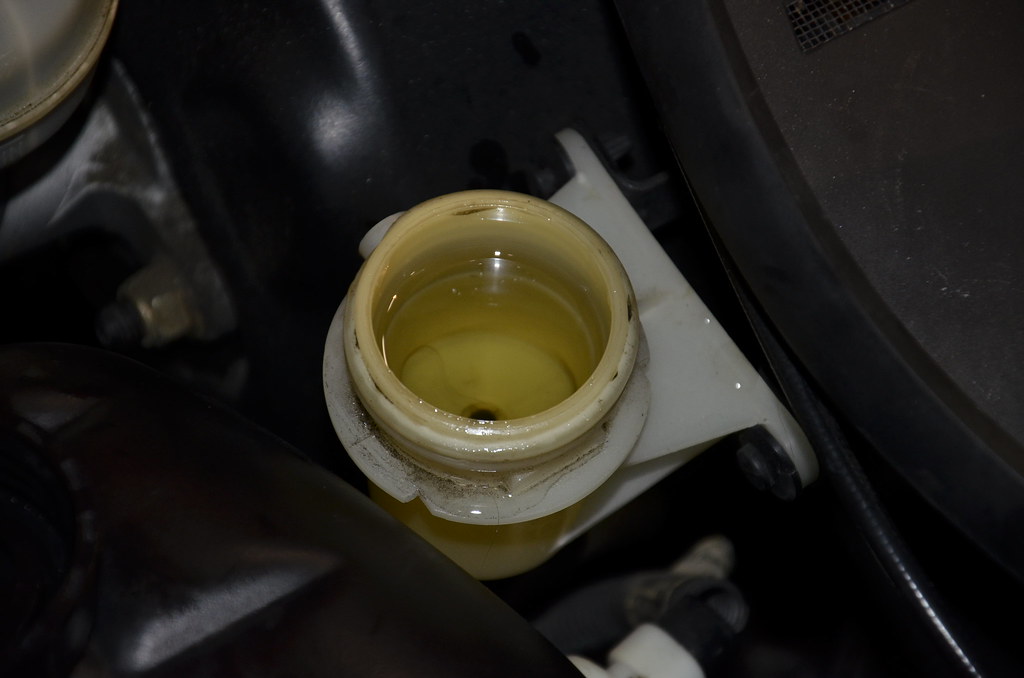
Final product of what was removed
 _DSC4770 by Norbert Ogiba, on Flickr
More to come this week, I'm working on installing an AUX connection for my phone with Bluetooth capability
_DSC4752 by Norbert Ogiba, on FlickrFired her up, checked for leaks, the band clamps on the intermediate pipes suck, so I'll replace those with proper quality ones
pipes getting nice and golden with heat, paid off to wipe them down
_DSC4755 by Norbert Ogiba, on Flickr_DSC4756 by Norbert Ogiba, on FlickrLooks stock otherwise, fuel rail covers are off to get scrubbed
_DSC4757 by Norbert Ogiba, on Flickrremoved the headlight bezels and wrapped in Carbon Fiber Vinyl, with a well earned treat
rather than upgrade to the newer 01-04 dipstick I made the older version work by bolting to the AIR fitting. the AIR won't be around for long, will wait until I install the LS6 intake before tuning
_DSC4752 by Norbert Ogiba, on FlickrFired her up, checked for leaks, the band clamps on the intermediate pipes suck, so I'll replace those with proper quality ones
pipes getting nice and golden with heat, paid off to wipe them down
_DSC4755 by Norbert Ogiba, on Flickr_DSC4756 by Norbert Ogiba, on FlickrLooks stock otherwise, fuel rail covers are off to get scrubbed
_DSC4757 by Norbert Ogiba, on Flickrremoved the headlight bezels and wrapped with Carbon Fiber Vinyl, ended that night with a treat
_DSC4759 by Norbert Ogiba, on Flickr_DSC4760 by Norbert Ogiba, on FlickrFinished up by doing the Ranger method for clutch fluid. Put 100 miles on it Sunday in the countryside, clutch went to the floor after a couple gear changes at very high RPM. Hopefully this helps.
Fluid definitely original
_DSC4763 by Norbert Ogiba, on Flickrtotally opaque
_DSC4764 by Norbert Ogiba, on Flickr_DSC4767 by Norbert Ogiba, on Flickrgetting there
_DSC4769 by Norbert Ogiba, on FlickrFinal product of what was removed
_DSC4770 by Norbert Ogiba, on FlickrMore to come this week, I'm working on installing an AUX connection for my phone with Bluetooth capability
Last edited by nsogiba; Feb 23, 2016 at 08:31 PM.
Thread Starter
Drifting
Joined: Apr 2015
Posts: 1,893
Likes: 295
From: Buffalo NY
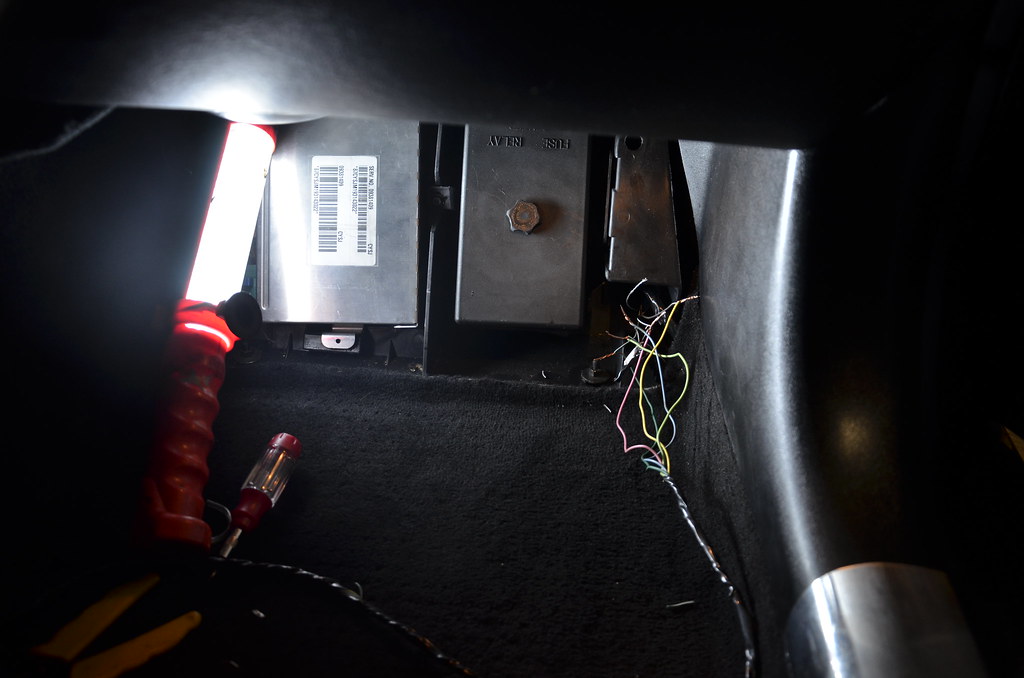
Time for some tunes
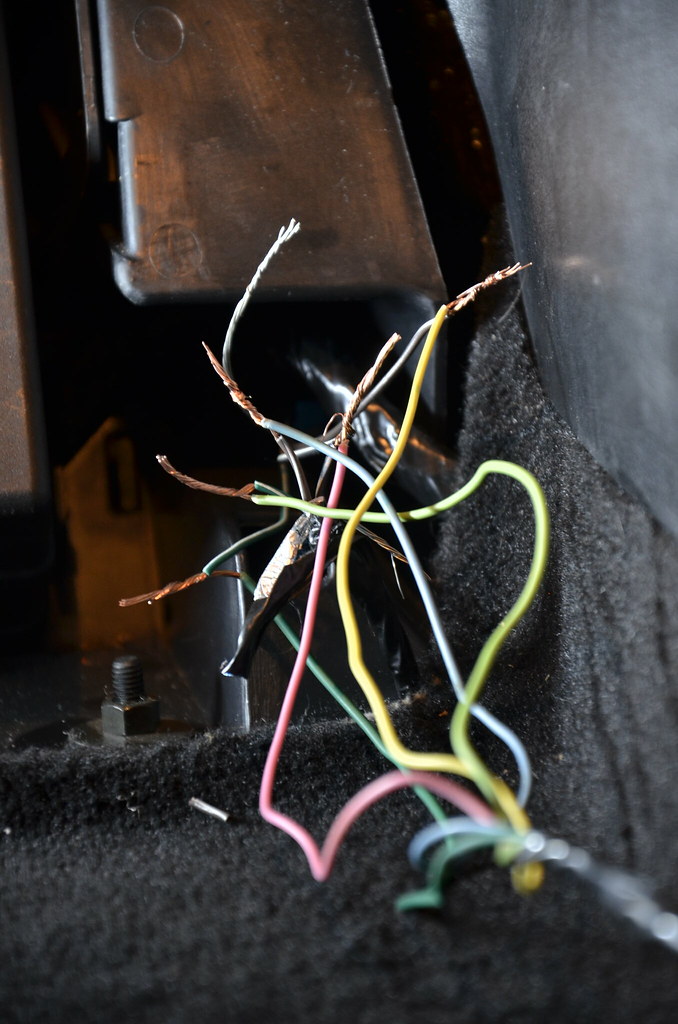
So i pulled the passenger foot kick panel and cut the CD changer connector, and after thinking about how I wanted to route the radio shack connector, I sat down at the kitchen table and soldered wires to the 5 pins using bits of my old GM truck harness from my swap. small scale soldering is not my strong point but I got it done.
I made temporary connections to everything (left the bare shield wires disconnected from anything), stuck a CD in the changer, crossed my fingers, reconnected the battery, and let her rip
 _DSC4771 by Norbert Ogiba, on Flickr
SUCCESS! Using a 3.5mm to 3.5mm I was able to get my phone to play music and it sounded great. Figured I'd take it one step further, and plugged in my Miccus Mini Bluetooth adapter, which is a tiny portable unit that takes a bluetooth audio signal (like from your smartphone) and converts it to audio output through a 3.5mm jack. After making sure it was paired properly, that worked perfectly as well! So now I have wireless bluetooth AUX audio through my smartphone, which will be great this summer on those long road trips. Sure beats those expensive AUX converter units
Now I need to clean up this mess, solder and heatshrink everything, and run the aux port into the center cubby where the bluetooth module will be housed.
 _DSC4773 by Norbert Ogiba, on Flickr
So i pulled the passenger foot kick panel and cut the CD changer connector, and after thinking about how I wanted to route the radio shack connector, I sat down at the kitchen table and soldered wires to the 5 pins using bits of my old GM truck harness from my swap. small scale soldering is not my strong point but I got it done.
I made temporary connections to everything (left the bare shield wires disconnected from anything), stuck a CD in the changer, crossed my fingers, reconnected the battery, and let her rip
_DSC4771 by Norbert Ogiba, on FlickrSUCCESS! Using a 3.5mm to 3.5mm I was able to get my phone to play music and it sounded great. Figured I'd take it one step further, and plugged in my Miccus Mini Bluetooth adapter, which is a tiny portable unit that takes a bluetooth audio signal (like from your smartphone) and converts it to audio output through a 3.5mm jack. After making sure it was paired properly, that worked perfectly as well! So now I have wireless bluetooth AUX audio through my smartphone, which will be great this summer on those long road trips. Sure beats those expensive AUX converter units
Now I need to clean up this mess, solder and heatshrink everything, and run the aux port into the center cubby where the bluetooth module will be housed.
_DSC4773 by Norbert Ogiba, on Flickr

Drifting

Joined: Sep 2007
Posts: 1,649
Likes: 50
From: Goldsboro NC
Nice thread and pics!!! Sounds like fun. Haha ive had my car for so long, I forgot what it was like when I first got her doing a lot of what you have just recently accomplished. Keep up the good work!!
Thread Starter
Drifting
Joined: Apr 2015
Posts: 1,893
Likes: 295
From: Buffalo NY
Few buddies sent me this, got a chuckle out of it
 photo 1 by Norbert Ogiba, on Flickr
I found this guy on ebay, used to love building these as a kid, kinda cool that now I own a car that I can have a model of
 photo 3 by Norbert Ogiba, on Flickr
So I was on the fence about the body side moldings but decided to pull them off and I'm really glad I did. It cleaned up the body lines a ton. Spent a couple hours Saturday doing it
Off to Wallyworld to get supplies. I am driving this thing every chance I get!
 photo 2 by Norbert Ogiba, on Flickr
 _DSC4774 by Norbert Ogiba, on Flickr
Rinse her down with hot water to soften the tape a bit and clean any dirt and grime off
 _DSC4776 by Norbert Ogiba, on Flickr
This piece came off with very minimal effort, surprisingly
 _DSC4777 by Norbert Ogiba, on Flickr
Glue came off easily too. Not the case for the rest of the doors
 _DSC4778 by Norbert Ogiba, on Flickr
Time to start flossin' baby
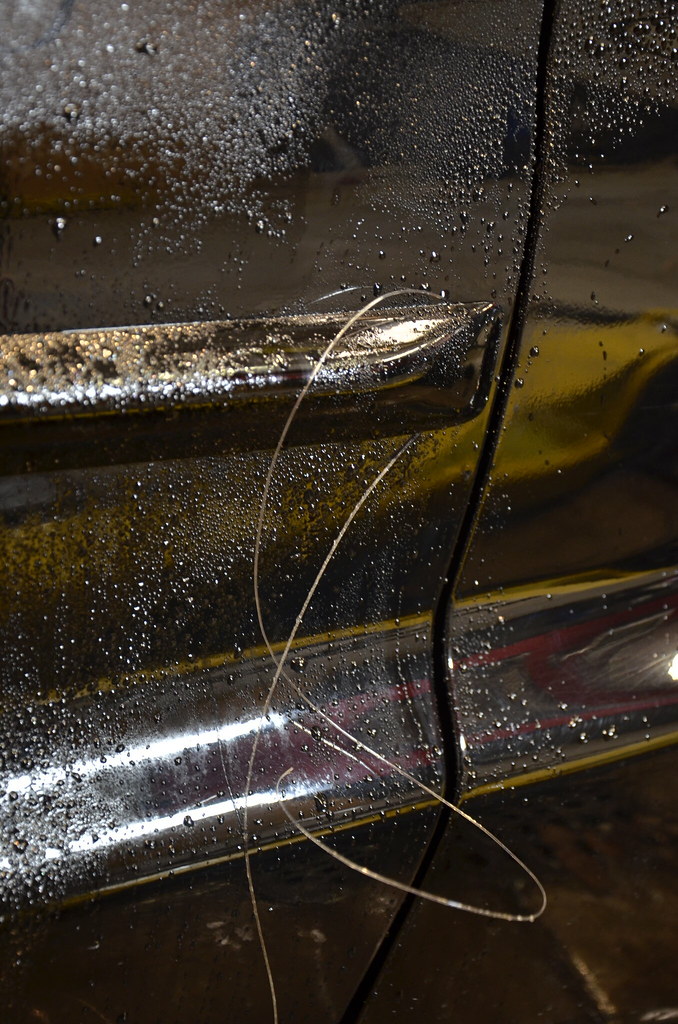 _DSC4780 by Norbert Ogiba, on Flickr
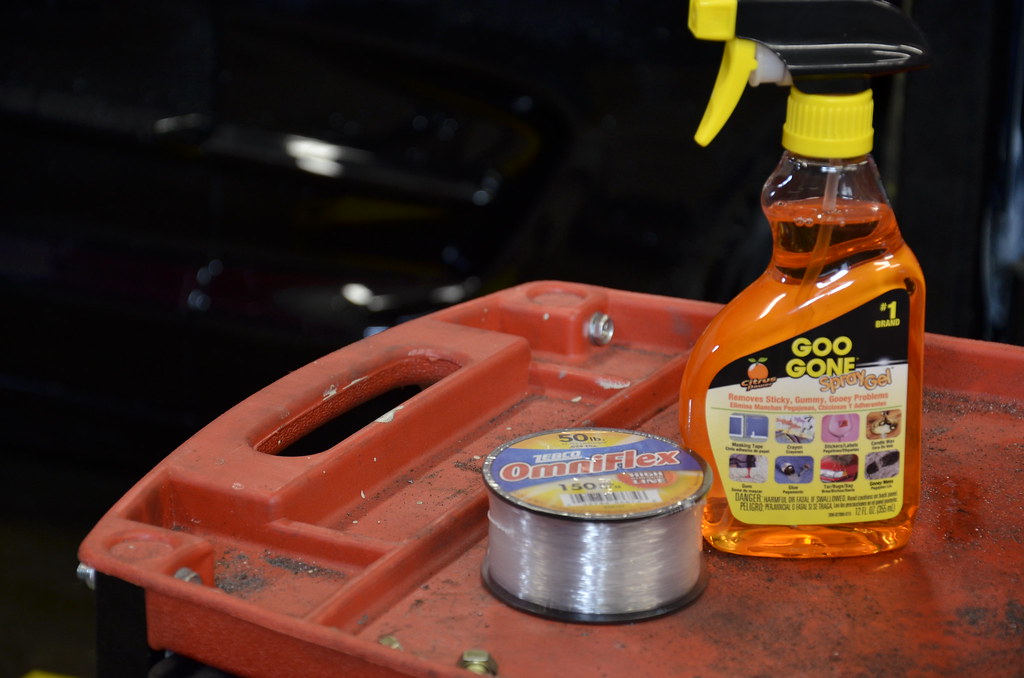
So the glue on the door is miserable soft foamy stuff, I spent about half an hour peeling chunks off with my fingernails before I had enough. off to the store to buy this bad boy which was the best thing since sliced bread and craft beer.
 _DSC4782 by Norbert Ogiba, on Flickr
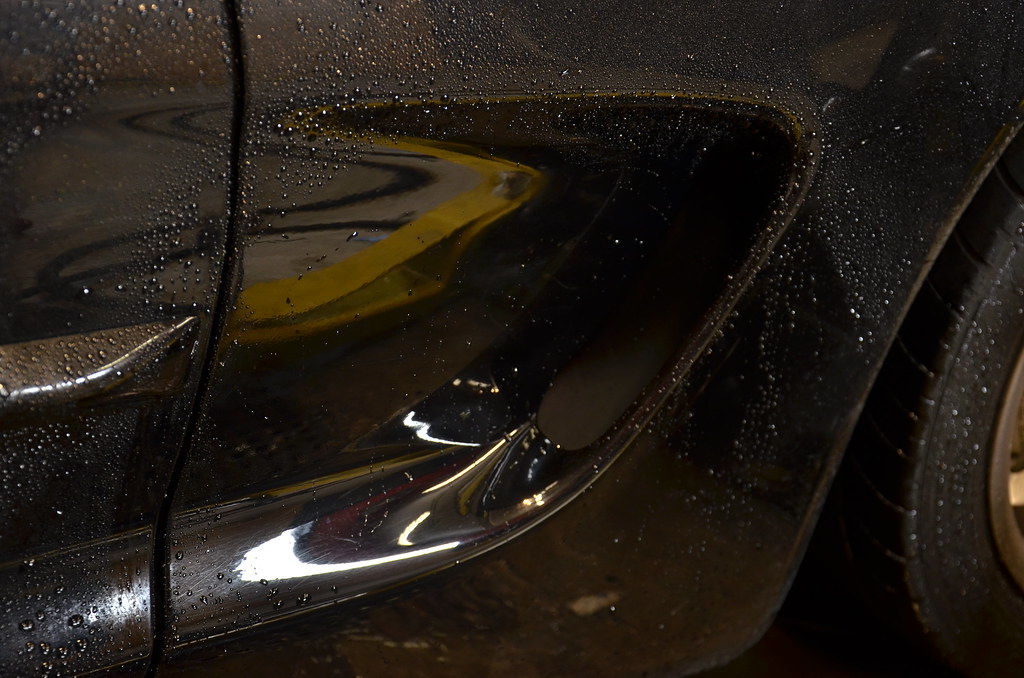
Very effective but leaves a pretty nasty mess of wax, foam, and dust behind. Worth every single penny
 _DSC4783 by Norbert Ogiba, on Flickr
 _DSC4784 by Norbert Ogiba, on Flickr
 _DSC4785 by Norbert Ogiba, on Flickr
 _DSC4786 by Norbert Ogiba, on Flickr
Quick wipe down with a microfiber looked great but there was still an imprint of adhesive around the perimeter
 _DSC4787 by Norbert Ogiba, on Flickr
I read about horror stories where guys with brightly colored cars down south (read: sun-baked) had a big shade difference when removing theirs. Mine was a NE car stored in a a garage so it was barely visible, especially on a black car. Anyhow out came the DA
_DSC4787 by Norbert Ogiba, on Flickr
 _DSC4788 by Norbert Ogiba, on Flickr
 _DSC4789 by Norbert Ogiba, on Flickr
Pulled it out for a quick wash, looks a ton better
 _DSC4790 by Norbert Ogiba, on Flickr
 _DSC4791 by Norbert Ogiba, on Flickr
 _DSC4792 by Norbert Ogiba, on Flickr
So I finished out the evening by visiting a friend in Rochester an hour away, chasing my buddy in his M5 the whole way. We did a couple of rips and the car was a blast but the clutch hydraulics will definitely need attention. I had the typical C5 problem of a soft clutch pedal after a couple hard shifts. Already did the Ranger method to clean the clutch fluid and honestly it didn't do squat, so I'll have to do some homework to see what's next.
 photo 4 by Norbert Ogiba, on Flickr
Depending on the weather this week I might start on the cutouts, stay tuned
photo 1 by Norbert Ogiba, on FlickrI found this guy on ebay, used to love building these as a kid, kinda cool that now I own a car that I can have a model of
photo 3 by Norbert Ogiba, on FlickrSo I was on the fence about the body side moldings but decided to pull them off and I'm really glad I did. It cleaned up the body lines a ton. Spent a couple hours Saturday doing it
Off to Wallyworld to get supplies. I am driving this thing every chance I get!
photo 2 by Norbert Ogiba, on Flickr_DSC4774 by Norbert Ogiba, on FlickrRinse her down with hot water to soften the tape a bit and clean any dirt and grime off
_DSC4776 by Norbert Ogiba, on FlickrThis piece came off with very minimal effort, surprisingly
_DSC4777 by Norbert Ogiba, on FlickrGlue came off easily too. Not the case for the rest of the doors
_DSC4778 by Norbert Ogiba, on FlickrTime to start flossin' baby
_DSC4780 by Norbert Ogiba, on FlickrSo the glue on the door is miserable soft foamy stuff, I spent about half an hour peeling chunks off with my fingernails before I had enough. off to the store to buy this bad boy which was the best thing since sliced bread and craft beer.
_DSC4782 by Norbert Ogiba, on FlickrVery effective but leaves a pretty nasty mess of wax, foam, and dust behind. Worth every single penny
_DSC4783 by Norbert Ogiba, on Flickr_DSC4784 by Norbert Ogiba, on Flickr_DSC4785 by Norbert Ogiba, on Flickr_DSC4786 by Norbert Ogiba, on FlickrQuick wipe down with a microfiber looked great but there was still an imprint of adhesive around the perimeter
_DSC4787 by Norbert Ogiba, on FlickrI read about horror stories where guys with brightly colored cars down south (read: sun-baked) had a big shade difference when removing theirs. Mine was a NE car stored in a a garage so it was barely visible, especially on a black car. Anyhow out came the DA
_DSC4787 by Norbert Ogiba, on Flickr_DSC4788 by Norbert Ogiba, on Flickr_DSC4789 by Norbert Ogiba, on FlickrPulled it out for a quick wash, looks a ton better
_DSC4790 by Norbert Ogiba, on Flickr_DSC4791 by Norbert Ogiba, on Flickr_DSC4792 by Norbert Ogiba, on FlickrSo I finished out the evening by visiting a friend in Rochester an hour away, chasing my buddy in his M5 the whole way. We did a couple of rips and the car was a blast but the clutch hydraulics will definitely need attention. I had the typical C5 problem of a soft clutch pedal after a couple hard shifts. Already did the Ranger method to clean the clutch fluid and honestly it didn't do squat, so I'll have to do some homework to see what's next.
photo 4 by Norbert Ogiba, on FlickrDepending on the weather this week I might start on the cutouts, stay tuned
Corvette Stories
The Best of Corvette for Corvette Enthusiasts

5 Best & 5 Worst Corvette Daily Drivers
Joe Kucinski
The Headlights of Every Corvette Generation Explained
Joe Kucinski
5 Best & 5 Most Overrated Corvette Track Packages of All Time!
Joe Kucinski
Every 2027 Corvette Engine Explained
Joe Kucinski
Designer Imagines A Corvette That Looks More Like a Corvette Than the Corvette
Verdad Gallardo
10 Ugly Corvettes That We Still Kinda Love
Joe Kucinski
Top 10 Most Expensive Corvettes Ever Sold on Bring A Trailer
Brett Foote
10 Things Every Corvette Owner Needs (2026 Edition)
Michael S. Palmer
8 Most "Only Corvette Owners Understand" Quirks and Problems
Pouria Savadkouei
Thread Starter
Drifting
Joined: Apr 2015
Posts: 1,893
Likes: 295
From: Buffalo NY
Did some tuning over the weekend with HPTuners, emissions codes deleted and AIR shut off. I also made a bunch of small changes like lowering the temps at which fans come on, shutting off AIR system, turning off CAGS (skip shift), and repurposing the 1-4 shift light to act as an actual shift light. I set it at 3000rpm for testing and it worked like a charm, so I'll have to change it to 6000 for the real deal. I also got in my LCM5 module to proactively fix the column lock but didn't get a chance to install it. While I had the laptop hooked up I also set the Column Lock Fail parameter to shut off fuel above 284mph in case of CL fail - so good to go there. I'll toss in the LCM5 this week and that should take care of that potential problem permanently. Finally I shut off AIR and rear O2 codes, flashed the tune, and took a ride to get it inspected. Unfortunately flashing the PCM erases it (along with readiness monitors for emissions), so I wasn't able to get a sticker today, but I put a bunch of miles on it Sunday with the wife, so should be good to go in a day or two.
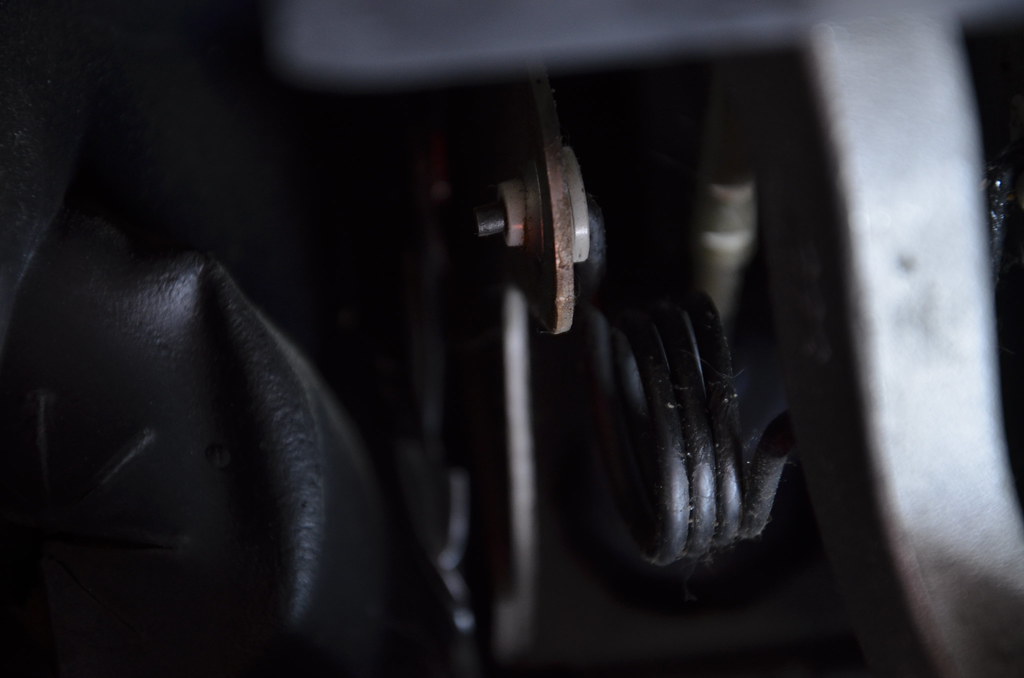
Had a few minutes before dinner Sunday and the weather was nice so I removed the Clutch Over Center spring (partial assist and return) to see if it helped with the sticking pedal - it seemed to have helped a bit but haven't beat on it hard enough to tell for sure. I am also working on a DIY solution for an actual return tension spring but need to think about how I want to attach it...
Had a few minutes before dinner Sunday and the weather was nice so I removed the Clutch Over Center spring (partial assist and return) to see if it helped with the sticking pedal - it seemed to have helped a bit but haven't beat on it hard enough to tell for sure. I am also working on a DIY solution for an actual return tension spring but need to think about how I want to attach it...
Thread Starter
Drifting
Joined: Apr 2015
Posts: 1,893
Likes: 295
From: Buffalo NY
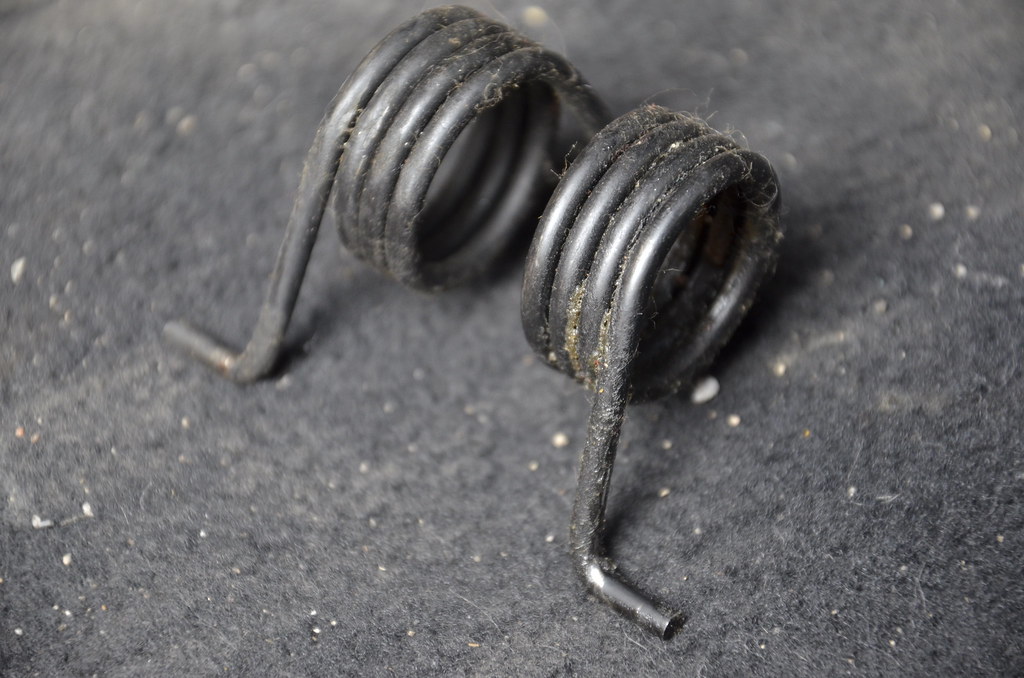
Pulled out the clutch assist spring:
 _DSC4884 by Norbert Ogiba, on Flickr
 _DSC4885 by Norbert Ogiba, on Flickr
 _DSC4886 by Norbert Ogiba, on Flickr
 _DSC4887 by Norbert Ogiba, on Flickr
Will be fabbing up a real return spring in the next week or so
_DSC4884 by Norbert Ogiba, on Flickr_DSC4885 by Norbert Ogiba, on Flickr_DSC4886 by Norbert Ogiba, on Flickr_DSC4887 by Norbert Ogiba, on FlickrWill be fabbing up a real return spring in the next week or so
Thread Starter
Drifting
Joined: Apr 2015
Posts: 1,893
Likes: 295
From: Buffalo NY
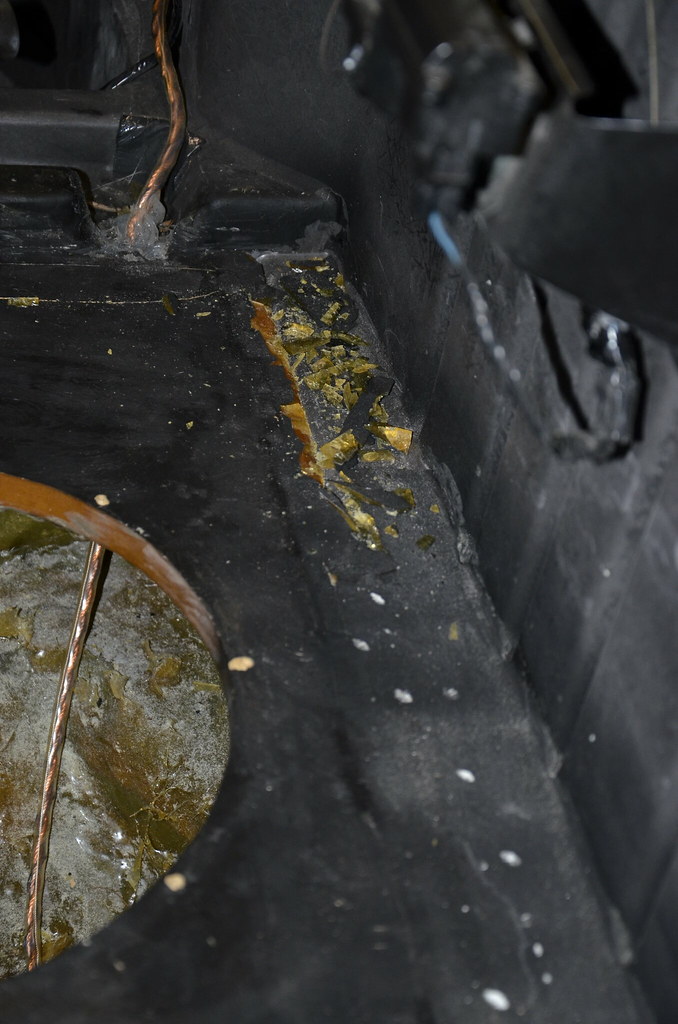
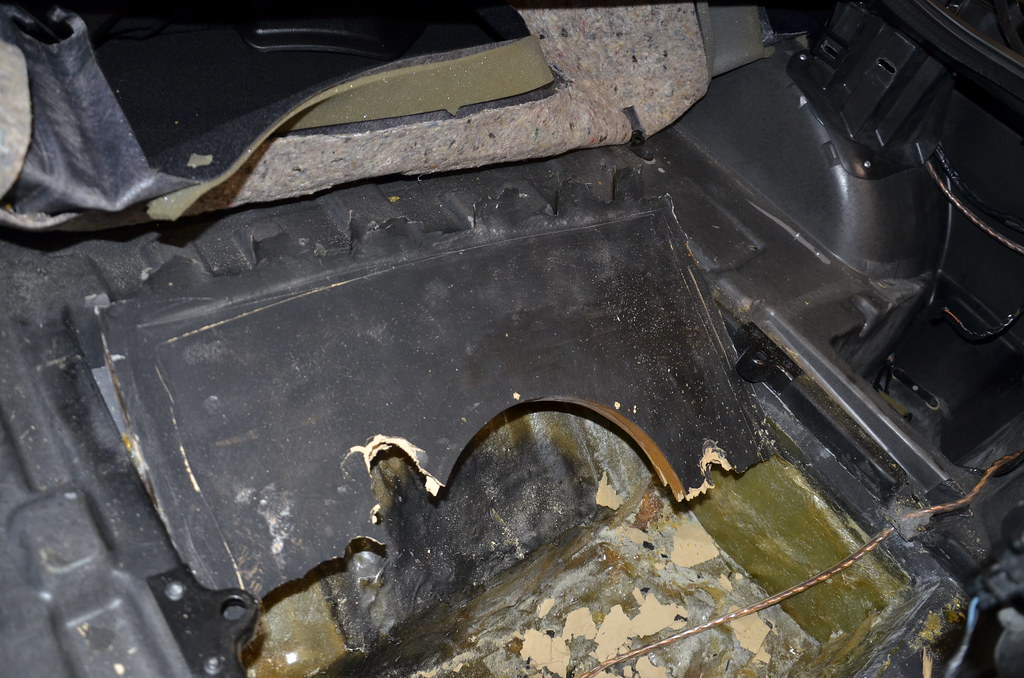
When I bought the car it had some wacky subwoofer fiberglass box in the OEM cargo well. Hated not having room for jumper cables, couple tools, the usual "necessities", so it had to go.
so here's what I started with
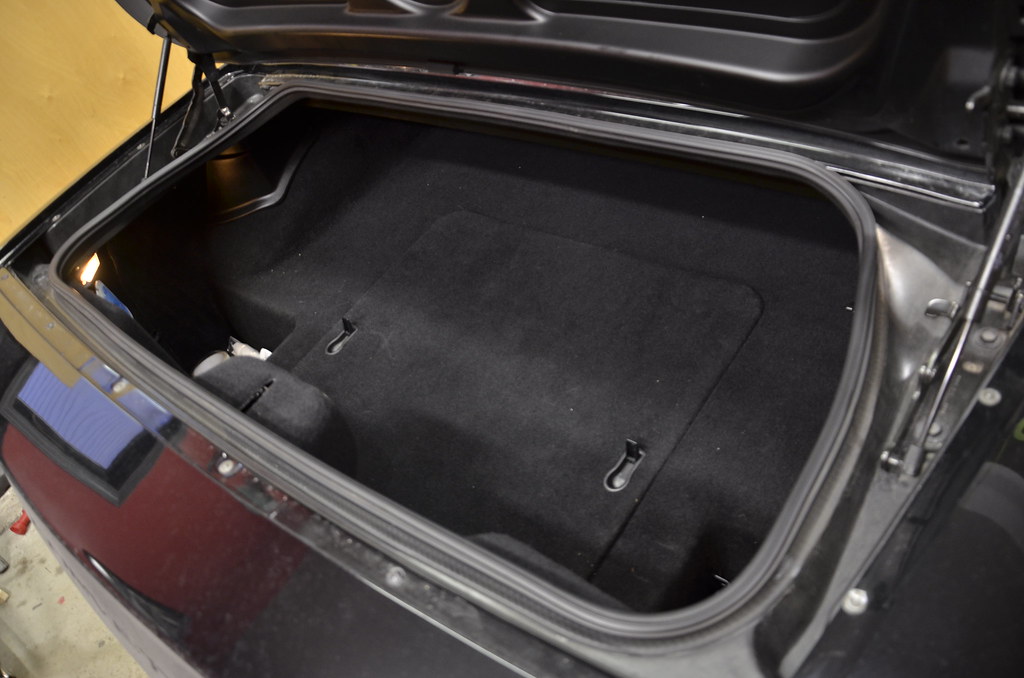 _DSC4888 by Norbert Ogiba, on Flickr
 _DSC4889 by Norbert Ogiba, on Flickr
 _DSC4890 by Norbert Ogiba, on Flickr
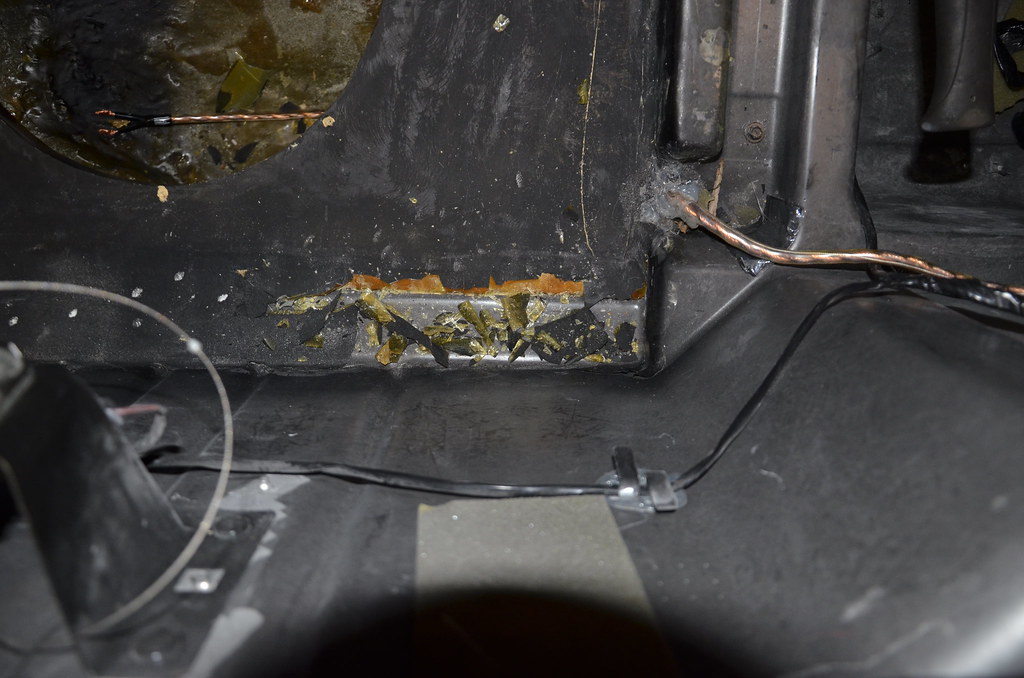
Pulled back the carpet, sure enough they glassed it right to the OEM tub. I'm sure it took somebody a long time to do this because it seemed to look pretty nice but I'm not into big audio and I want my storage space back
They glassed the wood into the shell and then bonded over that as well. Then laid the carpet over it and trimmed it with a knife.
 _DSC4891 by Norbert Ogiba, on Flickr
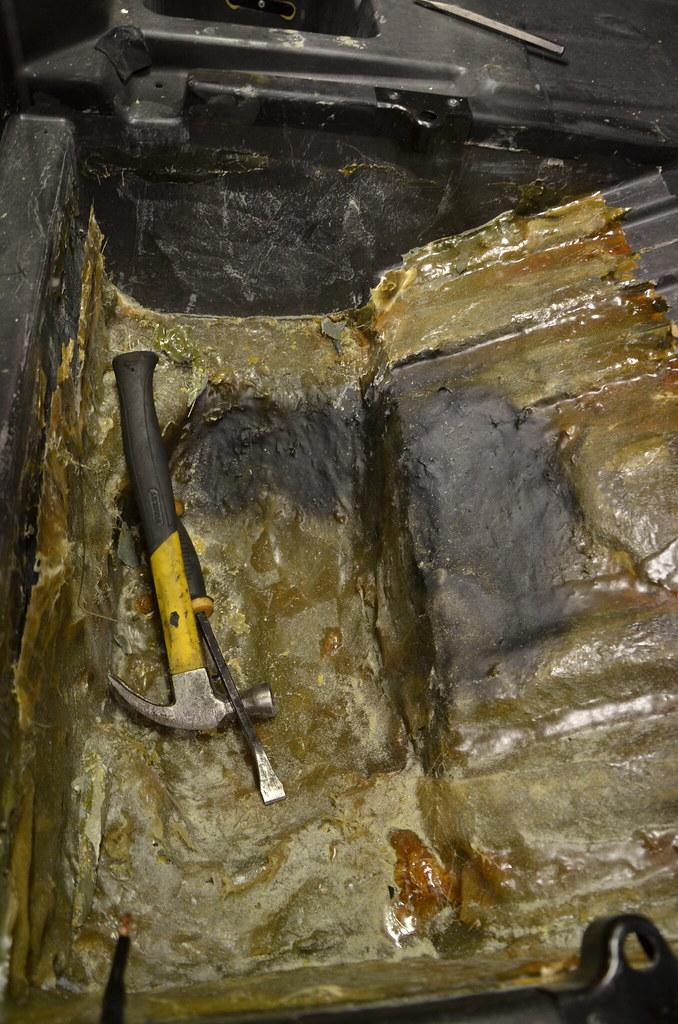
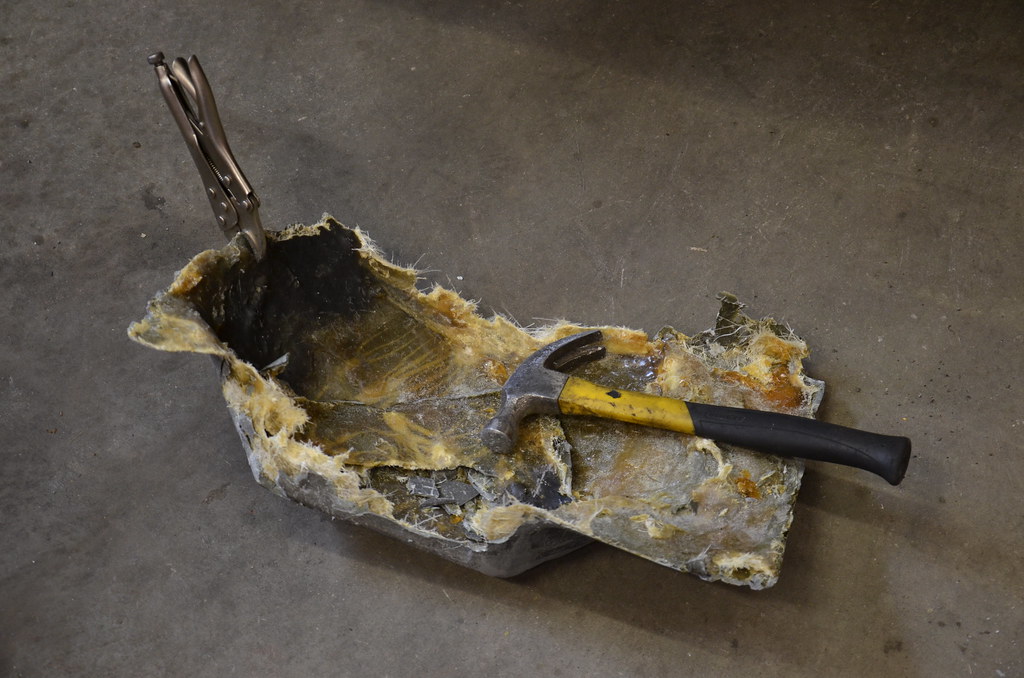
So out came the hammer for some test hits
 _DSC4892 by Norbert Ogiba, on Flickr
Pretty brittle stuff so it started ok along the stress points
 _DSC4893 by Norbert Ogiba, on Flickr
The wood flaked apart easily
_DSC4893 by Norbert Ogiba, on Flickr
 _DSC4894 by Norbert Ogiba, on Flickr
 _DSC4895 by Norbert Ogiba, on Flickr
 _DSC4896 by Norbert Ogiba, on Flickr
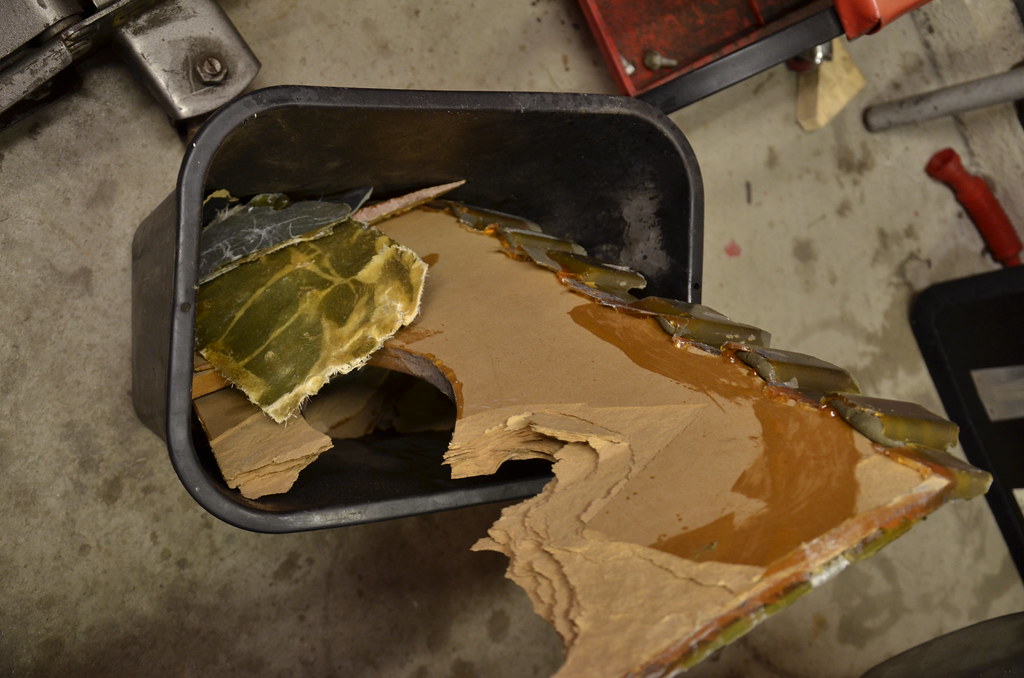
Keeping at it. Sides came away
 _DSC4897 by Norbert Ogiba, on Flickr
The pile grows
 _DSC4898 by Norbert Ogiba, on Flickr
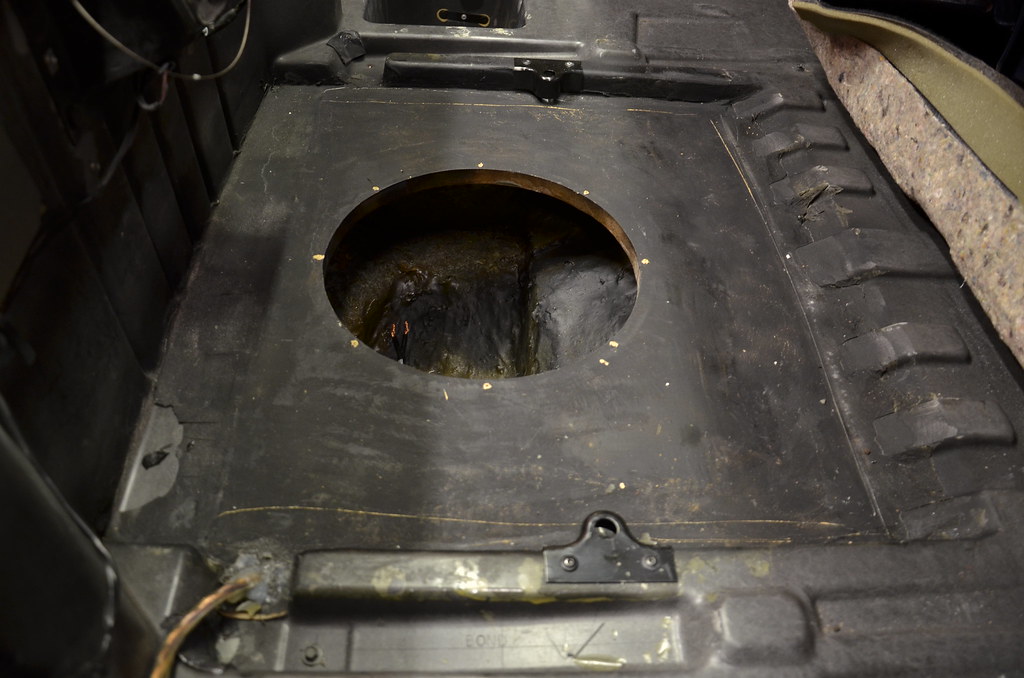
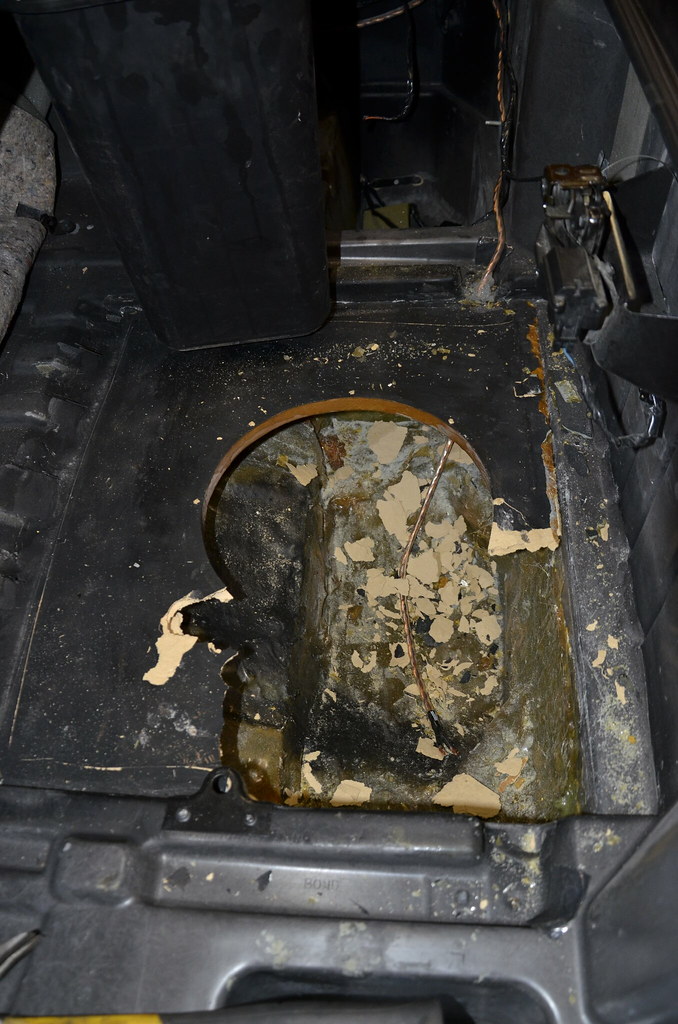
The final shell in the bottom of the tub proved to be very tricky.
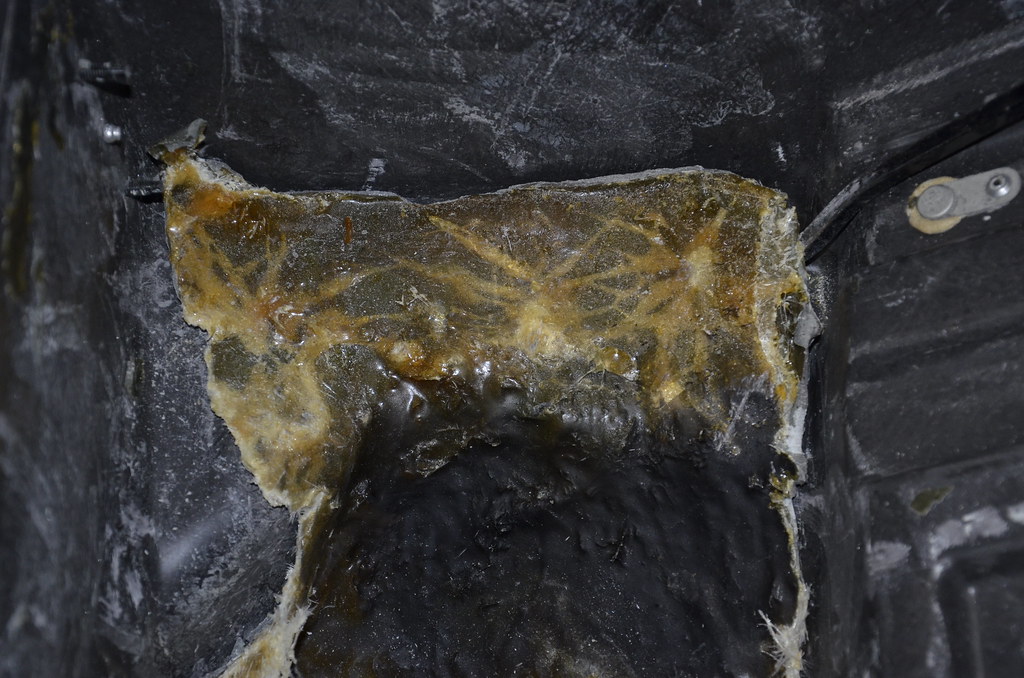 _DSC4899 by Norbert Ogiba, on Flickr
After some more cursing and yanking
 _DSC4900 by Norbert Ogiba, on Flickr
Finally! I vacuumed everything up
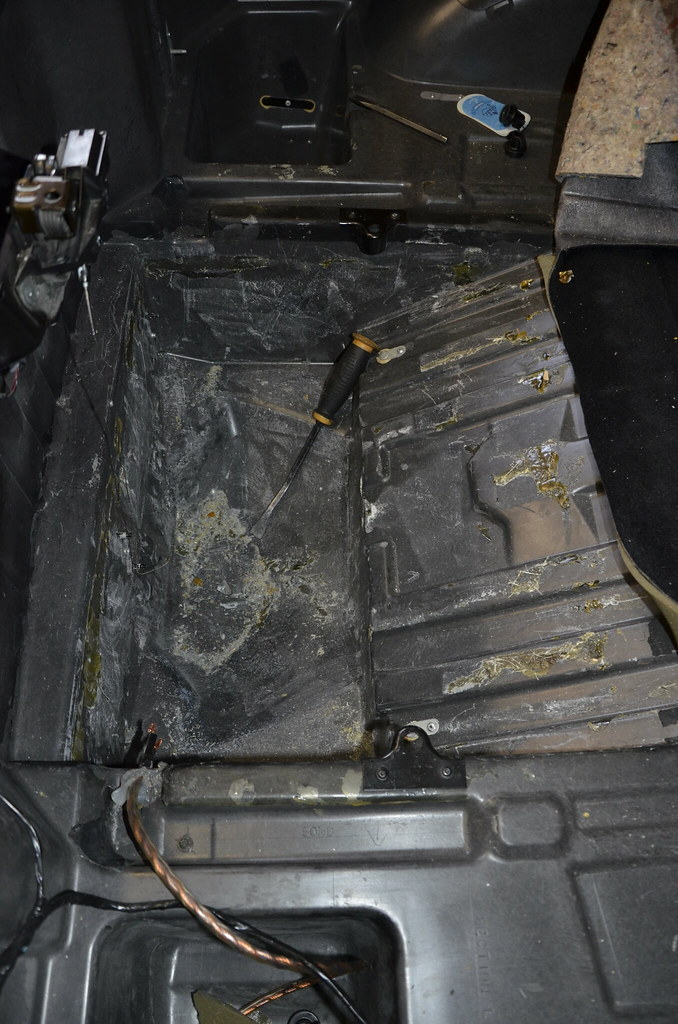 _DSC4901 by Norbert Ogiba, on Flickr
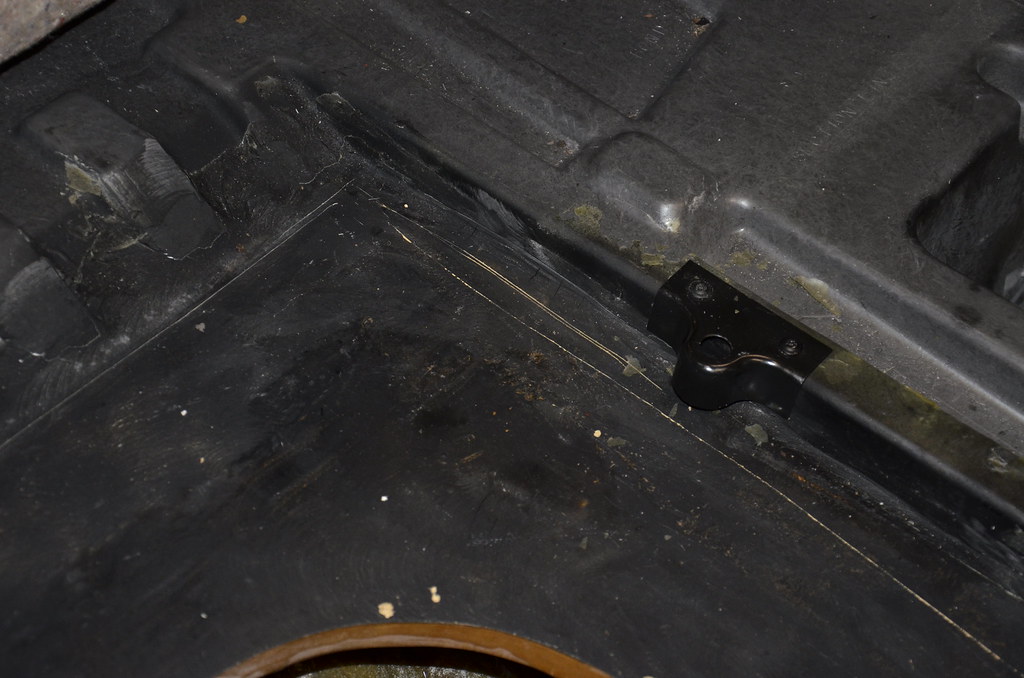
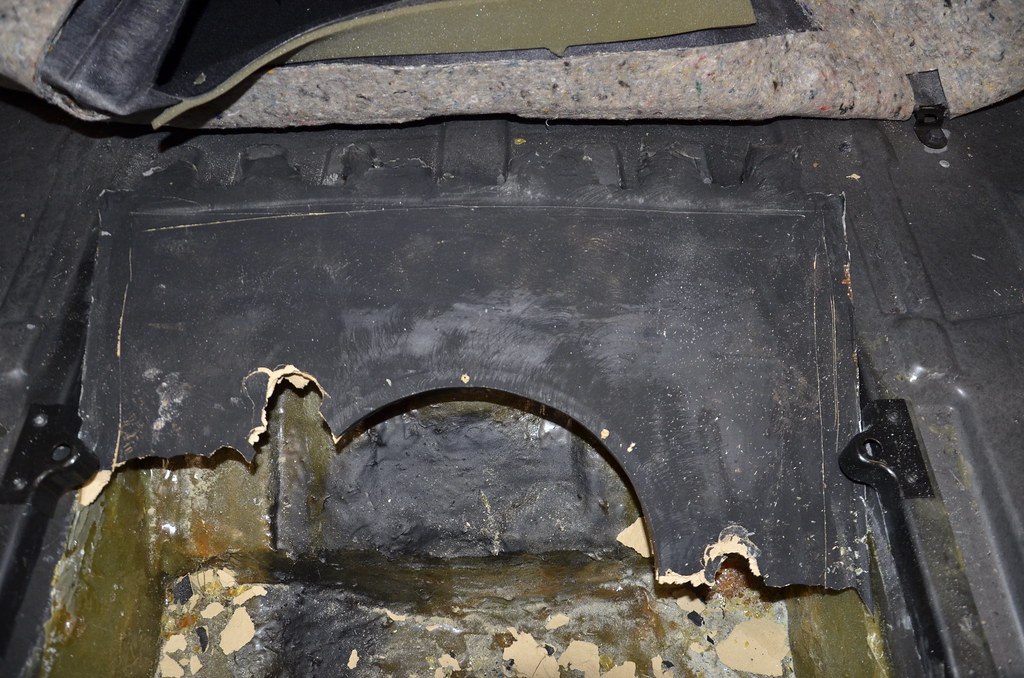
And lined the entire rear with Frost King insulation. No pics of the finished product, I was losing daylight and wanted to get it done.
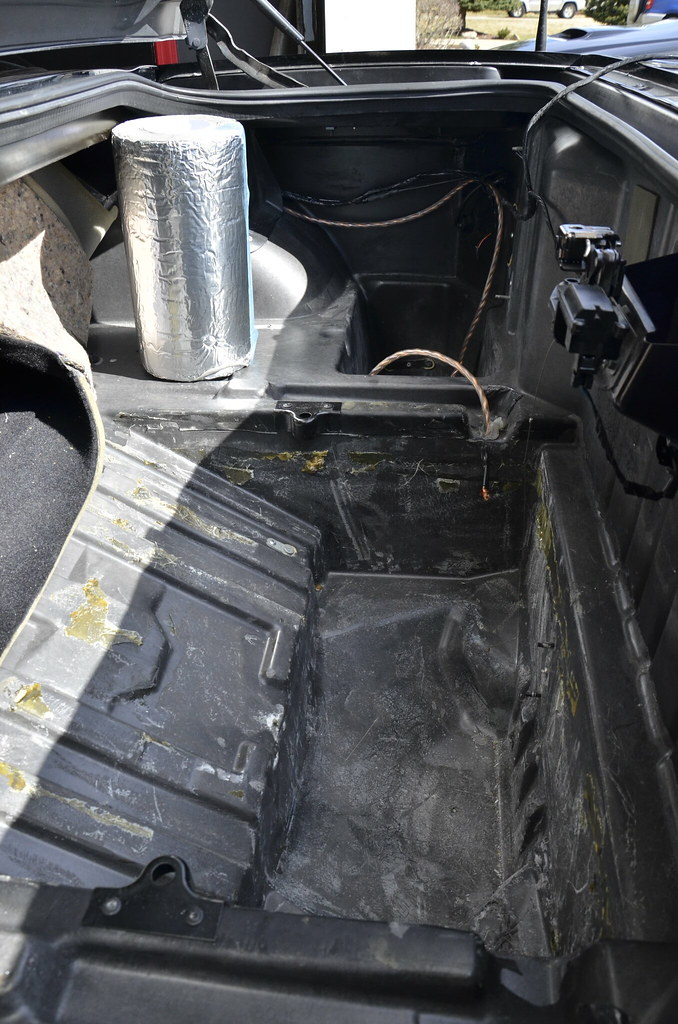 _DSC4902 by Norbert Ogiba, on Flickr
I finally remounted my 12 CD changer in the OEM spot since they had laid fiberglass in the well where it was supposed it go. New mounting nuts and lockwashers, and now it's like brand new. I am more than pleased with how it came out.
so here's what I started with
_DSC4888 by Norbert Ogiba, on Flickr_DSC4889 by Norbert Ogiba, on Flickr_DSC4890 by Norbert Ogiba, on FlickrPulled back the carpet, sure enough they glassed it right to the OEM tub. I'm sure it took somebody a long time to do this because it seemed to look pretty nice but I'm not into big audio and I want my storage space back
They glassed the wood into the shell and then bonded over that as well. Then laid the carpet over it and trimmed it with a knife.
_DSC4891 by Norbert Ogiba, on FlickrSo out came the hammer for some test hits
_DSC4892 by Norbert Ogiba, on FlickrPretty brittle stuff so it started ok along the stress points
_DSC4893 by Norbert Ogiba, on FlickrThe wood flaked apart easily
_DSC4893 by Norbert Ogiba, on Flickr_DSC4894 by Norbert Ogiba, on Flickr_DSC4895 by Norbert Ogiba, on Flickr_DSC4896 by Norbert Ogiba, on FlickrKeeping at it. Sides came away
_DSC4897 by Norbert Ogiba, on FlickrThe pile grows
_DSC4898 by Norbert Ogiba, on FlickrThe final shell in the bottom of the tub proved to be very tricky.
_DSC4899 by Norbert Ogiba, on FlickrAfter some more cursing and yanking
_DSC4900 by Norbert Ogiba, on FlickrFinally! I vacuumed everything up
_DSC4901 by Norbert Ogiba, on FlickrAnd lined the entire rear with Frost King insulation. No pics of the finished product, I was losing daylight and wanted to get it done.
_DSC4902 by Norbert Ogiba, on FlickrI finally remounted my 12 CD changer in the OEM spot since they had laid fiberglass in the well where it was supposed it go. New mounting nuts and lockwashers, and now it's like brand new. I am more than pleased with how it came out.

Thread Starter
Drifting
Joined: Apr 2015
Posts: 1,893
Likes: 295
From: Buffalo NY
i was just tired of all that stuff flopping and sliding around! now it's secure.
Ordered new LS6 replacement valve springs, replacement valve seals, and some other misc gaskets. LS6 intake going in as well, shortly. I raised the rev limit in anticipation of the better breathing and want the valvetrain to hold up.
Ordered new LS6 replacement valve springs, replacement valve seals, and some other misc gaskets. LS6 intake going in as well, shortly. I raised the rev limit in anticipation of the better breathing and want the valvetrain to hold up.


Thread Starter
Drifting
Joined: Apr 2015
Posts: 1,893
Likes: 295
From: Buffalo NY
Let's start with some guest appearances...
The new owner of my old car is enjoying it - he is finishing up the little things that I never got around to - electric cutouts, tint, etc. Weird seeing it with different plates on it
 IMG_1388 by Norbert Ogiba, on Flickr
 IMG_1387 by Norbert Ogiba, on Flickr
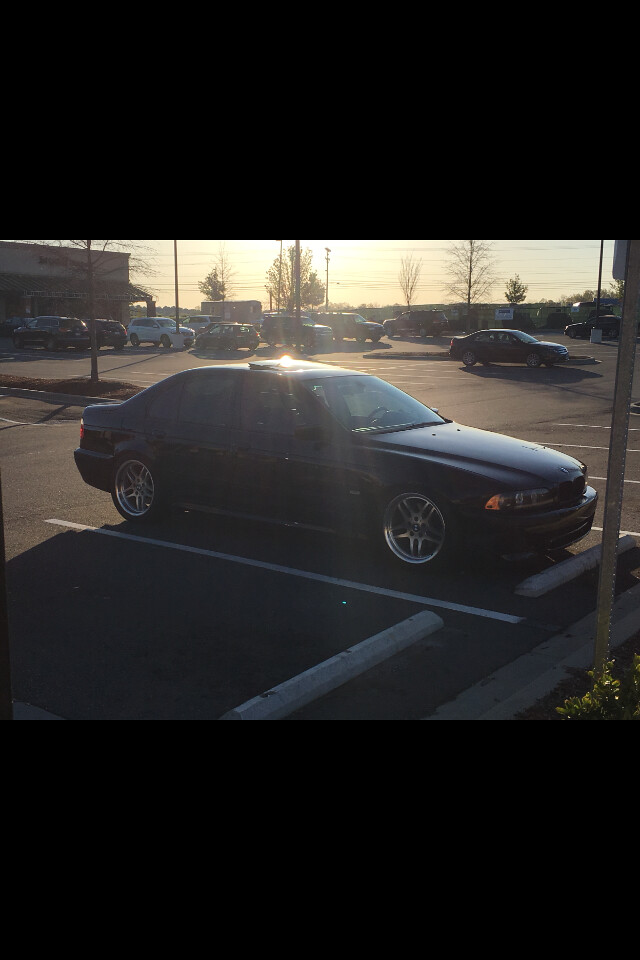
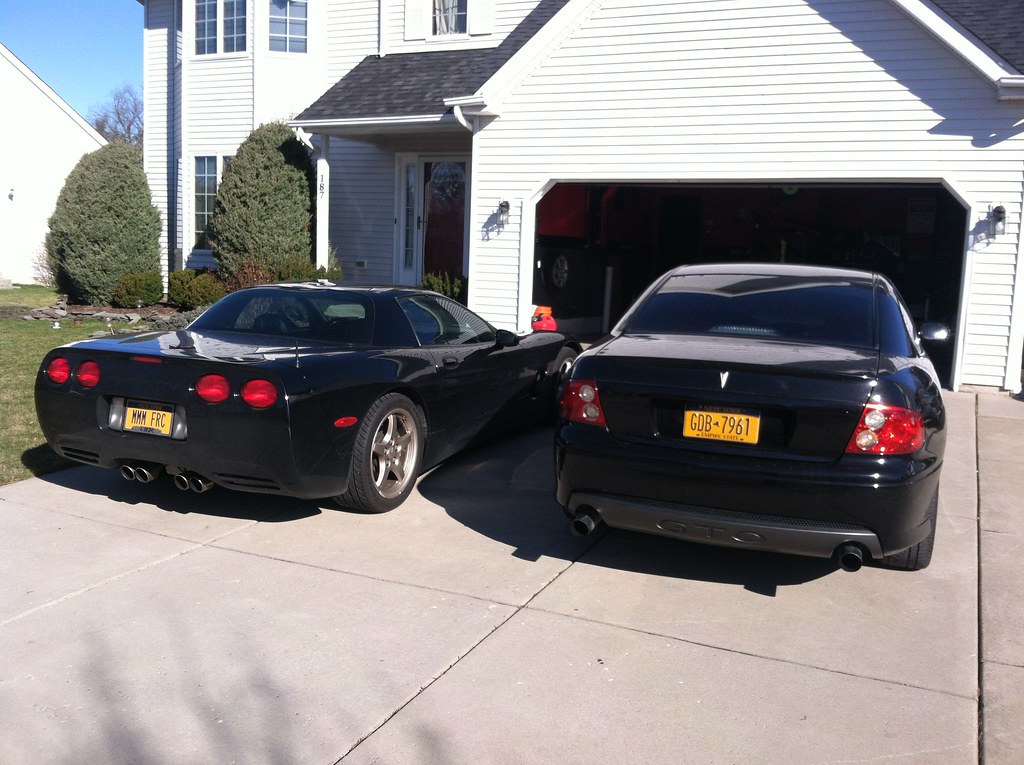
A friend stopped over last weekend for some work on his goat
 IMG_1378 by Norbert Ogiba, on Flickr
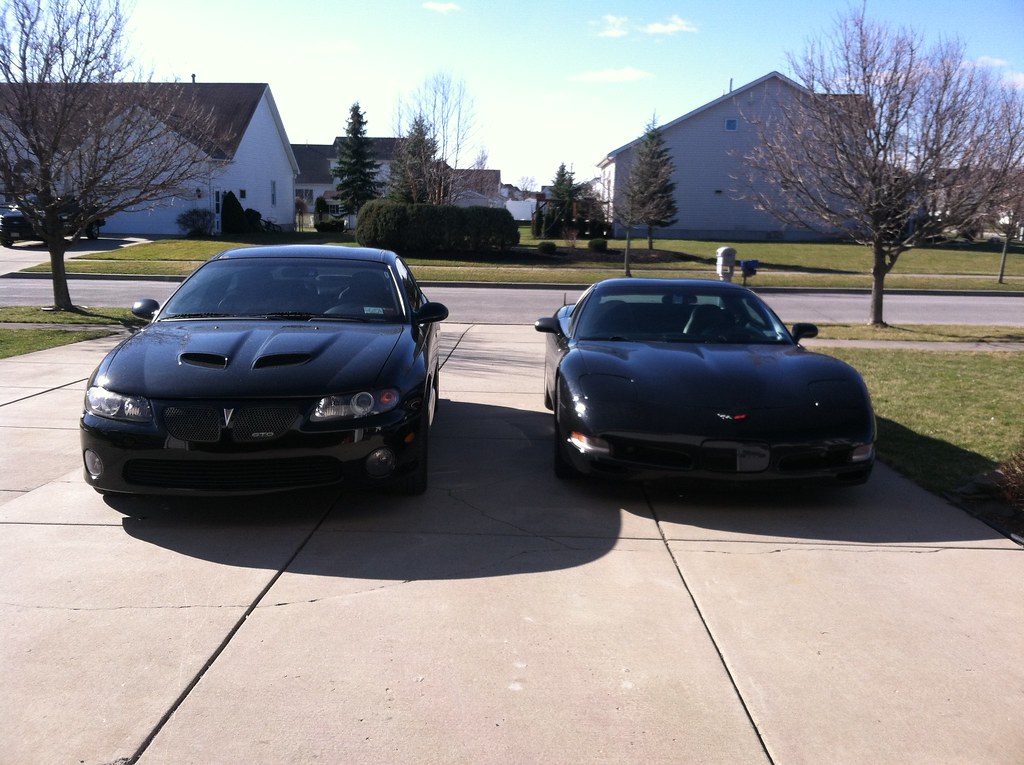 IMG_1377 by Norbert Ogiba, on Flickr
Back to your regularly scheduled crap...just been driving this thing to work on every nice day we get
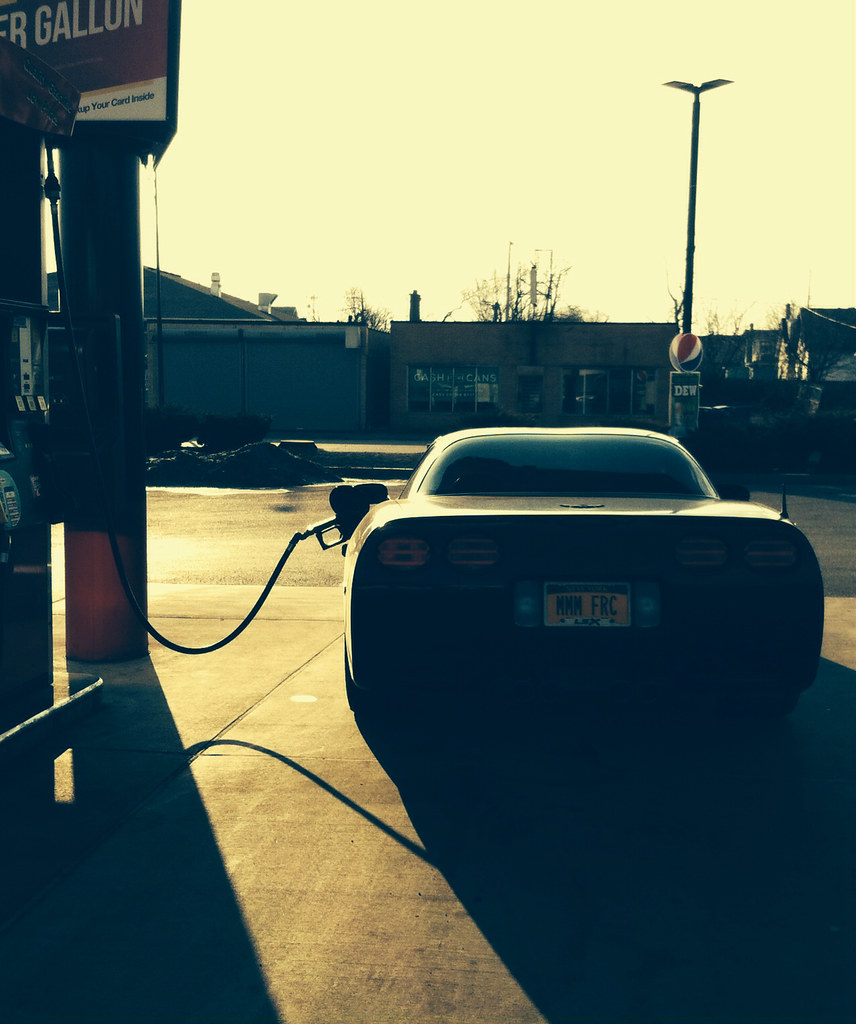 image by Norbert Ogiba, on Flickr
Couple small updates
Needed to get the car inspected and it was throwing a bunch of codes after the longtube install, so shut off those codes via HPTuners and also raised the rev limit to 6500 (from 6200) in anticipation of the last couple of bolt-ons I'm going to do. Picked up new LS6 OEM valve springs, 16 new seals, and an LS6 intake manifold. When it's all apart I will finish deleting the AIR system, should clean up the engine bay a bit.
I am not a fan of mimicking trim packages that the car didn't come with (aka putting red fuel rail covers from a Z06 on this car) but I wanted something different in the engine bay, so the LS6 intake will be getting paint. Starting off with deep clean, masking off the usual parts, and then primer. Final color will be a wrinkle red. Might do the air bridge too if I like how it turns out.
Ready for paint:
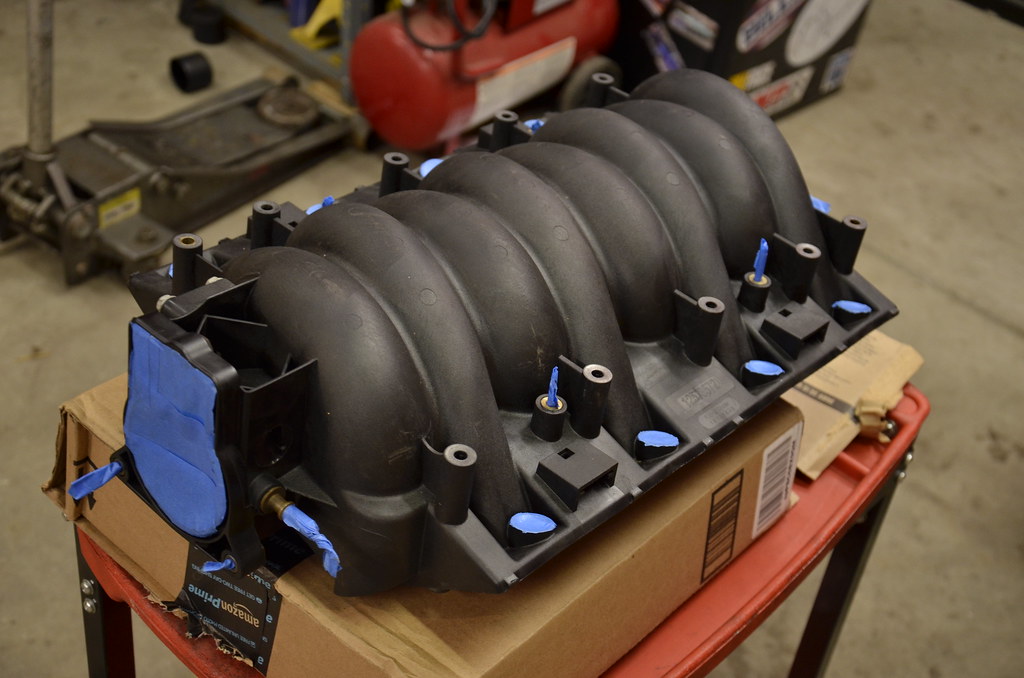 _DSC4907 by Norbert Ogiba, on Flickr
Primer:
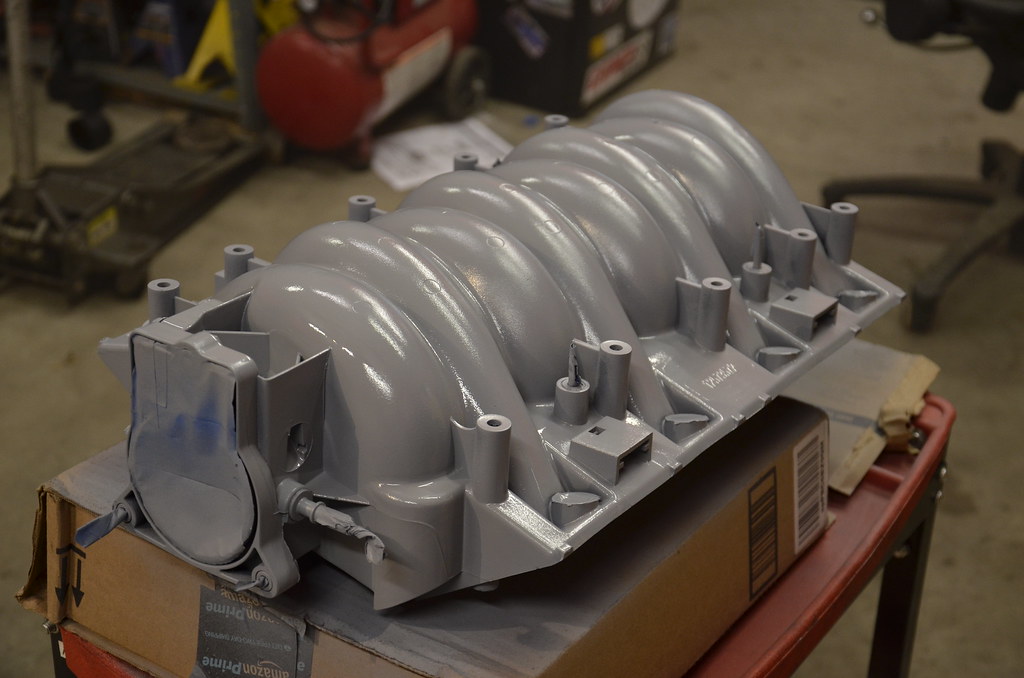 _DSC4908 by Norbert Ogiba, on Flickr
 _DSC4909 by Norbert Ogiba, on Flickr
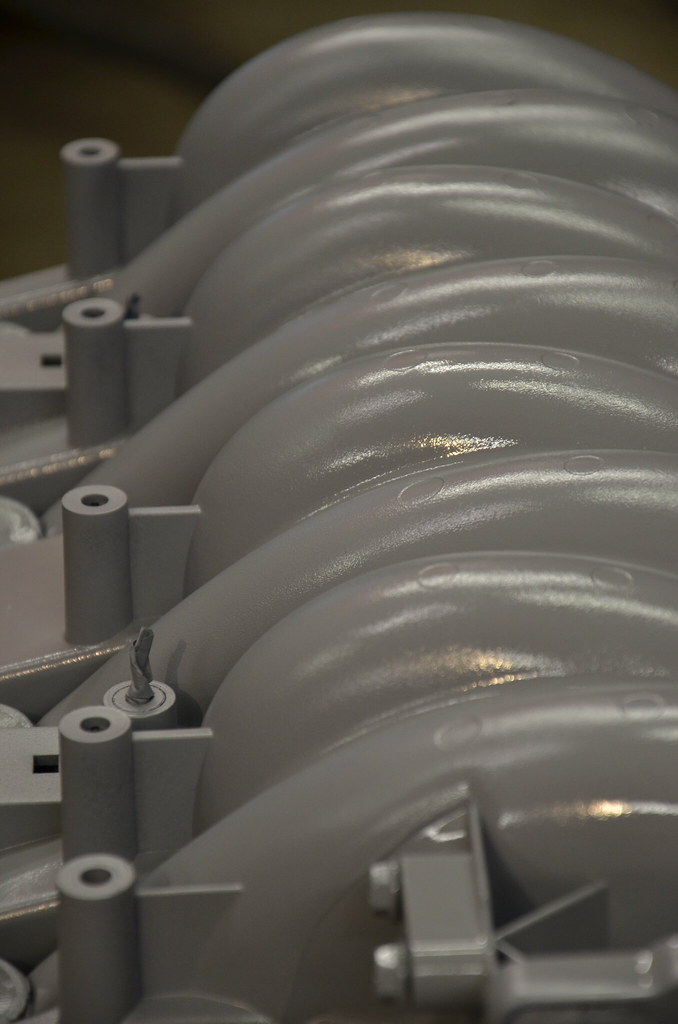 _DSC4910 by Norbert Ogiba, on Flickr
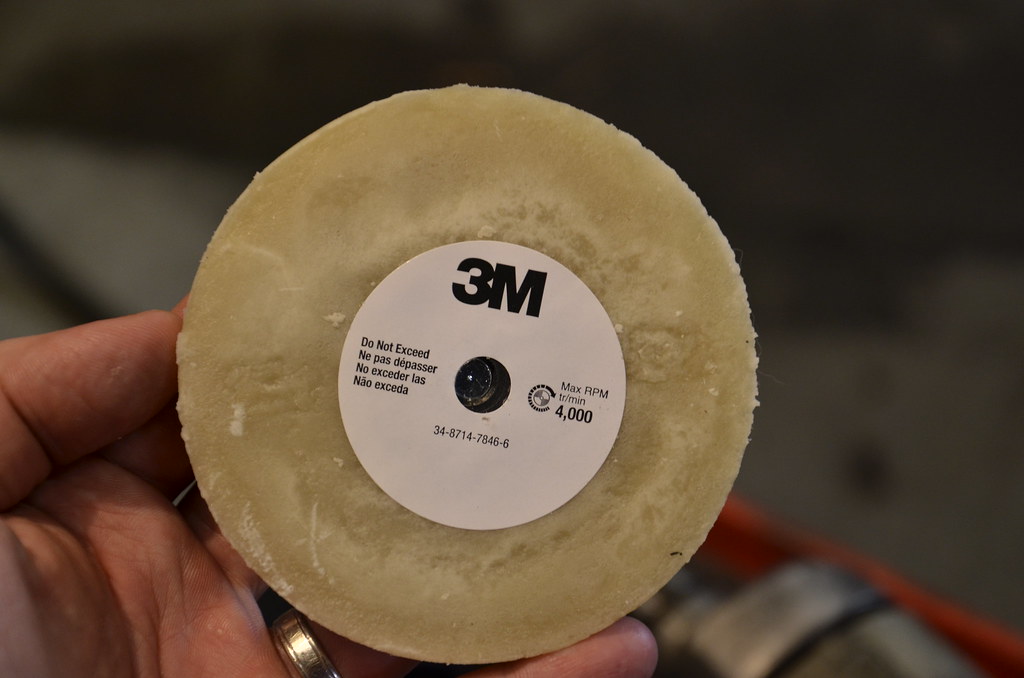
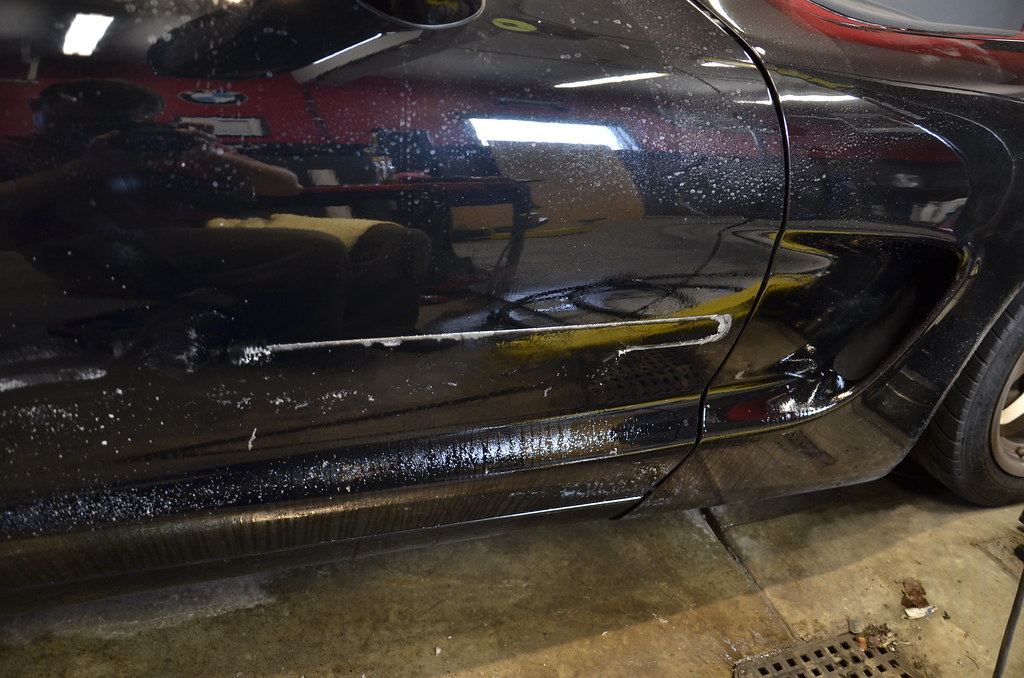
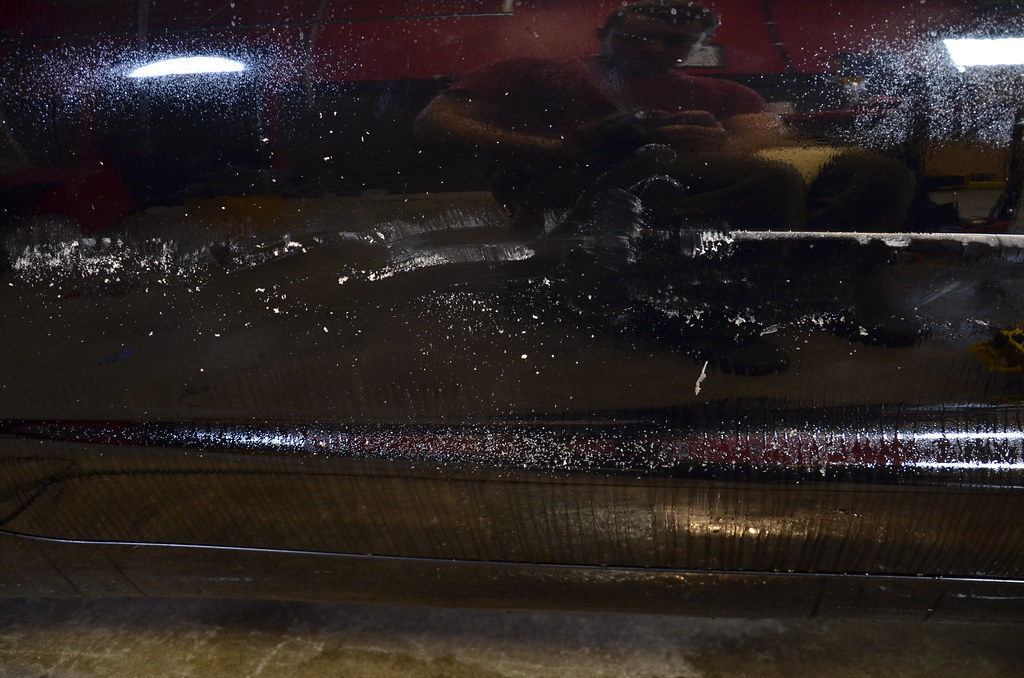
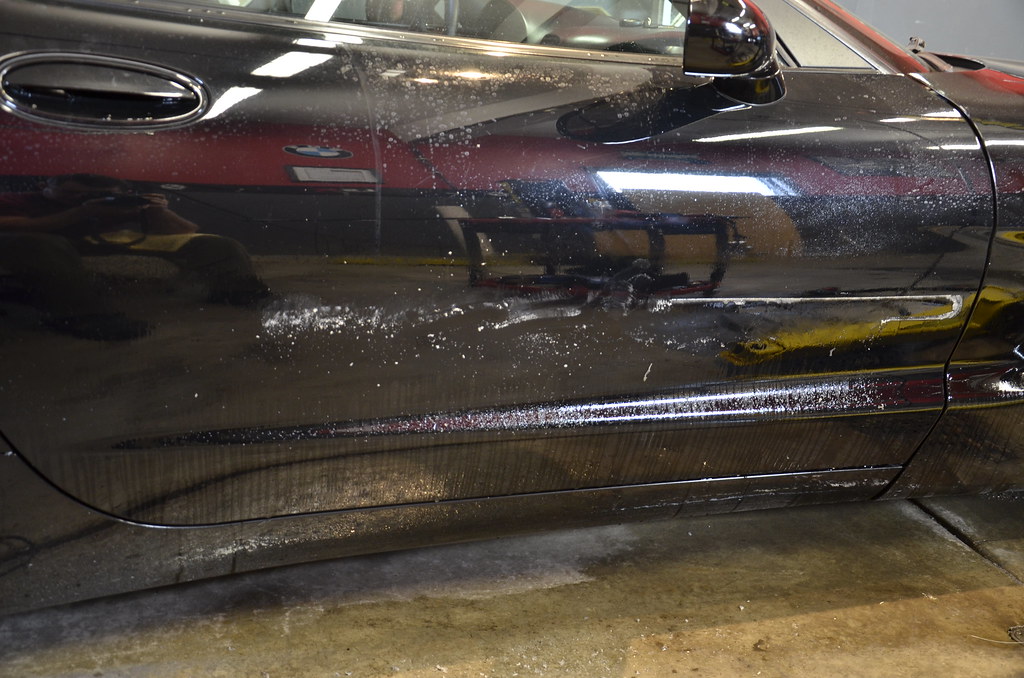
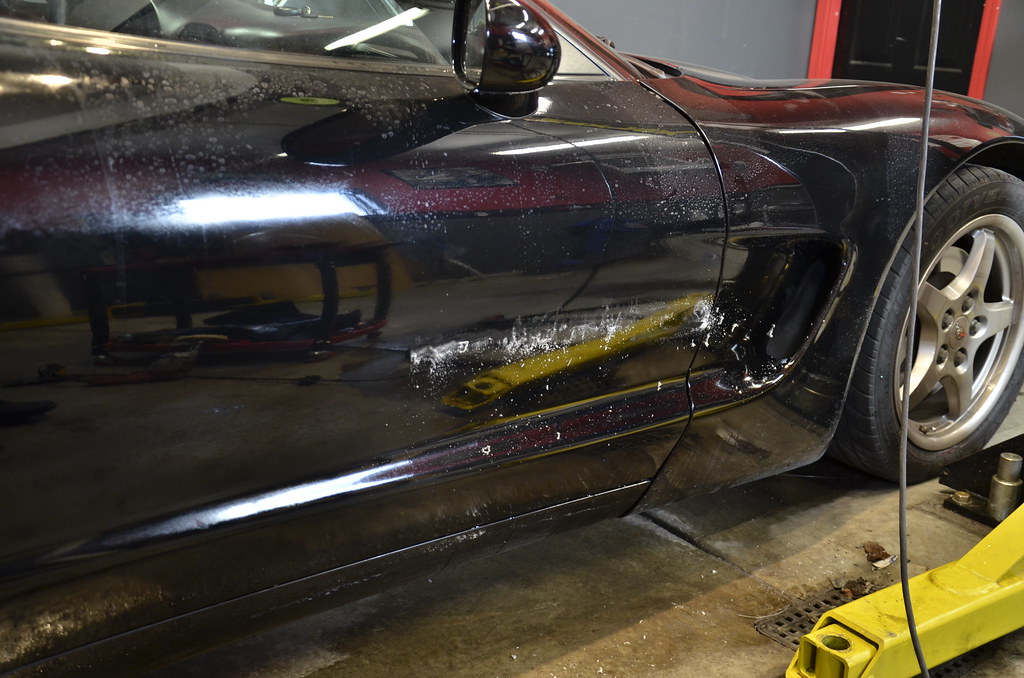
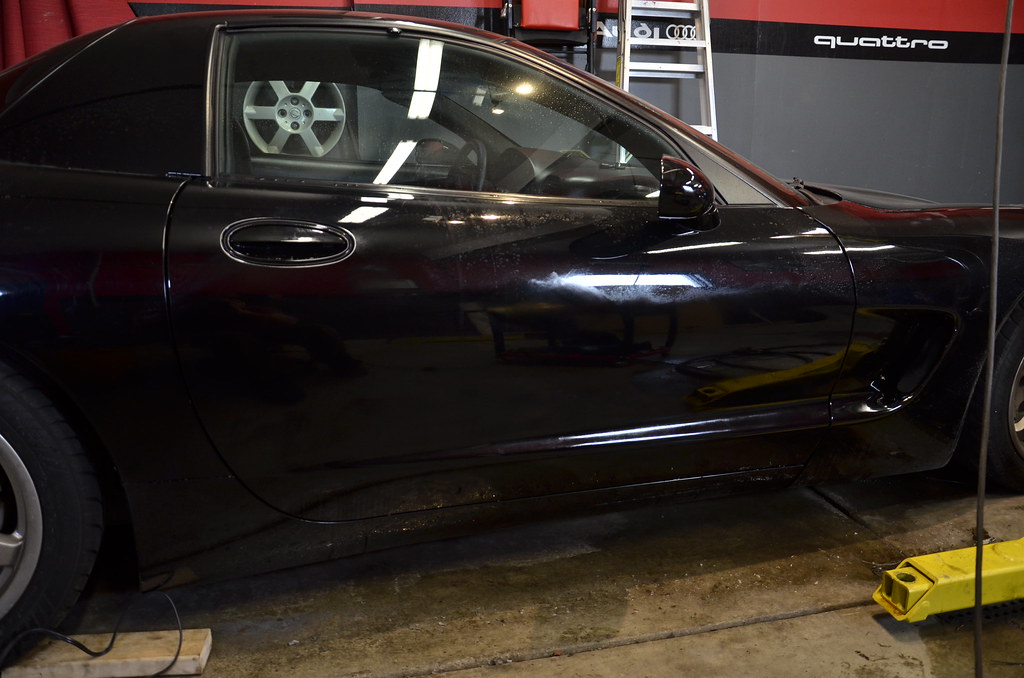
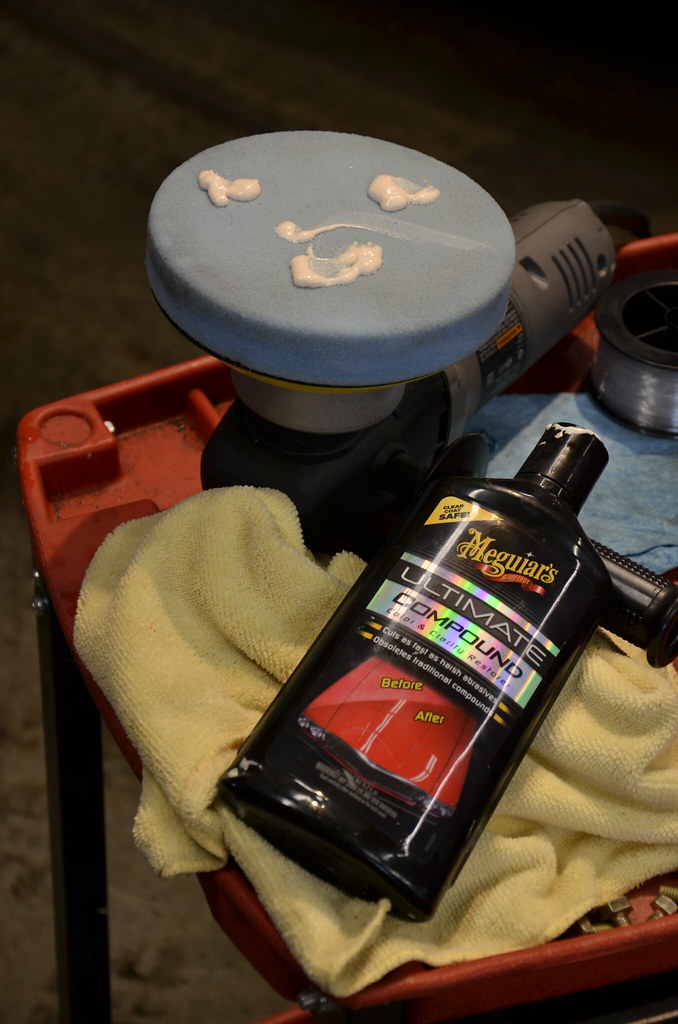
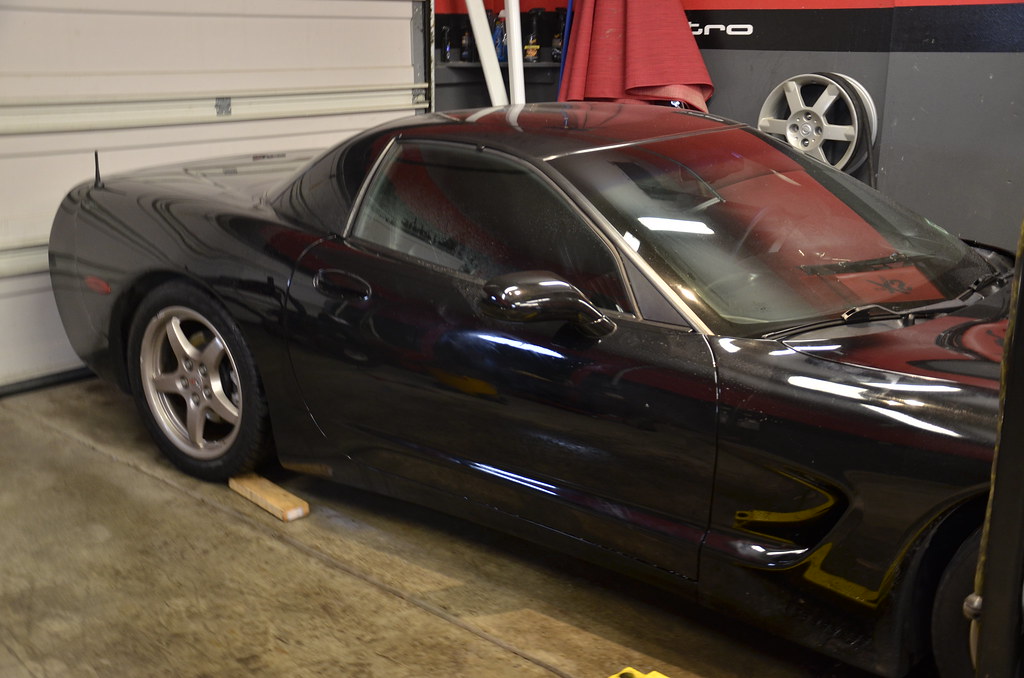
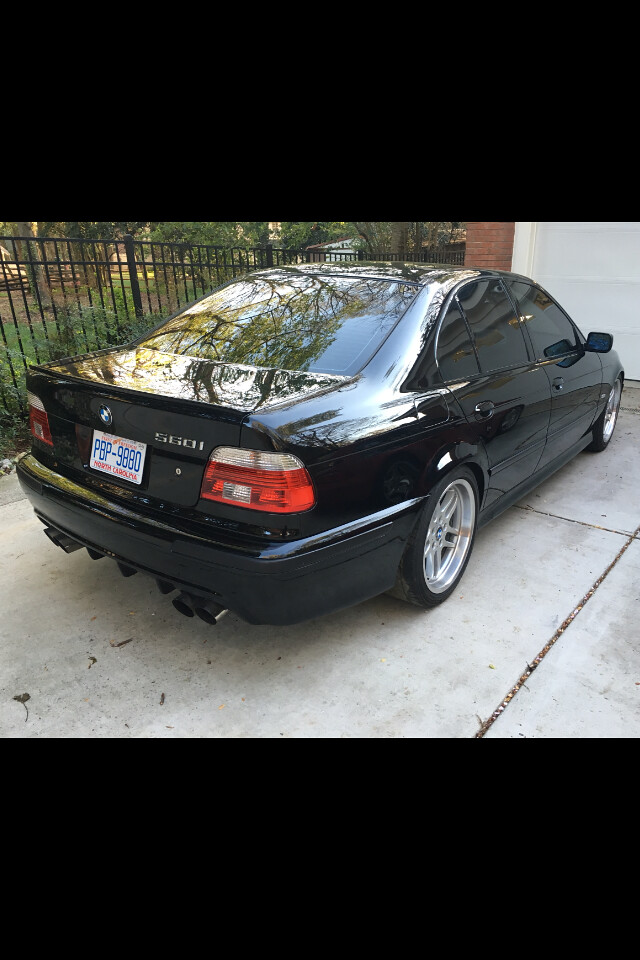
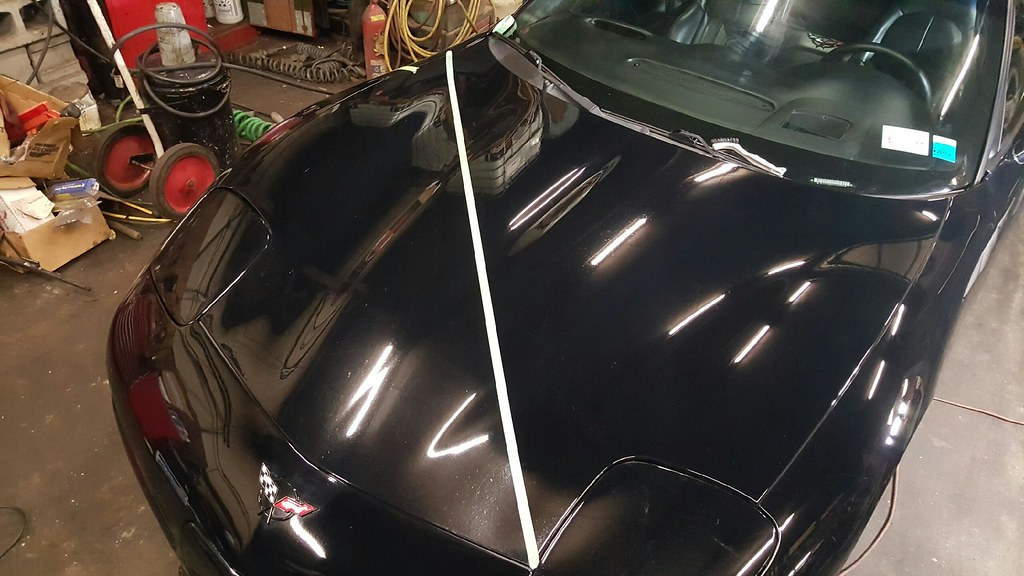
Buddy of mine asked me if I was interested in a paint correction - he wanted to show my car in his booth at http://www.buffalomotorama.com/ . I am not a big "show" person but this is a pretty cool opportunity. I will snap some pics this weekend when I go to the show. He worked wonders on the BMW so I'm sure the Vette will turn out great as well.
Check out his site.
https://www.facebook.com/sheerluxe.detailing/
 IMG_1394 by Norbert Ogiba, on Flickr
 IMG_1384 by Norbert Ogiba, on Flickr
Also started working on some cutouts. Picked up a drill press, don't know how I went without one all these years. Poor hole saw got its brains beat out by the stainless but the end result is nice.
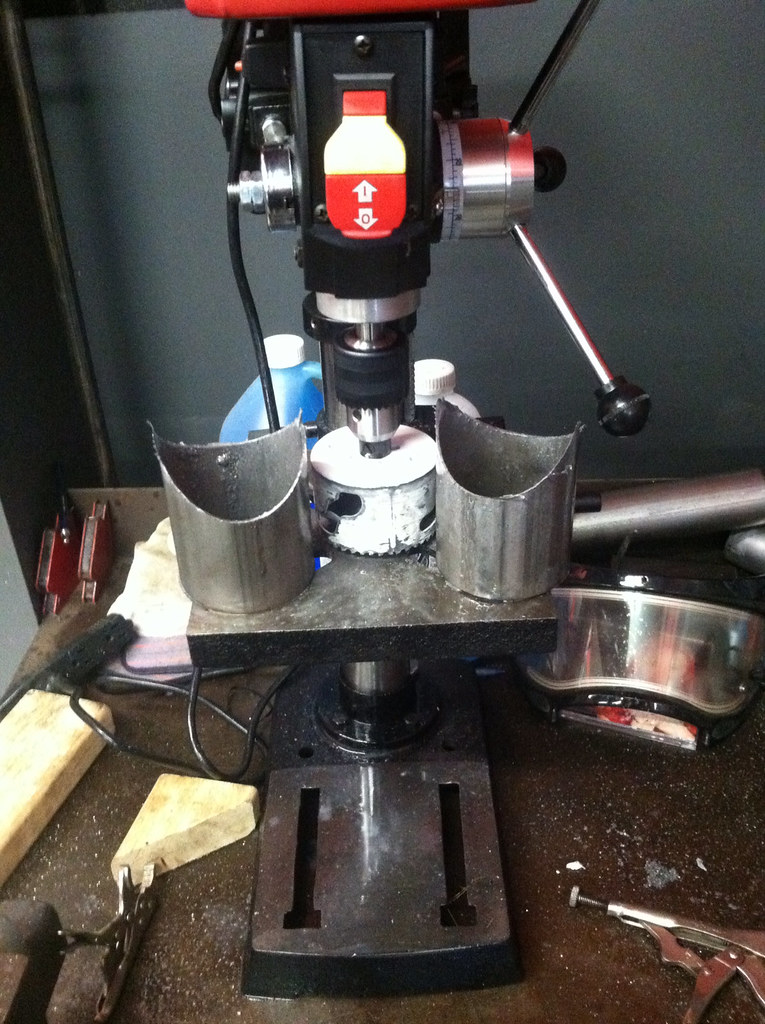 image by Norbert Ogiba, on Flickr
I am going to try something different on the cutouts. I ran an electric QTP some years ago and wasn't happy with the operation, reliability, etc. The motor crapped out on me and the vendor told me I had to buy a new one as they didn't sell parts. So I picked up some vacuum actuated ching chong 3" units off the chinese ebay wannabe site to try to put together my own "NPP" option. There is another Corvette guy using these for muffler modifications with success so I have high hopes. I haven't yet figured out how I want to control them, but am thinking about using some old EGR vacuum solenoids to control the valves on demand. We'll see.
The new owner of my old car is enjoying it - he is finishing up the little things that I never got around to - electric cutouts, tint, etc. Weird seeing it with different plates on it
IMG_1388 by Norbert Ogiba, on FlickrIMG_1387 by Norbert Ogiba, on FlickrA friend stopped over last weekend for some work on his goat
IMG_1378 by Norbert Ogiba, on FlickrIMG_1377 by Norbert Ogiba, on FlickrBack to your regularly scheduled crap...just been driving this thing to work on every nice day we get
image by Norbert Ogiba, on FlickrCouple small updates
Needed to get the car inspected and it was throwing a bunch of codes after the longtube install, so shut off those codes via HPTuners and also raised the rev limit to 6500 (from 6200) in anticipation of the last couple of bolt-ons I'm going to do. Picked up new LS6 OEM valve springs, 16 new seals, and an LS6 intake manifold. When it's all apart I will finish deleting the AIR system, should clean up the engine bay a bit.
I am not a fan of mimicking trim packages that the car didn't come with (aka putting red fuel rail covers from a Z06 on this car) but I wanted something different in the engine bay, so the LS6 intake will be getting paint. Starting off with deep clean, masking off the usual parts, and then primer. Final color will be a wrinkle red. Might do the air bridge too if I like how it turns out.
Ready for paint:
_DSC4907 by Norbert Ogiba, on FlickrPrimer:
_DSC4908 by Norbert Ogiba, on Flickr_DSC4909 by Norbert Ogiba, on Flickr_DSC4910 by Norbert Ogiba, on FlickrBuddy of mine asked me if I was interested in a paint correction - he wanted to show my car in his booth at http://www.buffalomotorama.com/ . I am not a big "show" person but this is a pretty cool opportunity. I will snap some pics this weekend when I go to the show. He worked wonders on the BMW so I'm sure the Vette will turn out great as well.
Check out his site.
https://www.facebook.com/sheerluxe.detailing/
IMG_1394 by Norbert Ogiba, on FlickrIMG_1384 by Norbert Ogiba, on FlickrAlso started working on some cutouts. Picked up a drill press, don't know how I went without one all these years. Poor hole saw got its brains beat out by the stainless but the end result is nice.
image by Norbert Ogiba, on FlickrI am going to try something different on the cutouts. I ran an electric QTP some years ago and wasn't happy with the operation, reliability, etc. The motor crapped out on me and the vendor told me I had to buy a new one as they didn't sell parts. So I picked up some vacuum actuated ching chong 3" units off the chinese ebay wannabe site to try to put together my own "NPP" option. There is another Corvette guy using these for muffler modifications with success so I have high hopes. I haven't yet figured out how I want to control them, but am thinking about using some old EGR vacuum solenoids to control the valves on demand. We'll see.