


Poly Control Arm bushing Rebuild
Thread Starter
Burning Brakes


Joined: Jun 2005
Posts: 782
Likes: 45
From: Toronto Ontario
There have been quite a few threads started regarding the use of polyurethane control arm bushings. In my humble opinion, after good tires, nothing will improve the handling of your vette as dramatically as poly control arm bushings. They provide a smoothly pivoting, bearing-like joint, and reduce unwanted motion in other directions. Unfortunately, they need a LOT of maintenance to function properly. The lubricating grease gradually works itself out of the bushings, causing them to bind up and make noise. I have found that I can get about 7-8 months of quiet daily-driving before they begin to groan. I don't drive the car during the winter, so I have plenty of time to re-grease them, but it's still a mega pain in the ***. The following is a general rebuild procedure for VBP poly bushings, though others are probably similar. If you're thinking about these for your car, read through this and ask yourself if you're ready to do this on the regular...
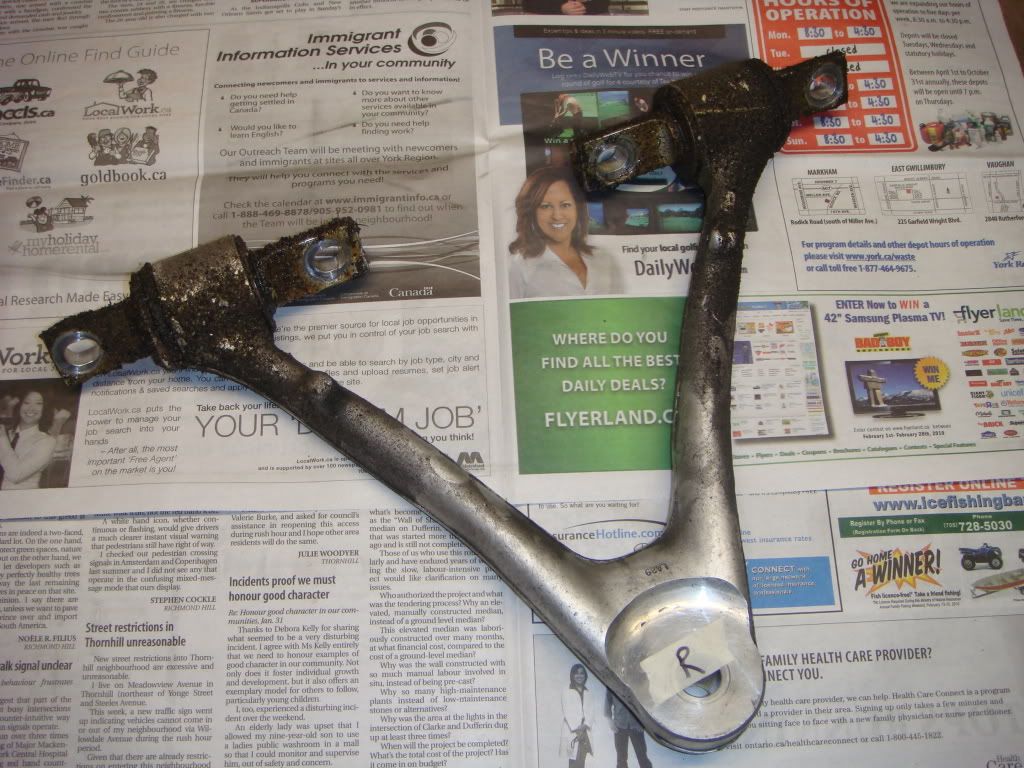
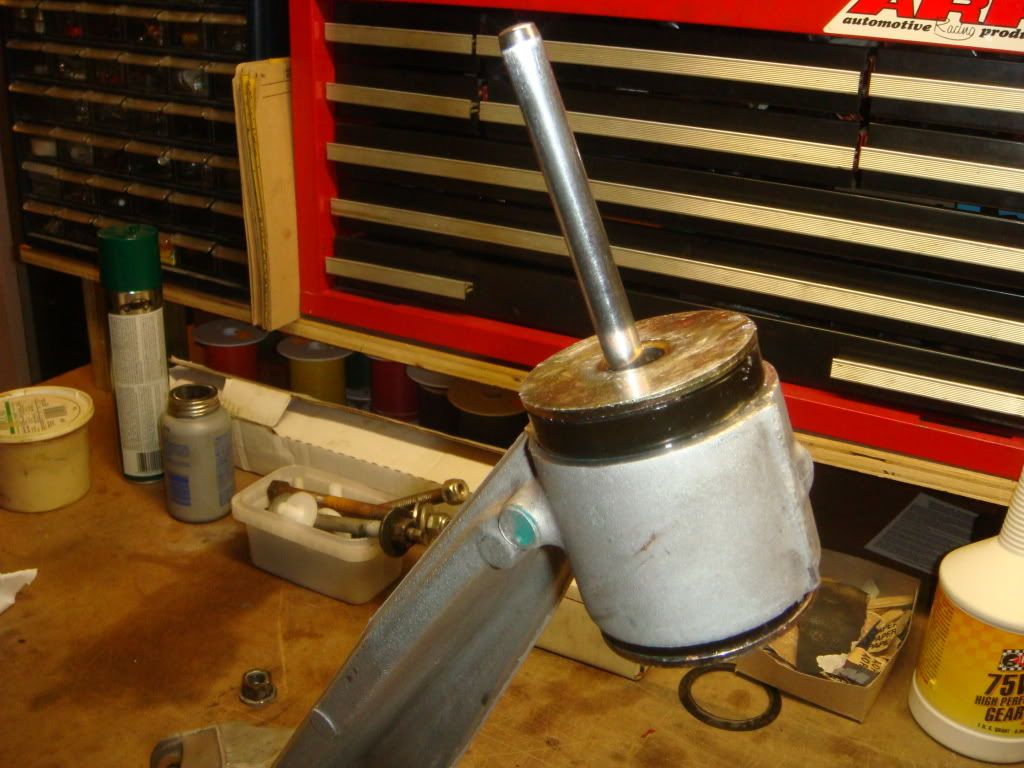
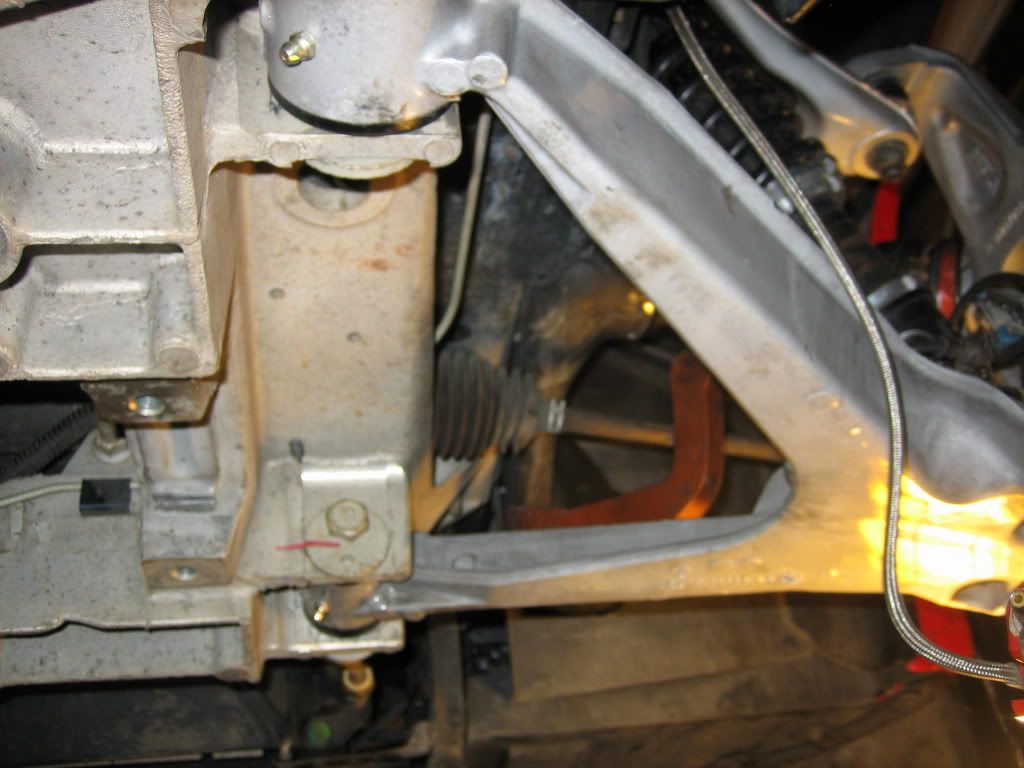
Here's the front right upper arm, straight off the car. This arm has about 8 months of daily driving and one long road trip on it since it was last overhauled. As you can see, the grease tends to ooze out over time, drying out the working surfaces inside.
First thing to do is give it a bath in the parts tank, and remove as much of the crud as possible. If there's one good think about the lube leaking out of the bushings, it really protects the arm from the elements...this arm is 8yrs old, driven daily.
Once it's clean, the bushings can be disassembled. Its a good idea to use soft jaws in the vice to prevent marking the soft aluminum shaft. Simply remove the circlip, lift off the washer and then the arm with the bushing still in it. To remove the bushing from the arm, push it out with your thumbs, or tap it out with a hammer/socket.
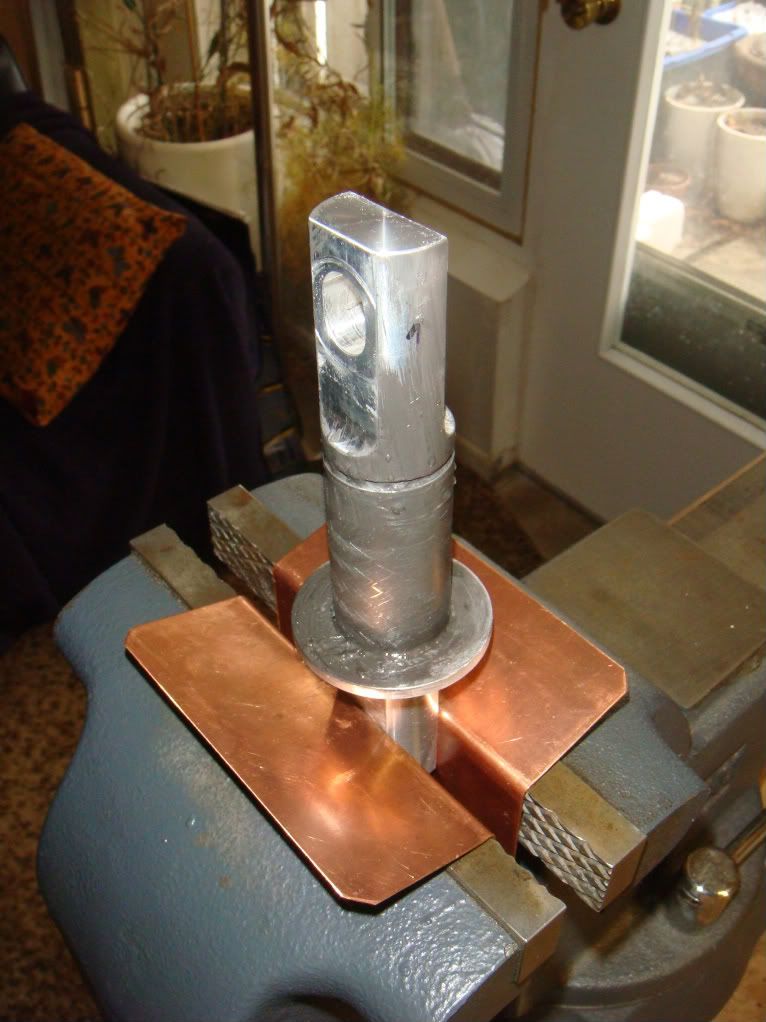
Here's the shaft with the bushing removed. Notice the almost complete lack of greese.

This is what a front-upper arm looks like completely disassembled. If I can make one suggestion...have a supply of extra circlips on hand. They have a tendency to distort somewhat during removal.
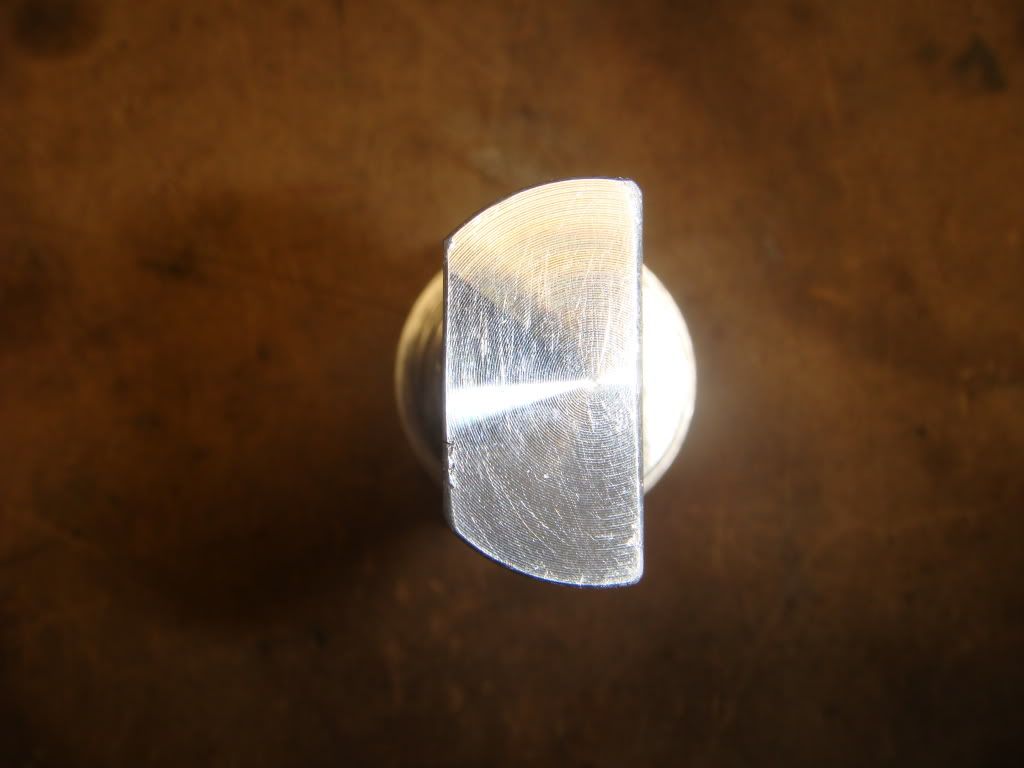
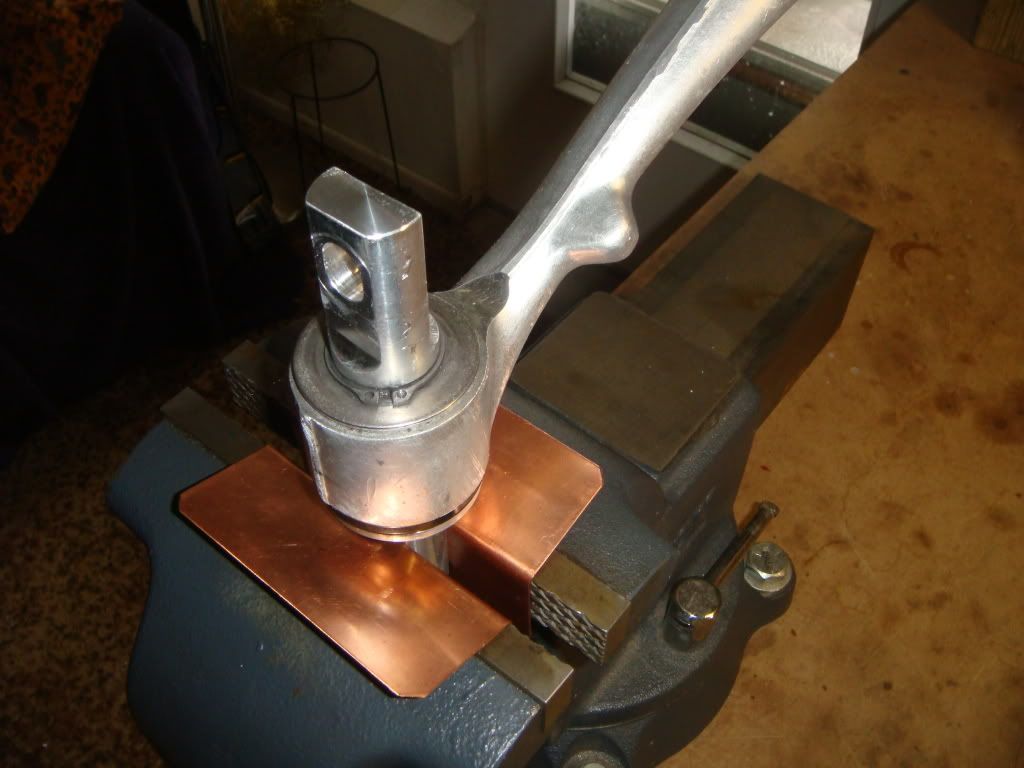
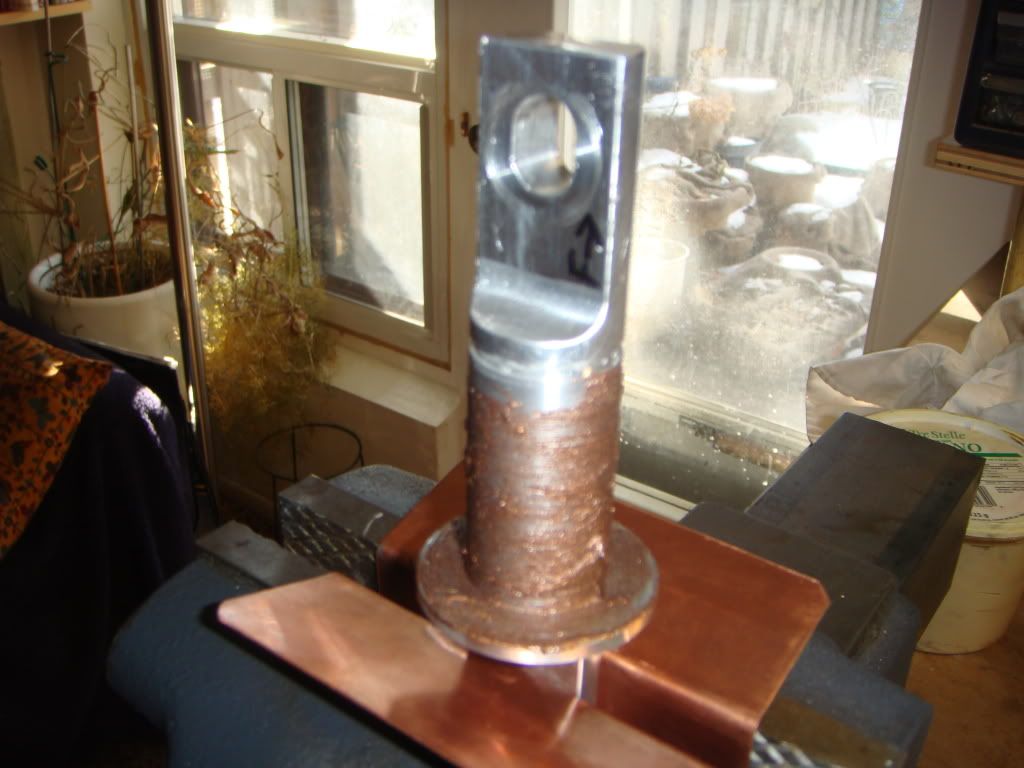
Here's an interesting feature of the VBP bushings. This is an end view of the pivot shaft. These can be bolted up to the car with either the short or long side against the frame. With the short side against the frame, you can achieve the same range of camber adjustment as OEM. Mounting them with the long face against the frame gives you a boatload of extra negative camber, making agressive track alignments easy to achieve.
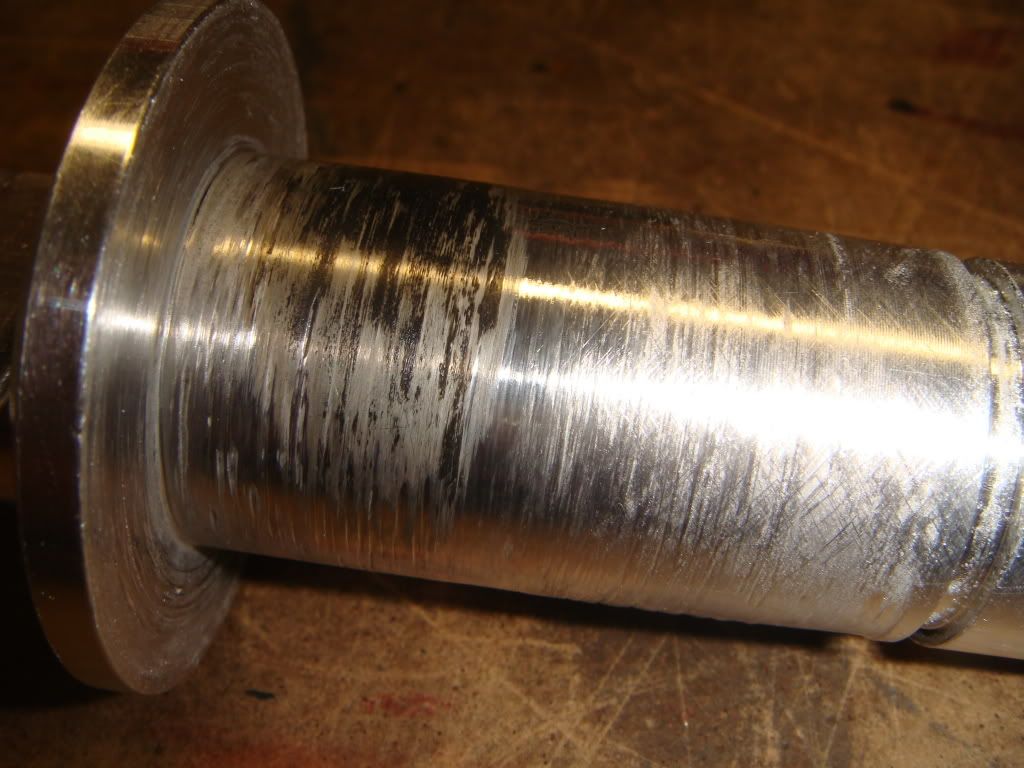
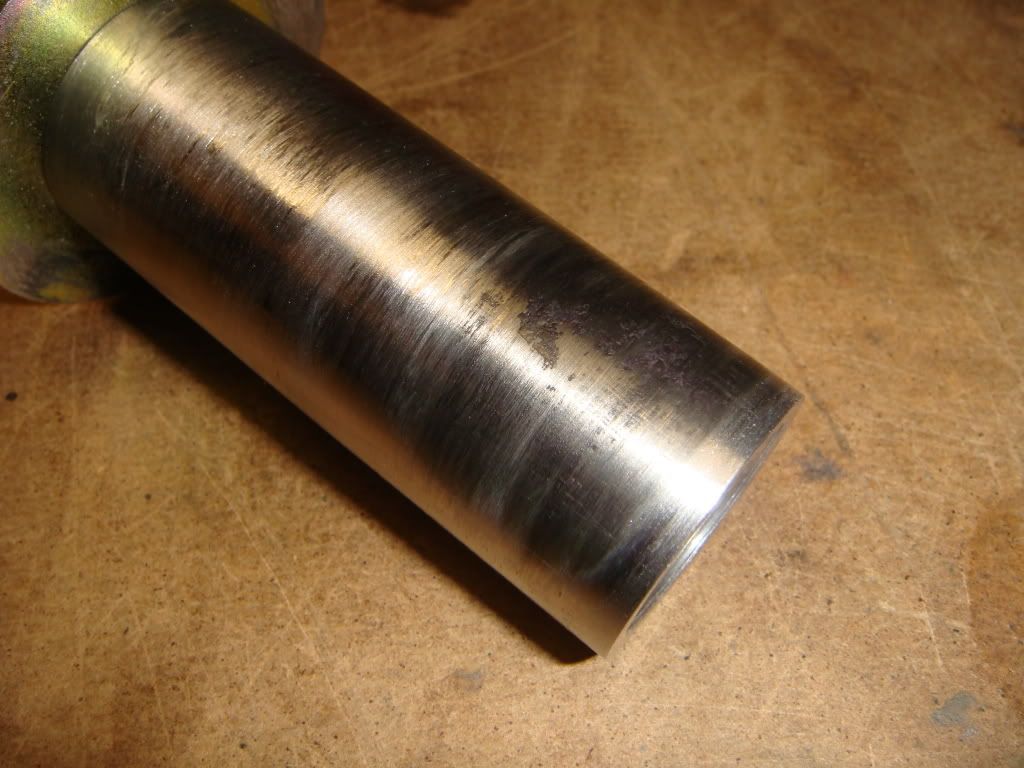
Here's what happens when the bushings dry up...material begins to transfer from the bushing to the shaft. Once this process begins, moaning and groaning is right around the corner. Before the bushing can be reassembled, this build-up must be removed.
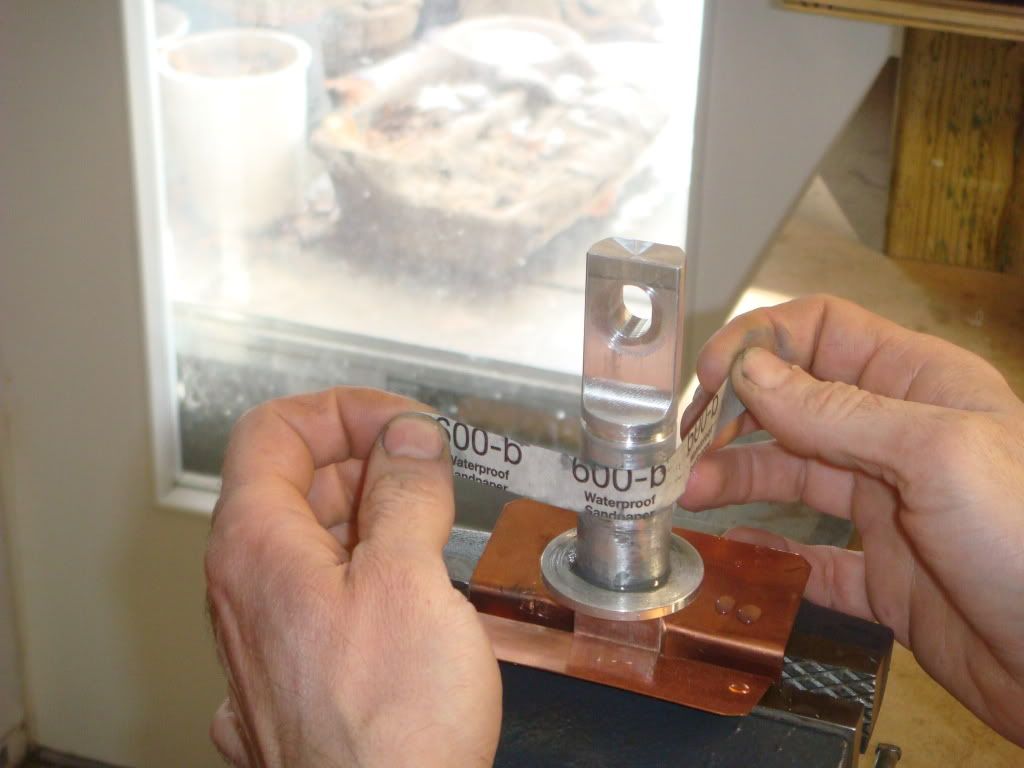
Simply run some 600 grit paper soaked in varsol over the shaft like this. Remove ALL traces of build-up, but try and avoid removing aluminum from the shaft.
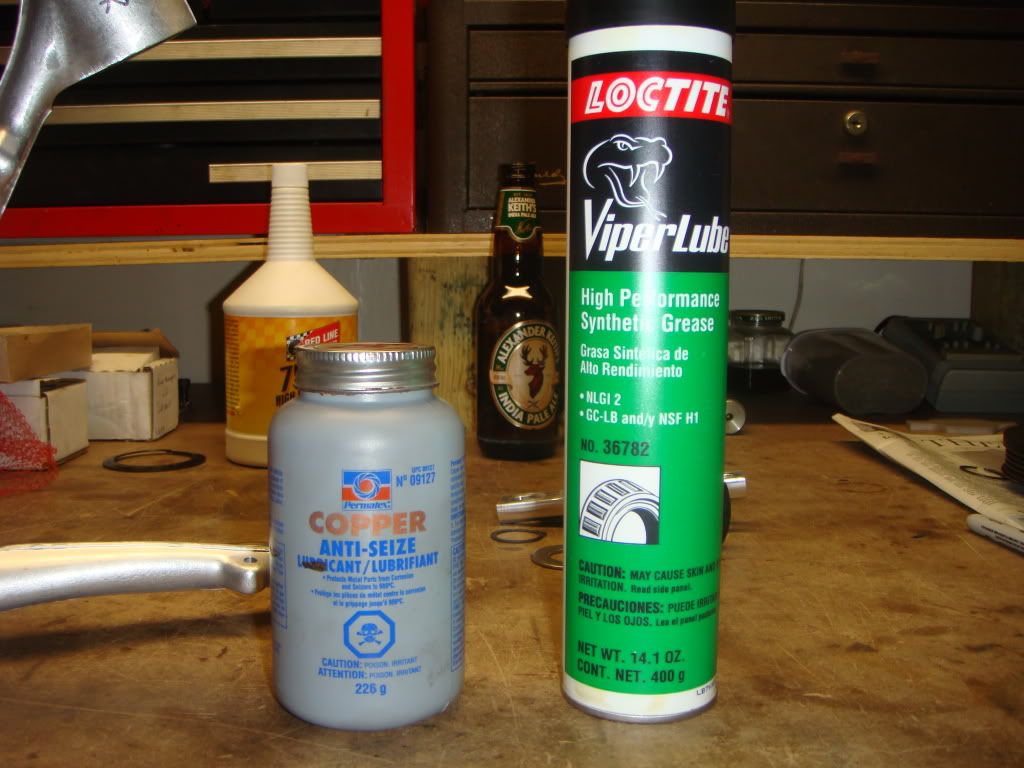
After years of experimenting, these are the two lubes which have worked the best for me. Not great, but good enough. Permatex Copper Anti-Seize on the shafts, and Loctite ViperLube full synthetic greese in the bushings. If anyone knows something that works really well, speak now.
Here's the shaft, lubed with anti-seize. Don't forget to lube the thrust surface as well!
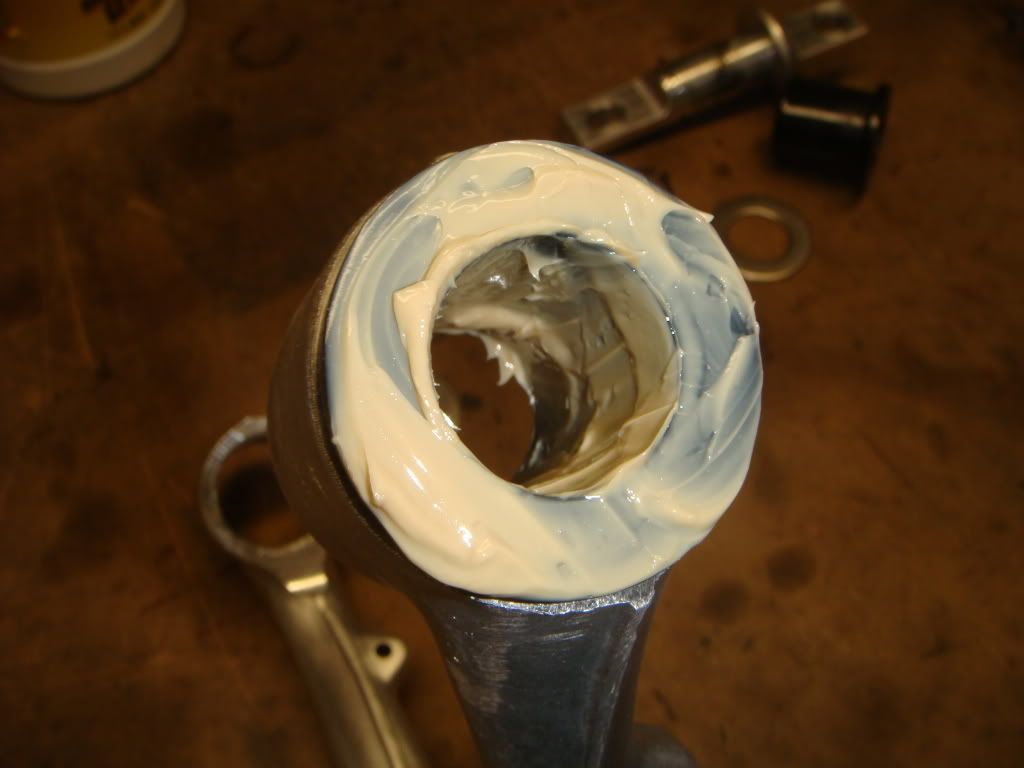
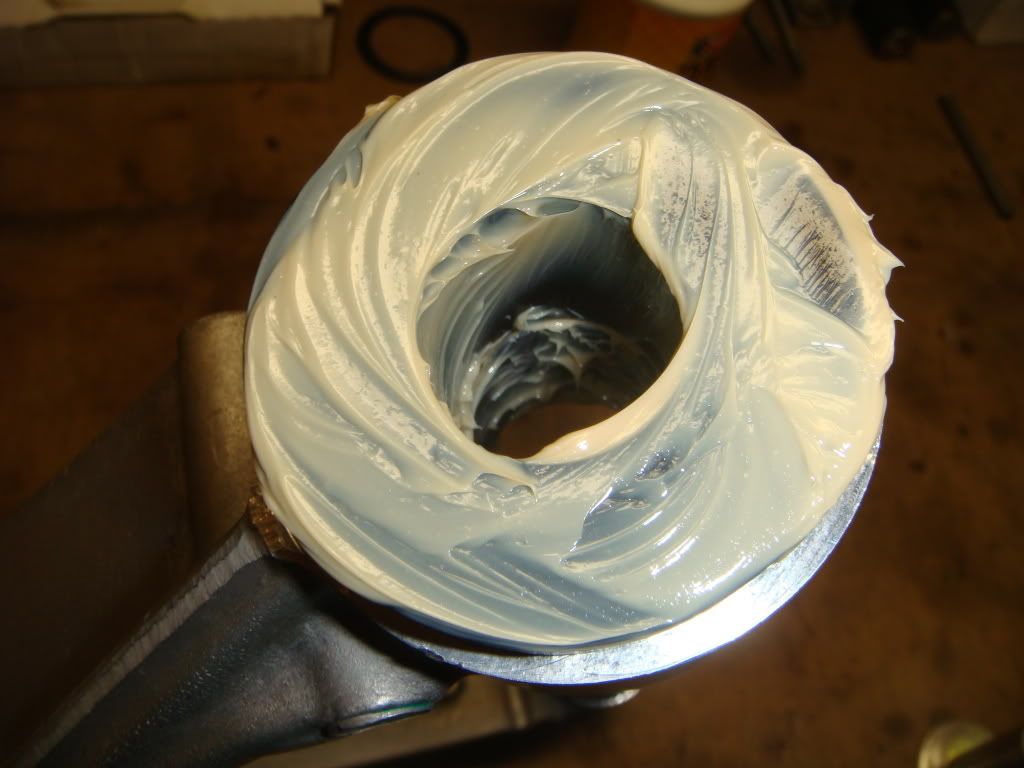
...and here's the greased bushing, pushed back into the arm.
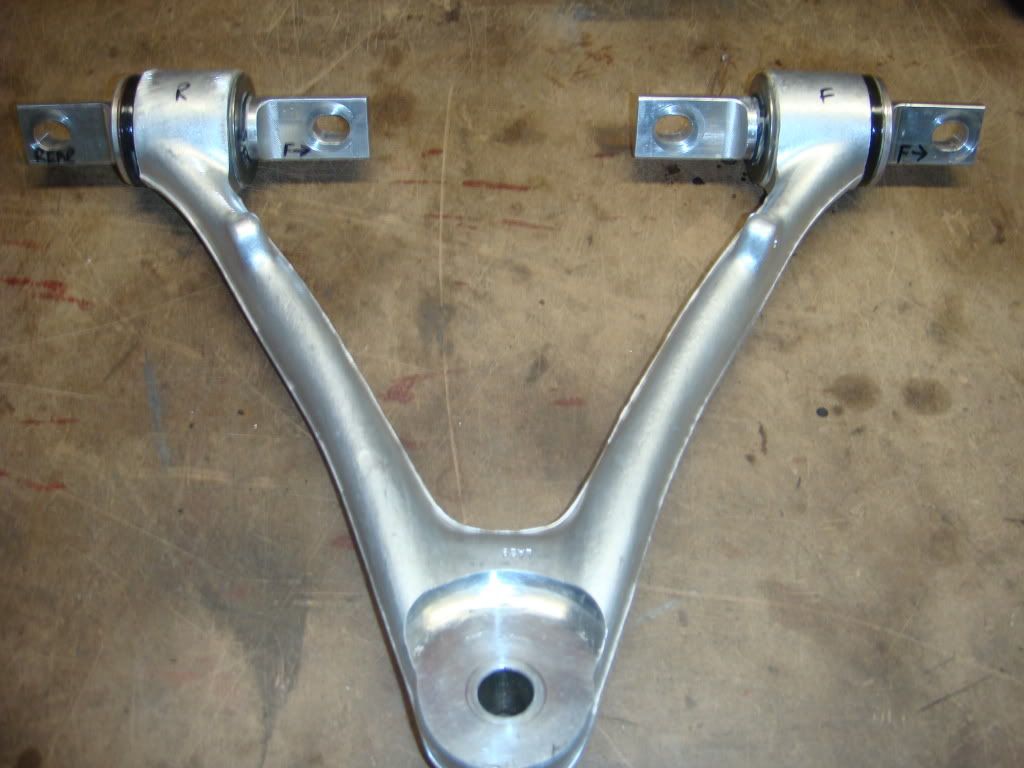
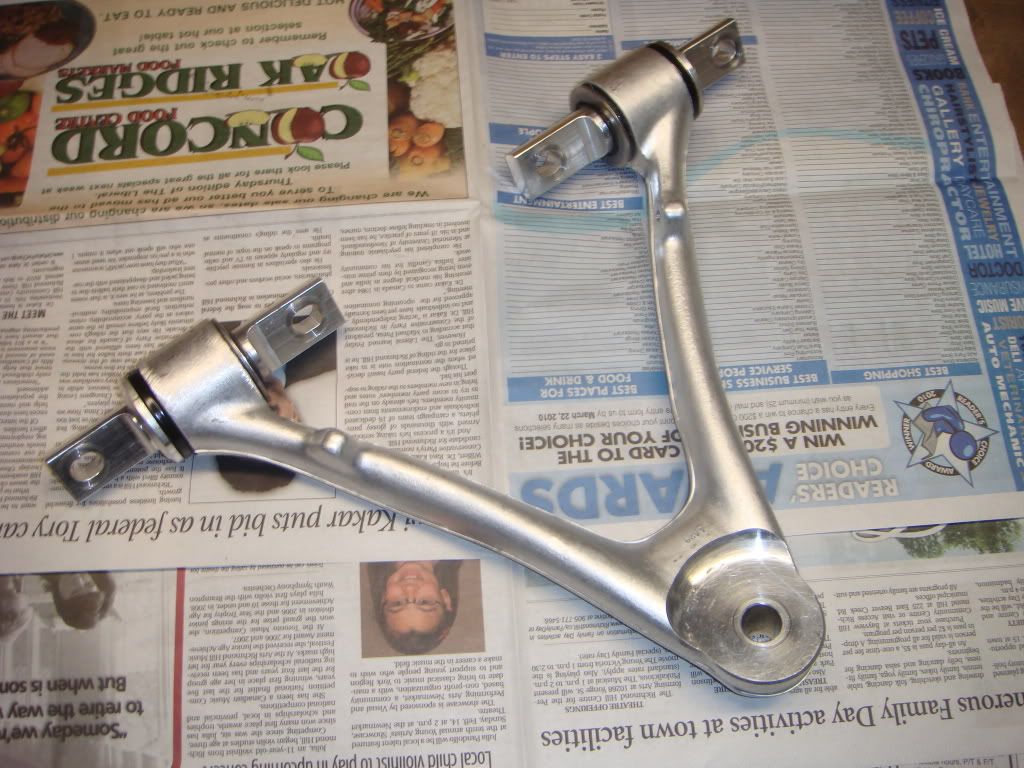
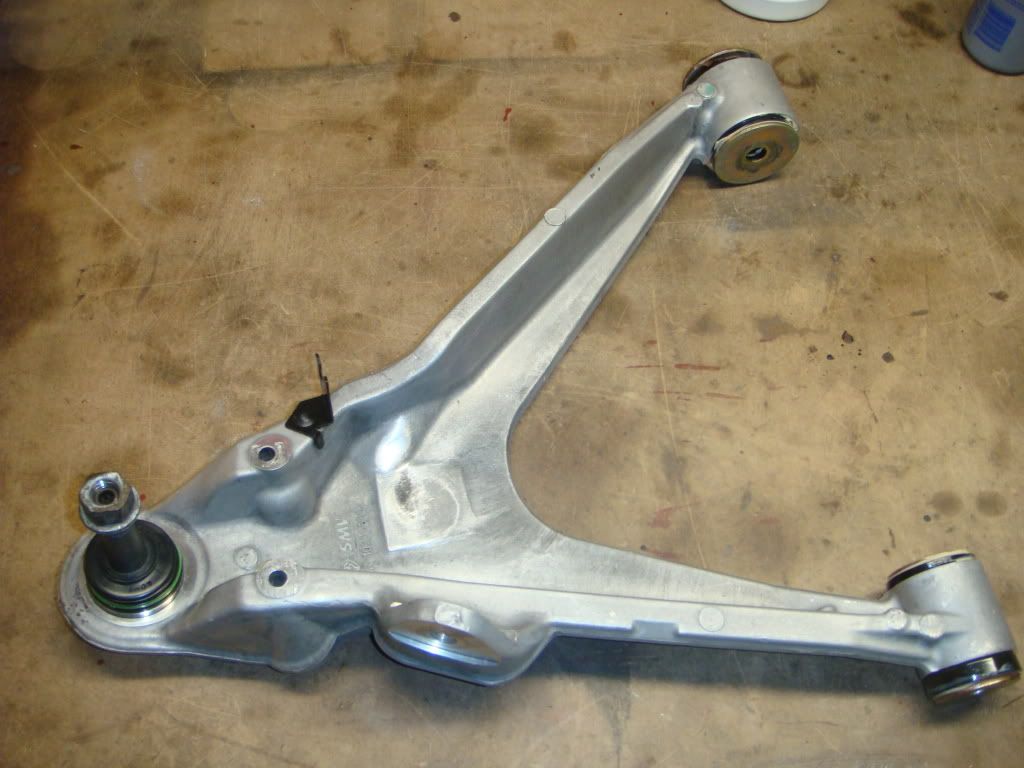
Finished front upper arm. Note that the bushings press in from the outside in. The shafts are inserted with the flanges to the outside.
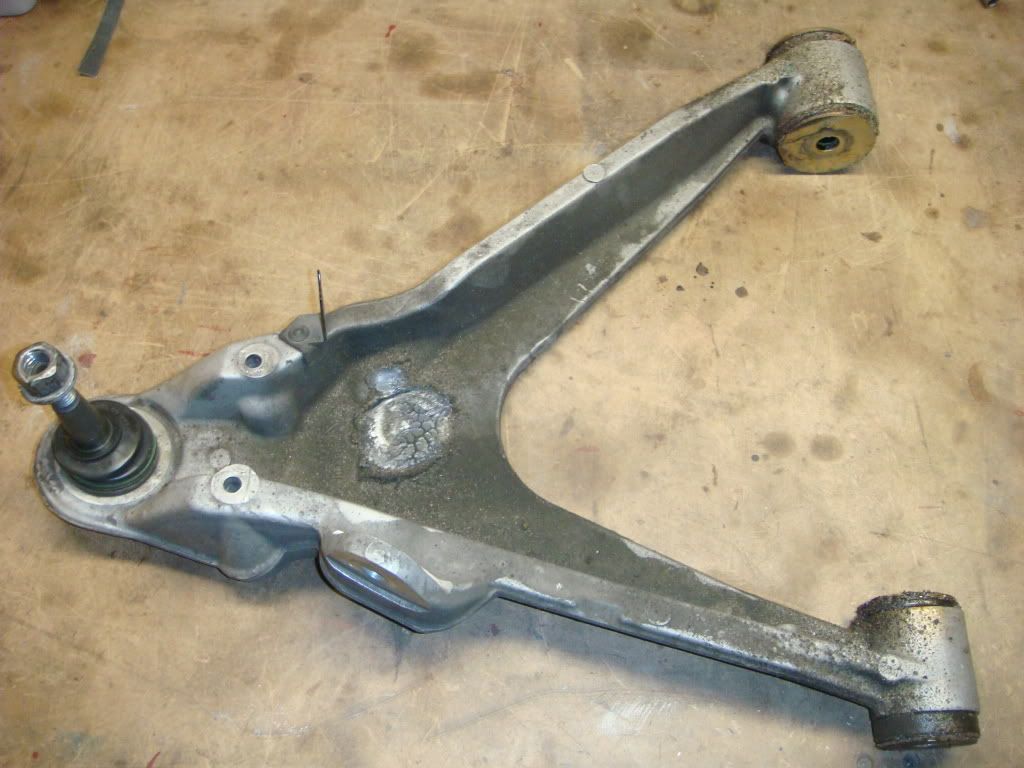
Front lower arm. The bushings in this are representative of all the bushings in the rear, so I'll only show how to do these...the rears are done the same way.
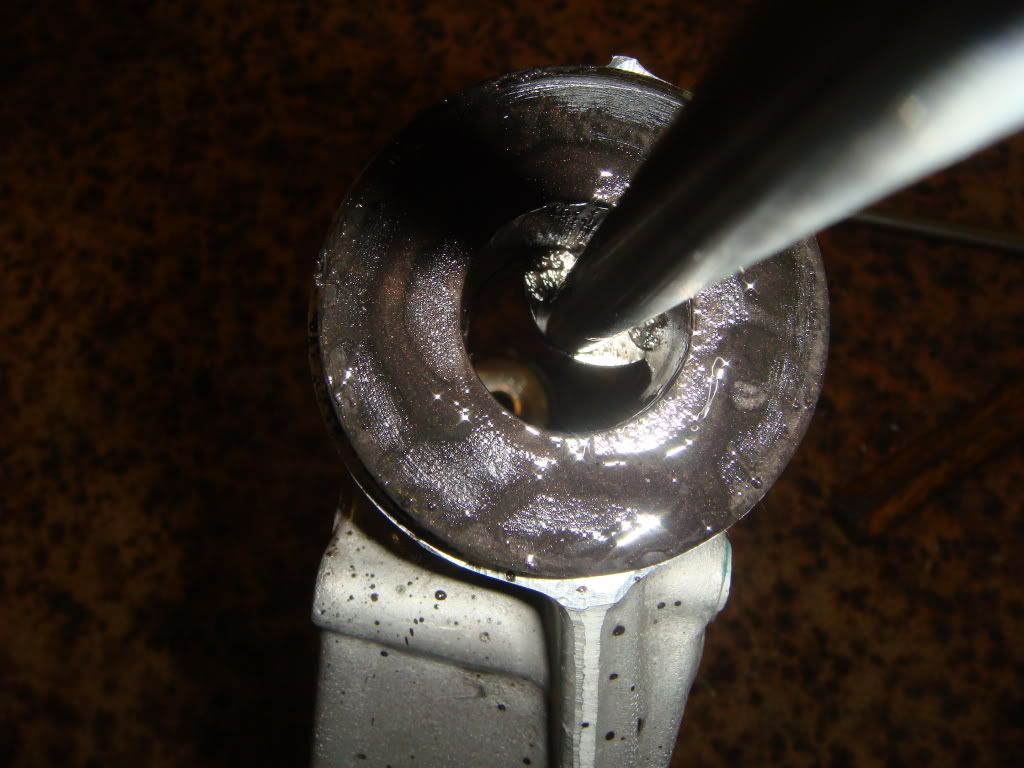
The first thing to do after the arm has been cleaned is seperate one of the outer washers from the center shaft. The easiest way to do this is to insert a pin punch or screwdriver into the center hole and knock against the shoulder of the washer. Once one washer is off, pull the other off with the center shaft still attached. If it doesn't slide out easily, knock it out from the other side with a long socket.
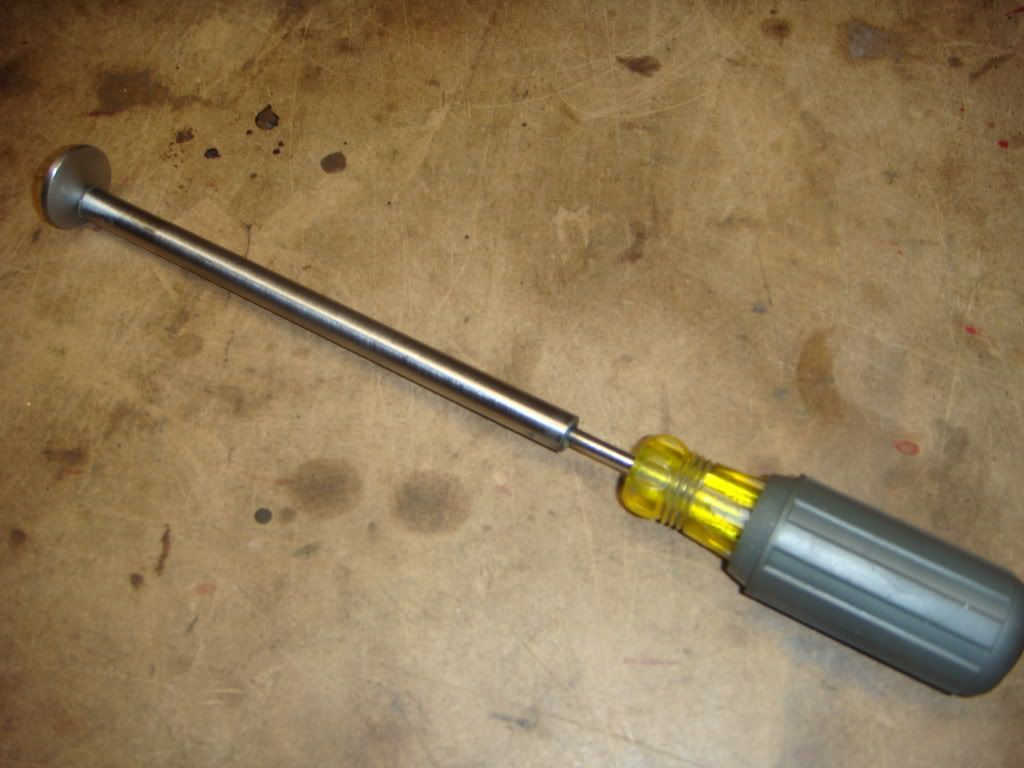
Once the side washers and center shafts are out, the bushings can be removed from the arm. The bushings are in 2 pieces, pressed in from either side. This makes it hard to get to the back of the bushing to knock it out. I made this tool to sneek into the gap between the bushing halves.
Here it is in position. I just tap on the end with a small ball peen hammer to push the bushing out. Once one half is out, the other half can be knocked out with a socket.
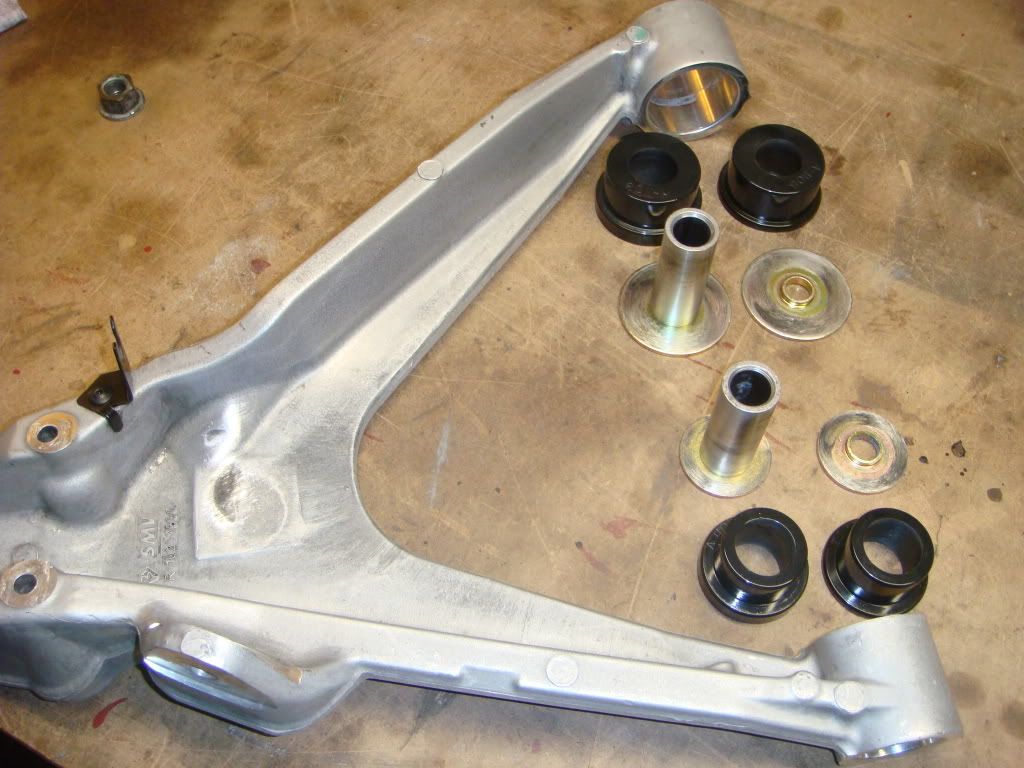
The arm, completely disassembled. Note how the washers have raised flanges in the center which press into the shaft to hold them in.
These steel shafts can pick up material from the bushings as well...make sure you clean them well.
I use the same lubricants on these bushings as well. When I apply the grease, I try and work as much as I can into the groove between the two halves. When I take the arms off in the winter, the front-lowers NEVER squeak...maybe this extra grease is why.
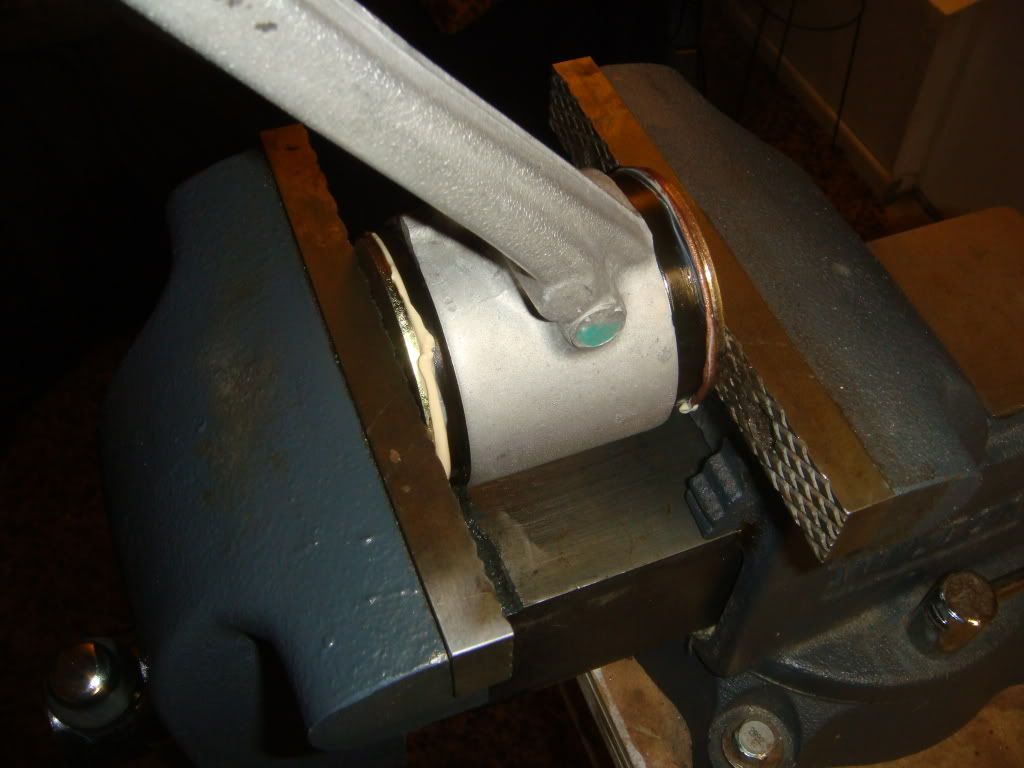
Once everything is lubed and assembled the washer needs to be pressed back into the shaft. This is all it takes. Just crank on the vise as hard as you can. When you have it clamped like this, you can really appreciate how smoothly these bushings operate. Note: make sure the bushing halves with the wide flanges go towards the outside...if you mess this up, the arm won't fit the crossmember any more.
Front lower arm finished.
Still reading? Only six more to go!

Here's the front right upper arm, straight off the car. This arm has about 8 months of daily driving and one long road trip on it since it was last overhauled. As you can see, the grease tends to ooze out over time, drying out the working surfaces inside.
First thing to do is give it a bath in the parts tank, and remove as much of the crud as possible. If there's one good think about the lube leaking out of the bushings, it really protects the arm from the elements...this arm is 8yrs old, driven daily.
Once it's clean, the bushings can be disassembled. Its a good idea to use soft jaws in the vice to prevent marking the soft aluminum shaft. Simply remove the circlip, lift off the washer and then the arm with the bushing still in it. To remove the bushing from the arm, push it out with your thumbs, or tap it out with a hammer/socket.
Here's the shaft with the bushing removed. Notice the almost complete lack of greese.
This is what a front-upper arm looks like completely disassembled. If I can make one suggestion...have a supply of extra circlips on hand. They have a tendency to distort somewhat during removal.
Here's an interesting feature of the VBP bushings. This is an end view of the pivot shaft. These can be bolted up to the car with either the short or long side against the frame. With the short side against the frame, you can achieve the same range of camber adjustment as OEM. Mounting them with the long face against the frame gives you a boatload of extra negative camber, making agressive track alignments easy to achieve.
Here's what happens when the bushings dry up...material begins to transfer from the bushing to the shaft. Once this process begins, moaning and groaning is right around the corner. Before the bushing can be reassembled, this build-up must be removed.
Simply run some 600 grit paper soaked in varsol over the shaft like this. Remove ALL traces of build-up, but try and avoid removing aluminum from the shaft.
After years of experimenting, these are the two lubes which have worked the best for me. Not great, but good enough. Permatex Copper Anti-Seize on the shafts, and Loctite ViperLube full synthetic greese in the bushings. If anyone knows something that works really well, speak now.
Here's the shaft, lubed with anti-seize. Don't forget to lube the thrust surface as well!
...and here's the greased bushing, pushed back into the arm.
Finished front upper arm. Note that the bushings press in from the outside in. The shafts are inserted with the flanges to the outside.
Front lower arm. The bushings in this are representative of all the bushings in the rear, so I'll only show how to do these...the rears are done the same way.
The first thing to do after the arm has been cleaned is seperate one of the outer washers from the center shaft. The easiest way to do this is to insert a pin punch or screwdriver into the center hole and knock against the shoulder of the washer. Once one washer is off, pull the other off with the center shaft still attached. If it doesn't slide out easily, knock it out from the other side with a long socket.
Once the side washers and center shafts are out, the bushings can be removed from the arm. The bushings are in 2 pieces, pressed in from either side. This makes it hard to get to the back of the bushing to knock it out. I made this tool to sneek into the gap between the bushing halves.
Here it is in position. I just tap on the end with a small ball peen hammer to push the bushing out. Once one half is out, the other half can be knocked out with a socket.
The arm, completely disassembled. Note how the washers have raised flanges in the center which press into the shaft to hold them in.
These steel shafts can pick up material from the bushings as well...make sure you clean them well.
I use the same lubricants on these bushings as well. When I apply the grease, I try and work as much as I can into the groove between the two halves. When I take the arms off in the winter, the front-lowers NEVER squeak...maybe this extra grease is why.
Once everything is lubed and assembled the washer needs to be pressed back into the shaft. This is all it takes. Just crank on the vise as hard as you can. When you have it clamped like this, you can really appreciate how smoothly these bushings operate. Note: make sure the bushing halves with the wide flanges go towards the outside...if you mess this up, the arm won't fit the crossmember any more.
Front lower arm finished.
Still reading? Only six more to go!
Pro


Joined: Feb 2006
Posts: 594
Likes: 5
From: O Fallon MO
Good write up. What are you using to get the arms so clean? Also for lube have you heard of Super Lube? I got it from Spohn Performance many years ago for my F-Body's Poly bushings. resists water washing it away.
Lube Link
Super-Lube Manufacturer Link
Chris
Lube Link
Super-Lube Manufacturer Link
Chris
Thread Starter
Burning Brakes
Joined: Jun 2005
Posts: 782
Likes: 45
From: Toronto Ontario
Good write up. What are you using to get the arms so clean? Also for lube have you heard of Super Lube? I got it from Spohn Performance many years ago for my F-Body's Poly bushings. resists water washing it away.
Lube Link
Super-Lube Manufacturer Link
Chris
Lube Link
Super-Lube Manufacturer Link
Chris

Race Director

Joined: Dec 2002
Posts: 10,233
Likes: 21
From: Baltimore suburbs Maryland
Great write up. I had Poly control arm bushings they were fun while they lasted but once they got noisy, after all the hassle on a daily driver, I took them off and went back to rubber 
Corvette Stories
The Best of Corvette for Corvette Enthusiasts

5 Best & 5 Worst Corvette Daily Drivers
Joe Kucinski
The Headlights of Every Corvette Generation Explained
Joe Kucinski
5 Best & 5 Most Overrated Corvette Track Packages of All Time!
Joe Kucinski
Every 2027 Corvette Engine Explained
Joe Kucinski
Designer Imagines A Corvette That Looks More Like a Corvette Than the Corvette
Verdad Gallardo
10 Ugly Corvettes That We Still Kinda Love
Joe Kucinski
Top 10 Most Expensive Corvettes Ever Sold on Bring A Trailer
Brett Foote
10 Things Every Corvette Owner Needs (2026 Edition)
Michael S. Palmer
8 Most "Only Corvette Owners Understand" Quirks and Problems
Pouria Savadkouei
Thread Starter
Burning Brakes
Joined: Jun 2005
Posts: 782
Likes: 45
From: Toronto Ontario
I'm scared The cross-section around the bushings is so thin, I don't really feel comfortable machining into it. Besides, I doubt the grease would spread evenly around. Theres pretty much no clearance between the shafts and bushings.
I do this for my sway bars and it works great! The sways have split bushings that kinda "wrap around" the bars, so its easy. With these bushings, you have to slide the center shafts into the bushings, which would just scrape the tape off...
The cross-section around the bushings is so thin, I don't really feel comfortable machining into it. Besides, I doubt the grease would spread evenly around. Theres pretty much no clearance between the shafts and bushings.I do this for my sway bars and it works great! The sways have split bushings that kinda "wrap around" the bars, so its easy. With these bushings, you have to slide the center shafts into the bushings, which would just scrape the tape off...
Pro
Joined: Feb 2006
Posts: 594
Likes: 5
From: O Fallon MO
I just cleaned them in a varsol parts cleaning tank...They're pretty greasy by the end of the summer, and I guess that keeps em looking fresh underneath. Thanks for the heads up on the grease...I'm done for this year, but maybe I'll give it a shot next winter. I've found the front-uppers to be the worst groaners by far. How did ur F-body fare with this stuff?
Good write up.
Chris
Team Owner


Joined: May 2001
Posts: 87,419
Likes: 1,598
From: Western NY
Good write up. What are you using to get the arms so clean? Also for lube have you heard of Super Lube? I got it from Spohn Performance many years ago for my F-Body's Poly bushings. resists water washing it away.
Lube Link
Super-Lube Manufacturer Link
Chris
Lube Link
Super-Lube Manufacturer Link
Chris

Thread Starter
Burning Brakes
Joined: Jun 2005
Posts: 782
Likes: 45
From: Toronto Ontario
Mods that frighten passengers are good...but ones that frighten the driver are the best
 . Getting the old rubber out will be the worst part of the job. You'll need a press to do it properly.

Tech Contributor


Joined: Dec 1999
Posts: 32,910
Likes: 2,402
From: Anthony TX
CI 6,7,8,9,11 Vet
St. Jude Donor '08
 about my suspension and cars capability. I pushed it to some very far limits and felt the rear-end suspension bushings not being happy.
New POLY Bushings should be REALLY COOL!
Yea,,,,Ive scared quite a few people in the right seat.
I let my son drive my ZO6 when he came home on leave from the Army and we were going to dinner. He was at a light and we needed to make a left turn. He started off in a normal every day start form the light and about half way thru the intersection, he NAILED the throttle and power slid thru the turn. I about S%*@ my pants.


He looked at me and laughed and said "See how it feels being the PASSENGER!"
 After I regained my composure, I had to laugh.
Chip off the ol� block!
Bill C

Burning Brakes
Joined: Feb 2010
Posts: 761
Likes: 1
From: sunnyvale ca
Race Director
Joined: May 2005
Posts: 15,960
Likes: 21
From: West Norriton PA
St. Jude Donor '08
Zert fittings work well and will shoot the grease where it's suppose to be on the inner side of the bushing between the inner bushing and metal sleeve.
Looks like this.
Looks like this.
Safety Car


Joined: May 2006
Posts: 3,799
Likes: 1
From: Northern Virginia
St. Jude Donor '08