



01 Harmonic Balancer

Team Owner


Joined: May 2001
Posts: 87,437
Likes: 1,598
From: Western NY


I used a long piece of string tied to the seat tracks, and wrapped around the bottom of the steering wheel.
Also, it helps if you loosen the two plastic tabs the hold the power steering lines to the subframe. By doing this, you'll have a little more movement of the lines, which helps when you're loosening the lines from the rack.
Thread Starter
Burning Brakes


Joined: Sep 2002
Posts: 1,012
Likes: 62
From: Houston Tx
Hi all. I just about have the steering gear out. Looks as though the passanger side tie rod end needs to come out to be able to clear and gear unseat it high enough for that rubber gasket to clear the cross memeber?
Also, I confirmed, the gear is leaking from the shaft connect area. What are the options for the leak? Is the there a seal available? Do I need to have it rebuilt by someone? Thanks.
Also, I confirmed, the gear is leaking from the shaft connect area. What are the options for the leak? Is the there a seal available? Do I need to have it rebuilt by someone? Thanks.
Team Owner
Joined: May 2001
Posts: 87,437
Likes: 1,598
From: Western NY
Hi all. I just about have the steering gear out. Looks as though the passanger side tie rod end needs to come out to be able to clear and gear unseat it high enough for that rubber gasket to clear the cross memeber?
Also, I confirmed, the gear is leaking from the shaft connect area. What are the options for the leak? Is the there a seal available? Do I need to have it rebuilt by someone? Thanks.
Also, I confirmed, the gear is leaking from the shaft connect area. What are the options for the leak? Is the there a seal available? Do I need to have it rebuilt by someone? Thanks.
BTW, the "rubber gasket" you're referring to, is a bushing, that provides a little vibration isolation for the rack from the frame. If yours is dried out and cracked, or damaged from removal, Moog makes a replacement rubber piece, and Doug Rippe Motorsports makes both Delrin and aluminum bushings.
Thread Starter
Burning Brakes
Joined: Sep 2002
Posts: 1,012
Likes: 62
From: Houston Tx
Steering gear is out. Just finished pulling it. I hear that's the hard part of this project. I sure hope so. Thanks for all the help. I found a company that says they can reseal/rebuild the steering gear for $200. I'll get it shipped off this week. EBCM is on it's way back from repair to get rid of those annoying "service" messages.
Thread Starter
Burning Brakes
Joined: Sep 2002
Posts: 1,012
Likes: 62
From: Houston Tx
Hi all, I'm about ready to complete the work to install the new harmonic balancer on my 01 and low and behold, I see evidence of oil leaking from the timing cover edges as well as the oil pan. Much more than I bargained for with this job but suppose it's fair for a car with a 100,000 miles on it. I'm looking through my service manual and I am seeing that this j41476 (Front and Rear Cover Alignment) tool is called for to align the timing cover. Can anyone let me know if that's truly the case? I see that this thing is very expensive on line. I'm thinking I complete the front of the engine 1st and come back to the oil pan. Before I do that, does anyone have any idea how long the C5 factory oil pumps usually lasts?

Burning Brakes

Joined: Dec 2012
Posts: 832
Likes: 14
From: Lake Charles Louisiana
You'll be about 1/2 hour from having a new oil pump in there. No way I was putting mine back together without it. Went with the melling 10296 high volume pump. Ported it a little just to clean up the galleys and shimmed the spring. Idles cold at about 60 psi. Hot at about 48 psi. Engine is much quieter now at all temps including cold at start up. I just used my ATI pinning tool to align my cover. Eye balled it afterwords. No leaks and that was about 20K miles ago.
Corvette Stories
The Best of Corvette for Corvette Enthusiasts

5 Best & 5 Worst Corvette Daily Drivers
Joe Kucinski
The Headlights of Every Corvette Generation Explained
Joe Kucinski
5 Best & 5 Most Overrated Corvette Track Packages of All Time!
Joe Kucinski
Every 2027 Corvette Engine Explained
Joe Kucinski
Designer Imagines A Corvette That Looks More Like a Corvette Than the Corvette
Verdad Gallardo
10 Ugly Corvettes That We Still Kinda Love
Joe Kucinski
Top 10 Most Expensive Corvettes Ever Sold on Bring A Trailer
Brett Foote
10 Things Every Corvette Owner Needs (2026 Edition)
Michael S. Palmer
8 Most "Only Corvette Owners Understand" Quirks and Problems
Pouria Savadkouei
Race Director


Joined: Mar 2008
Posts: 12,413
Likes: 502
From: Rio Rancho NM
Hi all, I'm about ready to complete the work to install the new harmonic balancer on my 01 and low and behold, I see evidence of oil leaking from the timing cover edges as well as the oil pan. Much more than I bargained for with this job but suppose it's fair for a car with a 100,000 miles on it. I'm looking through my service manual and I am seeing that this j41476 (Front and Rear Cover Alignment) tool is called for to align the timing cover. Can anyone let me know if that's truly the case? I see that this thing is very expensive on line. I'm thinking I complete the front of the engine 1st and come back to the oil pan. Before I do that, does anyone have any idea how long the C5 factory oil pumps usually lasts?
http://www.saccitycorvette.com/Timin...nmenttool.html




Race Director
Joined: Mar 2008
Posts: 12,413
Likes: 502
From: Rio Rancho NM

pin the crank while you are down there..


old sprocket coming out..

Hello stock cam!!

Almost forgot the dowels was so excited to get the damn thing out!!


New "Jam Cam"

Out with the old in with the new..

Putting it back together..

Now they say the pullers from autozone don't work I say they do and like a champ..


All out..Now before I put the new crank sprocket on I put it in the oven so it would slide on easier which it did after it was done BUT don't be a dumbass like me and put grease on it before it goes in the oven..Yeah it got smoky in the kitchen...oooops.....

Looks timed to me..

Last edited by Chicago1; Jul 22, 2014 at 06:23 PM.
Thread Starter
Burning Brakes
Joined: Sep 2002
Posts: 1,012
Likes: 62
From: Houston Tx
Yep, I understand what you all are saying. You can go as far as you want on these things. The way I look at it, the more I touch, the more chance I have to f something up. Don't ask about my Jeep still sitting and not running because of one of my "may as well change this" episodes. HAHAHA.
Last edited by hgoodwiniii; Jul 22, 2014 at 07:11 PM.
Race Director
Joined: Mar 2008
Posts: 12,413
Likes: 502
From: Rio Rancho NM
I hear that man but just something to consider since you already have done 90% of the work. When I took my rack off the second time I knew I wanted to do a cam sooner or later. There would not be a 3rd time to take the rack off. though I could do it in a couple hours. you get good at things once you done them a few times. Let us know what you need there isn't anything on these cars someone can't help you with.
Race Director
Joined: Mar 2008
Posts: 12,413
Likes: 502
From: Rio Rancho NM
I had it in when I did the whole thing..
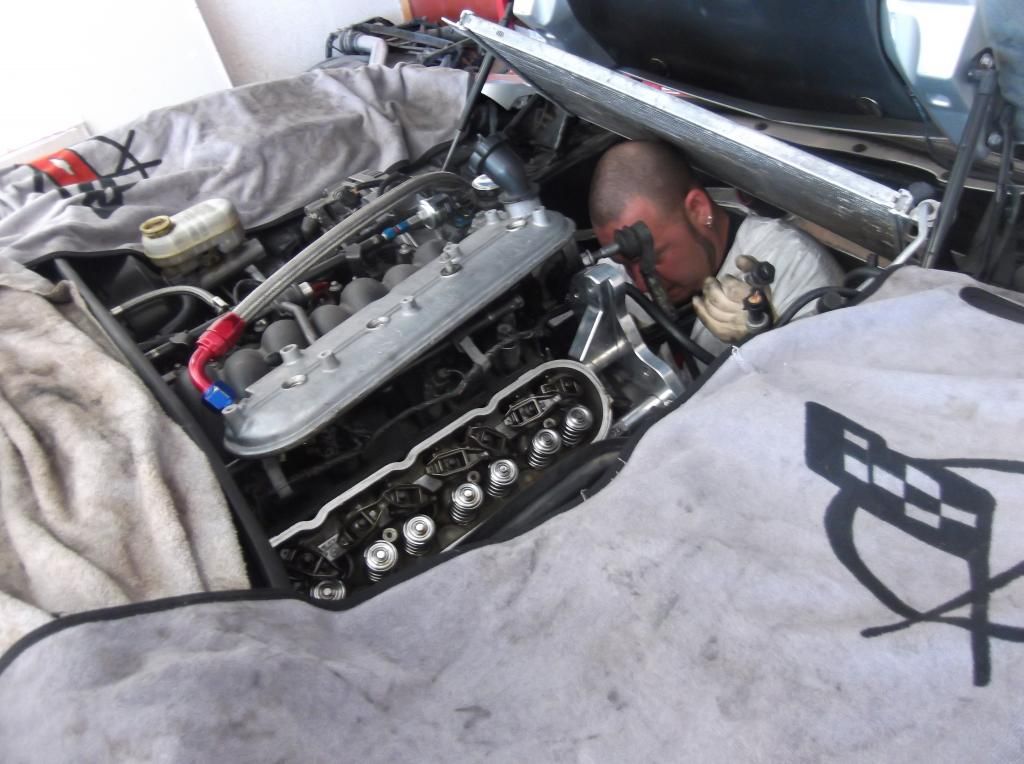
here is the springs coming out..
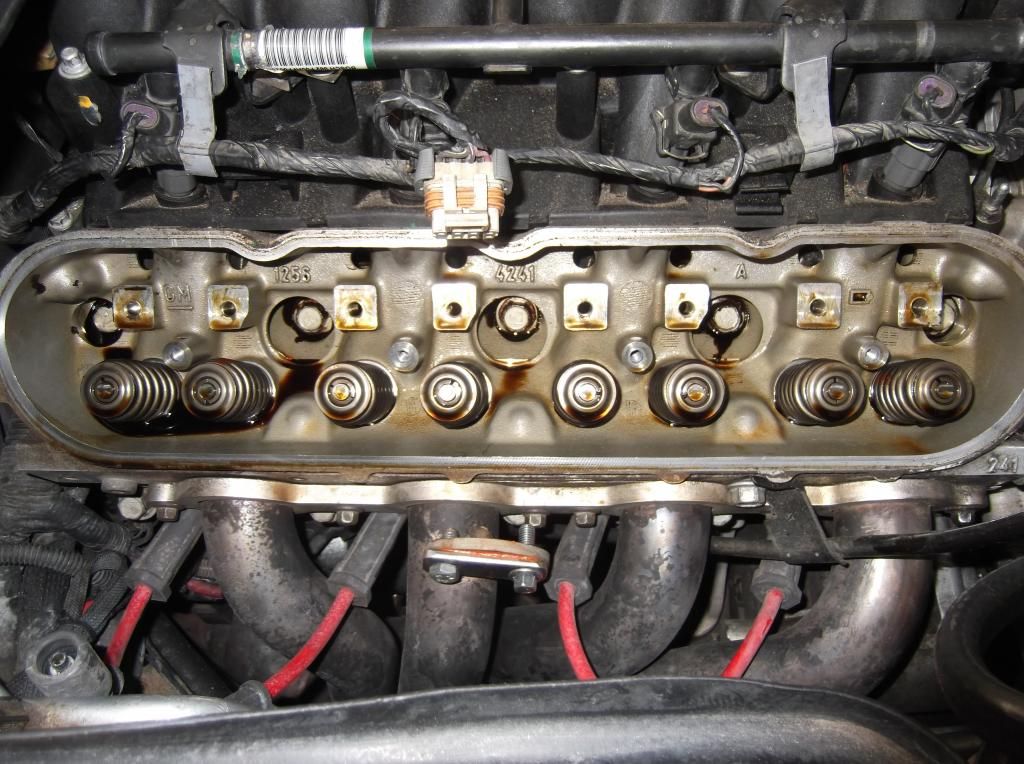
Take off the coilpacks and remove the 4 8mm bolts and you should see this. Don't mind the crooked looking one I had loosened it before I took the pic
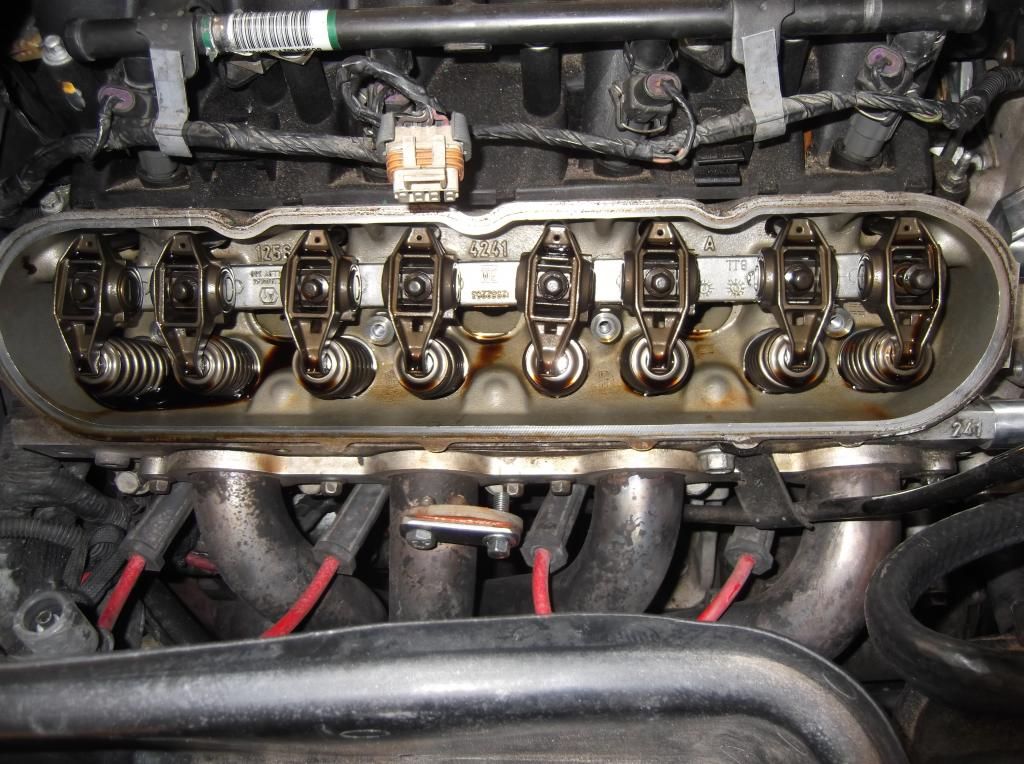
Take out this 8mm on the rocker.
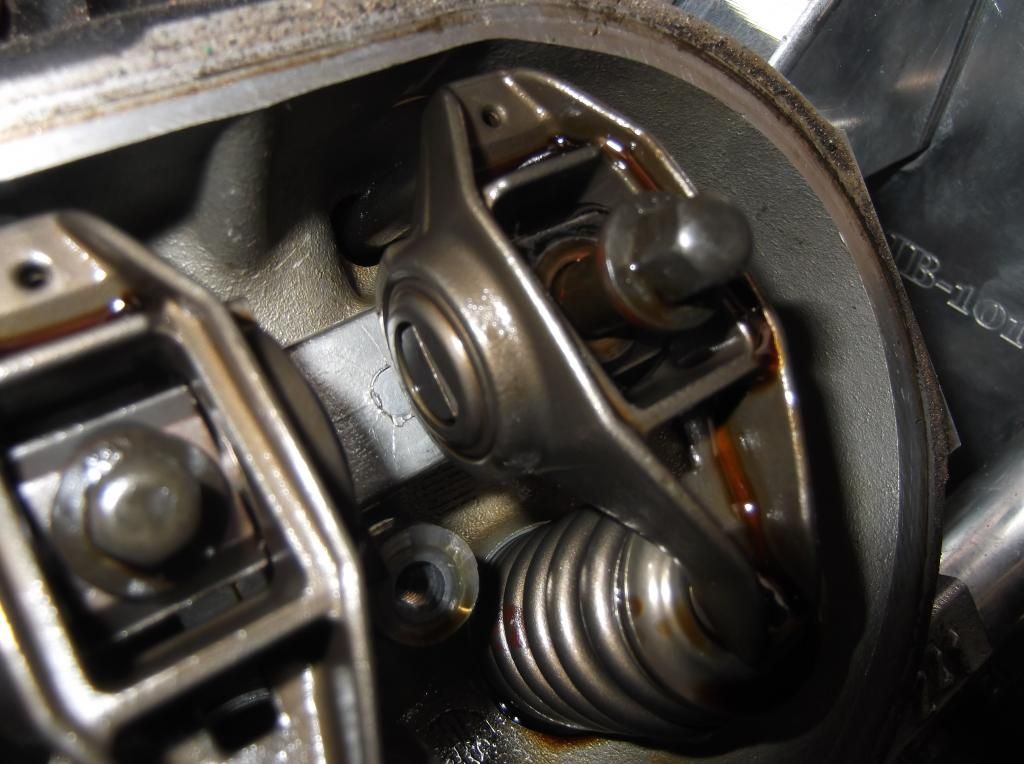
Take the pushrod out..
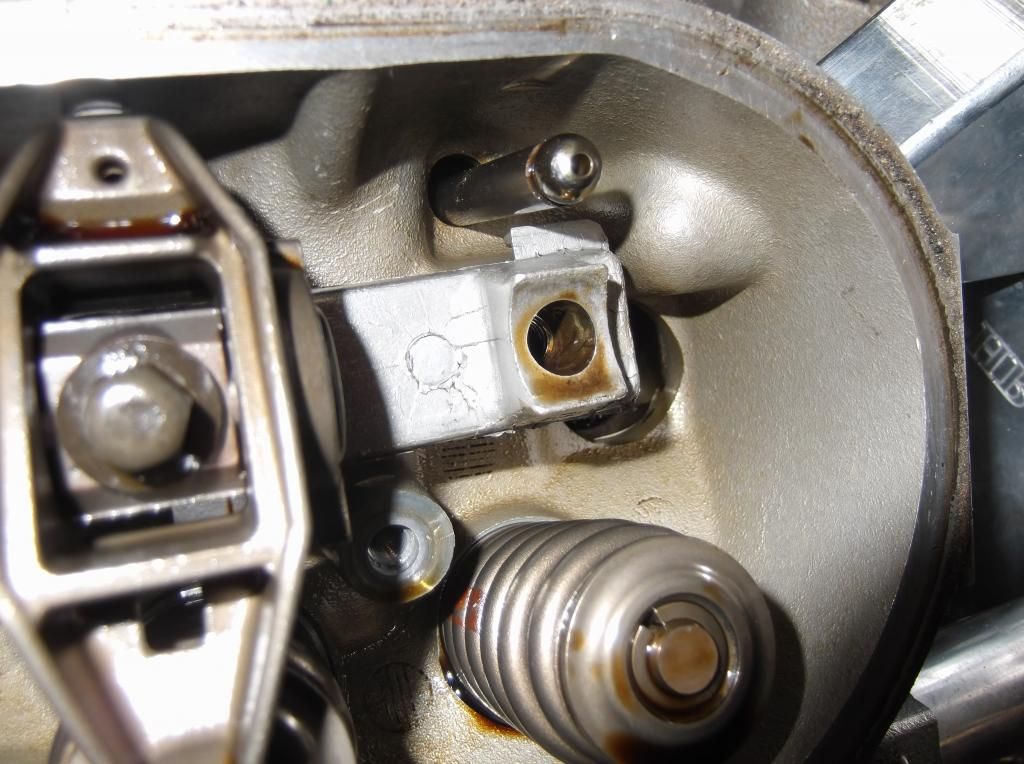
This is what you should have..
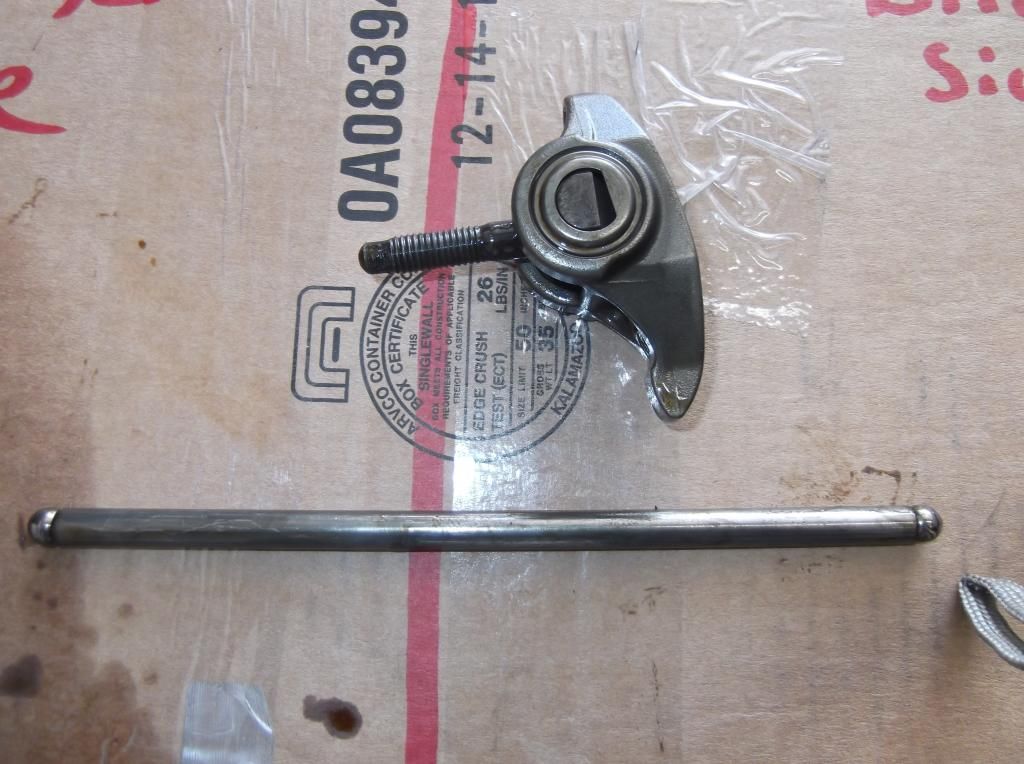
Then take the rocker arm pedestal out and for some reason mine was on upside down...wonder why?
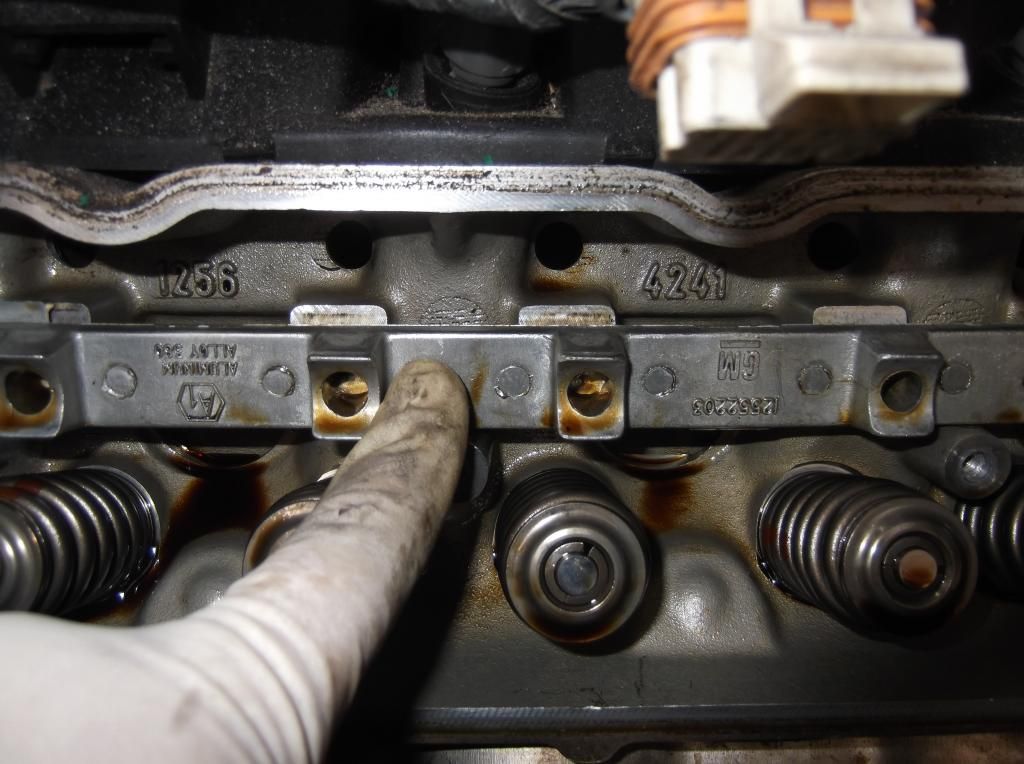
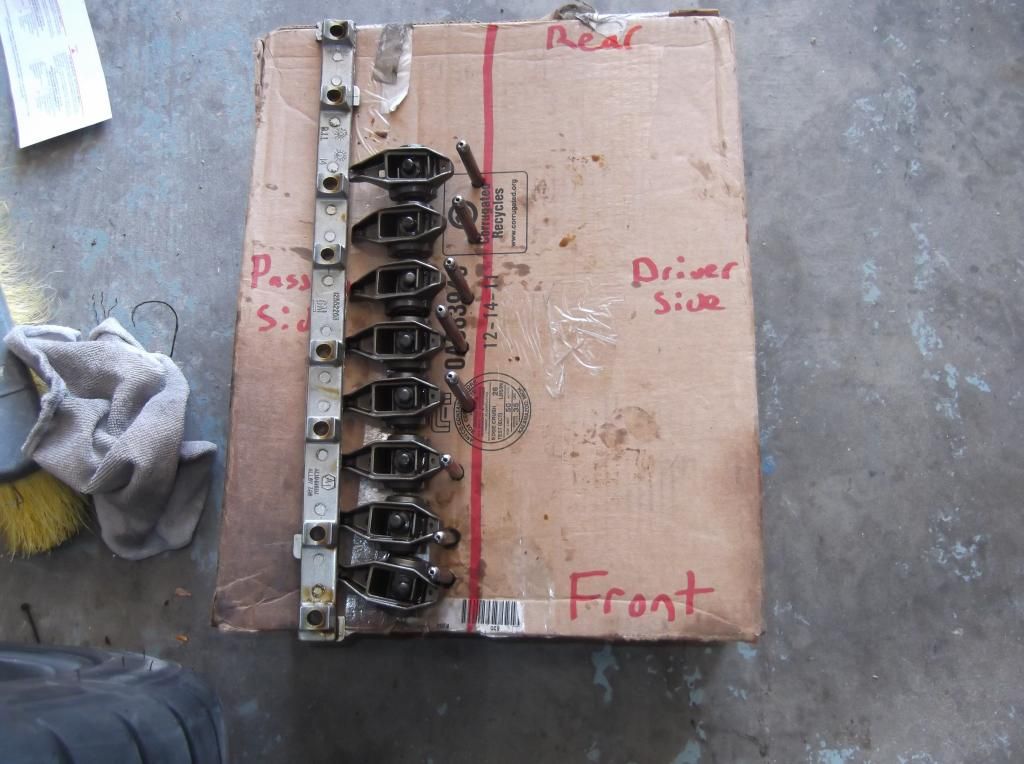
all out
and in order
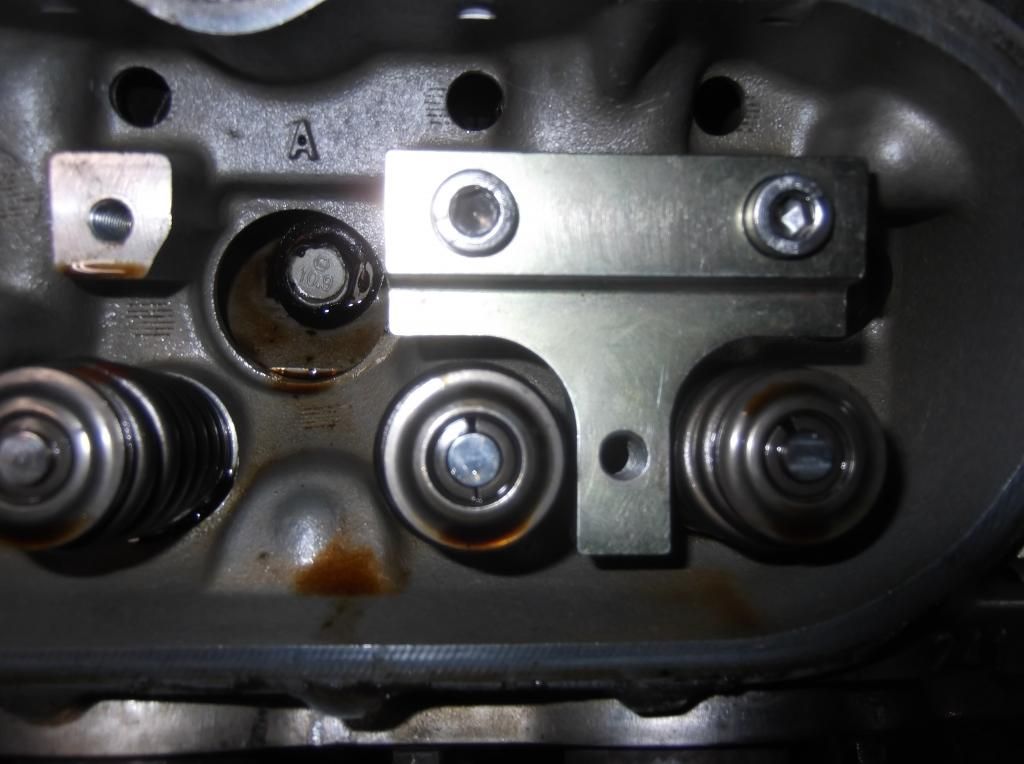
Here is the tool..besides the guy using it..
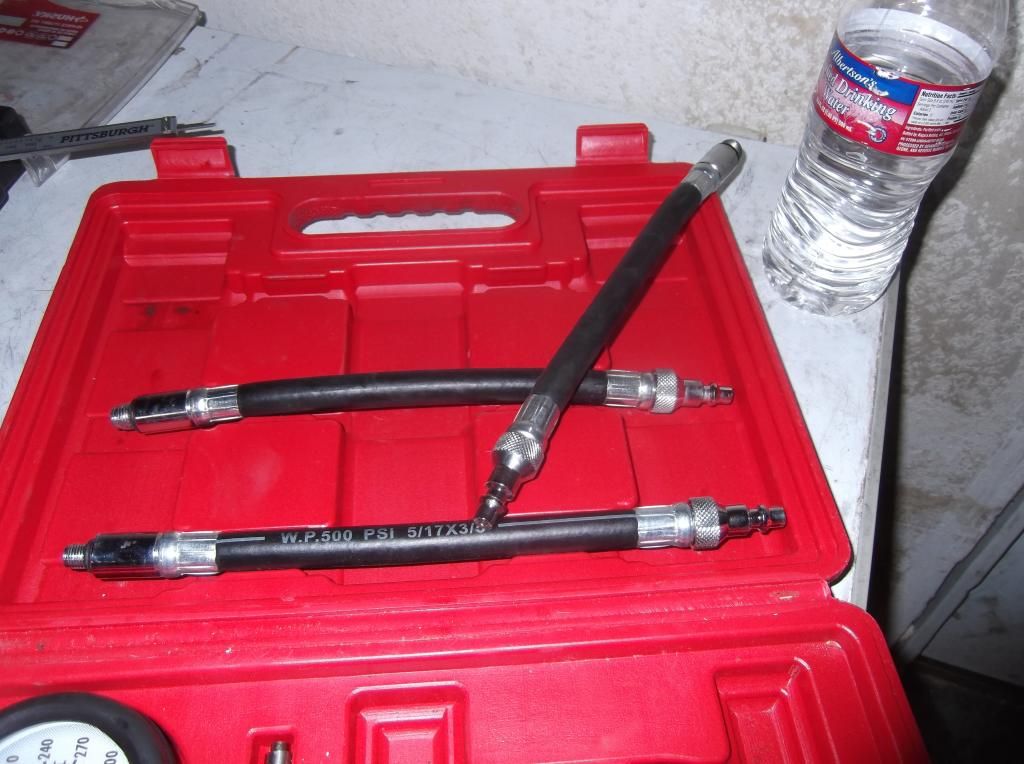
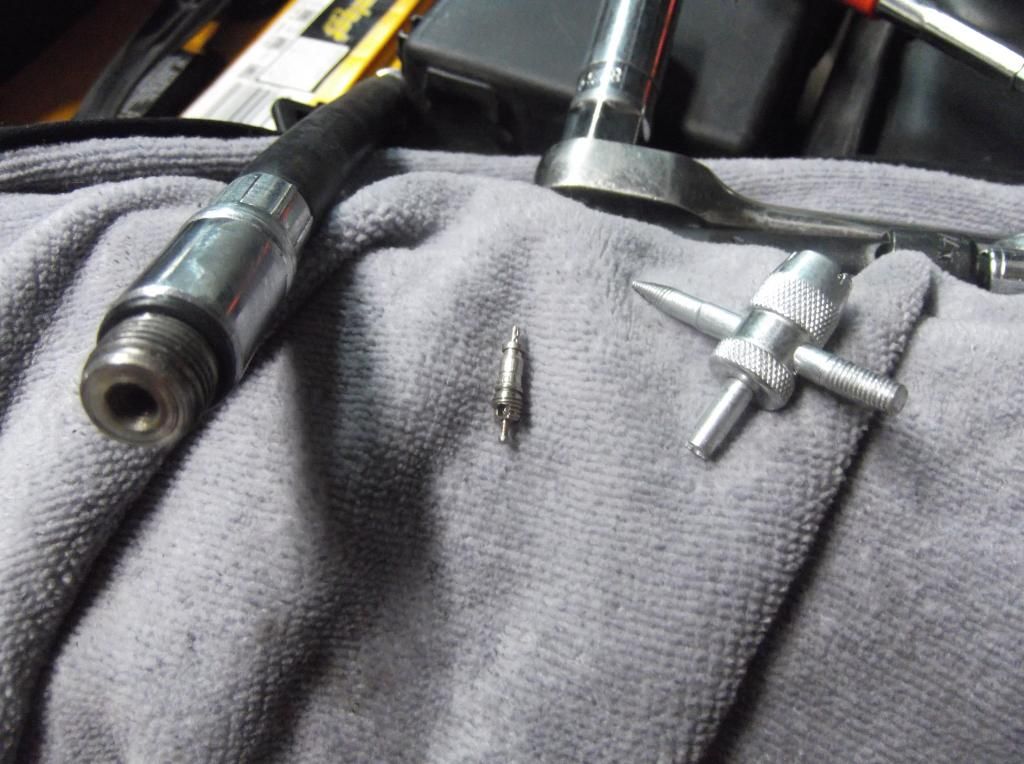
I just used fitting you find in a compression tester..Figured I better not drink during this process..
Take out the shrader valve and screw it into the cylinder you are working on. I also used the TDC method because I didn't wanna end up what I did on the first one almost dropping the damn thing..
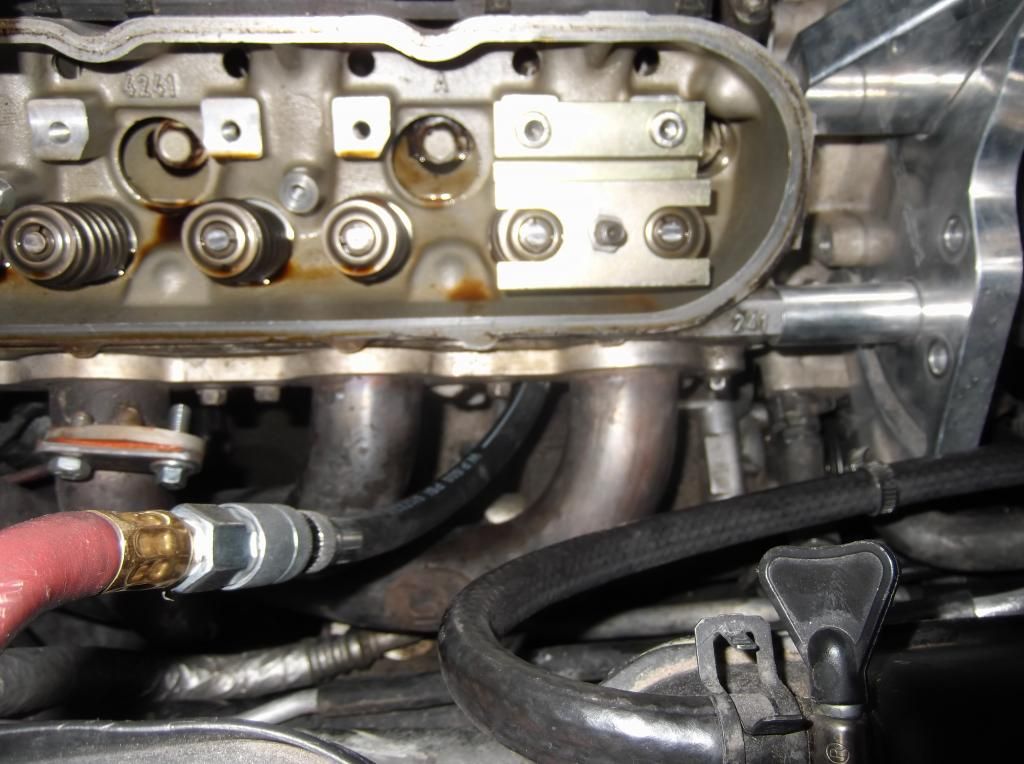
Tighten everything up and then start cranking down..SOme of the locks needed a tap on them to come loose..
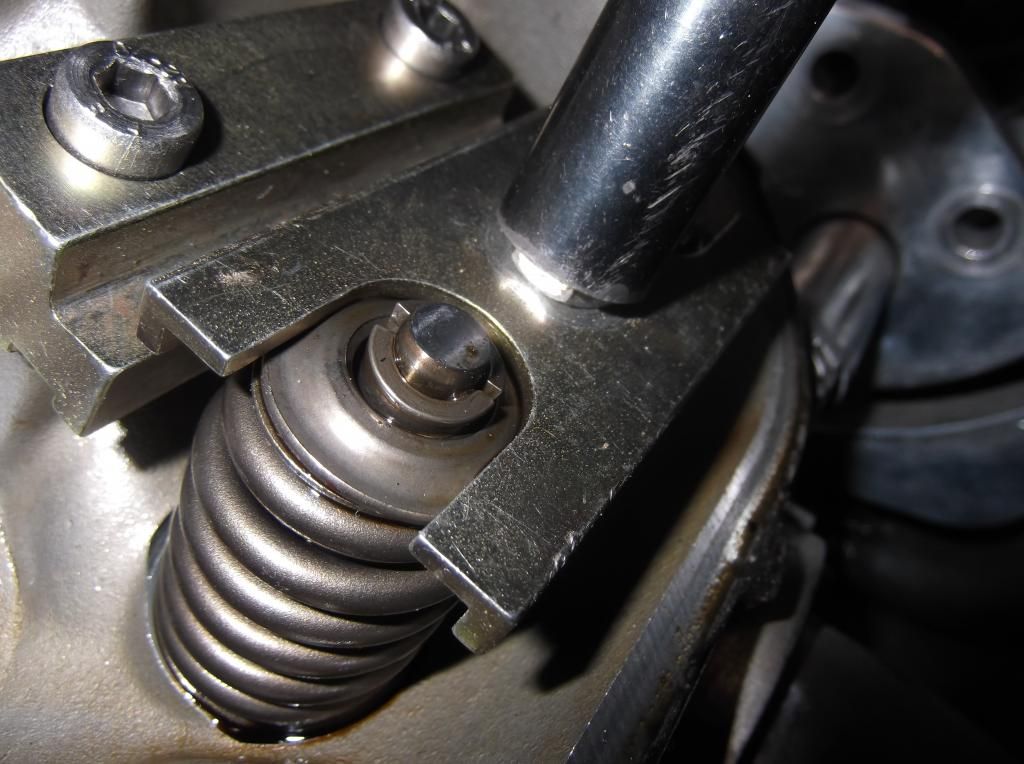
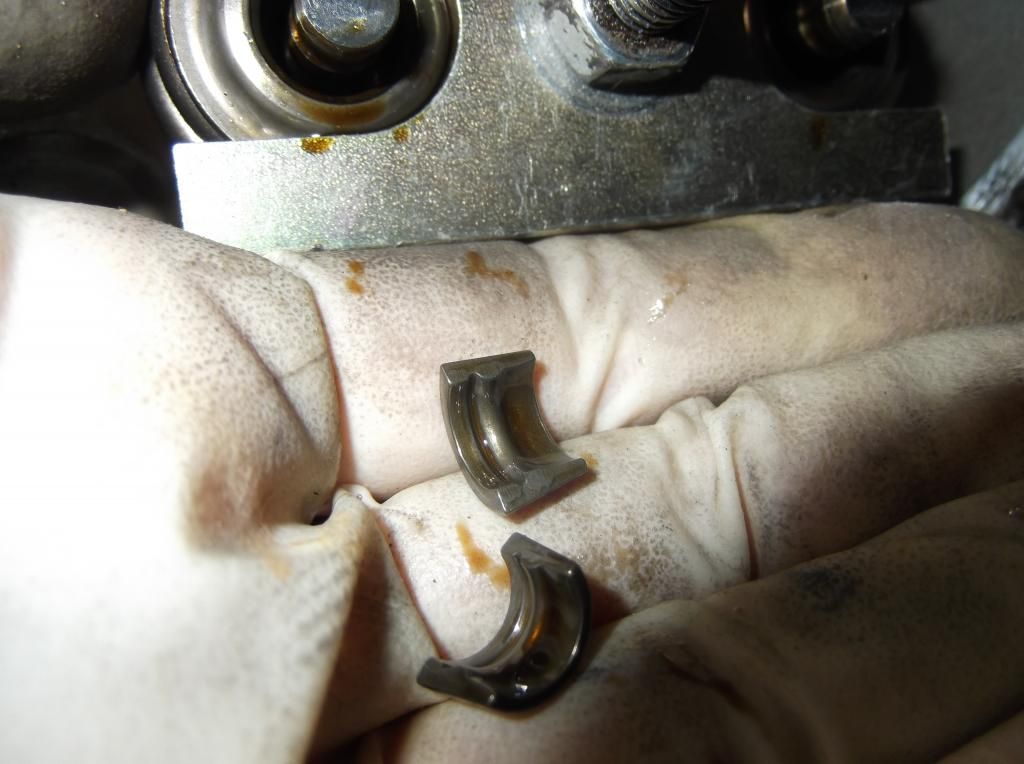
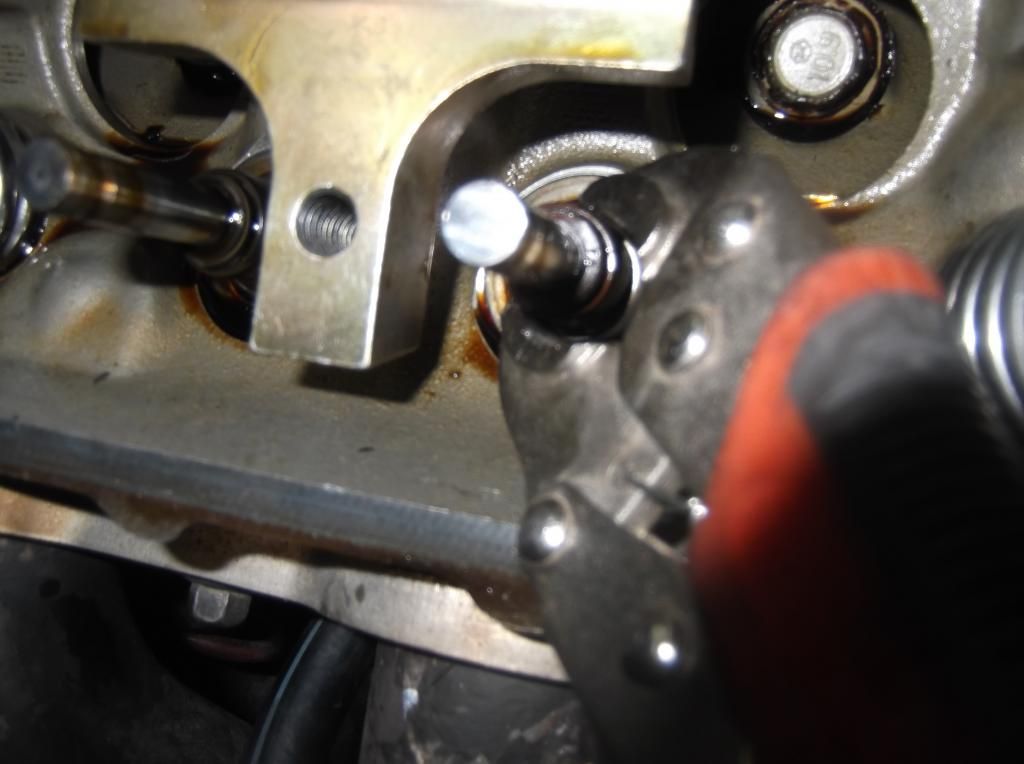
Once you take those locks off you just pull the spring/retainer out and your left with the seal and seat.
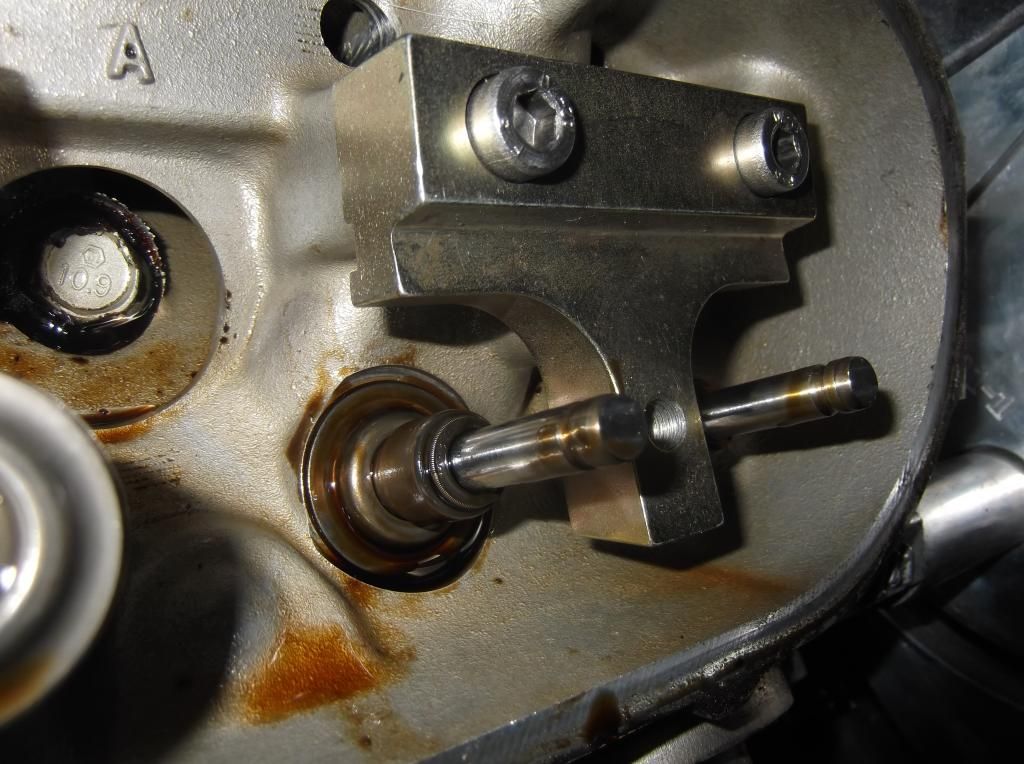
old stuff.
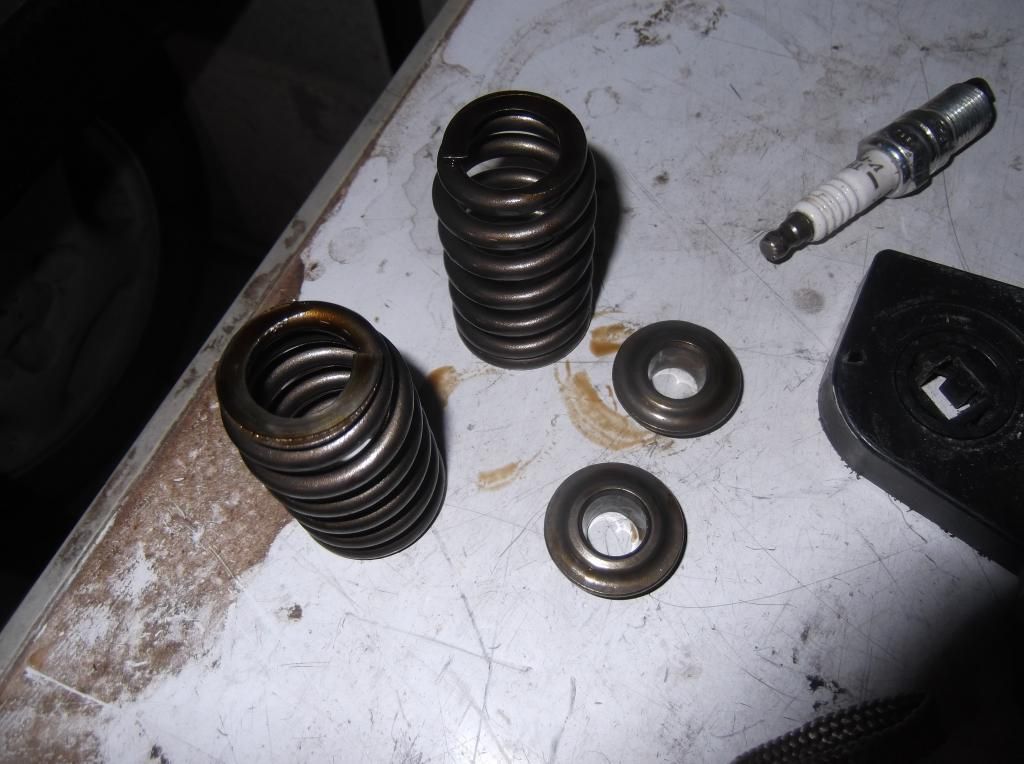
I used a pair of plies and a little twist and turn and they come right out and used a magnetic tool for the seats to come out.
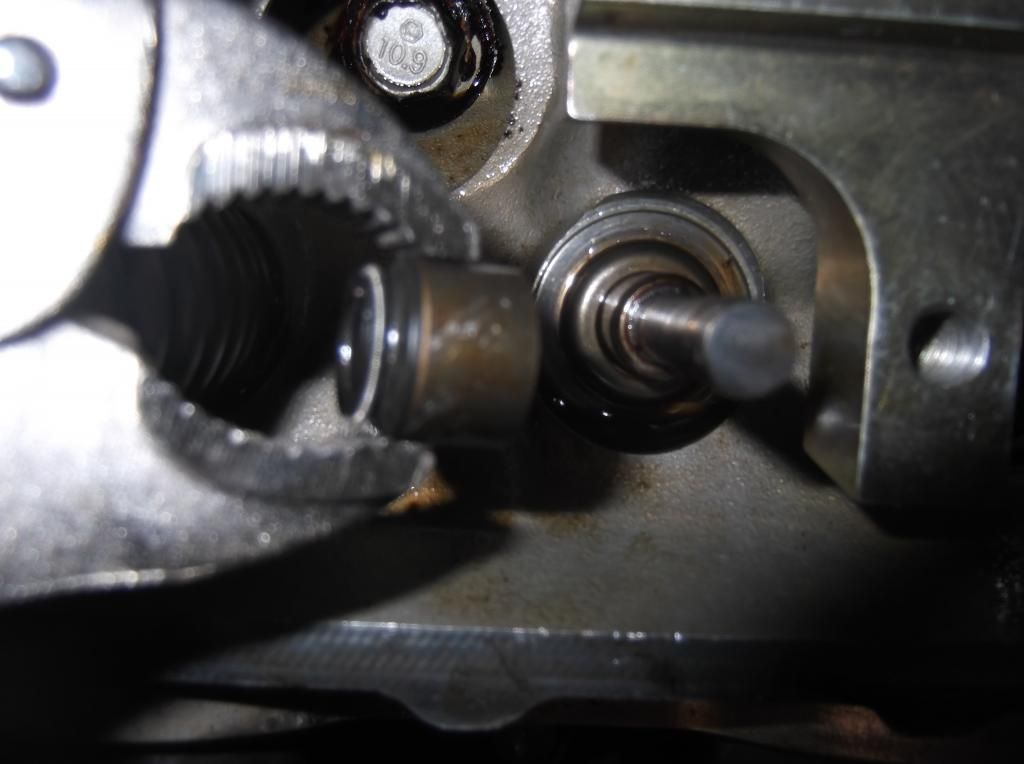
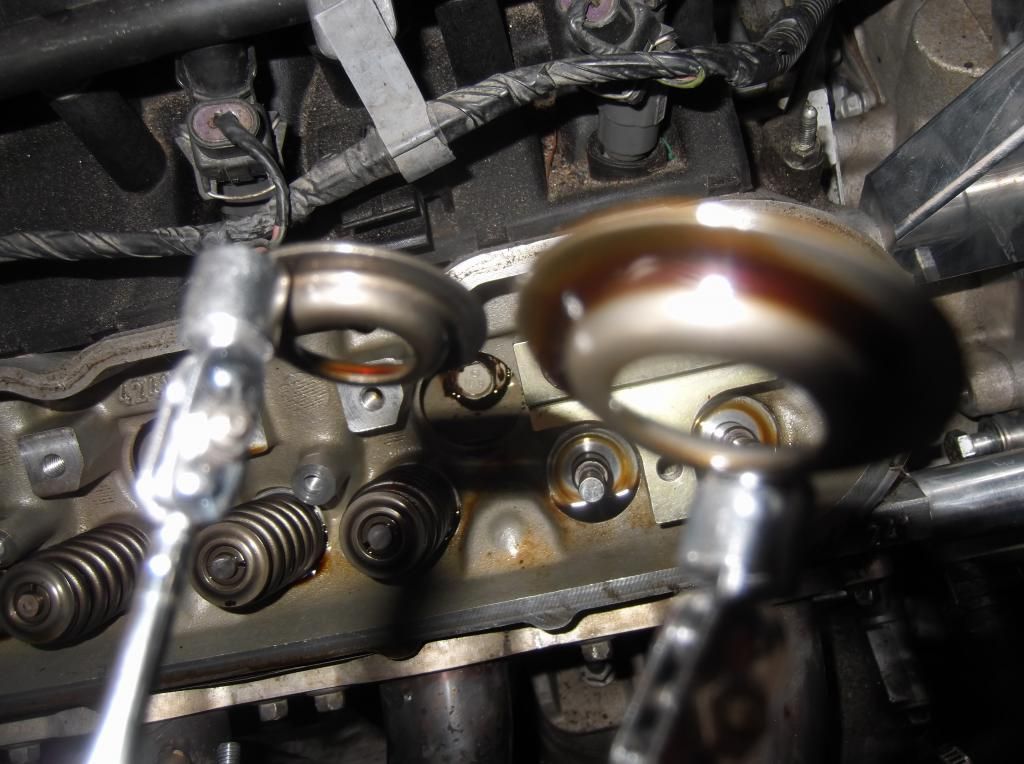
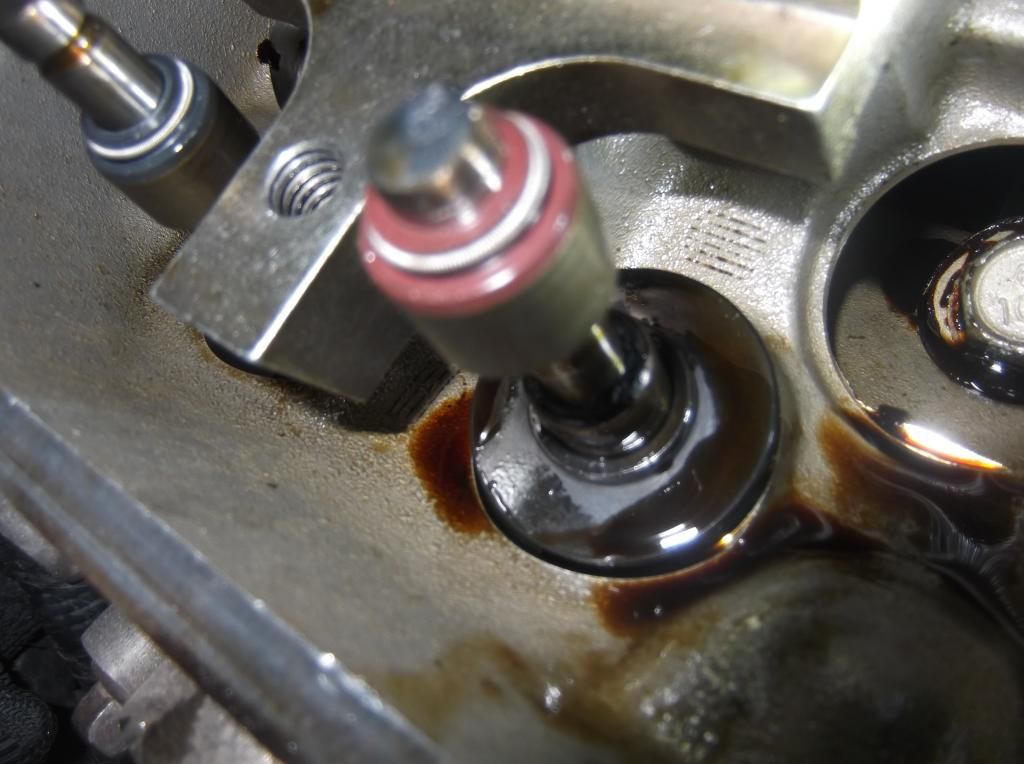
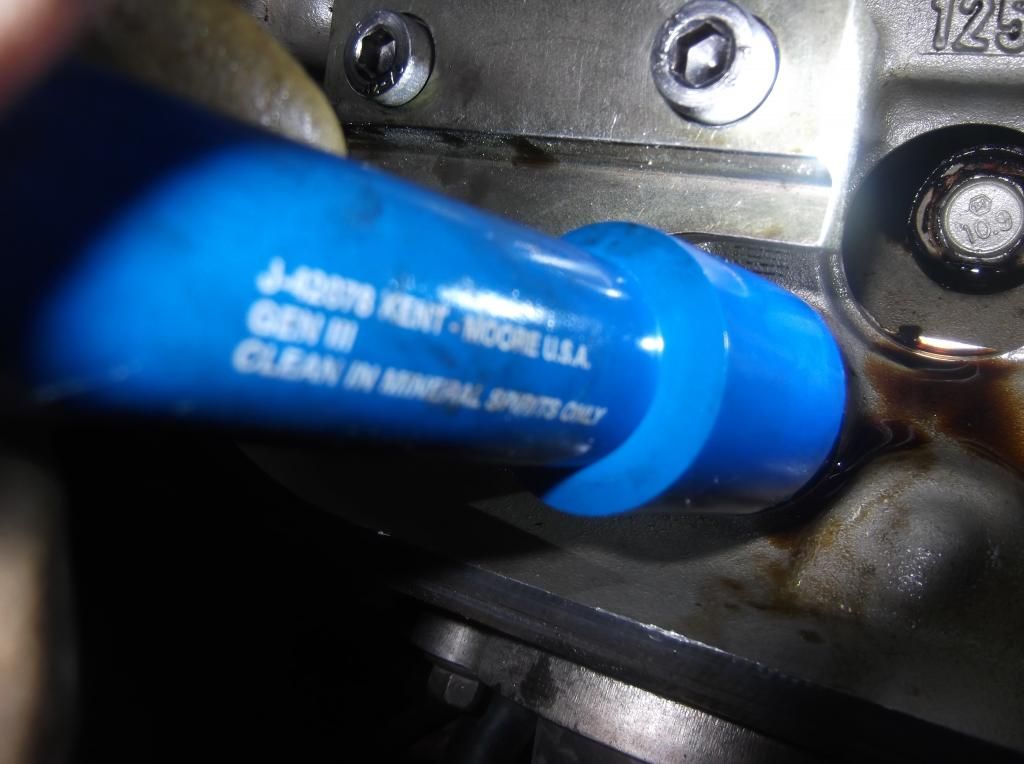
The install is the opposite oil everything up drop the seat in. Put the new seals in and I used the tool that your supposed to use I didn't like the socket and hammer idea. It was 7 bucks off ebay..J-42078 Valve Stem Oil Seal Installer
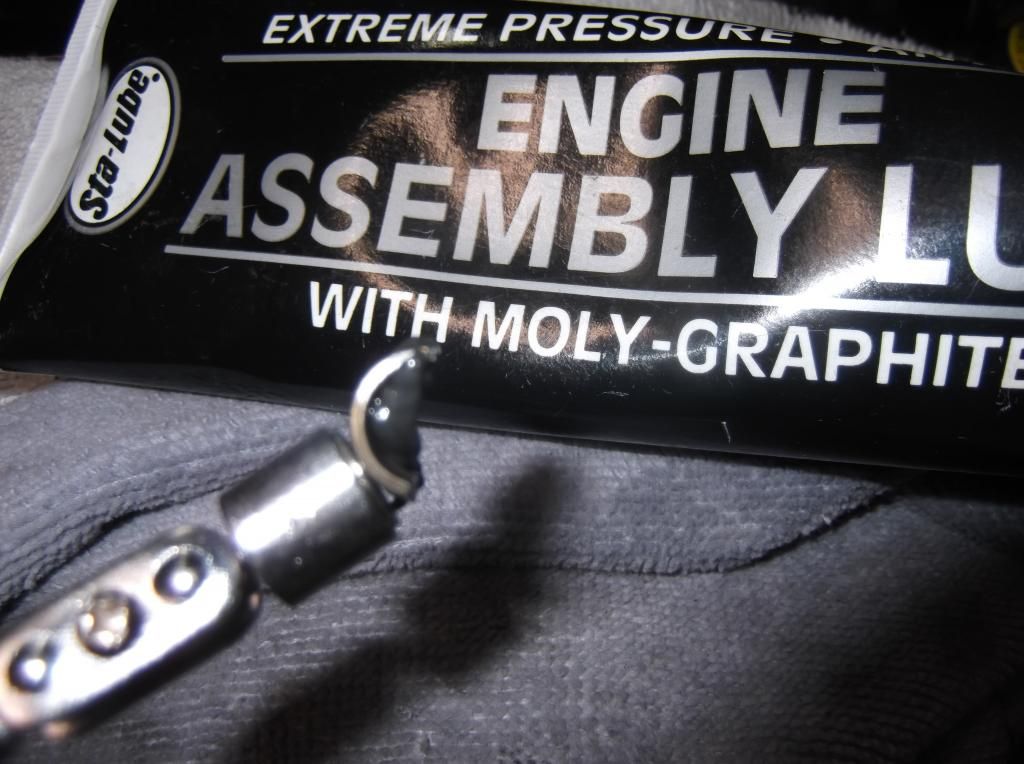
I read somewhere that the locks are a pain to install and use some lube to keep them on the top of the valve. It worked like a champ..
one is done..
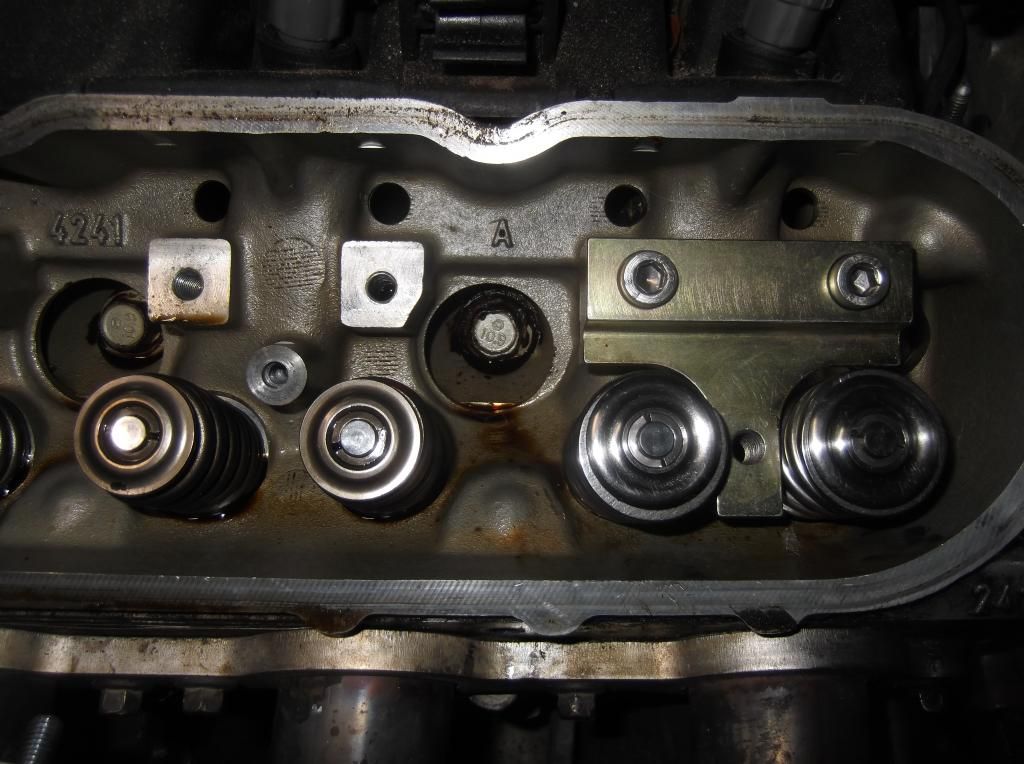
15 more to go..It goes quick after the first one..all done!!!
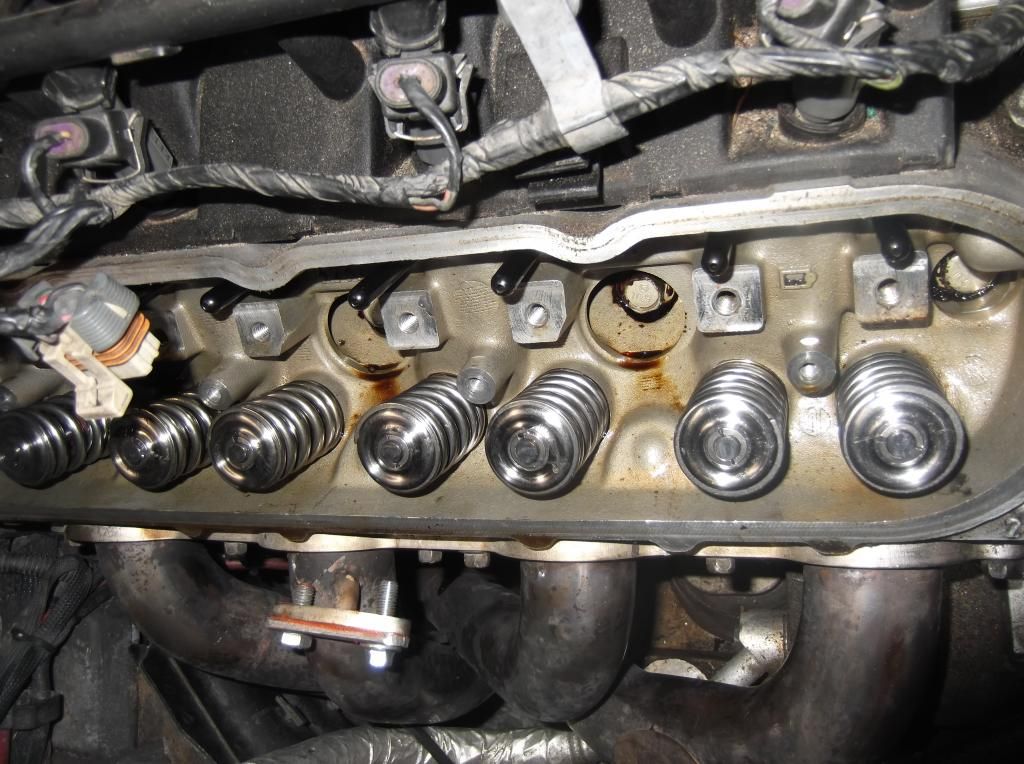

here is the springs coming out..
Take off the coilpacks and remove the 4 8mm bolts and you should see this. Don't mind the crooked looking one I had loosened it before I took the pic

Take out this 8mm on the rocker.

Take the pushrod out..

This is what you should have..

Then take the rocker arm pedestal out and for some reason mine was on upside down...wonder why?

all out

and in order

Here is the tool..besides the guy using it..

I just used fitting you find in a compression tester..Figured I better not drink during this process..

Take out the shrader valve and screw it into the cylinder you are working on. I also used the TDC method because I didn't wanna end up what I did on the first one almost dropping the damn thing..


Tighten everything up and then start cranking down..SOme of the locks needed a tap on them to come loose..


Once you take those locks off you just pull the spring/retainer out and your left with the seal and seat.

old stuff.

I used a pair of plies and a little twist and turn and they come right out and used a magnetic tool for the seats to come out.


The install is the opposite oil everything up drop the seat in. Put the new seals in and I used the tool that your supposed to use I didn't like the socket and hammer idea. It was 7 bucks off ebay..J-42078 Valve Stem Oil Seal Installer


I read somewhere that the locks are a pain to install and use some lube to keep them on the top of the valve. It worked like a champ..

one is done..

15 more to go..It goes quick after the first one..all done!!!

Thread Starter
Burning Brakes
Joined: Sep 2002
Posts: 1,012
Likes: 62
From: Houston Tx
hi all, I'm ready to install harmonic balancer and steering rack today. I decided to go back with a GM balancer and have a question regardin the balancer weights. I've read different schools of thought on if the weights are needed or not but I decided to use them.
With that said, can anyone confirm - when matching up the old balancer to the new to determine where to add weights, all that I am concerned with is the holes on the face of the balancer pulleys matching up correct?
I don't need to worry about the legs or any of the stamps on the legs of the pulleys matching up at all correct? Thanks.
With that said, can anyone confirm - when matching up the old balancer to the new to determine where to add weights, all that I am concerned with is the holes on the face of the balancer pulleys matching up correct?
I don't need to worry about the legs or any of the stamps on the legs of the pulleys matching up at all correct? Thanks.

Racer

Joined: Mar 2011
Posts: 337
Likes: 1
From: Mechanicsville Md
The weights won't do anything if you didn't mark where the old balancer was prior to removal. You need to get this right because you're going to do it again with the OEM balancer. I upgraded to the power bond balancer and so far all looks good. no vibration.