When you click on links to various merchants on this site and make a purchase, this can result in this site earning a commission. Affiliate programs and affiliations include, but are not limited to, the eBay Partner Network.
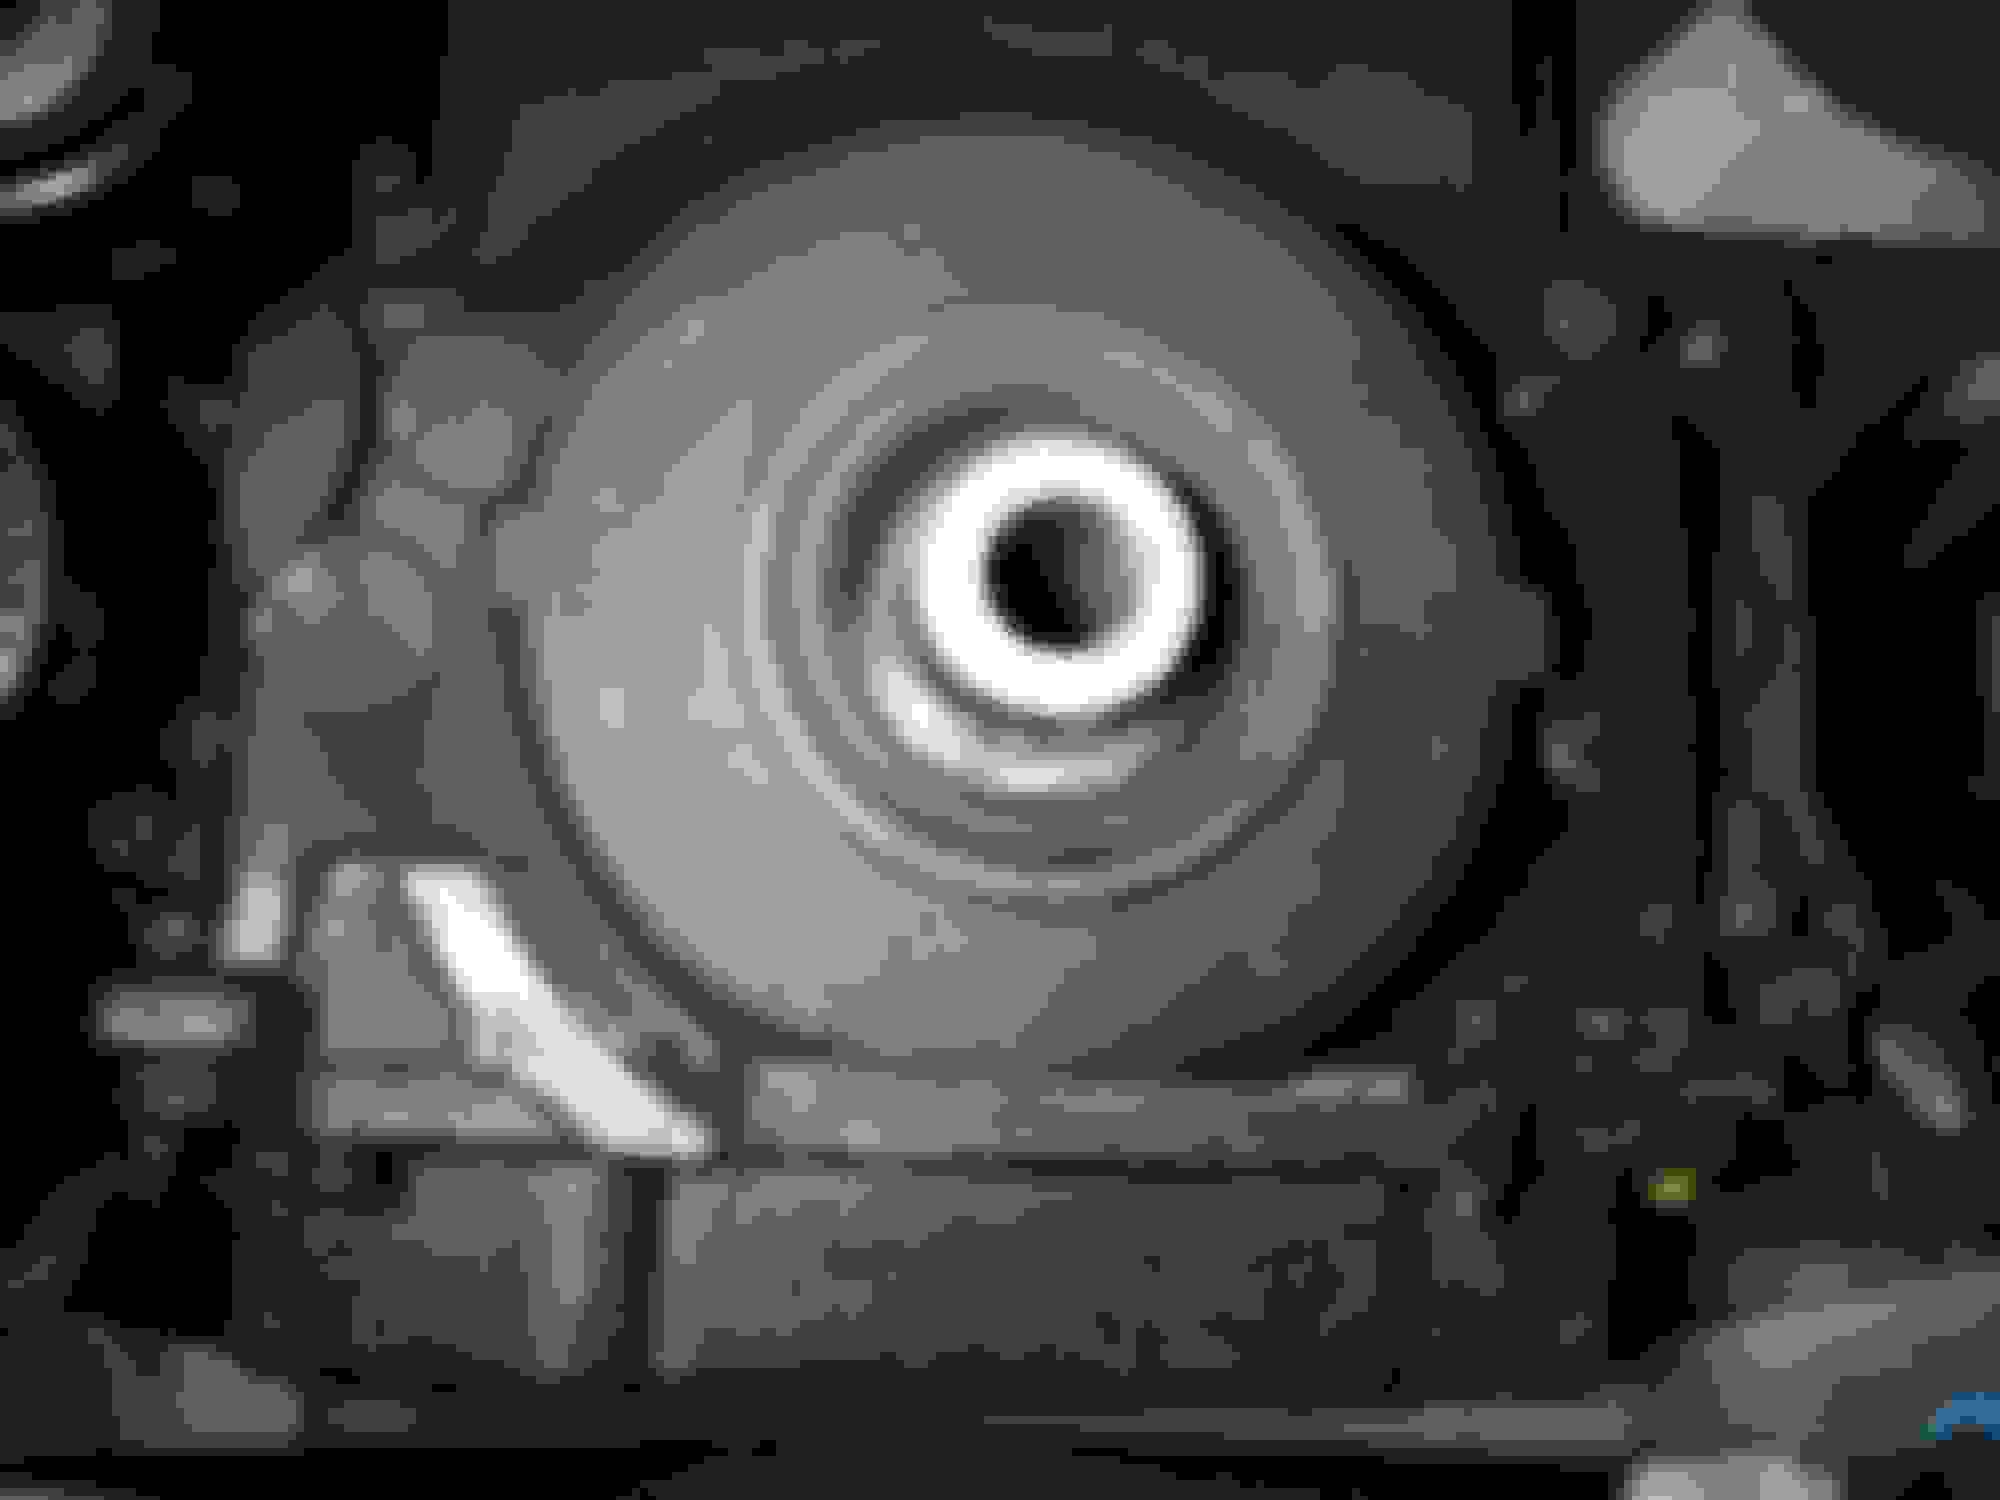
Hi All - My harmonic balancer failed and went back towards the engine. Rubbed on timing cover and edge of oil pan as you can see in the picture below. I was researching how to replace and found this thread where this gentleman's oil pan o-ring failed when his HB rubbed in the same spot. https://www.corvetteforum.com/forums...-balancer.html I assume the heat from the friction expanded the o-ring out of it's groove until it ripped, or something like that anyway.
I would like to check the o-ring without dropping the pan just yet, if possible. Any thoughts about tilting the car forward/downhill enough to submerge the front of the oil pan o-ring in oil and seeing if it leaks? I read sometimes the pan bolts can get a little loose, so I am going to check those too. Obviously I'll clean all this up to be able to see a new leak.
NOT going back with factory HB. No plans to pin crank since engine is stock and I have no plans for super charger or track stuff. Just cruising swiftly with the occasional pedal to the metal moment. Thanks in advance!
fyi - An Ingersoll Rand 2235tiMax 1/2" air impact wrench doesn't budge the bolt for the HB even with the flexplate lock tool. Had to go back to good ol' elbow grease to get it loose. lol. You can also use the Chrysler HB removal tool from the local parts store if you have about 1 1/2" of washers to stack up...both 1/2" and 7/16" I think. One washer size a bit smaller than the crank, and the other with a hole a bit smaller than the end of the screw on the tool. Wrap a little duct tape around the stack to hold them together and use the adapter rod in the kit to hold them up there. I used grade 8 washers so they weren't so bendy.
I would think that the first question would be how deep the groove is, that the HB cut into the oil pan, and is the side of the o-ring visible. While tipping the car forward, to see if oil seeps out, might help, if the damage is serious, that isn't the "end-all" in diagnosing the problem. There is a little pressure in the crankcase when the engine is running, so while it might not leak with the engine off, it could leak with the engine running, and the pan pressurized.....
From: Central PA. - - My AR15 identifies as a muzzleloader
I believe in the Beer Fairy
I made my own flywheel locking tool and still needed to remove the hood so I could put a 6ft bar on the end of a wrench to break mine loose. I then made my own puller arrangement and installation tool and did the job. But that was no small task and the labor that I was quoted for that was pretty substantial. I forget what it was but it was enough that I wasn't willing to pay it, not that that's saying a lot. For a place that is familiar with Corvettes and knows what they're doing, this shouldn't be a really bad job. For a guy doing it in his garage and doesn't have a lift, it's a pretty big deal. In that case your wrench needs to be up top and boy do you need a big wrench.
I never saw one walk back like what years did, I think your idea of jacking up the rear of the car real well and waiting to see if it leaks is a great idea. Goes without saying the harmonic balancer has to stay in while you're doing that and you'll have to identify that the oil is indeed coming from the pan and not from a worn front seal if that's the case.
you can buy a flywheel lock from eBay or wherever for around 40 or 50 bucks if I remember. If you're going to use the transmission in a manual car and the emergency brake to lock it, my suggestion would be to stick with a wrench on the bolt and not use impact. But I'm sure somebody else here is going to disagree with that. I like the wrench even with the flywheel lock, but that's just me.
given the tiny amount of damage to your front cover I would seriously doubt that it got hot enough to cause a problem with that gasket. But then the image you showed before doesn't really look like a whole lot happened there either, though at least that was the exterior of the balancer as opposed to yours which looks like something else hit closer to the hub.
From: Central PA. - - My AR15 identifies as a muzzleloader
I believe in the Beer Fairy
I also use the arp bolt when I put mine back in. You have to buy a great big 12 point socket for that but it's a really nice bolt and it is reusable and I used some Dupont never sees underneath the head and washer so that I got more torque and pressure and less galling and friction.
leadfoot4 - The groove is not very deep. Less than 1/32" I would estimate. It's not nearly as bad as the picture below of the other guy's oil pan. Good thought on the slight pressure in the crankcase. I guess if it leaks just tilting, I'll know for sure then, it's easy enough to do. I was about 6 miles from home when a light squealing started, didn't change much until I got home. Then the next time I started it, squealing was a bit louder and the belts jumped halfway off the pulley and started smoking from rubbing on something. Shut it off then and haven't started it since. On the upside, if I drop the crossmember and oil pan, it will be easier to put the steering rack back in I think.
K-Spaz - It's far enough apart that it's getting fixed by me at this point. The first picture is my car. Plus I have terrible luck with people working on my cars. Always something done wrong/damaged/tightened halfway. I got lucky and didn't have to take off the hood yet, just put the breaker bar on the HB bolt, and used half an old floor jack handle as a cheater to get it loose. Did it from below on the creeper. That thing was tight though!
I replaced my HB myself, and installed an ATI piece. I didn't pull the hood, and had the car about 16-18" off the ground, so I had decent access both underneath and on top....
2020 Corvette of the Year Finalist (performance mods)
C5 of Year Winner (performance mods) 2019
looks like you had a pretty significant leak before the balancer failed, I would replace the front cover gasket and crank seal while it's all apart and cross your fingers that the pan gasket isn't leaking too
From: Central PA. - - My AR15 identifies as a muzzleloader
I believe in the Beer Fairy
Originally Posted by rwcantrell
The more I look at that picture, the less I believe the balancer did that to the gasket. Just seems odd there's no sign of anything entering that gasket area but the whole thing is cut. Seriously, how does that happen?
Here's a pic of my trinkets I made.
(Edit)
I've also got steel gizmos that go in the crank snout for the puller to push on so it won't booger up the female threads in the crank when you're removing the old balancer. They're not really anything special, but they're made to sit on the crank snout face so that takes all the pressure. Then there's a mating bore in a second one to allow for additional pulling depth, just an additional spacer, to get the thing all the way off. I didn't bother taking a pic but can if you like.
On the upside, if I drop the crossmember and oil pan, it will be easier to put the steering rack back in I think.
I just wanted to comment on this point... I also thought it would be easier (i.e.: I would just drop the steering rack out with the subframe), but it didn't work out that way for me. There is a brake line that runs between the crossmember and the rack (at least on my '04Z), so that pretty much necessitated pulling the rack out through the driver's side with the subframe lowered on the bolts but still attached to the car. The fact that the subframe came all the way out in the next step didn't help any. Maybe there is a procedure that makes pulling the rack easier if the subframe is coming out, but I couldn't figure it out.
Is it okay to reply to my own 2 year old thread? 🤔😆. Finally got this thing put back on the road today! Sorry, lots of stuff happened between now and then.
There was a bit of a groove on the old HB, but I think the new one (powerbond 25% underdrive) had a bit of an area for the seal to ride too. I remember comparing them and thought they didn't look too much different. Only 80k mile on the car, so seal probably just got hard and failed. It's had a transmission and differential seal go bad too, about 10 years ago.
Didn't end up tilting the car to check for leaks, just went ahead and pulled the pan. Found the o-ring had separated from the outer aluminum of the gasket, so even if that wasn't leaking I'm glad I replaced it. I'm sure the friction made it heat up and start to expand, and the only way to go is in towards engine.
Ended up putting a oil pressure sensor/sending unit relocate kit in while I had the pan off. Took the tunnel plate off to allow the engine to drop more to give a little more room to work. Used flare wrench type crows foot wrenches to get it in. To get the old one out I had to go get the Lisle socket for oil pressure switches. Nothing I had that was the right size would work. Got the socket, out in a minute.
Installed the steering rack into the cradle and then put it back on the car. I did not have brake lines in the way as all of my ABS stuff is at the back of the car. That rack would have been hard to put into the cradle if it was on the car.
Ended up pinning the crank since it got some surface rust in 2 plus years of sitting exposed. Cleaned it up using some aluminum foil instead of sandpaper. Thanks to the wife for finding that little tip when we were polishing some chrome hubcaps one time. Used some sort of naval jelly FR from the auto parts store to finish the cleanup. Looked good when done. Smeared grease on it this time until the HB went on again! New HB went on nice and snug, but I figured pinning would be a safe bet due to the rust and its removal Used a ninety degree drill attachment and the ICT Billet pin kit. Worked well. Used the ICT Billet HB installation tool too, also worked well. Had to use a rag and pliers to unscrew it, because I bottomed it out when I put it in. I think it snugged up more somehow during HB installation, wasn't much though. It doesn't have a slot or hex on the end, it's all threaded. Probably would have been a good idea to back it off a half turn and then install HB. One washer bowed a little, but it still worked.
Seemed to run and idle fine from a temp/power steering/charging standpoint. Bonus is that there are no belt chirping and squeaking any longer. I thought I had a belt slipping with the old HB when I would floor it, but I think it was the outside of the HB slipping on the center part now.
They brag on the box/paperwork about the nice finish on the balancer...but it comes off with brake cleaner. 😆. Overall very happy with the Powerbond HB so far. Powerbond 25% underdrive, ARP bolt and a new seal. Plus elbow grease to clean up front of engine. Just a little character mark there now.
Last edited by rwcantrell; Jan 18, 2021 at 09:42 PM.
I just finished my HB replacement. My heart goes out to you. What a pain in the butt.
I'm old and don't have a garage or a paved driveway.
I hate crawling around under a car on frozen muddy ground.
I try to get all my maintenance done in the fall so I can sit by the fire drinking scotch and reading Hot Rod magazine. Not replacing a badly designed harmonic balancer stuck in a poorly engineered location with the nuttiest installation procedure. Ever.
Don't get me going on bleeding the steering rack.
Jeez.
Designer Imagines A Corvette That Looks More Like a Corvette Than the Corvette
Slideshow: A Jaguar designer's personal project imagines what a modern front-engined Corvette might look like if Chevrolet revisited the golden age of the Stingray.


 Plus I have terrible luck with people working on my cars. Always something done wrong/damaged/tightened halfway. I got lucky and didn't have to take off the hood yet, just put the breaker bar on the HB bolt, and used half an old floor jack handle as a cheater to get it loose. Did it from below on the creeper. That thing was tight though!


 Seriously, how does that happen?


