When you click on links to various merchants on this site and make a purchase, this can result in this site earning a commission. Affiliate programs and affiliations include, but are not limited to, the eBay Partner Network.
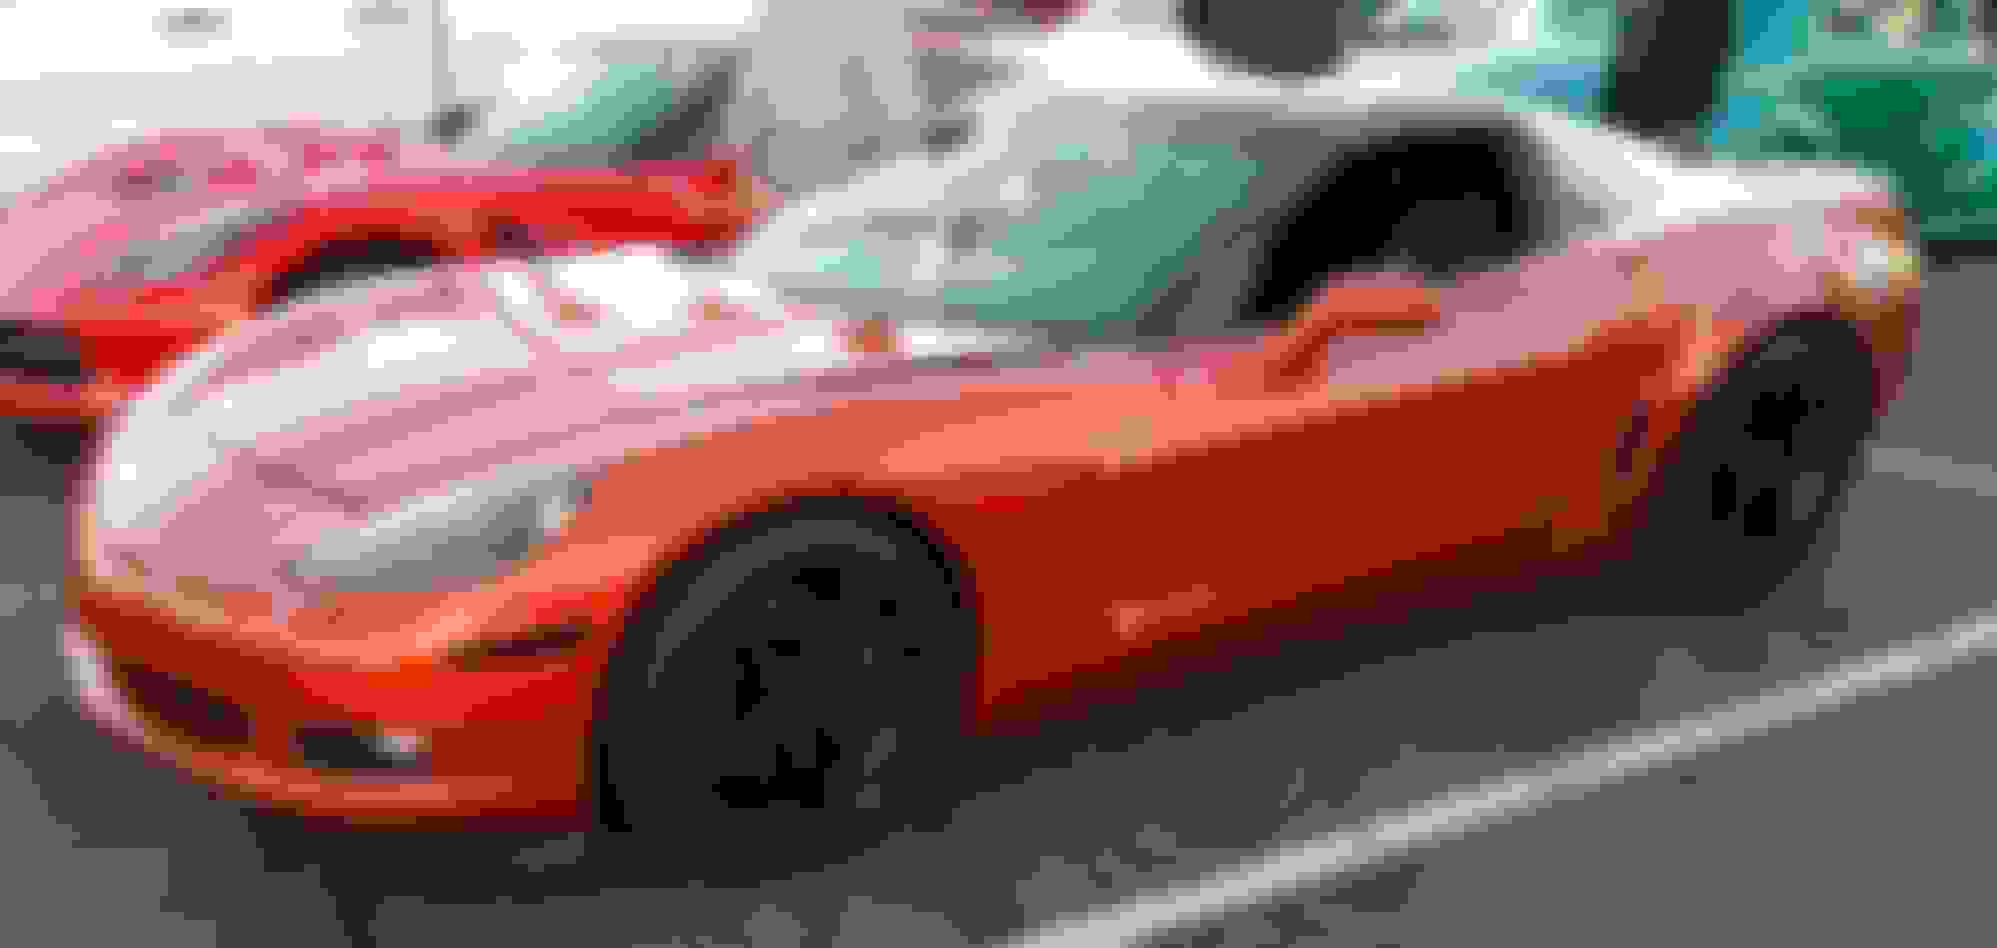
Posted a thread awhile back about choosing a vinyl color. I ended up going with 3M fiery orange gloss with 3M gloss black for the top/halo. I had recently picked up the z06 wheels and went with some aftermarket rear fenders to help clear the tires out back, so I had to get rid of the primer grey back fender look as I drove like that for far too long. I was also tired of the car being all black anyways.
Ended up doing the majority of it DIY. I did end up taking the back for a shop to do as I was running out of time and patience.
I will say that I'll never wrap a car again. The relatively flat panels were easy (hood, roof, doors, rockers, hatch). The panels with a lot of curves were a pain, especially since I did everything solo after initially laying the flat vinyl sheet on the car.
It definitely didn't come out as nice as I had hoped, but it looks pretty good from a distance. I liken it to something like a Maaco paint job- up close you can find all sorts of tiny imperfections and flaws, but it looks good from a distance. The benefit here is that all of the factory paint is protected if I decided to sell it (obviously I'd have to put the stock wheels and rear fenders back on though). I've also only got about $1k into it, so it certainly was nowhere near as expensive as if I painted it this color.
Below are a couple pics. It definitely pops in the sun:
Very nice i'm starting to wrap my car is a week or 6.
What where the hardest parts to wrap. And did you need to overlap vinyl? or could you use 1 big part of vinyl per panel on the car?
what i'm worried about is the door opening in the rear fender its so diep to push the vinyl all the way to the bottom of the door handle. and the rear bumper to make it out of one piece.
I'm sure there are others who have had similar experiences on large area wraps but haven't said so. Only a couple of people on CF have actually said they did a pro job of it. I'd guess it's not like falling out of bed which everyone can do.
Very nice i'm starting to wrap my car is a week or 6.
What where the hardest parts to wrap. And did you need to overlap vinyl? or could you use 1 big part of vinyl per panel on the car?
what i'm worried about is the door opening in the rear fender its so diep to push the vinyl all the way to the bottom of the door handle. and the rear bumper to make it out of one piece.
Hardest parts for me were the front and rear bumpers. As noted above, I did take the rear into a shop to get it done. I tried it once and ruined the vinyl on my first attempt (I goofed up wrapping the top outer corners). As it was the last panel I was trying to do, I was out of patience to do it again (plus I only had enough material to do it one more time). I'd say second hardest parts would be the mirrors and zr1 spoiler.
Have you ever done vinyl before? I will say the biggest thing to keep in mind is that it will never be paint job perfect, even if a pro does it. There are plenty of small blemishes on the pro work done on my car. The average person probably wouldn't notice, but I certainly do since I know where the trouble spots are.
All panels on the car can be done with 1 piece of vinyl each if you really wanted to. The only issue is the more you stretch it, the less adhesive is present per square inch and at a certain point your pigment will start to thin out and look odd. Because of this, the pros will ocassionally do butt joints in certain areas to avoid the need to really over stretch the material. The door handle pockets are certainly one of those areas where a butt joint can help make it easier on you.
It wil be the first time doing a car. but i have watched a lot of video and got a account on https://wrapinstitute.com there are lot of demo videos on different hard parts on cars. Just got a big sample of the vinyl i wanna use to test it on parts of the car and see how much we can do with cold stretching and wen to use the heat-gun. (less is beter)
I also have kniveless tape to make cuts if its realty needs. like the mirrors i'm doing in 2 parts just make a druple shape on the underside of the mirror where normally you get the most stretch in the vinyl and the cover the rest with 1 part. the cut should be out of view if you just walk around the car.
And for the rest i'm completely stripping the car and wil do 1 panel at a time that we can put on a table to work on. that way i can also do the compleet doors in and out side.
I have orderd 22 meters of vinyl. i'm going for Matt metallic yellow that metallic color you also have to take in account that the lines in the vinyl are all pointing the same way or you see color changes in the parts.
this is how I am doing mine. Currently reassembling it. the rear bumper I did in 2 pieces and the front needs parts patched in. Cutting tape is a god when wrapping vettes!
this is how I am doing mine. Currently reassembling it. the rear bumper I did in 2 pieces and the front needs parts patched in. Cutting tape is a god when wrapping vettes!
Could you please show me a picture where you have cut the rear bumper vinyl,
It wil be the first time doing a car. but i have watched a lot of video and got a account on https://wrapinstitute.com there are lot of demo videos on different hard parts on cars. Just got a big sample of the vinyl i wanna use to test it on parts of the car and see how much we can do with cold stretching and wen to use the heat-gun. (less is beter)
I also have kniveless tape to make cuts if its realty needs. like the mirrors i'm doing in 2 parts just make a druple shape on the underside of the mirror where normally you get the most stretch in the vinyl and the cover the rest with 1 part. the cut should be out of view if you just walk around the car.
And for the rest i'm completely stripping the car and wil do 1 panel at a time that we can put on a table to work on. that way i can also do the compleet doors in and out side.
I have orderd 22 meters of vinyl. i'm going for Matt metallic yellow that metallic color you also have to take in account that the lines in the vinyl are all pointing the same way or you see color changes in the parts.
Honestly, the mirrors can be done as 1 piece. Look up the stretch and shrink technique. You basically pre stretch the vinyl, apply the flattest spots first and then apply heat as you guide the rest on. It'll shrink pretty well around the curves if you do it right. If you're worried about peeling in any specific area, you can always hit it with 3M 94 adhesion promoter first.
I wouldn't be too afraid of hitting it with heat. As long as you don't overstretch a hot spot and screw up the pigment, it's fine. You just need to post heat it to lock it in afterwards (which you really should do even with cold stretching anyways to relieve all the tension). As long as everything is post heated right, you shouldn't have any issues with lifting later.
As far as taking panels off, there are definitely some that are easier that way. I bet you'll still bolt some back to the car to wrap them though. Sometimes it's easier to have the panel solidly locked to something so it's not moving around (at least for me since I did most of the work alone).
this is how I am doing mine. Currently reassembling it. the rear bumper I did in 2 pieces and the front needs parts patched in. Cutting tape is a god when wrapping vettes!
I honestly didn't use much cutting tape. The mirrors and mirror posts (since they make a complete loop, so you have to seam it somewhere) and the door handle pockets were the only places on mine.
Just curious, what did you have to patch on the front bumper? I got pretty lucky and figured out how to do the front grille opening with minimal stretching on the first shot. I basically stretched it on the top edge of the opening until it got just out of view. Then I sliced it and laid the material down to cover the bottom of the grille opening since that's the part you can really see. I had to stetch a bit at the sides, but the rest pretty much laid down nicely.
Could you please show me a picture where you have cut the rear bumper vinyl,
I traced the very edge of the bumper with the cutting tape and did the flat top and sides as one piece. The area above the liscence plate as one piece and the rest of it was one piece. I kinda made a crappy scetch to help u out haha the seam is almost invisible unless I point it out to people
I honestly didn't use much cutting tape. The mirrors and mirror posts (since they make a complete loop, so you have to seam it somewhere) and the door handle pockets were the only places on mine.
Just curious, what did you have to patch on the front bumper? I got pretty lucky and figured out how to do the front grille opening with minimal stretching on the first shot. I basically stretched it on the top edge of the opening until it got just out of view. Then I sliced it and laid the material down to cover the bottom of the grille opening since that's the part you can really see. I had to stetch a bit at the sides, but the rest pretty much laid down nicely.
I patched in the upper part on the lower grill and a little section on the upper one (I have a z06) but its almost all one piece.. Did you do your door jambs? if so I'd like to see some pics and any tips would be great because I am about to do them!