[Z06] DIY 3" Muffler Mod
#22
Racer


Wish I had the welding skillz necessary to pull this off! Congrats, that is a *way* stealthy mod! Hope you get some b2b dyno numbers soon! Can't wait for the video. thanks!
#23
Drifting


I figured it would sound like the Fusions open, they are 3" straight pipe too
#25
Melting Slicks


Thread Starter
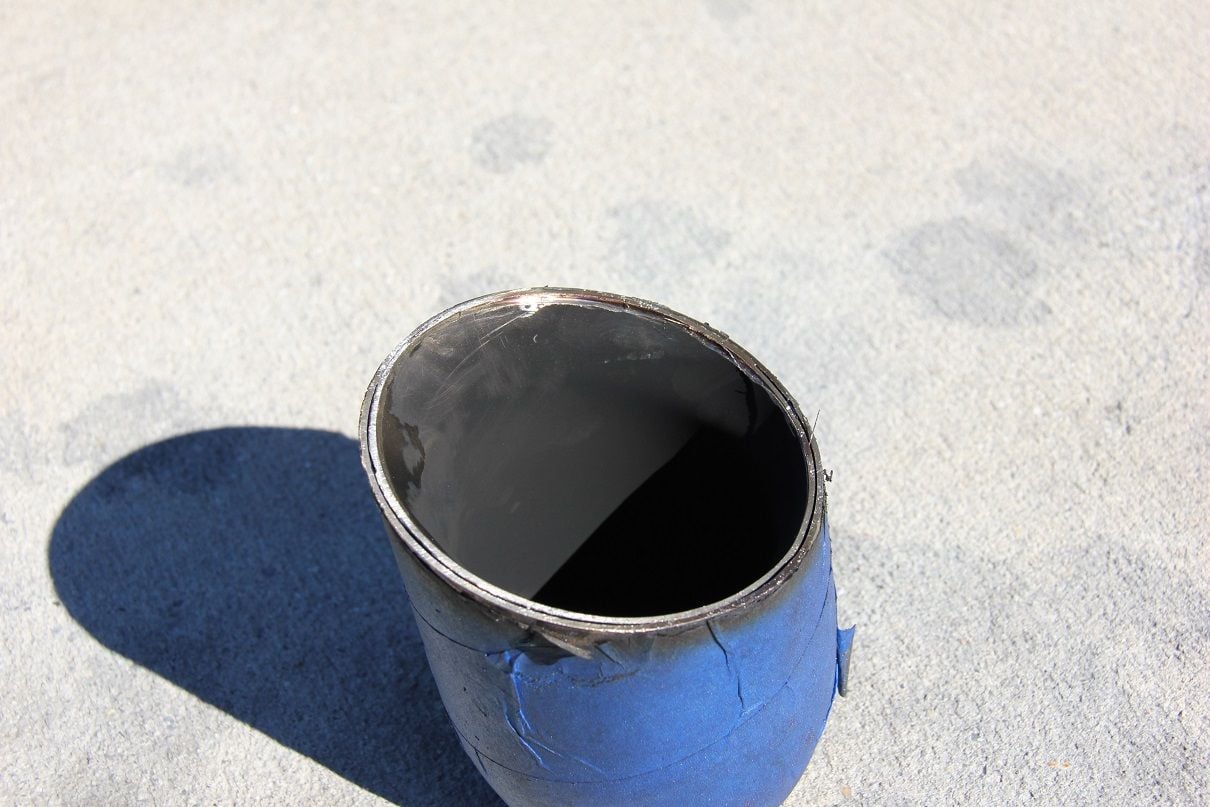
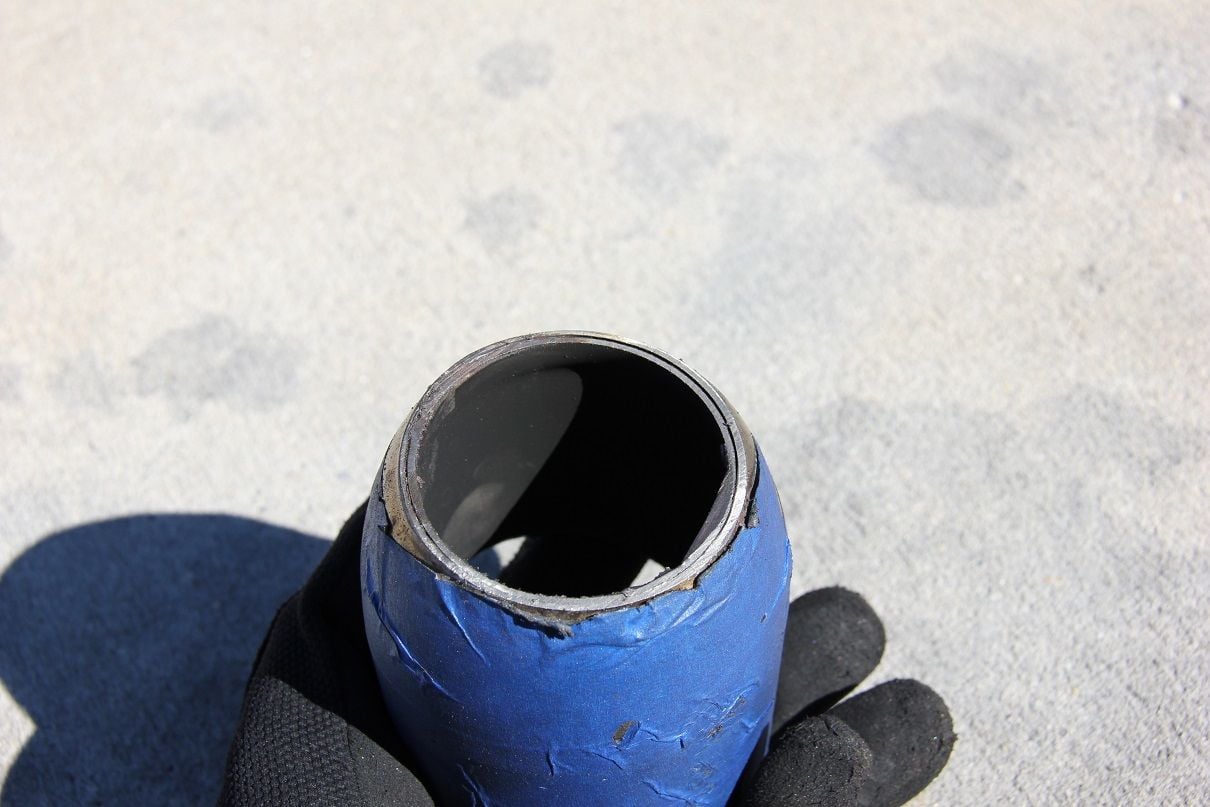
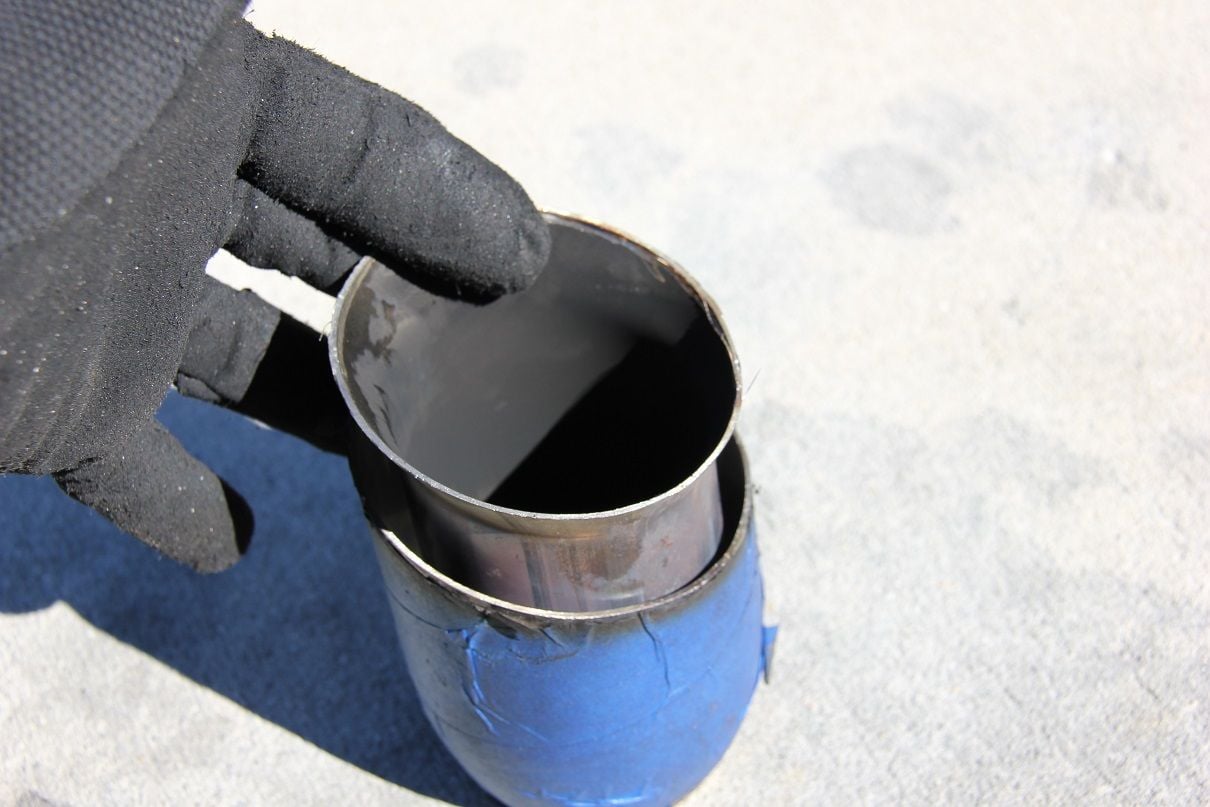
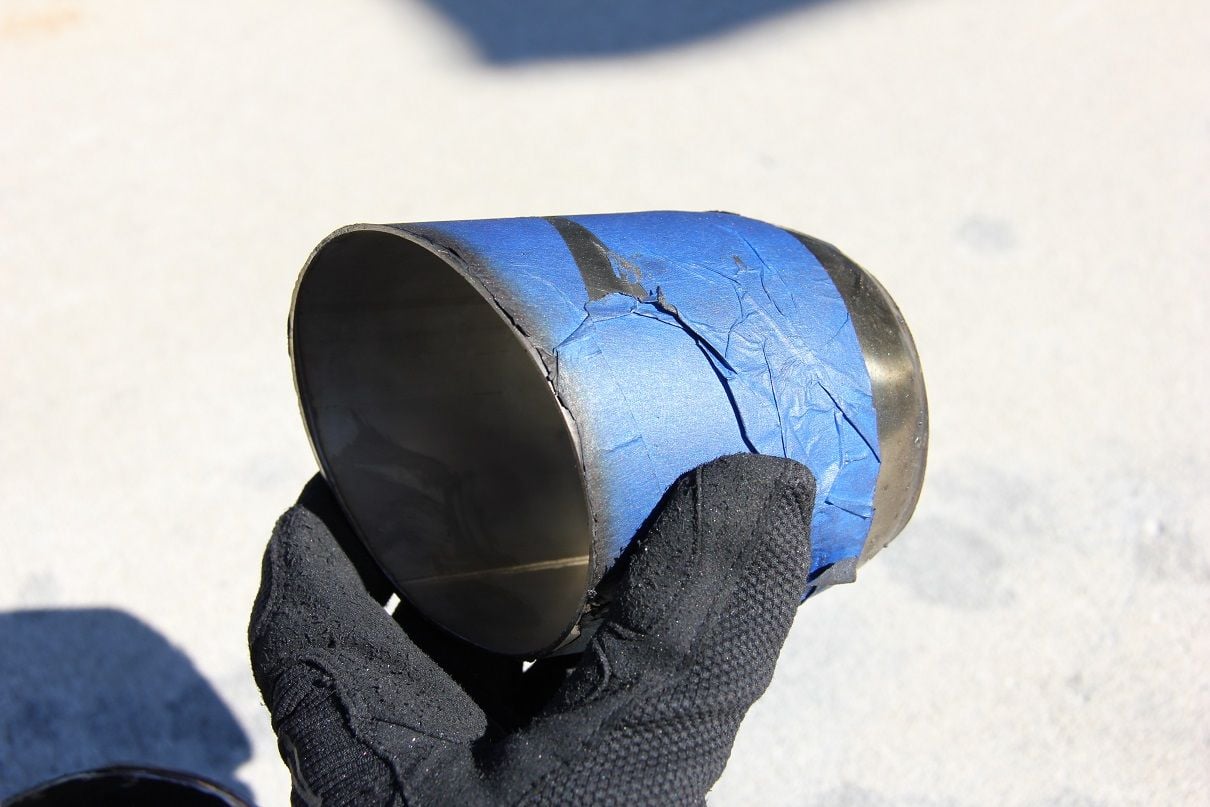
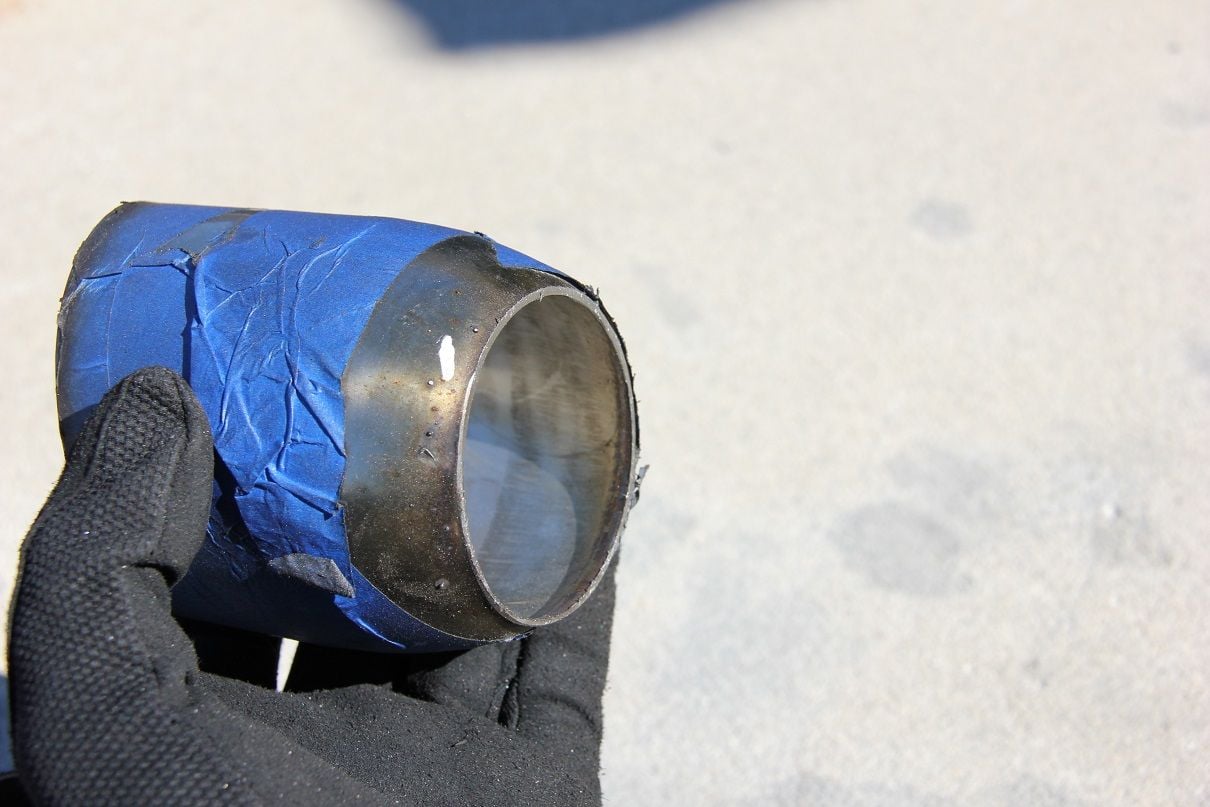
 The stock tip is double walled ss. To separate the inner and outer "walls" I used flat grinding wheel to flush grind the edge of the tip. I probably took off about 1/8" or so, but the grinding complete separated the two halves. Once the inner wall was relieved of duty I worked on increasing the inlet ID to work with the 3" pipe, since the factory 60mm was much smaller. I accomplished this by cutting the outer wall about midway through the taper from 3.5 to 2.5. Cutting it on the taper worked out perfectly, but the tip is a bit shorter now, which you can't even see while mounted on the car. Hope that helps, I will make sure I detail that in the write up. NO DRONE!!!!! I was worried I might induce a little drone but I am GLAD to report there is zero drone, none, nada. I hate hate hate drone and would report back to you guys if there was any (LG headers, no cats, BTW). The tone is louder, but zero drone. IMO it sounds phenomenal, throttle response is vastly improved, which I was not expecting, I tested it out a few more times to make sure I wasn't imagining things, and things are absolutely more crispy on tip-in.
Best $200 you'll ever spend on your Z!
Picture of the tip modifications
Last edited by Josh B.; 11-18-2015 at 01:04 PM.
#26
Drifting


(2) 76mm Exhaust Control Valves, SS, Closed style, $40 each
http://www.aliexpress.com/snapshot/7...70138975749301
http://www.aliexpress.com/snapshot/7...70138975749301
I also noticed they are coming from China, how long did it take to get yours?
Here is the link for normally open
http://www.aliexpress.com/store/prod...789782919.html
Last edited by v8sten; 11-18-2015 at 02:54 PM.
#27
 . It was a huge PITA to weld the skins back on my mufflers when I modded them. The grinding wheel was absolutely needed in my case.
#28
Melting Slicks


Thread Starter
I was just wondering, arent the valves normally open. the link you posted is for normally closed.
I also noticed they are coming from China, how long did it take to get yours?
Here is the link for normally open
http://www.aliexpress.com/store/prod...789782919.html
I also noticed they are coming from China, how long did it take to get yours?
Here is the link for normally open
http://www.aliexpress.com/store/prod...789782919.html
The only margin note on reusing the Pierburg actuators is that the triangular bolt circle of the Pierburgs are smaller in diameter than the 76mm butterflies, so you have to file/drill the holes towards the inside by about 2mm each. Then, no fitment issue, completely the same operation as the stock NPPs, only more evil.
The following users liked this post:
v8sten (11-18-2015)
#31
Drifting


No MTW???? Pull the fuse while its running so we can hear the difference at idle
#33
Melting Slicks


Thread Starter
Fair point, I found a similar "before" mod video, I'll put them together. Didn't I send you a PM regarding GS seats for sale, I don't recall a response? I love the new exhaust, sounds much throatier, cackles and pops on decel now. Looking for other peoples feedback as well.
#34
Drifting


im gunna order the valves tonight and the piping shouldnt be an issue to get. once it all comes in im gunna do this either over Thanksgiving or Christmas, whenever the parts get here
#35
Melting Slicks


Thread Starter
That's awesome man. The 60 degree bend with the 3" CLR is critical, any longer of a radius and the pipes wont be able to make the turns tight enough inside the can. I could only find one company selling the 3" CLR, all others were like 4" or 5". One more note on the Chinese actuators, the vacuum nipple is facing side to side, and the factory hose connects from the rear. The hose would probably stretch far enough to make the turn, but something to think about. I'll make sure I have those how to notes prepared before Thanksgiving.
The following users liked this post:
v8sten (11-18-2015)
#37
Drifting


I though about the CLR on the way home, I just opened CF up and saw your comment, thanks that helps a lot
#38
Sounds healthier with the 3in upgrade. It's gotta be making more power, at least a little more.

#39
Drifting


Ordered the valves, looking for the pipes, gunna see if i can get them local
****** EDIT ******
Everything is ordered, it was a little more than you stated. So far I am at $259.68 in parts to be exact, not including shop supplies
****** EDIT ******
Everything is ordered, it was a little more than you stated. So far I am at $259.68 in parts to be exact, not including shop supplies
Last edited by v8sten; 11-18-2015 at 10:28 PM.
#40
Melting Slicks


Thread Starter
 Welding the can back together is, well, you'll see
The only two tools that are specific to the job are the 3" holesaw and the 3/4" holesaw (for the 4 bypass holes 3 inches foreward of the baffle). Both holesaws are available at Lowes, I went through two of each, you can save by buying one with an arbor each, and another blade only of each. If you have a drill press one holesaw each will last, but I had a hand held drill that allowed the holesaw to "walk" slightly and it put too much heat on the cutting edges and wore out faster. Locking it all in place will make the tools last, lots of WD40 on the saws, obviously. I'll put the notes into the how-to. Seemed like I couldn't go 45 mins without somekind of hurdle that was unanticipated, hoping to have other people avoid the unanticipated stuff.
Looking forward to see your project, I can't stop driving my car today, just happy with how it sounds now, like a Z06 is meant to sound.
The following users liked this post:
jasonz28camaro (11-18-2015)


