
My UPP Twin Turbo thread
 07-14-2011, 09:55 PM
#21
Safety Car

Thread Starter
Member Since: Feb 2008
Location: TEXOMA
Posts: 3,712
Likes: 0
Received 3 Likes
on
3 Posts
St. Jude Donor '08-'09

thanks mr and mrs hijack! lol
today i experimented with the exhaust wrap. decided to not do the flex sections, and the fact that i sucks up like 60" of wrap which i only ordered so much.
just need to pick up some 2.5" clamps from the hardware store. yes i know those zip ties wont work. lol
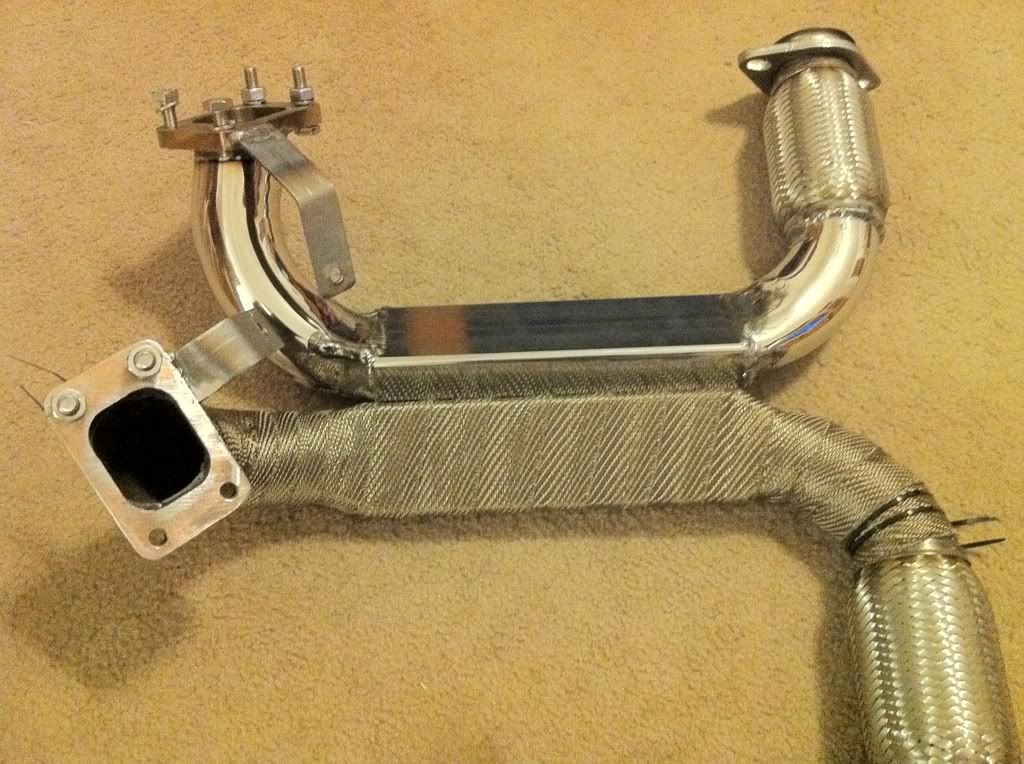
also picked up a m10 x 1.25 tap and some cutting disc, ready for a big day tomorrow. i have nothing planned this weekend but to try and finish this!
-Carl
today i experimented with the exhaust wrap. decided to not do the flex sections, and the fact that i sucks up like 60" of wrap which i only ordered so much.
just need to pick up some 2.5" clamps from the hardware store. yes i know those zip ties wont work. lol
also picked up a m10 x 1.25 tap and some cutting disc, ready for a big day tomorrow. i have nothing planned this weekend but to try and finish this!
-Carl
 07-14-2011, 11:07 PM
#22
Safety Car

I have about four feet of leftover wrap from my DEI turbo blankets if you want to buy it. I actually have another DEI blanket new in the package if you wanna buy that cheap too. Amazon had the best price on the DEI blankets.
 07-15-2011, 12:16 AM
#24
Race Director

 In for updates

 07-18-2011, 02:20 PM
#28
Melting Slicks


 07-18-2011, 02:22 PM
#29
Safety Car
Thread Starter
Member Since: Feb 2008
Location: TEXOMA
Posts: 3,712
Likes: 0
Received 3 Likes
on
3 Posts
St. Jude Donor '08-'09
i wish that was the case, but a couple bbq's popped up along with a run in with the law that pretty much side tracked my whole weekend,
goal today is to clean the rust off the manifold and put on the exhaust wrap then take off the fenders. its just so damn hot in my garage right now.
-Carl
goal today is to clean the rust off the manifold and put on the exhaust wrap then take off the fenders. its just so damn hot in my garage right now.
-Carl
 07-25-2011, 10:31 PM
#32
Safety Car
Thread Starter
Member Since: Feb 2008
Location: TEXOMA
Posts: 3,712
Likes: 0
Received 3 Likes
on
3 Posts
St. Jude Donor '08-'09
ok, well its been awhile. but i managed to turn some wrenches on the car these past couple of days.
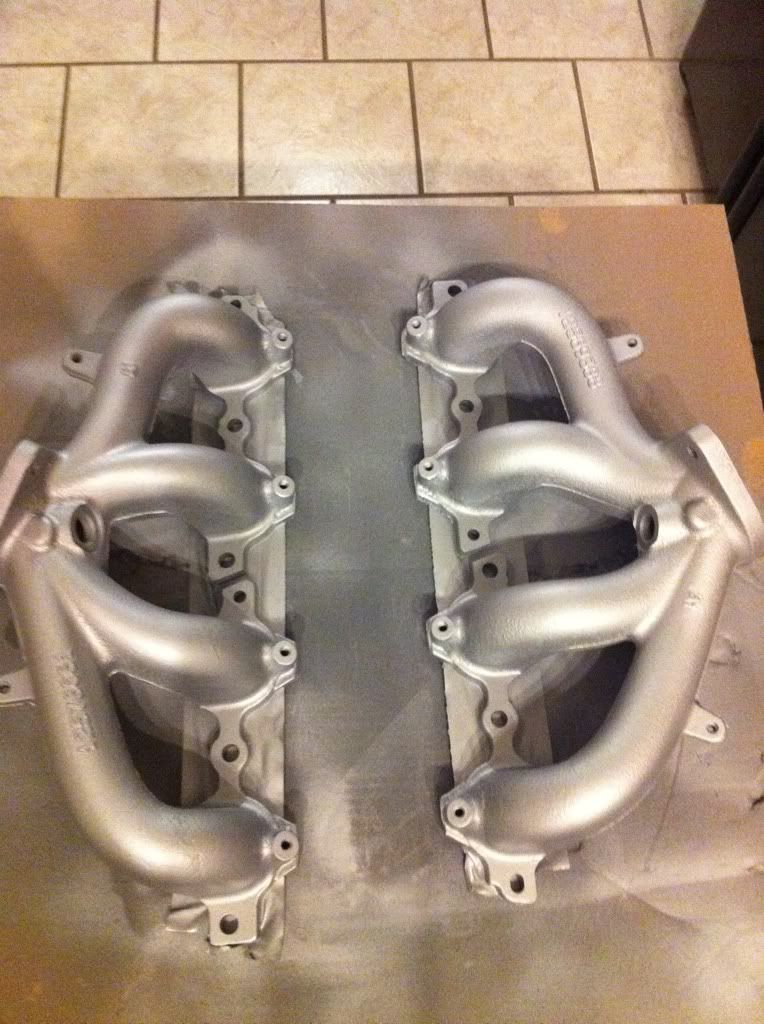
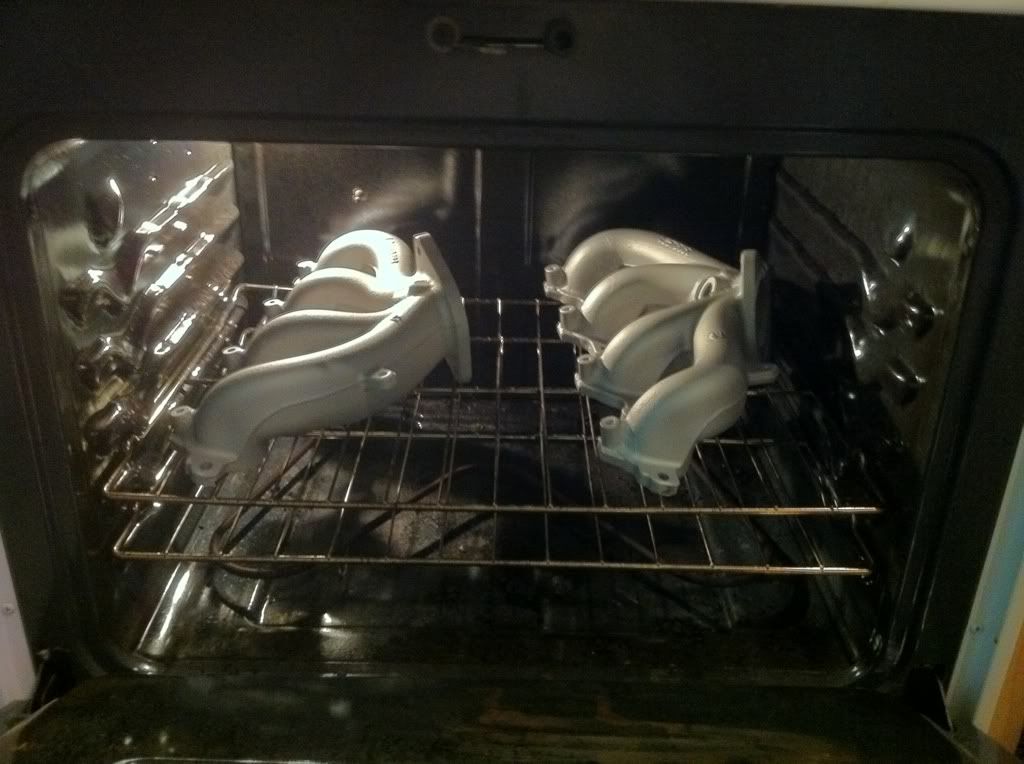
the problem with me is that im a perfectionist and if its not 100% im not satisfied.
so that lead me to cleaning a ceramic coating the manifold with VHT 2000 paint.
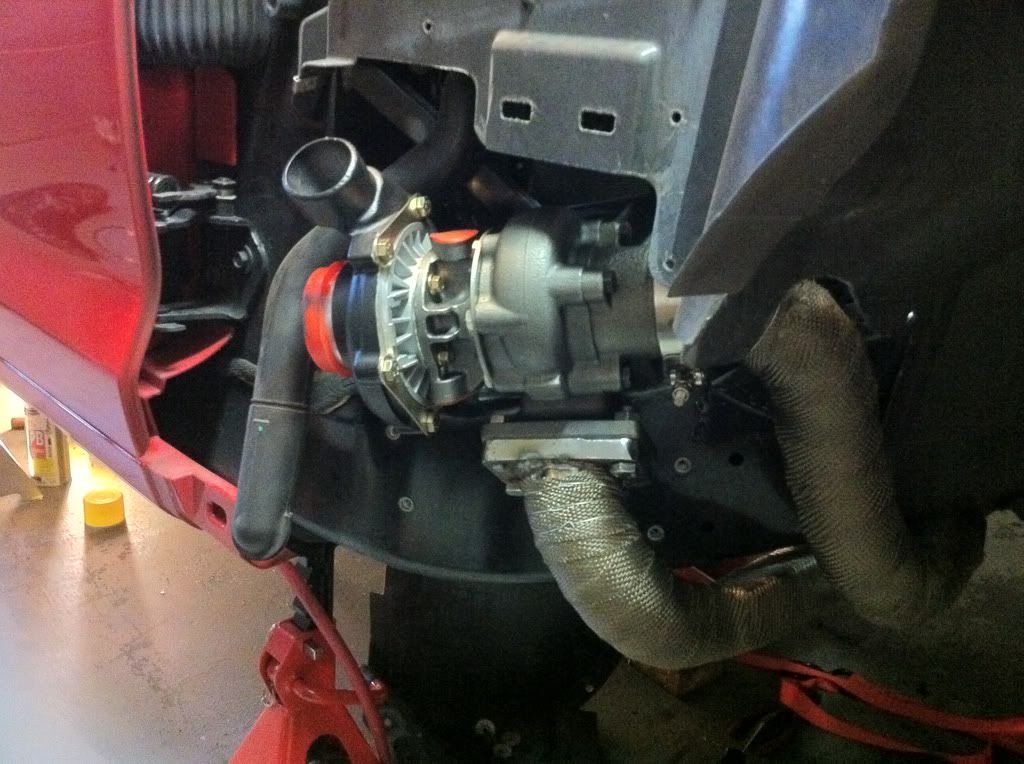
then i got the passenger side installed, goto mount of the uppipe and the bolt holes dont line up, bust out the air grinder and widen them out to go over the studs.
then i positioned the turbo on the up pipe and had to rebend the bracket and then i could mark and tap the frame.
then after having the up pipe installed and turbo on top, i goto install the downpipe. do a little grinding, but then you have to snake the pipe inbetween the uppipe and the frame. so off goes the turbo, diconnect uppipe from frame, snake in downpipe, redo it all again.
then my kooks 3"x3" catted x pipe needed to come out and of course that wasn't happy about leaving the car, so today i put a cargo strap inbetween the x-pipe and attached to the subframe of the car and pulled it tight, had to use a oil filter wrench to seperate from the axel back,, nothing to do with installing the kit, but that just goes to show you what kind of day i was having. lol
so that leaves me here.
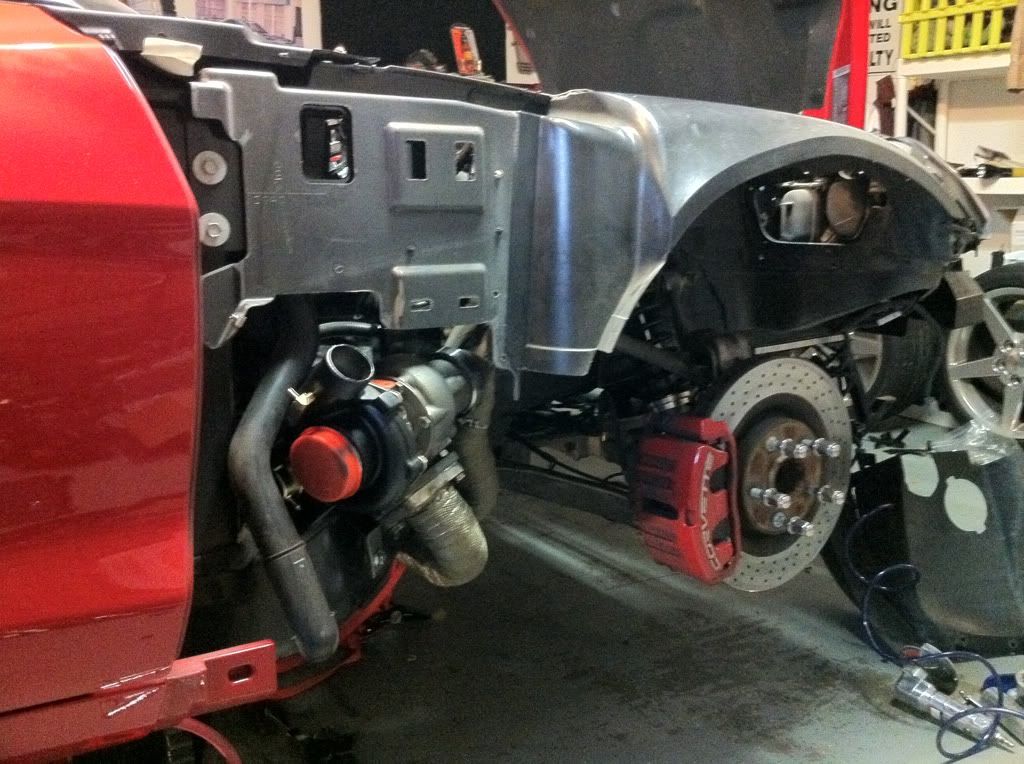
so since i see where the exhaust is now routed, i finished relocating the battery and connecting to the starter then to the fusebox, like how it is stock. if you dont remember i have my own 1awg relocation kit and i ended up grounding upfront as well with some left over 2awg from my old speaker kit.
tomorrows goal.
remove drivers side fender,
install up pipe
install turbo
install down pipe.
......
-Carl
the problem with me is that im a perfectionist and if its not 100% im not satisfied.
so that lead me to cleaning a ceramic coating the manifold with VHT 2000 paint.
then i got the passenger side installed, goto mount of the uppipe and the bolt holes dont line up, bust out the air grinder and widen them out to go over the studs.
then i positioned the turbo on the up pipe and had to rebend the bracket and then i could mark and tap the frame.
then after having the up pipe installed and turbo on top, i goto install the downpipe. do a little grinding, but then you have to snake the pipe inbetween the uppipe and the frame. so off goes the turbo, diconnect uppipe from frame, snake in downpipe, redo it all again.
then my kooks 3"x3" catted x pipe needed to come out and of course that wasn't happy about leaving the car, so today i put a cargo strap inbetween the x-pipe and attached to the subframe of the car and pulled it tight, had to use a oil filter wrench to seperate from the axel back,, nothing to do with installing the kit, but that just goes to show you what kind of day i was having. lol
so that leaves me here.
so since i see where the exhaust is now routed, i finished relocating the battery and connecting to the starter then to the fusebox, like how it is stock. if you dont remember i have my own 1awg relocation kit and i ended up grounding upfront as well with some left over 2awg from my old speaker kit.
tomorrows goal.
remove drivers side fender,
install up pipe
install turbo
install down pipe.
......
-Carl
07-26-2011, 02:33 PM
#34
Former Vendor

Carl,
From what we've seen, it helps to loosely "preassemble" everything (leaving the bolts semi-loose) and with the help of a friend, lift the whole assembly into place at once, this way you can be assure everything lines up before you drill and tap the frame.
CK
From what we've seen, it helps to loosely "preassemble" everything (leaving the bolts semi-loose) and with the help of a friend, lift the whole assembly into place at once, this way you can be assure everything lines up before you drill and tap the frame.
CK
07-26-2011, 03:43 PM
#35
Safety Car
Thread Starter
Member Since: Feb 2008
Location: TEXOMA
Posts: 3,712
Likes: 0
Received 3 Likes
on
3 Posts
St. Jude Donor '08-'09
templates would be perfect on where to drill and tap the initial bolt, there are several bolt holes in those locations on where to line it all up, templates could be made of simple paper. its just a confidence thing, im still not 100% sure that the turbo is in the right location.
Other templates on what to cut to help clearance the turbo and downpipe, its no big deal for a shop that does it alot, but would be a tremendous help to the average joe.
again, nothing i can't handle, just some notes that would help.
Other templates on what to cut to help clearance the turbo and downpipe, its no big deal for a shop that does it alot, but would be a tremendous help to the average joe.
again, nothing i can't handle, just some notes that would help.
07-26-2011, 04:32 PM
#36
Former Vendor
templates would be perfect on where to drill and tap the initial bolt, there are several bolt holes in those locations on where to line it all up, templates could be made of simple paper. its just a confidence thing, im still not 100% sure that the turbo is in the right location.
Other templates on what to cut to help clearance the turbo and downpipe, its no big deal for a shop that does it alot, but would be a tremendous help to the average joe.
again, nothing i can't handle, just some notes that would help.
Other templates on what to cut to help clearance the turbo and downpipe, its no big deal for a shop that does it alot, but would be a tremendous help to the average joe.
again, nothing i can't handle, just some notes that would help.
CK
07-26-2011, 04:41 PM
#37
Safety Car
Thread Starter
Member Since: Feb 2008
Location: TEXOMA
Posts: 3,712
Likes: 0
Received 3 Likes
on
3 Posts
St. Jude Donor '08-'09
(Not sure what was different on yours that you had to drill it out). And it seems to make a difference with only .25" movement in terms of down pipe fitment. With the installs we've done we've noticed that sometimes when it looks perfect with the turbo and up pipe, the down pipe is a little too close to the frame.
i can see why now, unless you were cnc'ing every bracket, adjustablility is good.
I think that is the case with my downpipe too. hot exhaust on frame = not good.
how much do round trip tickets from colorado to charleston cost? lol
-Carl
07-26-2011, 04:47 PM
#38
Former Vendor
the holes i had to drill were the flange on the up-pipe to the engine manifold.
i can see why now, unless you were cnc'ing every bracket, adjustablility is good.
I think that is the case with my downpipe too. hot exhaust on frame = not good.
how much do round trip tickets from colorado to charleston cost? lol
-Carl
i can see why now, unless you were cnc'ing every bracket, adjustablility is good.
I think that is the case with my downpipe too. hot exhaust on frame = not good.
how much do round trip tickets from colorado to charleston cost? lol
-Carl

And yea, I did notice that sometimes those were tight, we're using a basic 2.5" "standard" 2bolt on there right now, I'm trying to get some actual exact mated ones water jetted for the C6/camaro now.
CK
07-27-2011, 10:03 PM
#40
Melting Slicks

Member Since: Nov 2007
Location: Niagara Falls NY
Posts: 2,197
Likes: 0
Received 2 Likes
on
2 Posts
St. Jude Donor '08-'09
Nice build.Looks like you are doing everything right.I'm interested to see how long the paint will last on the manifolds.Turbos are really tough on coatings.
Good luck.
Good luck.