



Supporting Components for Pfadt Header Installation?

Thread Starter
Instructor


Joined: Nov 2008
Posts: 153
Likes: 0
From: London Ontario
 Supporting Components for Pfadt Header Installation?
Hi all,
In search of a spring project, I ordered a set of Pfadt Tri-Y headers this morning. I will be installing them in my 2011 LS3 coupe which currently has about 23,000km on the odometer (Canadian car...). The car already has a Corsa Xtreme exhaust system and I can't wait to hear how deliciously obnoxious it's going to sound. What supporting components would the masses suggest I purchase before diving into the installation? I'm currently considering:
-160-degree thermostat (along with ECM tuning...)
-new Delco spark plugs (but is this really necessary at such low mileage? I'm doubtful)
-Heat sleeves for the spark plug wires
-MSD spark plug wires (although, again, I'm sure the stock ones are fine...anyone have clearance/heat issues recycling the stock wires?)
-3/8 tunnel plate...a few squeaks and rattles have developed lately and I'm wondering if the added stiffness might be beneficial since I'm in there anyways. Any comments regarding the efficacy of this part?
Thanks in advance for your sage advice! I realize that I should include a CAI in my parts list, but I'm intending to add a supercharger kit in the fall so it seems like a wasted expense.
In search of a spring project, I ordered a set of Pfadt Tri-Y headers this morning. I will be installing them in my 2011 LS3 coupe which currently has about 23,000km on the odometer (Canadian car...). The car already has a Corsa Xtreme exhaust system and I can't wait to hear how deliciously obnoxious it's going to sound. What supporting components would the masses suggest I purchase before diving into the installation? I'm currently considering:
-160-degree thermostat (along with ECM tuning...)
-new Delco spark plugs (but is this really necessary at such low mileage? I'm doubtful)
-Heat sleeves for the spark plug wires
-MSD spark plug wires (although, again, I'm sure the stock ones are fine...anyone have clearance/heat issues recycling the stock wires?)
-3/8 tunnel plate...a few squeaks and rattles have developed lately and I'm wondering if the added stiffness might be beneficial since I'm in there anyways. Any comments regarding the efficacy of this part?
Thanks in advance for your sage advice! I realize that I should include a CAI in my parts list, but I'm intending to add a supercharger kit in the fall so it seems like a wasted expense.
Last edited by RestoRoc89; Apr 30, 2013 at 09:18 PM.

Le Mans Master


Joined: Apr 2013
Posts: 5,376
Likes: 1,118
I would say leave the plugs and wires until you have some more miles on the car. The stick wires have a metal boot protector on them already. If you want a nice sleeved wire in the future you can buy the granatelli sleeved ones.
I can't see why you would need the thermostat, unless when you tune the car for the headers (which you will need to do) the tuner says that they can make you a bit more power with the 160 thermostat.
The tunnel plate is probably a good idea, especially if you get one of those that comes with insulation on it, to keep the exhaust heat out of the driveshaft tunnel area. I see a nice one that Zip has that I'm going to buy when I install headers on my car.
Other than that, bolt em on and tweak on her till you get the right AFR and come back on here and tell us how those Pfadts work.
BTW: is it an A6 or manual 6 trans?
I can't see why you would need the thermostat, unless when you tune the car for the headers (which you will need to do) the tuner says that they can make you a bit more power with the 160 thermostat.
The tunnel plate is probably a good idea, especially if you get one of those that comes with insulation on it, to keep the exhaust heat out of the driveshaft tunnel area. I see a nice one that Zip has that I'm going to buy when I install headers on my car.
Other than that, bolt em on and tweak on her till you get the right AFR and come back on here and tell us how those Pfadts work.
BTW: is it an A6 or manual 6 trans?
Thread Starter
Instructor
Joined: Nov 2008
Posts: 153
Likes: 0
From: London Ontario
Thanks for the pointers, CI. I think I agree. The car is an M6 and I do intend the have it dyno tuned at a local shop afterwards.
I noticed that most shops advertising header installations on the forum are including 160-deg thermostats and fan set point adjustments as part of the package deal...which leads me to believe that there's more power on the table at lower operating temperatures. I'm still on the fence.
With regards to the tunnel plate, I really haven't noticed any excessive heat as-is, though relocating the cats might change that. I'll probably get one just in case it helps.
I noticed that most shops advertising header installations on the forum are including 160-deg thermostats and fan set point adjustments as part of the package deal...which leads me to believe that there's more power on the table at lower operating temperatures. I'm still on the fence.
With regards to the tunnel plate, I really haven't noticed any excessive heat as-is, though relocating the cats might change that. I'll probably get one just in case it helps.
Thread Starter
Instructor
Joined: Nov 2008
Posts: 153
Likes: 0
From: London Ontario
Also, thanks for suggesting the Granatelli wire option--one I hadn't seen before. That's pretty slick compared to the MSD wire kit that most forum searches turn up. I like the integrated heat sleeving and the RFI shielding.
Le Mans Master
Joined: Apr 2013
Posts: 5,376
Likes: 1,118
No worries man. Ive had those wires on my Sierra Denli for about two years and have no complaints. They are solid core but somehow don't generate any RF interference. I would also suggest that with whatever wires you use, get some dielectric grease and rub some inside of the spark plug and coil boots. That stuff seals off any voltage leakage from the wire to the body of the plug and works great to keep the boots from sticking on the plugs as well. I tore a couple of good wires up before I started using it. Good luck with your install and let us know how it goes.
Thread Starter
Instructor
Joined: Nov 2008
Posts: 153
Likes: 0
From: London Ontario
Well, I'm 75-percent through the header installation. I've been at it for about 7 hours now and am mostly pleased. But I discovered one supporting component that is definitely required to install Pfadt headers--longer primary O2 extension harnesses. As others have previously mentioned, the extensions included in the kit are way too short. I had to cut back the tape and unwind the factory wiring harness to get enough slack to even remotely reach the new 02 sensor location. Another 12" of extension would be ideal. As it is, I'm not entirely happy with the harness routing I was able to achieve. The harnesses on each side had to go down behind the engine to reach, crossing several sharp, cast edges (I've zip tied and used split loom as best I can...). The connections to the sensor pigtails wind up nearly jammed between the bellhousing and the frame rails to the point where I'm worried about the motor rocking and crushing them. The installation instructions do not address the intended harness routing at all. A routing diagram would be ideal (along with a longer extension).
Fitment of the hard parts has been excellent, at least. With the car about 20" off the ground on jack stands, both headers slid in without drama. All I have left to do is install the crossover pipe.
Fitment of the hard parts has been excellent, at least. With the car about 20" off the ground on jack stands, both headers slid in without drama. All I have left to do is install the crossover pipe.
Corvette Stories
The Best of Corvette for Corvette Enthusiasts

10 Reasons the C6 Z06 is Still A Performance Benchmark After 20 Years
Joe Kucinski
How Much Horsepower Every Corvette Engine "LOST" in 1972
Joe Kucinski
Top 10 DOs and DON'Ts for Protecting Your Convertible Top!
Michael S. Palmer
Top 10 Most Explosive Corvettes Ever Made: Power-to-Weight Ratio Ranked!
Joe Kucinski
150 hp to 1,250 hp: Every Corvette Generation Compared by the Specs That Matter
Joe Kucinski
8 Coolest Corvette Pace Cars (and Replicas) of All Time
Verdad Gallardo
Top 10 Corvette Engines RANKED by Peak Torque (70+ Years of Muscle!)
Joe Kucinski
Corvette ZR1X Will Be Pacing the Indy 500, And Could Probably Race, Too!
Verdad Gallardo
Top 10 Corvettes Coming to Mecum Indy 2026!
Brett Foote
Safety Car

Joined: Dec 2009
Posts: 3,724
Likes: 9
Well, I'm 75-percent through the header installation. I've been at it for about 7 hours now and am mostly pleased. But I discovered one supporting component that is definitely required to install Pfadt headers--longer primary O2 extension harnesses. As others have previously mentioned, the extensions included in the kit are way too short. I had to cut back the tape and unwind the factory wiring harness to get enough slack to even remotely reach the new 02 sensor location. Another 12" of extension would be ideal. As it is, I'm not entirely happy with the harness routing I was able to achieve. The harnesses on each side had to go down behind the engine to reach, crossing several sharp, cast edges (I've zip tied and used split loom as best I can...). The connections to the sensor pigtails wind up nearly jammed between the bellhousing and the frame rails to the point where I'm worried about the motor rocking and crushing them. The installation instructions do not address the intended harness routing at all. A routing diagram would be ideal (along with a longer extension).
Fitment of the hard parts has been excellent, at least. With the car about 20" off the ground on jack stands, both headers slid in without drama. All I have left to do is install the crossover pipe.
Fitment of the hard parts has been excellent, at least. With the car about 20" off the ground on jack stands, both headers slid in without drama. All I have left to do is install the crossover pipe.

Safety Car
Joined: Dec 2009
Posts: 3,724
Likes: 9
I would say leave the plugs and wires until you have some more miles on the car. The stick wires have a metal boot protector on them already. If you want a nice sleeved wire in the future you can buy the granatelli sleeved ones.
I can't see why you would need the thermostat, unless when you tune the car for the headers (which you will need to do) the tuner says that they can make you a bit more power with the 160 thermostat.
The tunnel plate is probably a good idea, especially if you get one of those that comes with insulation on it, to keep the exhaust heat out of the driveshaft tunnel area. I see a nice one that Zip has that I'm going to buy when I install headers on my car.
Other than that, bolt em on and tweak on her till you get the right AFR and come back on here and tell us how those Pfadts work.
BTW: is it an A6 or manual 6 trans?
I can't see why you would need the thermostat, unless when you tune the car for the headers (which you will need to do) the tuner says that they can make you a bit more power with the 160 thermostat.
The tunnel plate is probably a good idea, especially if you get one of those that comes with insulation on it, to keep the exhaust heat out of the driveshaft tunnel area. I see a nice one that Zip has that I'm going to buy when I install headers on my car.
Other than that, bolt em on and tweak on her till you get the right AFR and come back on here and tell us how those Pfadts work.
BTW: is it an A6 or manual 6 trans?


Safety Car


Joined: Nov 2010
Posts: 3,725
Likes: 84
From: Woodlands (houston) TX
those parts are all look good. same things I did when I did my header install the first time.
you'll love the pfadt headers amazing craftsmanship and the smoothest install out of any of the major brands.
you'll love the pfadt headers amazing craftsmanship and the smoothest install out of any of the major brands.
Thread Starter
Instructor
Joined: Nov 2008
Posts: 153
Likes: 0
From: London Ontario
I appreciate your prompt response and generous offer. I've re-routed the stock harness and buttoned up the installation already, so I'm ok. In hindsight (and given how happy I am now that it's finished), it wasn't that big of a deal. I would recommend including a longer extension in future kits and giving some guidance re: primary sensor harness routing in the installation instructions. I have been an early adopter of several Pfadt products now and they never fail to exceed my expectations.
Photos of the installation (done easily in my driveway on stands) and sound clips coming shortly!
Last edited by RestoRoc89; Apr 30, 2013 at 09:21 PM.
Safety Car
Joined: Dec 2009
Posts: 3,724
Likes: 9
I appreciate your prompt response and generous offer. I've re-routed the stock harness and buttoned up the installation already, so I'm ok. In hindsight (and given how happy I am now that it's finished), it wasn't that big of a deal. I would recommend including a longer extension in future kits and giving some guidance re: primary sensor harness routing in the installation instructions. I have been an early adopter of several Pfadt products now and they never fail to exceed my expectations.
Photos of the installation (done easily in my driveway on stands) and sound clips coming shortly!
Photos of the installation (done easily in my driveway on stands) and sound clips coming shortly!
Thread Starter
Instructor
Joined: Nov 2008
Posts: 153
Likes: 0
From: London Ontario
As promised, here are some pictures. Unfortunately, my iPhone was the only image capturing device that was handy, but they make for good eye candy nonetheless. Here's what I encountered after the ceremonious unboxing.


Everyone says it and I will reiterate--check out those TIG welds!! There is some serious workmanship behind these!

Everything you need in the box...

Even the spring hanger bracket is a work of art.

Everyone says it and I will reiterate--check out those TIG welds!! There is some serious workmanship behind these!
Everything you need in the box...
Even the spring hanger bracket is a work of art.
Last edited by RestoRoc89; May 1, 2013 at 09:53 PM.
Thread Starter
Instructor
Joined: Nov 2008
Posts: 153
Likes: 0
From: London Ontario
For all you driveway hacks like me, installing these headers was more or less a piece of cake (aside from the harness headscratcher that Pfadt seems to have resolved going forwards). Here was my setup--rear of the car on ramps while the front was raised 20-in off the ground with jackstands under the engine cradle.

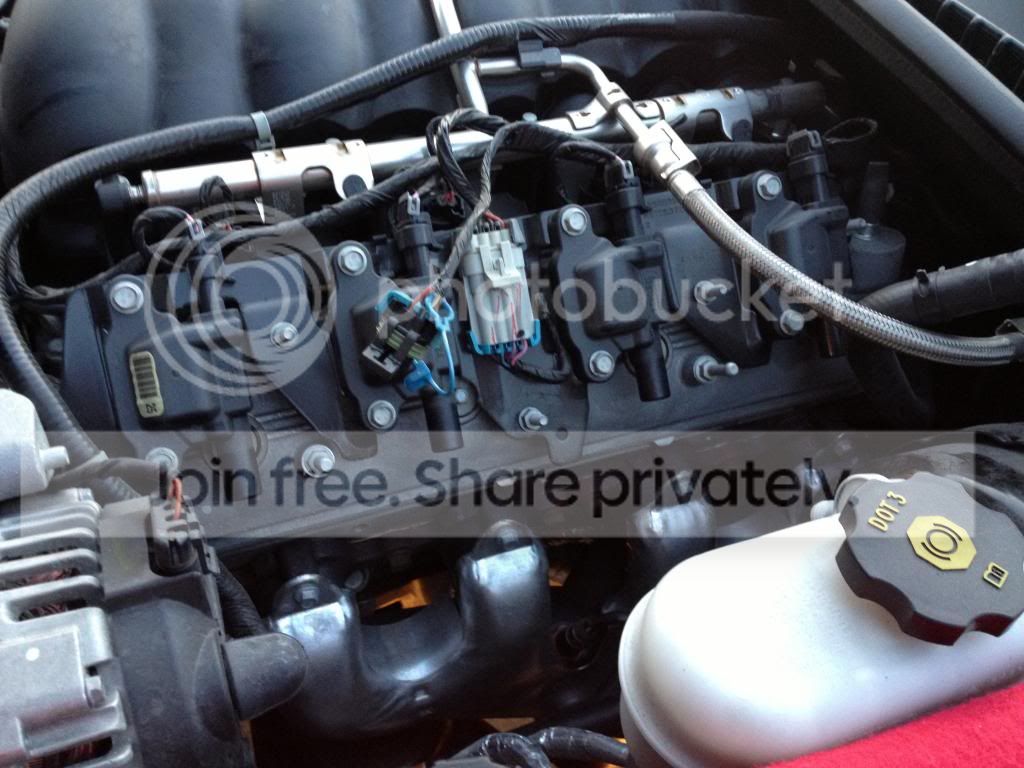
Step 1: remove engine covers, spark plug wires, spark plugs and oil dipstick tube (for wet sump LS3s). I also disconnected the hose going to the brake booster to have better access to the rearmost plug on the driver's side. The hanging black and blue connectors are for the primary O2 sensors. Later, you'll see how I had to relocate them.

The growing pile of cast aways:

Step 2: remove factory mid-pipe and catalytic converters. Disclaimer, my car is still fairly new and I doused all fasteners with PB blaster the night before. As such, I was easily able to undo the nuts connecting the catalytic converters to the exhaust manifolds without snapping the studs. I did this entire job solo and I wanted to be able to remove the exhaust manifolds in the most controlled manner possible so I removed the cats first. Note: the rear O2 sensor harness connections are behind the engine on each side. The driver's side connector is accessible from the top. I had to undo the passenger's side connection from the bottom as I was lowering the cat after unbolting it. Some curse words were employed as disconnecting harnesses single handedly is tricky.

Step 3: get out the trusty 1/2-in wrench and remove the exhaust manifolds. This really was a piece of cake compared to the f-bodies I'm used to working on.
Driver's side removed:

Passenger's side removed:

The pile of discarded parts grows larger.

Step 4: Transfer the rear O2 sensors over to the spiffy Pfadt mid-pipe. Use a touch of never-seize on the threads.
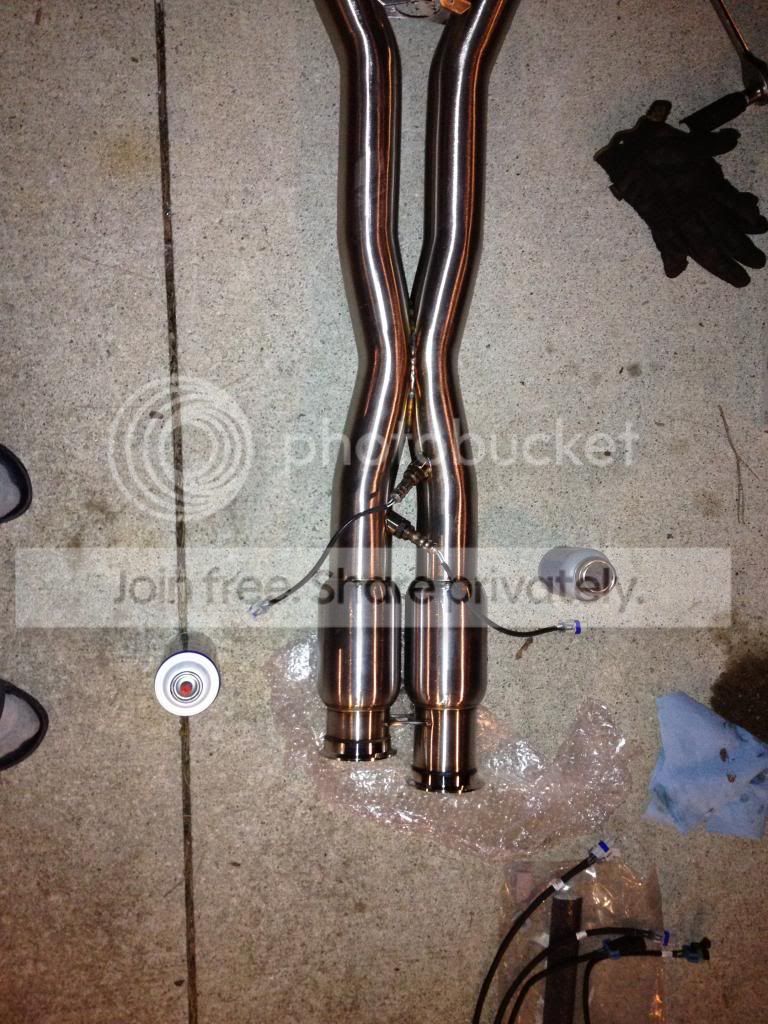
Step 6: Install the O2 sensor harness extensions (because you'll never reach the connectors once the headers are in place.
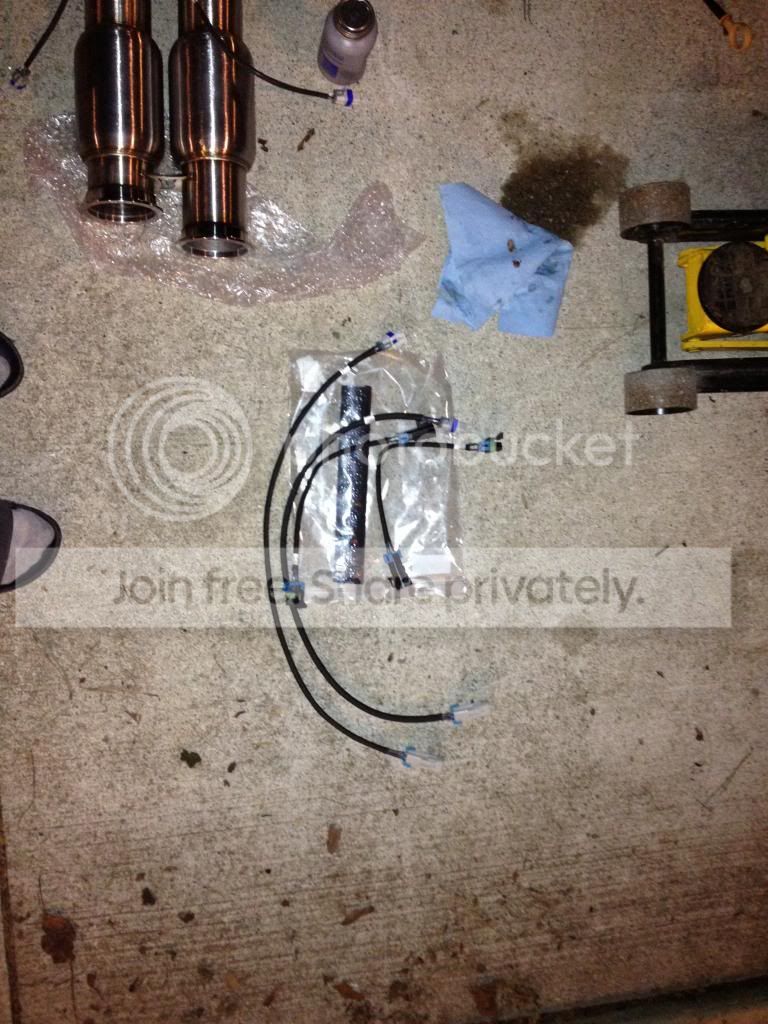
Remember those primary O2 sensor connectors that used to hang out above the centre of the valve cover? To reach the new sensor location, I had to cut back the tape on the factory wire harness and unravel about 10-12 inches of the primary O2 sensor branch. The connector is now located down behind the engine. I tried to re-tape the harness as much as access would allow.
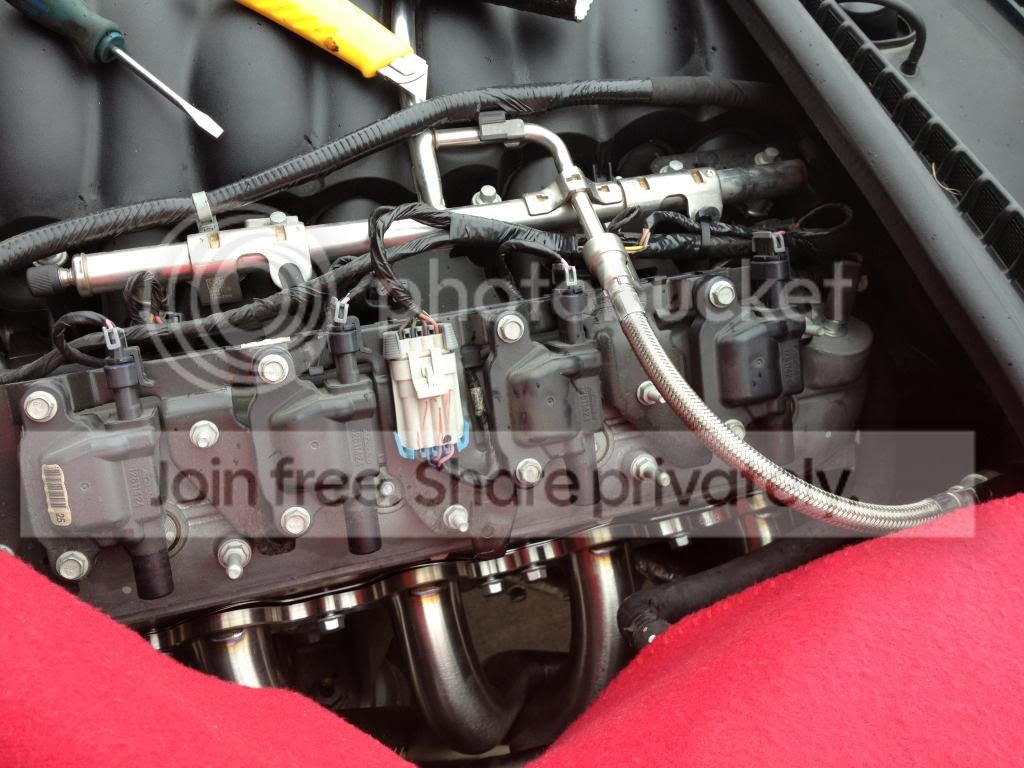
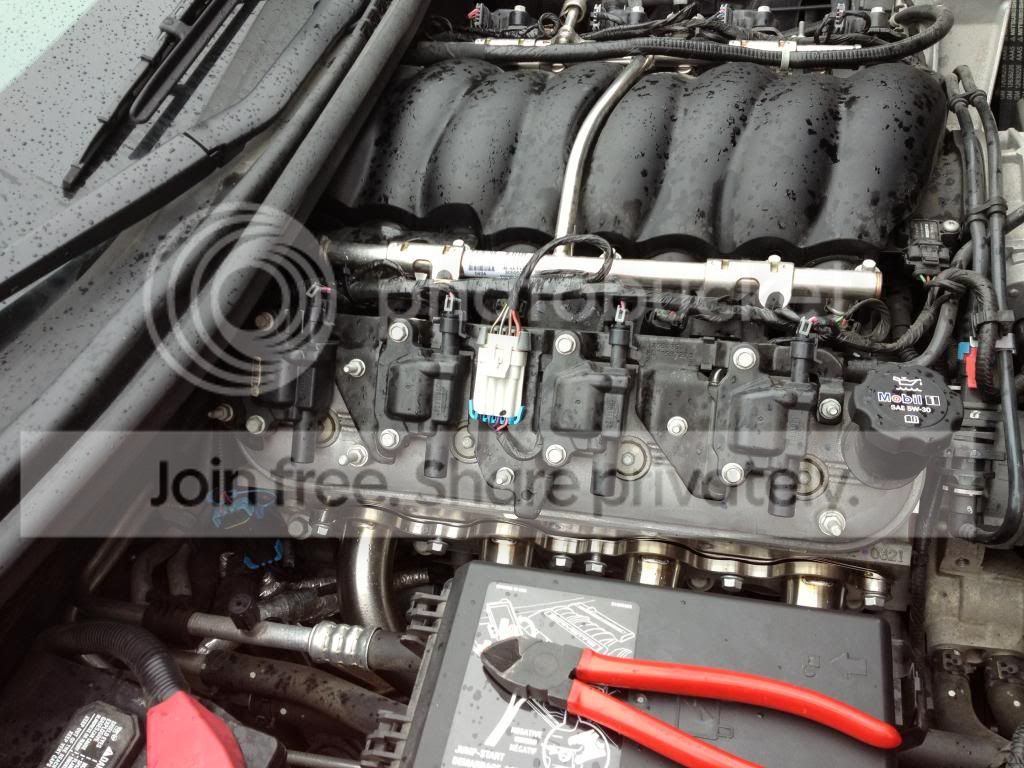
I tried to zip tie the O2 branch back to the main harness and leave a bit of a loop to prevent stressing the wires too much. I know I haven't adhered to the wire's minimum bend radius, but I couldn't spare any more length. I'm not too worried about it. Apparently this is the norm for header installations? Yes, it did start raining by the time I got to the passenger's side wiring. I should have done this in the garage, but the weather was beautiful when I started.
Step 7: lift headers into place from under the car, balance them on something and quickly climb up to the topside to loosely install the gaskets and bolts. This would be easier with a second set of hands, but I did it on my own without issues. As a disclaimer, I loosened both motor mount nuts and raised the engine a few inches with a bottle jack and piece of lumber underneath the oil pan. Who knows if I actually needed to, but I just did it upfront because it was easy. I'm not sure why some people get so worked up about having to raise the engine.


Step 8: install the mid-pipe. Leave all clamps loose at this point for alignment later.

Step 9: finish O2 sensor harness routing.
I didn't want to mess with melted wires down the road, so I called in the reinforcements.

All of the plastic connectors got the firesleeve treatment. I notice that GM pretty much insulated everything in the area, so I continued the tradition.

Where the primary O2 connections wound up.

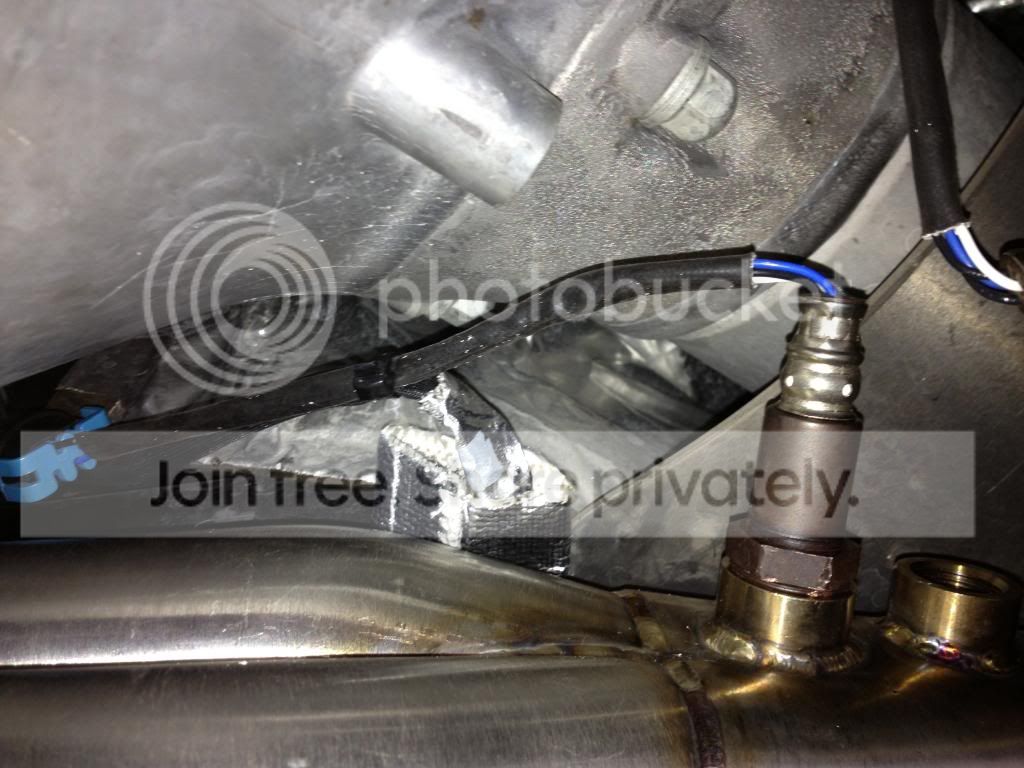
Routing of the rear sensor harnesses. I put the supplied heat sleeving over the rear connectors because they literally wind up right beside the cats. Pfadt's installation instructions show the same location.

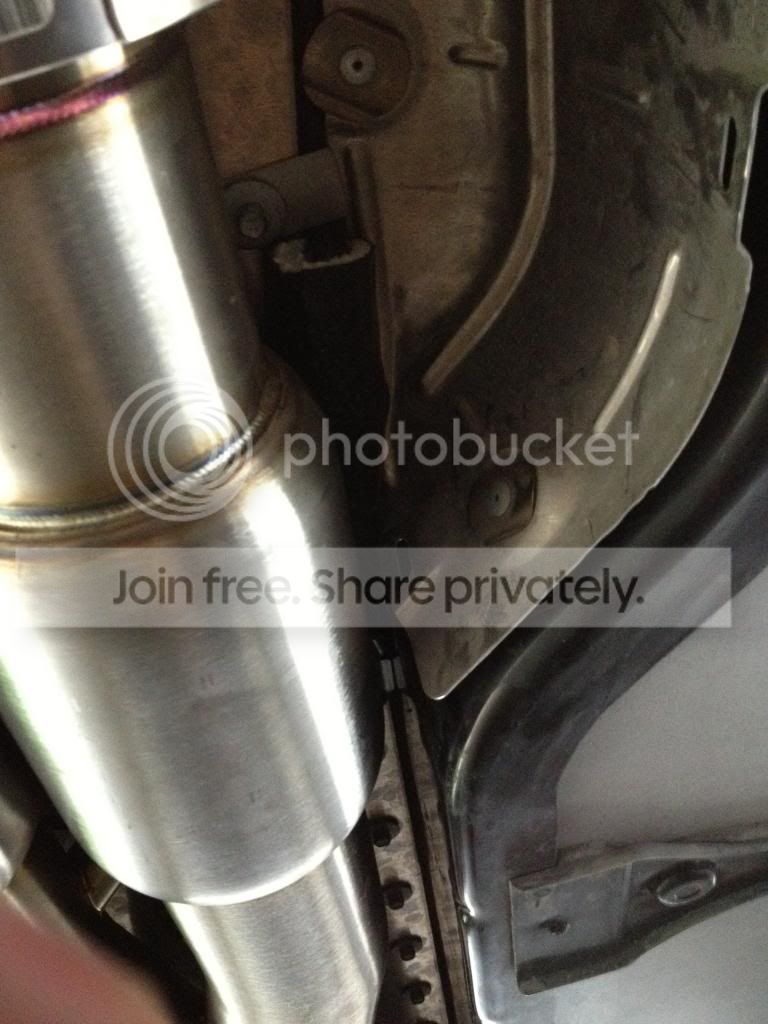
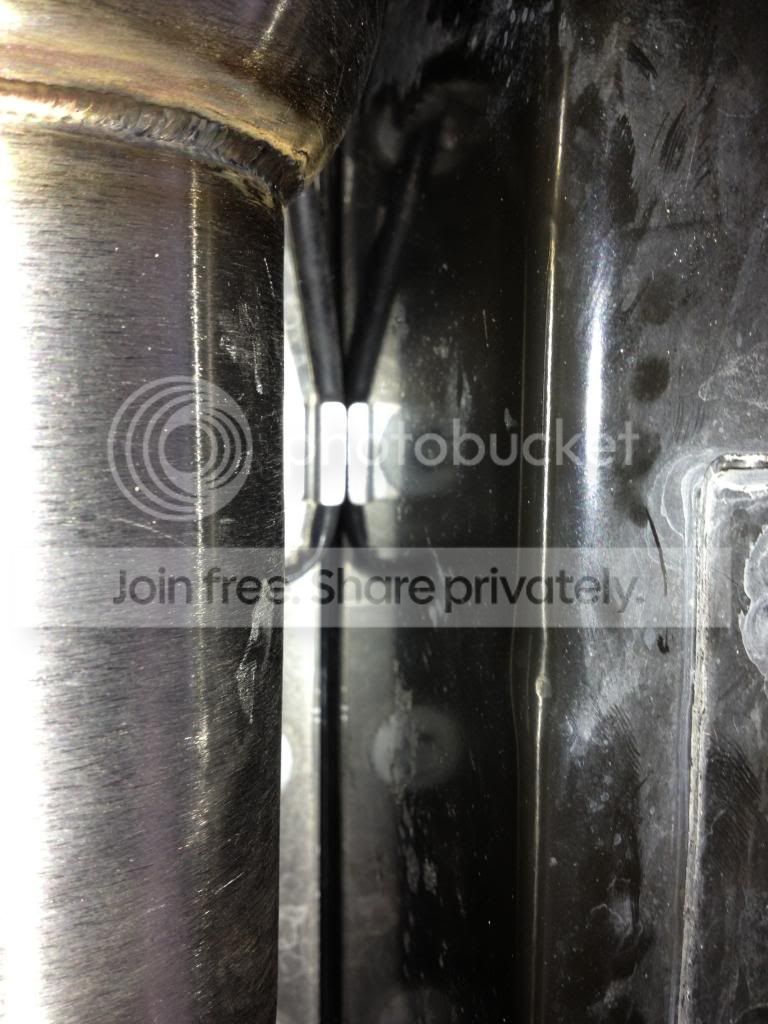

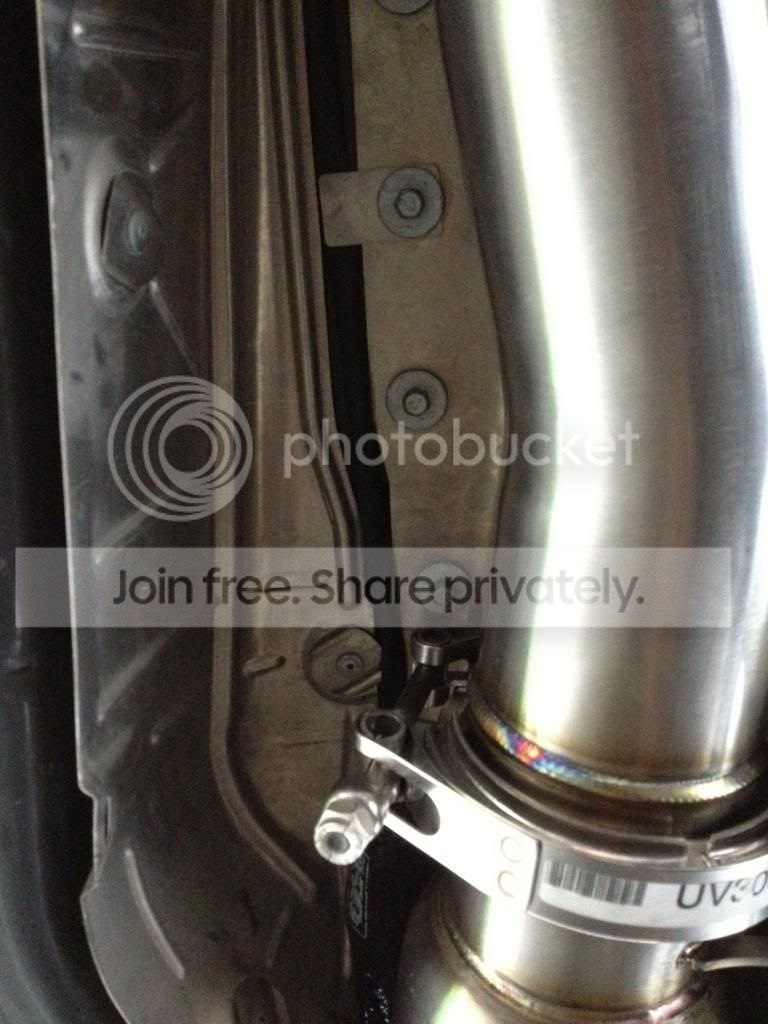
Passenger's side header clearance.

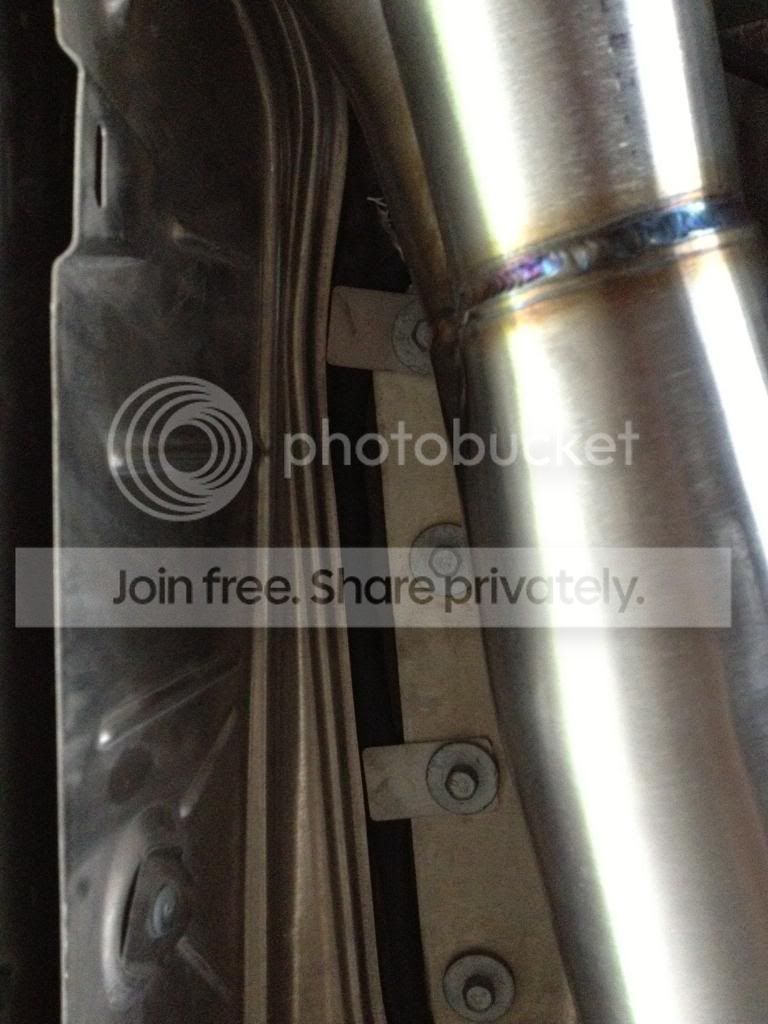
Driver's side header clearance.

Step 10: Align the headers, pipes and exhaust tips. I used lumber as spacers to centre the mid-pipe in the tunnel and put axle stands under the axle-back connection points to constrain the exhaust tip location. Tighten all fasteners from the headers back. The Pfadt headers and Corsa axle-back were a piece of cake to align...unlike some other exhaust systems I have installed in the past. This demonstrates some solid engineering and understanding of tolerance stack-ups. Props to Pfadt.
Driver's side header after final torque.

Passenger's side header after final torque.

Exhaust tip alignment. I do love the 4-in Corsa tips.

Step 11: reinstall everything else, press the glowing, green start button and shriek with glee and fear as the monster breathes its first few breaths.


Step 1: remove engine covers, spark plug wires, spark plugs and oil dipstick tube (for wet sump LS3s). I also disconnected the hose going to the brake booster to have better access to the rearmost plug on the driver's side. The hanging black and blue connectors are for the primary O2 sensors. Later, you'll see how I had to relocate them.
The growing pile of cast aways:
Step 2: remove factory mid-pipe and catalytic converters. Disclaimer, my car is still fairly new and I doused all fasteners with PB blaster the night before. As such, I was easily able to undo the nuts connecting the catalytic converters to the exhaust manifolds without snapping the studs. I did this entire job solo and I wanted to be able to remove the exhaust manifolds in the most controlled manner possible so I removed the cats first. Note: the rear O2 sensor harness connections are behind the engine on each side. The driver's side connector is accessible from the top. I had to undo the passenger's side connection from the bottom as I was lowering the cat after unbolting it. Some curse words were employed as disconnecting harnesses single handedly is tricky.
Step 3: get out the trusty 1/2-in wrench and remove the exhaust manifolds. This really was a piece of cake compared to the f-bodies I'm used to working on.
Driver's side removed:
Passenger's side removed:
The pile of discarded parts grows larger.
Step 4: Transfer the rear O2 sensors over to the spiffy Pfadt mid-pipe. Use a touch of never-seize on the threads.
Step 6: Install the O2 sensor harness extensions (because you'll never reach the connectors once the headers are in place.
Remember those primary O2 sensor connectors that used to hang out above the centre of the valve cover? To reach the new sensor location, I had to cut back the tape on the factory wire harness and unravel about 10-12 inches of the primary O2 sensor branch. The connector is now located down behind the engine. I tried to re-tape the harness as much as access would allow.
I tried to zip tie the O2 branch back to the main harness and leave a bit of a loop to prevent stressing the wires too much. I know I haven't adhered to the wire's minimum bend radius, but I couldn't spare any more length. I'm not too worried about it. Apparently this is the norm for header installations? Yes, it did start raining by the time I got to the passenger's side wiring. I should have done this in the garage, but the weather was beautiful when I started.
Step 7: lift headers into place from under the car, balance them on something and quickly climb up to the topside to loosely install the gaskets and bolts. This would be easier with a second set of hands, but I did it on my own without issues. As a disclaimer, I loosened both motor mount nuts and raised the engine a few inches with a bottle jack and piece of lumber underneath the oil pan. Who knows if I actually needed to, but I just did it upfront because it was easy. I'm not sure why some people get so worked up about having to raise the engine.
Step 8: install the mid-pipe. Leave all clamps loose at this point for alignment later.
Step 9: finish O2 sensor harness routing.
I didn't want to mess with melted wires down the road, so I called in the reinforcements.
All of the plastic connectors got the firesleeve treatment. I notice that GM pretty much insulated everything in the area, so I continued the tradition.
Where the primary O2 connections wound up.
Routing of the rear sensor harnesses. I put the supplied heat sleeving over the rear connectors because they literally wind up right beside the cats. Pfadt's installation instructions show the same location.
Passenger's side header clearance.
Driver's side header clearance.
Step 10: Align the headers, pipes and exhaust tips. I used lumber as spacers to centre the mid-pipe in the tunnel and put axle stands under the axle-back connection points to constrain the exhaust tip location. Tighten all fasteners from the headers back. The Pfadt headers and Corsa axle-back were a piece of cake to align...unlike some other exhaust systems I have installed in the past. This demonstrates some solid engineering and understanding of tolerance stack-ups. Props to Pfadt.
Driver's side header after final torque.
Passenger's side header after final torque.
Exhaust tip alignment. I do love the 4-in Corsa tips.
Step 11: reinstall everything else, press the glowing, green start button and shriek with glee and fear as the monster breathes its first few breaths.
Last edited by RestoRoc89; May 2, 2013 at 01:18 AM. Reason: typos
Thread Starter
Instructor
Joined: Nov 2008
Posts: 153
Likes: 0
From: London Ontario
Now for a bit about first impressions. I have an appointment with Dasilva Motorsports on May 11th for dyno tuning. So far, I have driven the car a few hundred kilometres and, even without tuning, the boost in low end torque is definitely noticeable. The sound is earth shatteringly awesome. The best part is that the Corsa Xtremes still don't drone very badly at cruising speed...but they sound deadly at bruising speed when you want them to. All of the joints sealed perfectly on the first attempt and I haven't had any issues with leaks whatsoever. My distaste for leaks is what made the Pfadt product look so appealing.
I will say that, after roughly 300kms, I did get a check engine light for cat inefficiency. I was initially peeved but, after some research, I see that this code is very common with high flow catalytic converters. It sounds like the only fix is to remove the sensors functionality via tuning. Do you agree, Pfadt? Has anyone ever tried to leave the rear O2 sensors functional and simply adjust the sensing thresholds for cat inefficiency? Any suggestions as to what those thresholds should be? I know the rear sensors are purely diagnostic, but we require them to be functional in Ontario to pass emissions testing. Luckily, my car is newer and I won't have to face an e-test for another 5 years. My question is, if everyone knows that the rear O2s won't work with high flow cats, why do manufacturers bother including harness extensions and sensor bungs at all? Why not just physically remove the bulk? Is it to satisfy visual inspections?
I will say that, after roughly 300kms, I did get a check engine light for cat inefficiency. I was initially peeved but, after some research, I see that this code is very common with high flow catalytic converters. It sounds like the only fix is to remove the sensors functionality via tuning. Do you agree, Pfadt? Has anyone ever tried to leave the rear O2 sensors functional and simply adjust the sensing thresholds for cat inefficiency? Any suggestions as to what those thresholds should be? I know the rear sensors are purely diagnostic, but we require them to be functional in Ontario to pass emissions testing. Luckily, my car is newer and I won't have to face an e-test for another 5 years. My question is, if everyone knows that the rear O2s won't work with high flow cats, why do manufacturers bother including harness extensions and sensor bungs at all? Why not just physically remove the bulk? Is it to satisfy visual inspections?

Melting Slicks

Joined: Apr 2007
Posts: 2,987
Likes: 16
From: Phoenix
You got it. Visual will still pass. You can turn off the rear O2's and still meet all the emissions readiness checks as long as your tuner does it the correct way. Down here in Phoenix they plug into the OBDII port and that is what they check. My 2005 GTO passed with no cats.
Safety Car
Joined: Dec 2009
Posts: 3,724
Likes: 9
Now for a bit about first impressions. I have an appointment with Dasilva Motorsports on May 11th for dyno tuning. So far, I have driven the car a few hundred kilometres and, even without tuning, the boost in low end torque is definitely noticeable. The sound is earth shatteringly awesome. The best part is that the Corsa Xtremes still don't drone very badly at cruising speed...but they sound deadly at bruising speed when you want them to. All of the joints sealed perfectly on the first attempt and I haven't had any issues with leaks whatsoever. My distaste for leaks is what made the Pfadt product look so appealing.
I will say that, after roughly 300kms, I did get a check engine light for cat inefficiency. I was initially peeved but, after some research, I see that this code is very common with high flow catalytic converters. It sounds like the only fix is to remove the sensors functionality via tuning. Do you agree, Pfadt? Has anyone ever tried to leave the rear O2 sensors functional and simply adjust the sensing thresholds for cat inefficiency? Any suggestions as to what those thresholds should be? I know the rear sensors are purely diagnostic, but we require them to be functional in Ontario to pass emissions testing. Luckily, my car is newer and I won't have to face an e-test for another 5 years. My question is, if everyone knows that the rear O2s won't work with high flow cats, why do manufacturers bother including harness extensions and sensor bungs at all? Why not just physically remove the bulk? Is it to satisfy visual inspections?
They've been included for several reasons. While 99.9% of tuners turn the rear 02 off, it is theoretically possible to adjust them in a tune to avoid the CEL via tuning. People also have used spacing tricks to move the sensor out of the direct stream to try and get the sensor to report the proper timing/thresholds. Also, as you observed they are needed for states that perform a visual inspection.
All that aside, awesome install and write-up!



Le Mans Master
Joined: Apr 2013
Posts: 5,376
Likes: 1,118
If I ever had a doubt about whether to go with the Pfadt headers, this thread has me sold.
I have one question: in one of the pics, I noticed a second O2 sensor bung in the header collector. Is this a secondary bung for use of a wideband? Is this standard on the Pfadt headers? That was the one thing I wasn't sure about - whether you had to special order a second bung for use of a wide band, because I recall having to do that when I ordered the ARHs for my truck.
Very good write-up and excellent pictures! Thanks OP. This is what these forums are for, IMV.