When you click on links to various merchants on this site and make a purchase, this can result in this site earning a commission. Affiliate programs and affiliations include, but are not limited to, the eBay Partner Network.
To add, don't know how GM would every call the clean side, a clean side, when you have that much oil passing through it back into the intake manifold (in front of the TB vane to boot).
So anyone thinking that you are fine with one catch can ( only the dirty side), really needs to rethink that choice is you are trying to keep oil out of the intake manifold/ prevent detonation from oil on the pistons.
Even in a wet sump system, install a fuel filter on the clean side line to confirm just how clean the clean side is staying oil free.
Thanks to everyone for all the comments. Will some one please post a link to what is the most simple 'next step' for me to do (for this set up to function properly). My only planned mods in the future are Longtube headers.
Thanks to everyone for all the comments. Will some one please post a link to what is the most simple 'next step' for me to do (for this set up to function properly). My only planned mods in the future are Longtube headers.
So your catch can gets piped to the dirty side as noted above (your catch tank can stay were it at, since your hose are long enough to reach the correct ports), and you are going to pick up a Clean-Air Oil Separator cap to swap with the OEM oil tank cap to catch the clean side as noted above .
So your catch can gets piped to the dirty side as noted above (your catch tank can stay were it at, since your hose are long enough to reach the correct ports), and you are going to pick up a Clean-Air Oil Separator cap to swap with the OEM oil tank cap to catch the clean side as noted above .
So, will this specific 'clean-air-oil-separator' work for my set up? I would just install the cap & change the hoses to the correct sides...?
Yes, the cap I listed is for your LS-3 dry pump tank; and with it and the catch can you have, can complete the system correctly as show in the diagram I marked up.
And to break it down again, port out of the valley cover to the intake port is the dirty side, and what is pushing most of the oil into the intake manifold. In between these two parts is where the catch can needs to be installed to catch most of the oil that is pushed into the motor, and what you are not catching now (as shown on the diagram).
The two valve covers ports, piped in and out of the tank is the clean side, and these get piped to the air coupler port in front of the throttle body as show in the diagram. The new cap will catch the oil here (what you saw in your catch can), and just drop it back down into the tank.
So, back at your oil tank, your going to disconnect the catch can line off the oil tank port and cap that port out of the tank with the cap that will come with the new air/oil seperator cap.
On the other side of the your catch can, going to pull the hose off the hose you have it connected to that leads the air reducer for the air filter system port, and now going to connect the new air/oil separator port on the cap to that line that instead.
Now back at the catch can hoses, pull the OEM cross over hose from the valley port and intake port that is still connector on your motor,
The hose that you had connector to the oil tank port on the catch can, will connect to the valley cover port (metal silver port). The hose that you had connect to the line that lead to the air coupler port in front of the TB port line, your going to connect that hose to the intake manifold port (black plastic port).
________________________________________ _________________________________
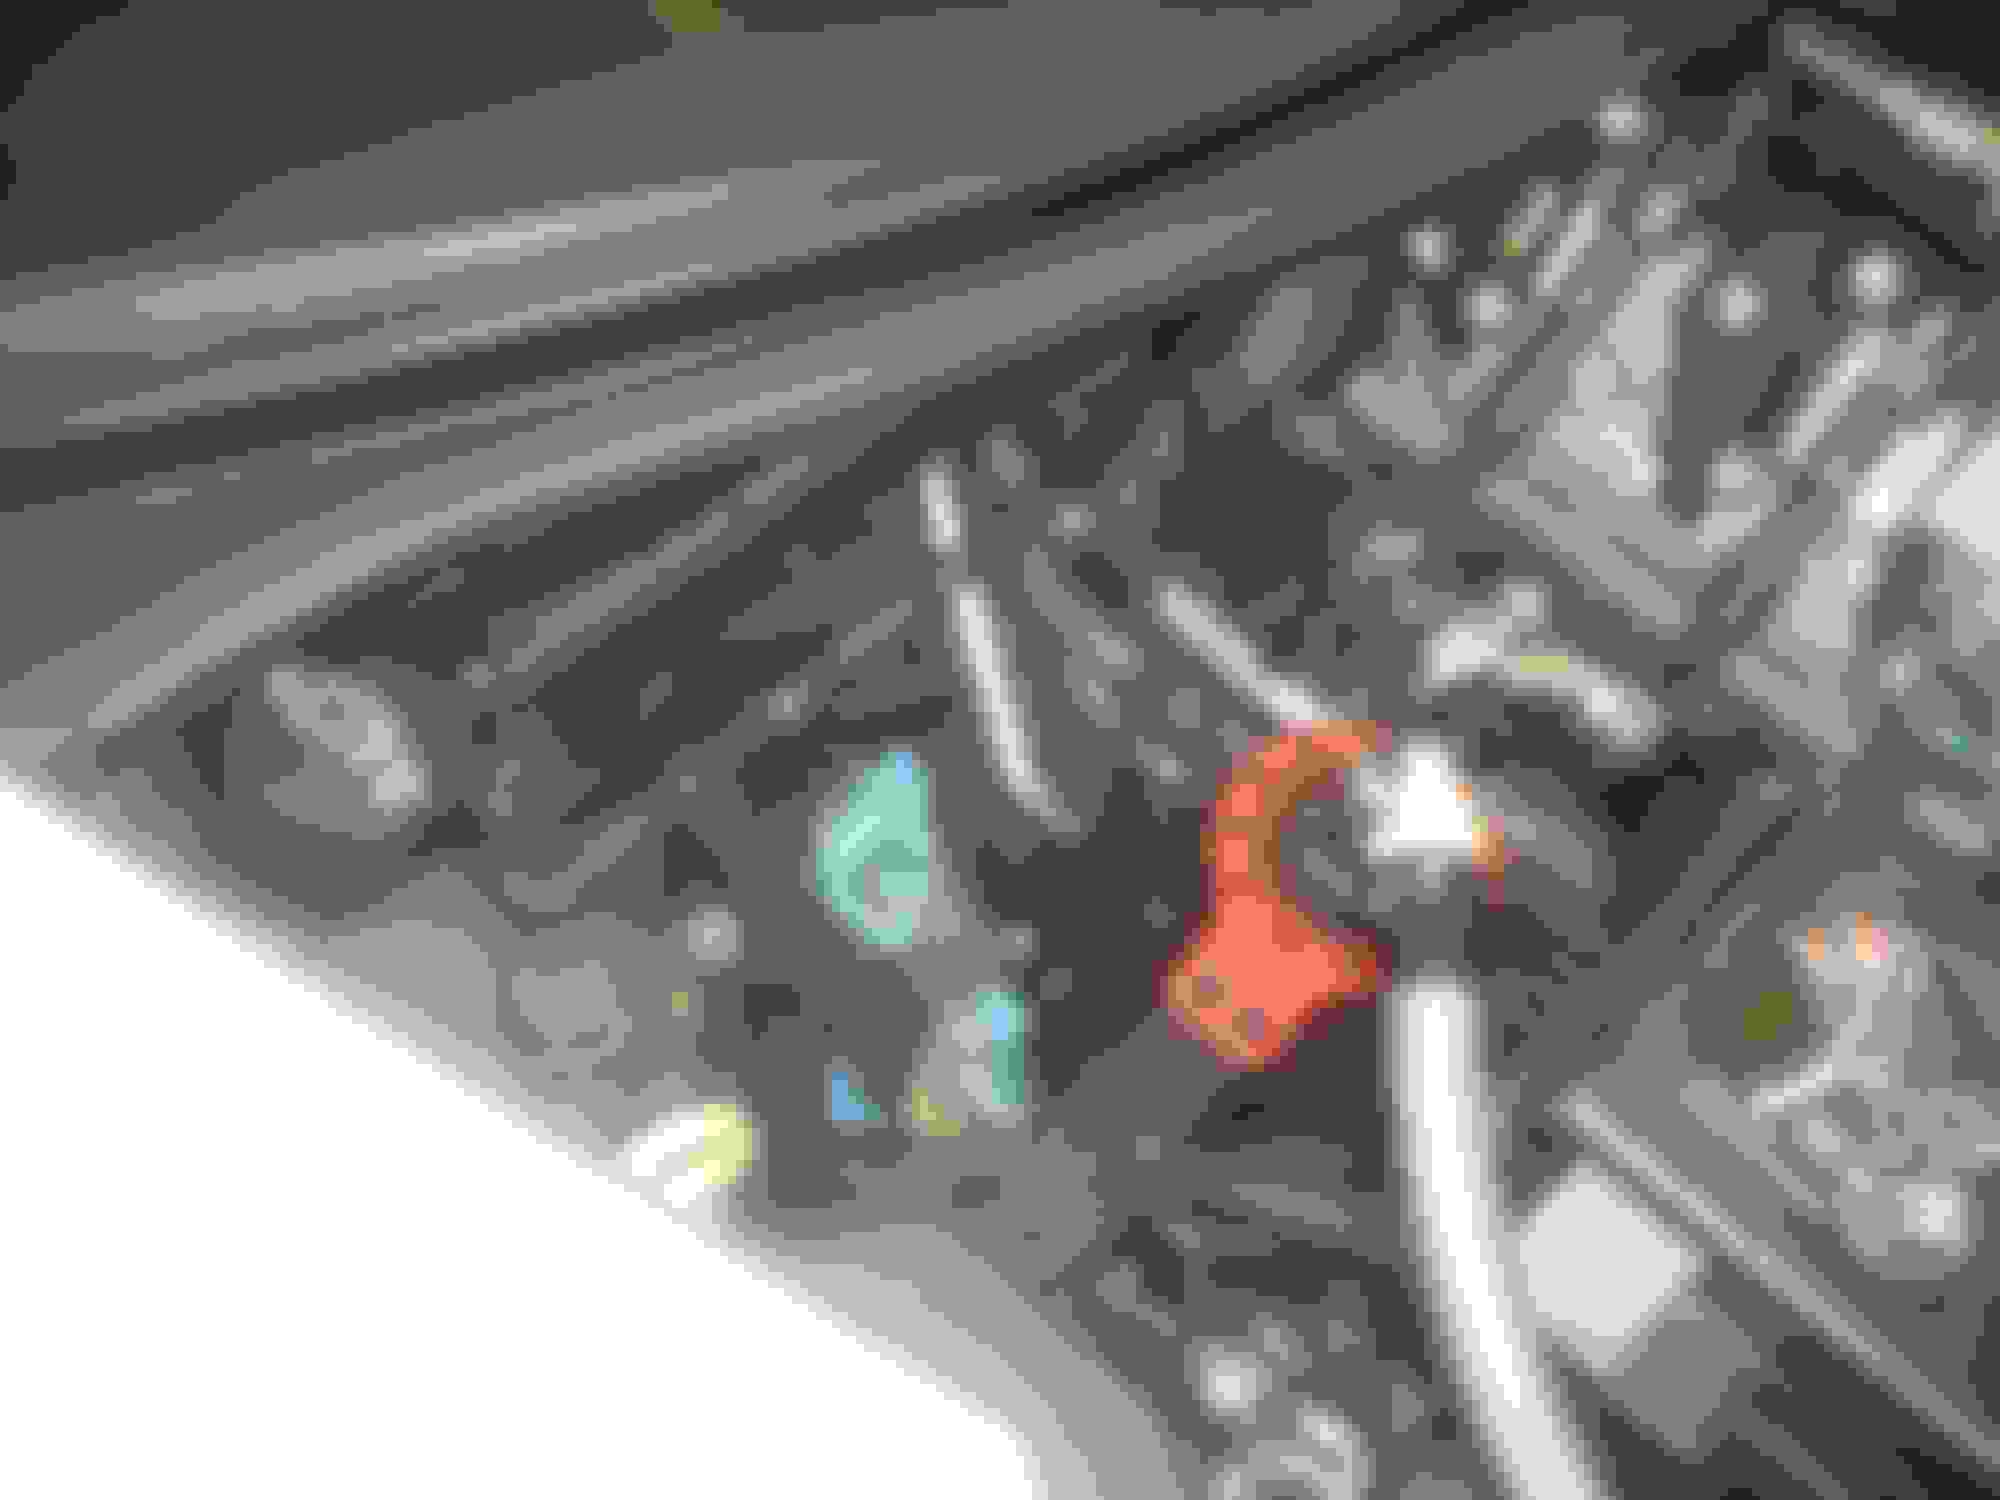
And again on your motor, look just left of the purple/pink TB elector connector clip to see the PVC hose shown above, that is still connected to your valley cover port, and what you can not see in the photo, is the other side of that hose is still connected to the intake port behind the TB.
These are the dirty side ports (in and out), and where the catch can needs to be connected between to really catch the larger amounts of oil that is being dumped into the intake manifold.
(read: the clean side oil amount is nothing compared to the amounts of oil through the dirty side ports will push, and the new oil/air separator cap will take care of the clean side oil that you are seeing in the catch can now).
I took some of the comments (constructive) & re-ran the lines (Thanks Dano523). I had a good buddy help me out because he is much more adept when it comes to these sort of things. I used the Elite air/oil separator cap (http://www.eliteengineeringusa.com/c...oil-separator/) and ran it to the front part of the intake. I forgot to take pictures while it was apart so it's hard to see in the pictures where the catch can lines are hooked up. We hooked up the lines like it's shown on post#24 (Thanks Dano523) I'm sure some one will chime in w/their thoughts/questions...
Last edited by dmoneychris; Feb 25, 2015 at 06:48 PM.
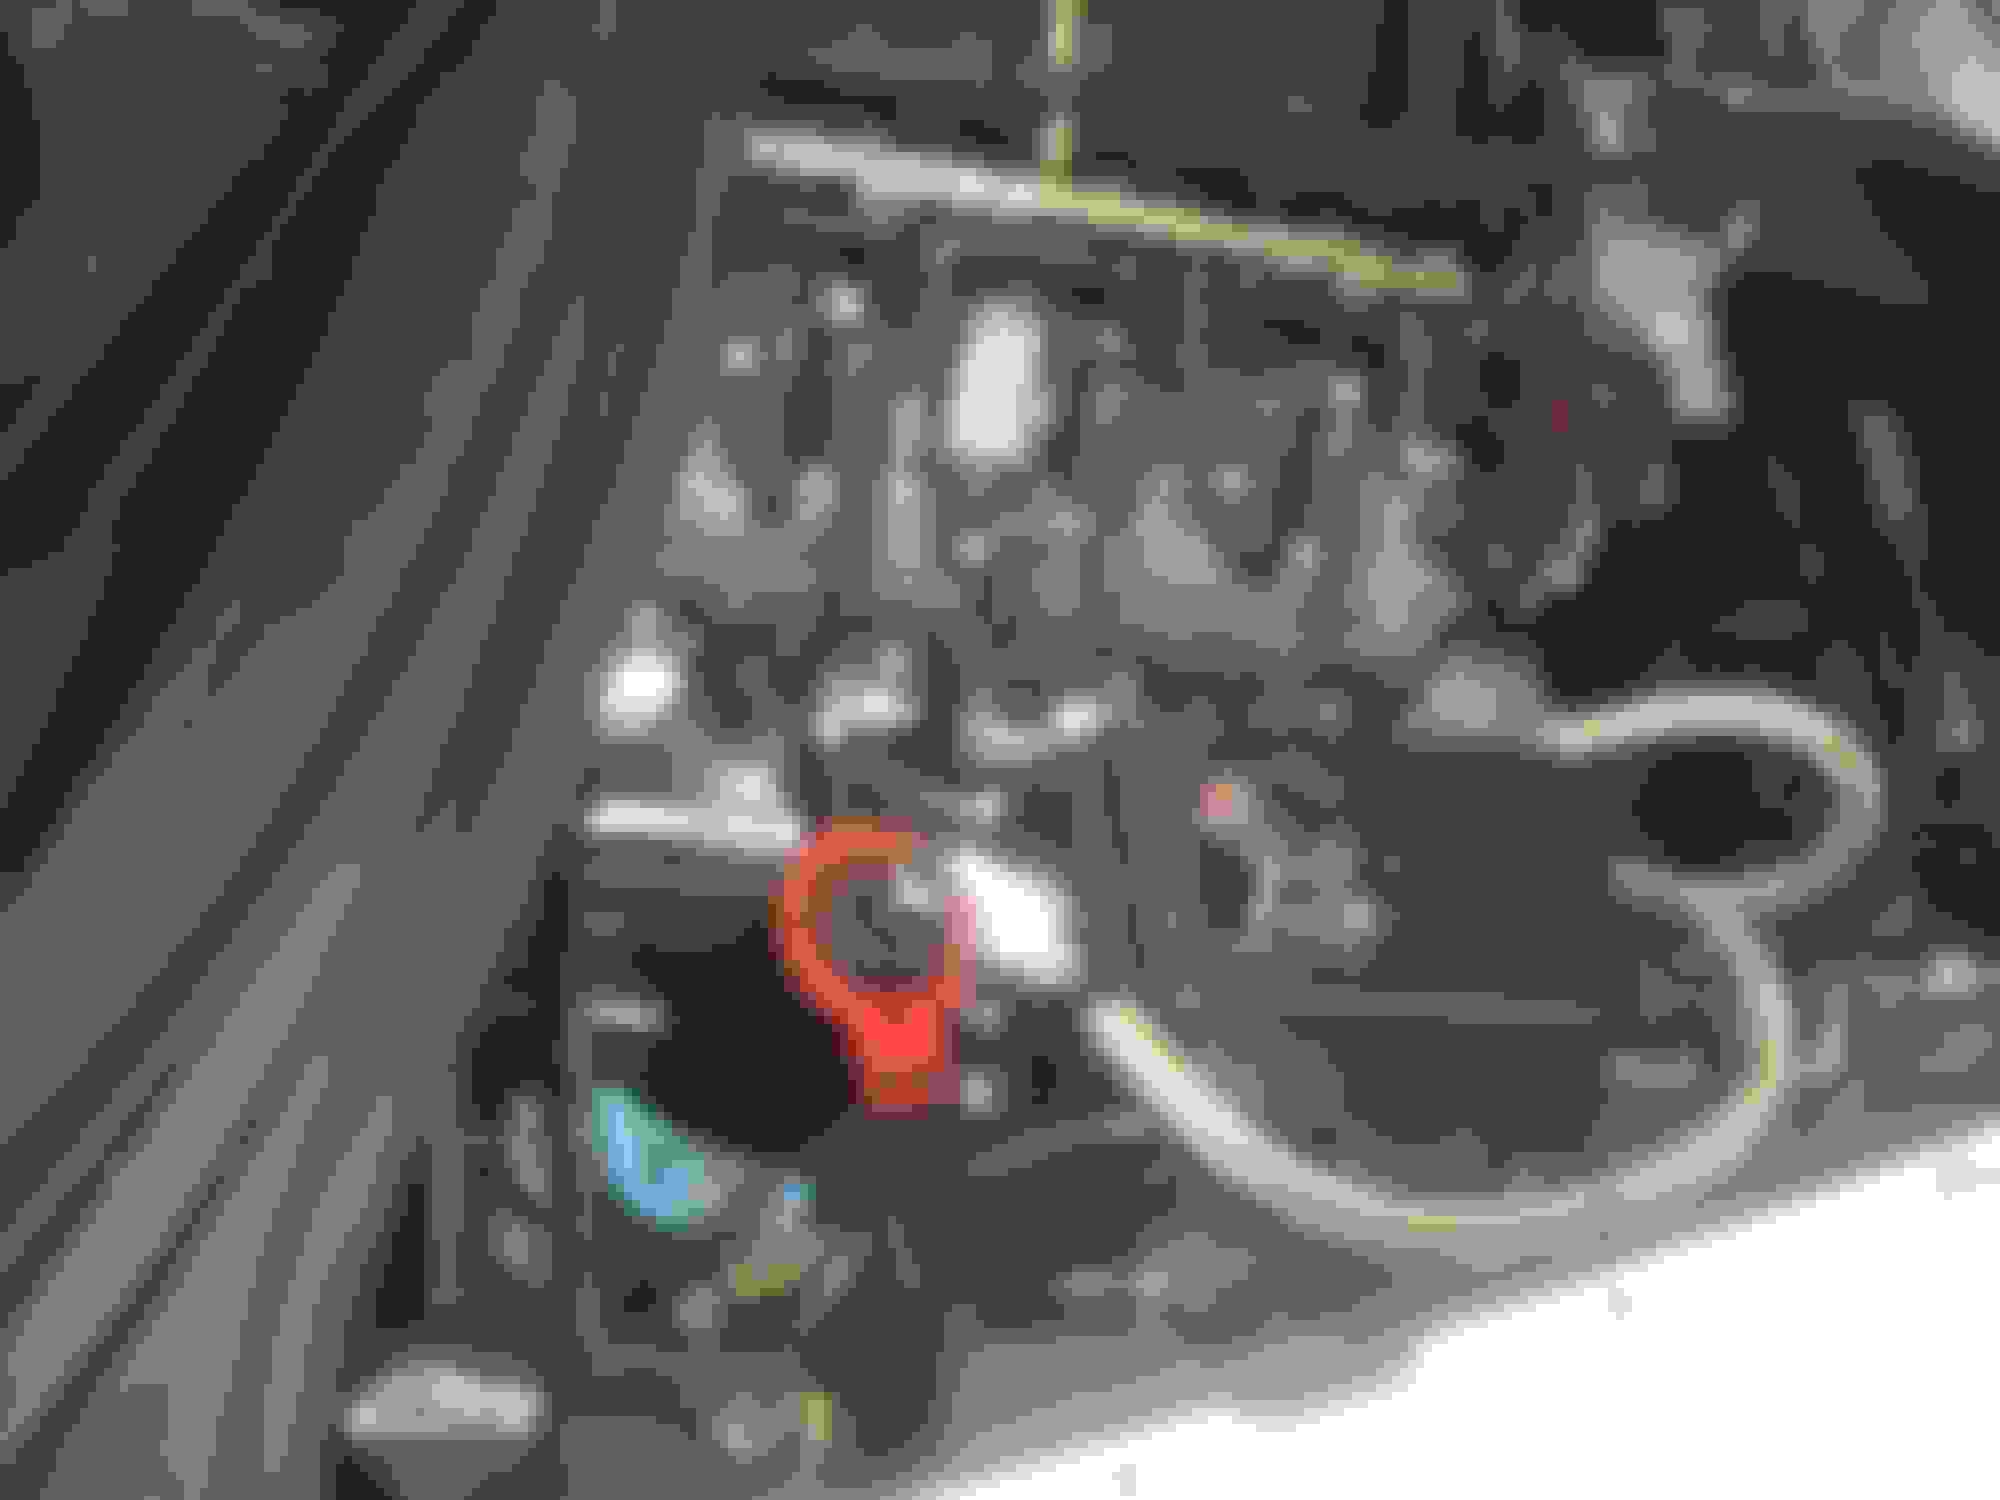
Looks plumbed correctly, as long as you have the hose off the top of your catch can going to the silver nipple on the valley cover port, and the hose off the side of the can going to black intake nipple.
But have to ask, can't you shorten the braided hoses to run them more neatly?
The black part on the hose is the part that locks the braid covers hoses to the barb fittings on connectors, so should be able to loosen them up, slide them back on the braided hoses to shorten the braided lines, then tighten them back up to lock the braid hoses back on barbs end fittings. This will allow you to route the hose between the fuse block and the valve cover cleanly under the coil cover with just enough needed braided lines used, and not have all the extra braided hose looped unneeded instead (read both hose are about twice as long as they really need to be).
Yeah where you mentioned in the above comment is where we have the hoses running to. I was thinking that about the length of the hoses too while we were 'plumbing'. I guess for now, I just wanted to get it hooked up properly. At some point soon though, I will be adjusting hose lengths to get it looking squared away. Thanks for all the technical support. I appreciate it!
It's been a couple months since I installed a Mishimoto Baffled Oil Catch Can on my Dry sump LS3 Grand Sport. I checked it after the first month & poured about 3 oz. of oil out of it. I checked it again this evening at the end of the second month & another few oz. of oil. This oil WOULD have gone back into the air intake if the Catch Can were not installed. There is no doubt in my mind that this modification does what it's designed to do.
Please pardon my ignorance but I have read several threads re: catch can installation. Most of the threads appear to be written by members who track their cars. Does a standard LS3 that is only street driven need an aftermarket oil catch can?
Please pardon my ignorance but I have read several threads re: catch can installation. Most of the threads appear to be written by members who track their cars. Does a standard LS3 that is only street driven need an aftermarket oil catch can?
Good question! I did on mine when I first bought my car in 2006 and am glad I did. I was getting oil into the intake, and the catch can fixed it.
Please pardon my ignorance but I have read several threads re: catch can installation. Most of the threads appear to be written by members who track their cars. Does a standard LS3 that is only street driven need an aftermarket oil catch can?
My car has never been to a race track, (That I know of) I bought it w/300 miles on the odometer. It's just been driven on the street. I followed the recommended break-in procedure in the drivers manual to the letter. It has 19k miles now & they are not hard track miles, they are semi-hard street miles w/a cross country road trip in there w/them. So, w/me not even driving the car hard (very often), there are still ounces of oil getting emptied from the catch can... I will report back on this thread after a few more miles.
Last edited by dmoneychris; Feb 26, 2015 at 10:30 PM.
Please pardon my ignorance but I have read several threads re: catch can installation. Most of the threads appear to be written by members who track their cars. Does a standard LS3 that is only street driven need an aftermarket oil catch can?
Both the valley cover and the valve cover have oil baffles that are good about catching the oil before it makes it to the intake manifold for normal driving.
Its when the motor is pushed harder/higher rev'd, that the baffles can oil saturated, and the oil is vacuum pulled past the baffles instead.
Just a quick update on the catch-can set up;
I've had the check engine light come on twice so far. The car is running great though as far as idle quality/drive-ability.
I had a friend w/a scanner tool read the code & it came up as something to the extent of "P0171 OBD-II Trouble Code" or oxygen sensor in bank 1 has detected a lean condition.
I was thinking that when the code came up on the dash the first time time that maybe there was a leak on one of the fittings. I checked the hoses, wiggled the Elite cap around, unscrewed the CC, emptied some oil and screwed it back on. I started it up after all that & the CHK engine light went off.
The thing is though, I've been driving the car since it was brand new & since the catch can has been installed the car has been running better than ever (from what I can see, hear & feel).
Right now the chk engine light is NOT on.
(this is an example picture of the same chk engine light & NOT my actual dash)
Last edited by dmoneychris; Mar 12, 2015 at 11:17 PM.
Put a spring loaded Hose clamp on the dirty side hose to port behind the TB and check your other fittings on the dirty side/the catch can for air leaks, to make sure that the line is not pulling in fresh air.
If you have a air leak in the can/dirty side lines, and it's drawing fresh air behind the TB, instead of just the limited vacuum from the valve covers, this introduces uncheck air behind the MAF, your going to get a unchecked lean condition every time.
Also, hook the car up to something like ScanMaster-ELM and check the response on the pre-cat O2 sensor. The pre- O2's should be peaking and valley'g between .2 and .8 volts constantly and if it only peaking up to .5 volts or lower, and even the post cat O2 sensor much higher in voltage than the pre cat sensor, the O2 sensor is going lazy and needs to be changed.
And yes, anyone that is going to wrench on a new car, needs to have diagnostics software set up on a machine. Most is cheap enough, and just think of it as replacing the timing light of the past that you had to have for the older cars instead.
Thanks Dano for all of your input on this thread. I appreciate your feedback & the constructive comments.
I'm adding a couple closer shots of where the catch can hoses attach because of a request to do so.
Update: The Check Engine light has not come back on again.
Will be getting Long tube headers and Akrapovic Slip On exhaust. I'm starting another thread on the build ( https://www.corvetteforum.com/forums...post1589542339 ) I will be adding photos & video when I have them. Thanks for all the comments & support everyone!
and why would a little oil pulled through the intake over the coarse of an oil chage hurt anything? I'll bet your "that guy" that like's to drive around in 2nd gear at 4500 rpm's and pull your foot off the pedal because it sounds cool. MINE 2006 LS2 74,000 tracked. not a drop of oil in the intake.
and why would a little oil pulled through the intake over the coarse of an oil chage hurt anything? I'll bet your "that guy" that like's to drive around in 2nd gear at 4500 rpm's and pull your foot off the pedal because it sounds cool. MINE 2006 LS2 74,000 tracked. not a drop of oil in the intake.
You lost that bet...
I drive around @ 1200k to 2500k rpm...& once in awhile...When I feel like it, not all the time...I get on it at stop lights & on-ramps & go through the gears. My car is for me to enjoy & I don't make it a habit of beating on it. That's great that your LS2 is a single lone wolf minority in the world of LS engines that doesn't get a drop of oil in the intake. It's great that you know who is who & who is "that guy" & who isn't that guy...
and why would a little oil pulled through the intake over the coarse of an oil chage hurt anything?
All depends,
Oil in the cylinders above the pistons will pull the Octane rating down of the fuel, and if you have the timing pushed to the max in a tune, will start to detonate with too much oil in the cylinders pulling the octane rating down, and the car is going to pull timing/HP back instead.
Designer Imagines A Corvette That Looks More Like a Corvette Than the Corvette
Slideshow: A Jaguar designer's personal project imagines what a modern front-engined Corvette might look like if Chevrolet revisited the golden age of the Stingray.