When you click on links to various merchants on this site and make a purchase, this can result in this site earning a commission. Affiliate programs and affiliations include, but are not limited to, the eBay Partner Network.
Is so easy. There is a diy thread somewhere here, take out the screws along the front and side air damn, install splitter, replace screws, drill out holes that are in spltter and some say plastic rivets, i used push pull pins.
Bobs your uncle.
Is so easy. There is a diy thread somewhere here, take out the screws along the front and side air damn, install splitter, replace screws, drill out holes that are in spltter and some say plastic rivets, i used push pull pins.
Bobs your uncle.
I did this same modification. It is very easy. You have to jack up the front end of the car. Hold the new splitter in position to see which existing screws are used to fasten the splitter to the car. And to determine which holes in the splitter need a hole drilled in the car to properly fasten the splitter to the car. If I remember correctly I drilled four holes into the car. You use the plastic push pins in the newly drilled holes. You will need to buy the push pins prior to mounting the splitter.
I think C7Jake has a step by step set of instructions. You might PM him and ask. But really it does not require installation instructions it is so easy. It took less than thirty minutes to install mine.
You can just drive on to a couple of 2x12 pieces to get some clearance. As others mentioned one row of bolts lines up, the others you need to drill, 3/16 if using supplied rivets(best hardware), 5/16 if using plastic scrivets(not very strong). You can also use screws and bolts(best hardware) drill appropriate size hole for your screws. Take off an fair dams below front end. Lots of threads showing all options.
I did a carbon fiber splitter install on my Z51, I have ramps, a good investment if you want to do anything under the car. I also installed the carbon fiber side rails. Front, most holes lined up perfectly, start with the 2 center holes. I put some supporting stuff (Bricks) to hold the sides close to the car so that there was little bending. Where I needed holes, just used a drill. Same process for the sides.
If you use ramps to lift the car to working height when installing the splitter, make sure the car-to-ramp clearance will still be adequate after the splitter is installed. Otherwise it my be a PITA to get the car off the ramps.
If you use ramps to lift the car to working height when installing the splitter, make sure the car-to-ramp clearance will still be adequate after the splitter is installed. Otherwise it my be a PITA to get the car off the ramps.
Got racing ramps with the extenders - u need them, otherwise you will bottom out.
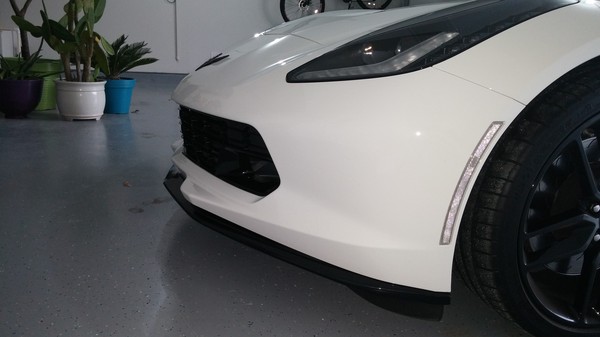
I modified the left and right little black deflectors underneath that were on it in order to reinstall them with the splitter. Makes for a good low driveway feeler so the first crunch you hear isn't the splitter dragging the ground. Unless you look under it you can't see them.
Definitely recommend that you install extra fasteners along the leading edge. I used the same fasteners that attach the bumper cover instead of plastic push rivets. There are details and photos in other posts on this subject.
Just attach the splitter using the rear mounting screws already holding the bumper cover, then drill the extra holes using the splitter as the template. You will need to use push in plastic rivets on the two center holes since you cannot reach the screws from inside the bumper to attach the nut there.
Last edited by TEXHAWK0; Feb 20, 2017 at 10:17 AM.
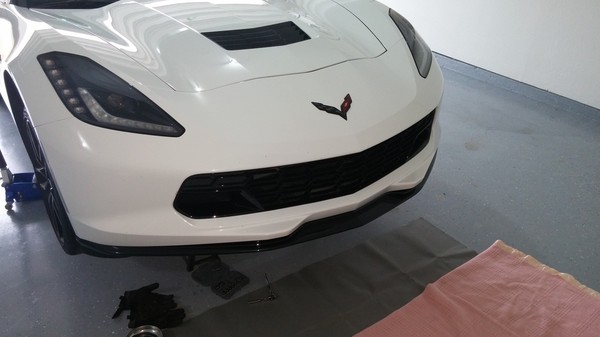
I just installed the Z06 Stage 1 "poverty" splitter on my car this morning and the install could not have been easier. for starters, I jacked up both sides of the car to raise the front; this gives more room to work than driving up on ramps alone.
For tools, you will need:
7mm socket
drill
3/16" drill bit
rivet gun (I got mine for $5 at Harbor Freight)
10 3/16" rivets (included)
Remove the 12 existing 7mm bolts underneath the front bumper then lift the splitter into position and reinstall the 12 bolts you just removed. You will see the 10 holes in the splitter where you need to drill the 3/16" holes. You don't need to go deep, just enough to punch through the bumper cover. This was my first time ever using a rivet gun, don't be afraid, it was simple! I see some guys using plastic scrivets but a pack of those costs more than the rivet gun, plus the rivets are going to give a stronger and more solid mounting which is a good thing considering it is an aero part that will see decent force on it at speed.
It's tough to see in the pics, but I got the version painted in Carbon Flash to match the grille, badges, etc.
Hello, I've seen your recommendation for using bolts, nuts and washers for the 10 additional fasteners. And I fully understand what I see from your one picture of the bottom of the front bumper and splitter. Can you provide a picture or two of what's going on top where the nut is attached to the bolt? If possible snap a picture of the nut and washer on the bolt? I'm not seeing how you get to that location without a bunch of disassembly in the engine bay. Thanks.
Originally Posted by TEXHAWK0
Definitely recommend that you install extra fasteners along the leading edge. I used the same fasteners that attach the bumper cover instead of plastic push rivets. There are details and photos in other posts on this subject.
Just attach the splitter using the rear mounting screws already holding the bumper cover, then drill the extra holes using the splitter as the template. You will need to use push in plastic rivets on the two center holes since you cannot reach the screws from inside the bumper to attach the nut there.
Hello, I've seen your recommendation for using bolts, nuts and washers for the 10 additional fasteners. And I fully understand what I see from your one picture of the bottom of the front bumper and splitter. Can you provide a picture or two of what's going on top where the nut is attached to the bolt? If possible snap a picture of the nut and washer on the bolt? I'm not seeing how you get to that location without a bunch of disassembly in the engine bay. Thanks.
If you want to do it right use rivets NOT bolts (not useful where you need them) or what are officially called Scrivets (or plastic rivets, or push rivets) they don't hold with much force. 3/16 inch aluminum rivets can hold ~300 pounds! That is what GM supplied to install the splitter that came with my Stage 2 Aero Option on my 2017 Grand Sport. This link posted above on this old Thread has info of my splitter install on my 2014 Z51. It's been updated since 2017 so start at page 15. http://netwelding.com/Ceramic_Pads.pdf
Here is another about rivets and a very good rivet gun I recently bought at Harbor Freight for ~$8 to install my C8 Side Skirts! They also sell the 3/16 inch aluminum rivets I have used and will hold just fine for a splitter. Just need to review pages 6 and 7! http://netwelding.com/Side_Skirts.pdf
Designer Imagines A Corvette That Looks More Like a Corvette Than the Corvette
Slideshow: A Jaguar designer's personal project imagines what a modern front-engined Corvette might look like if Chevrolet revisited the golden age of the Stingray.