


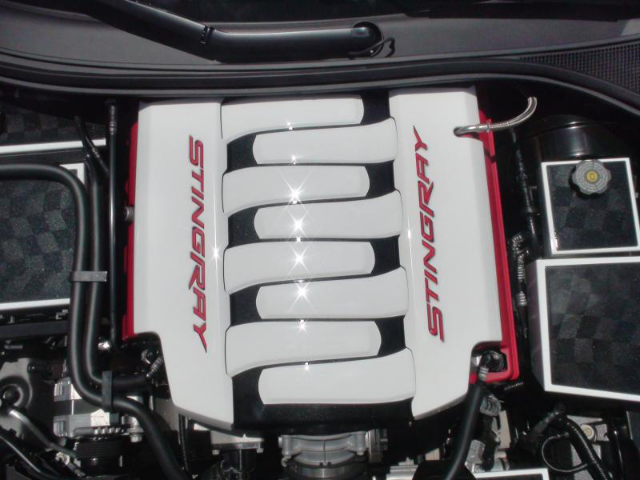

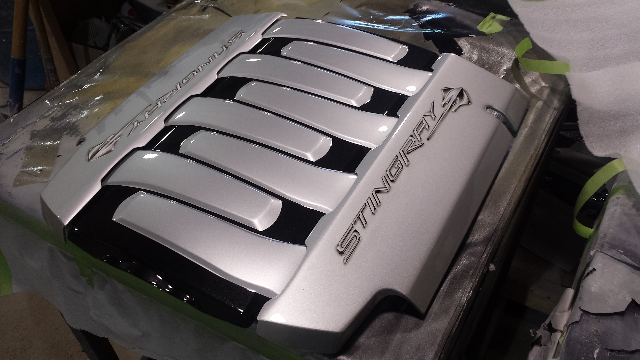

Fuel Rail and Plenum Cover Removal
Thread Starter
Supporting Vendor


Joined: Aug 2013
Posts: 2,789
Likes: 298
From: Chicago
St. Jude Donor '14. '17
Corvette Stories
The Best of Corvette for Corvette Enthusiasts

Every 2027 Corvette Engine Explained
Joe Kucinski
Designer Imagines A Corvette That Looks More Like a Corvette Than the Corvette
Verdad Gallardo
10 Ugly Corvettes That We Still Kinda Love
Joe Kucinski
Top 10 Most Expensive Corvettes Ever Sold on Bring A Trailer
Brett Foote
10 Things Every Corvette Owner Needs (2026 Edition)
Michael S. Palmer
8 Most "Only Corvette Owners Understand" Quirks and Problems
Pouria Savadkouei
10 Reasons the C6 Z06 is Still A Performance Benchmark After 20 Years
Joe Kucinski
How Much Horsepower Every Corvette Engine "LOST" in 1972
Joe Kucinski
Top 10 DOs and DON'Ts for Protecting Your Convertible Top!
Michael S. PalmerLe Mans Master

Joined: Jul 2015
Posts: 6,223
Likes: 1,700
From: Northern California
St. Jude Donor '15
There's no harness to transfer. There are a few things to unplug, then if you're doing the lower covers you have to cut the zip ties holding the plug wires. It's easy unless you have a z51 with that one damn vacuum hose going through the lower passenger side cover. Thats a little tricky. It's all really apparent when you're looking at it.


Melting Slicks


Joined: Nov 2012
Posts: 3,164
Likes: 686
From: SUFFIELD CONNECTICUT
Instructor

Joined: Apr 2016
Posts: 201
Likes: 40
From: New Port Richey Florida
I took off my plenum, fuel rails, and coil covers...
I Need to find the name or part number for the zip tie anchors that hold the wire harness to the fuel rails. I broke half of them. They did not "wiggle" out as suggested. In retrospect, I bet it would have been easier with a warm engine. Maybe they would have been softer.
Also... like many others, I broke the edge off one of the little wings on the Z51 line that goes into the coil cover on the passenger side that everyone complains about. It was just the edge, maybe 1mm, but enough to **** me off. Again, Im sure a warm engine would have made it easier. I saw that part number before, but I cant find it now.
Questions:
What is that line for? What is its function? It was a little oily when it came out. Also, Im asking because I forgot to put it back on and I took a little spin around the block to make sure everything was running good. No Problems at all. I put it back in, and drove again... no difference.
Also, the screws I had to remove to take out the coil covers do not come out of the covers. I was afraid I was going to drop one so I had a magnet on it while turning. It would have been cool to know they wont fall out ahead of time. Should they be forced out somehow before they are painted? If so... HOW?
Thanks in advance.. If anyone wants to do this, its pretty easy, but I highly recommend a warm motor.
Last edited by PapaLeo67; Jul 10, 2016 at 09:37 PM.

Racer
Joined: Mar 2009
Posts: 354
Likes: 32
We have had quite a few of our customers request instructions for removing the fuel rail covers and plenum cover after purchasing our smoothie versions. Here is a quick session on how to do so.
Plenum Cover
http://showstopperaccessories.com/pr...num-Cover.html
Fuel Rail Covers
http://showstopperaccessories.com/pr...il-Covers.html
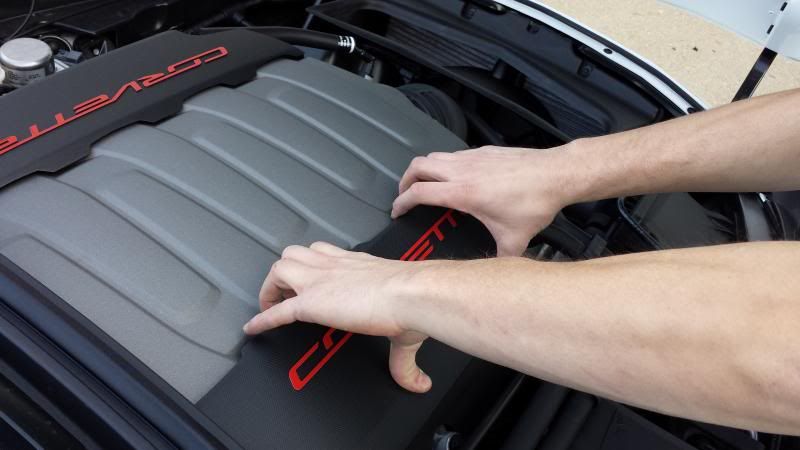
The fuel rail covers are just snapped in place using a rubber grommet style fastener. Start of by lifting upward more towards the plenum side and they will unsnap without using too much force.
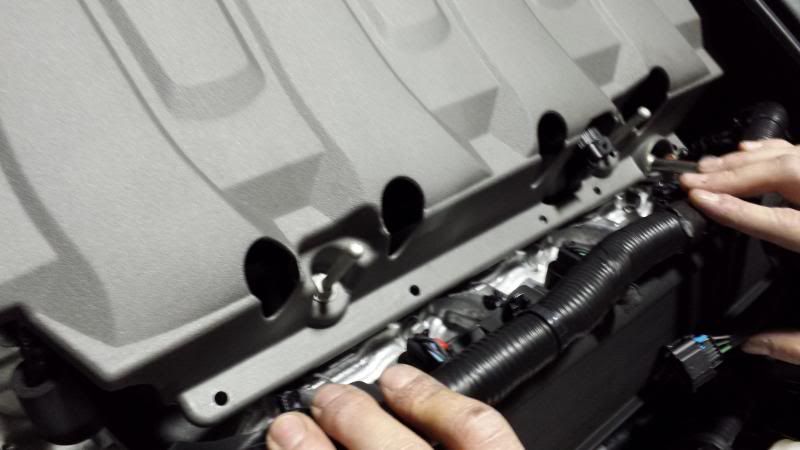
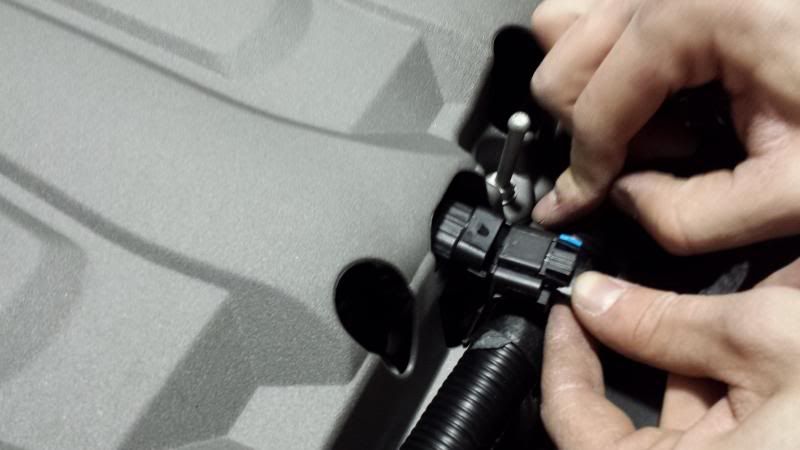
Then, once you remove the fuel rail you will notice a wiring harness that is fastened to the plenum cover. They are just zip ties that are snapped into the plenum. So if you wiggle the zip tie upward, it should slowly come out. Sometimes a tool is needed to get this started. This is what it should look like once removed.
The next step is to remove a total of four 10mm bolts that hold the plenum in place. These also have a nipple at the top in which your fuel rails snapped into.

Lastly, there is one wiring connector that will need to be disconnected in order to lift the plenum off. Once this is done, you are ready to lift the plenum off.
Reverse the steps to re install everything. If you have any questions, feel free to pm me.
Plenum Cover
http://showstopperaccessories.com/pr...num-Cover.html
Fuel Rail Covers
http://showstopperaccessories.com/pr...il-Covers.html
The fuel rail covers are just snapped in place using a rubber grommet style fastener. Start of by lifting upward more towards the plenum side and they will unsnap without using too much force.

Then, once you remove the fuel rail you will notice a wiring harness that is fastened to the plenum cover. They are just zip ties that are snapped into the plenum. So if you wiggle the zip tie upward, it should slowly come out. Sometimes a tool is needed to get this started. This is what it should look like once removed.

The next step is to remove a total of four 10mm bolts that hold the plenum in place. These also have a nipple at the top in which your fuel rails snapped into.

Lastly, there is one wiring connector that will need to be disconnected in order to lift the plenum off. Once this is done, you are ready to lift the plenum off.


Reverse the steps to re install everything. If you have any questions, feel free to pm me.
Racer
Joined: Mar 2009
Posts: 354
Likes: 32
We have had quite a few of our customers request instructions for removing the fuel rail covers and plenum cover after purchasing our smoothie versions. Here is a quick session on how to do so.
Plenum Cover
http://showstopperaccessories.com/pr...num-Cover.html
Fuel Rail Covers
http://showstopperaccessories.com/pr...il-Covers.html
The fuel rail covers are just snapped in place using a rubber grommet style fastener. Start of by lifting upward more towards the plenum side and they will unsnap without using too much force.
Then, once you remove the fuel rail you will notice a wiring harness that is fastened to the plenum cover. They are just zip ties that are snapped into the plenum. So if you wiggle the zip tie upward, it should slowly come out. Sometimes a tool is needed to get this started. This is what it should look like once removed.
The next step is to remove a total of four 10mm bolts that hold the plenum in place. These also have a nipple at the top in which your fuel rails snapped into.
Lastly, there is one wiring connector that will need to be disconnected in order to lift the plenum off. Once this is done, you are ready to lift the plenum off.
Reverse the steps to re install everything. If you have any questions, feel free to pm me.
Thread Starter
Supporting Vendor
Joined: Aug 2013
Posts: 2,789
Likes: 298
From: Chicago
St. Jude Donor '14. '17
You have to disconnect the breather lines,then just remove the two bolts holding them in place.
Instructor


Joined: Nov 2011
Posts: 119
Likes: 34
How do you get the 4 zip tie connectors to release from the plenum cover ?
I have pulled on them and they will not come out. They look like serrated plastic fasteners.
I have pulled on them and they will not come out. They look like serrated plastic fasteners.
Last edited by semperfi1946; Mar 28, 2017 at 10:41 PM.
Instructor
Joined: Nov 2011
Posts: 119
Likes: 34
How do you get the zip tie fasteners to come out? I have pulled on them HARD and they do not come out - they look like serrated panel fasteners - do you need to use a panel fastener tool to get them out to replace the plenum?