How-To: Remove/Replace Lower Rear Bumper Fascia
#1
Tech Contributor
Thread Starter
Member Since: Jan 2006
Location: Saint Louis MO
Posts: 4,761
Likes: 0
Received 218 Likes
on
110 Posts
St. Jude Donor '14-'15
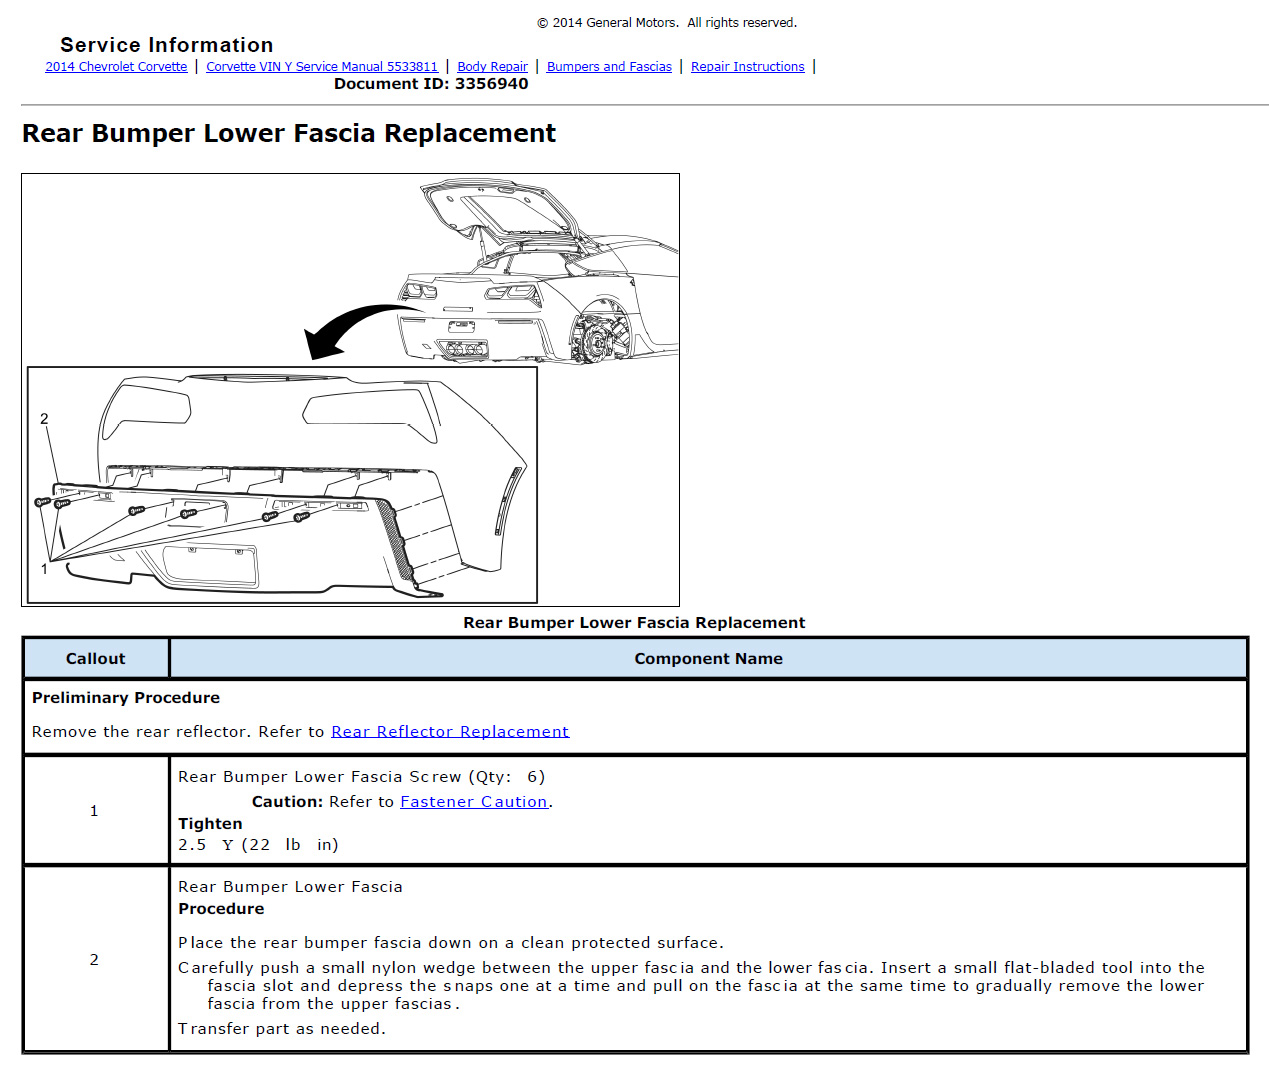
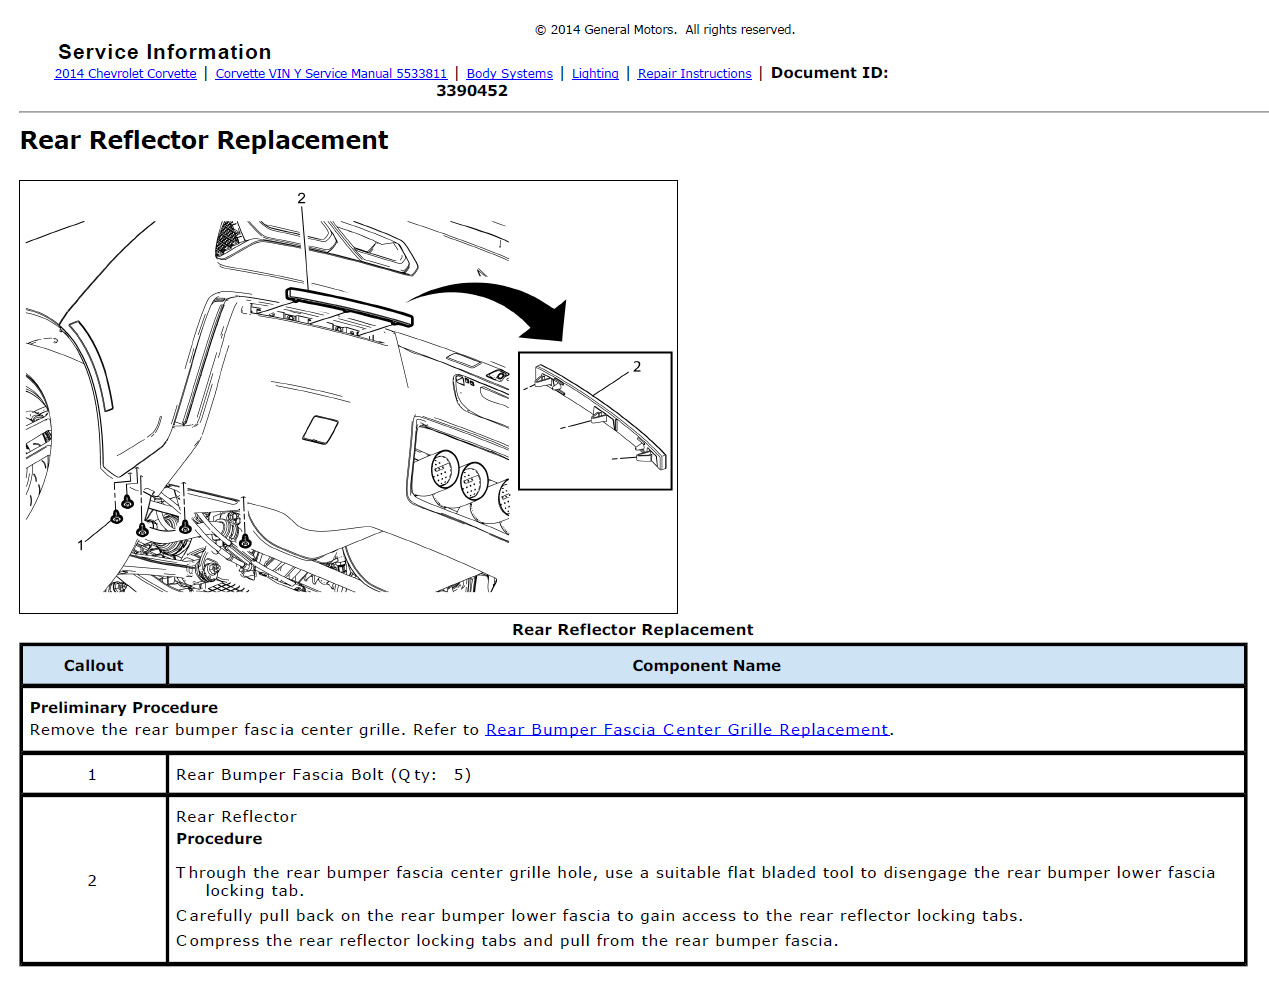
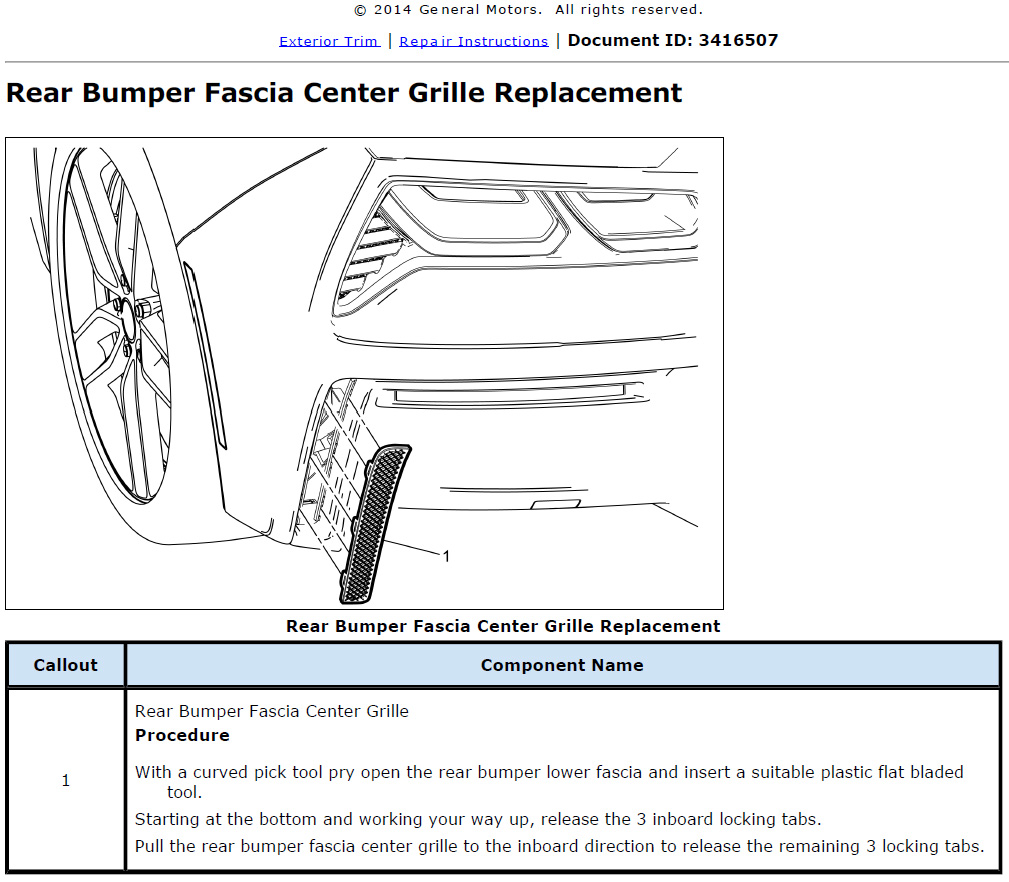
The following How-To covers the explanation of how to Remove/Replace the Lower Rear Bumper Fascia and includes specifications, schematics, etc.
These How-To guides are neither endorsed by or property of Corvette Forum or myself in any way/shape/form. All liability stemming from any actions taken in relation to these guides is solely placed upon the user.
We hope you will find these guides useful.
These How-To guides are neither endorsed by or property of Corvette Forum or myself in any way/shape/form. All liability stemming from any actions taken in relation to these guides is solely placed upon the user.
We hope you will find these guides useful.

The following 2 users liked this post by Theta:
!00%DISVET (02-18-2016),
Hawkerpilot62 (08-24-2020)
The following users liked this post:
Rooster OG (10-08-2015)
#5
Le Mans Master


Did you change it out using these instructions?
Did anyone?
Most indicate the need to remove the entire rear end first.
Did anyone?
Most indicate the need to remove the entire rear end first.
#7
Le Mans Master


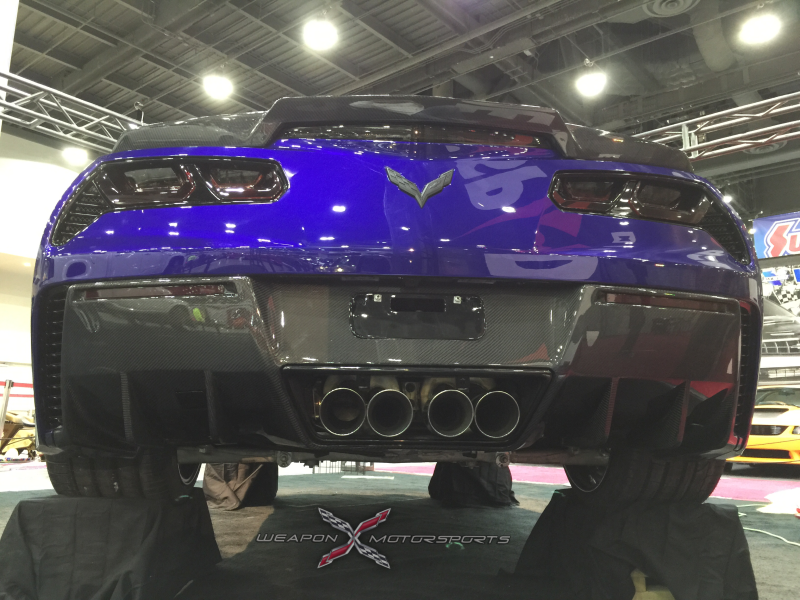
I purchased the WeaponXmotorsport diffuser (ie a replacement for the rear lower fascia piece), and this is the instruction received:
Basically you must remove the entire rear end of the car to replace the lower piece correctly.
Your instructions indicate that is not necessary.
#8
Tech Contributor
Thread Starter
Member Since: Jan 2006
Location: Saint Louis MO
Posts: 4,761
Likes: 0
Received 218 Likes
on
110 Posts
St. Jude Donor '14-'15
I, too, have the WeaponX full kit as you can see in my sig. The lower valance replacement was just that.
Granted, I had one of the first valances Ben had shipped, but it only required the lower valance removal. Perhaps the mold has changed a bit?
You can also find the Upper Valance Removal here in the DIY section.
https://www.corvetteforum.com/forums...er-fascia.html
Granted, I had one of the first valances Ben had shipped, but it only required the lower valance removal. Perhaps the mold has changed a bit?
You can also find the Upper Valance Removal here in the DIY section.

https://www.corvetteforum.com/forums...er-fascia.html
#9
Safety Car


Member Since: Jan 2012
Location: Cin City
Posts: 4,885
Received 481 Likes
on
317 Posts
St. Jude Donor '14

I, too, have the WeaponX full kit as you can see in my sig. The lower valance replacement was just that.
Granted, I had one of the first valances Ben had shipped, but it only required the lower valance removal. Perhaps the mold has changed a bit?
You can also find the Upper Valance Removal here in the DIY section.
https://www.corvetteforum.com/forums...er-fascia.html
Granted, I had one of the first valances Ben had shipped, but it only required the lower valance removal. Perhaps the mold has changed a bit?
You can also find the Upper Valance Removal here in the DIY section.

https://www.corvetteforum.com/forums...er-fascia.html

I will tell you the Z06 grills are much better constructed than the flimsy LT1 grills.

#10
Le Mans Master


In addition to what is mentioned in the first diagram, you also need to remove two screws that hold the exhaust surround in place in order to remove the lower fascia.
#13
Intermediate


please help if you can. Iím planning on replacing my z51 spoiler and replace it with another different spoiler...By chance do you have instructions for removing the Z51 spoiler?
Thanks
Lee
Thanks
Lee
#14
I searched everywhere for information on if the entire bumper has to be removed on the 2014-2016 rear end to repaint the bottom half. Well good news you don't have to do very much to get it off.
1. Remove the ten 7mm bolt on bottom.
3. Remove the two 10 mm bolts above the exhaust.
4. Pop off the mud flaps and remove the two 15 torx screws on each side.
5.On the bottom edge of bumper by the wheel pop the bumper loose from the upper part of the facia separating the two colored sections.
6. Now you can put your hand under the bumper and pop the red reflectors off the back.
7. Lastly remove the two 10 mm bolts on each side where the reflectors were and you are done. The bumper bottom will fall off in your hands.
Total time is less than 30 min and you can do by yourself. Then you can get the bottom painted. Installation is easier wish I had video taped it but you won't need that anyway. Good luck. Now mine is color coded to rest of car
Last edited by 2016 vette; 11-06-2015 at 06:28 PM. Reason: Pictures
The following 5 users liked this post by 2016 vette:
Hawkerpilot62 (08-24-2020),
jimmie jam (02-18-2017),
Johnp94 (09-26-2017),
Rangerdog1 (04-07-2019),
timmyZ06 (10-23-2017)
The following users liked this post:
Vett2013 (11-13-2015)
#20
Pro


This is great information as I'm considering pulling the cat-back exhaust to have the tips powdercoated. Removing the lower fascia doesn't look difficult at all.


