When you click on links to various merchants on this site and make a purchase, this can result in this site earning a commission. Affiliate programs and affiliations include, but are not limited to, the eBay Partner Network.
Going to touch base on the big aspects of this build to get everyone caught up. This is my second go around with this car as I change my plans half way through and started basically from scratch. I started with a 1969 Camaro and wanted a lot from it. Serviceability, parts availability, performance, and comfort.
Currant build parts:
Anvil Carbon fiber front end, deck lid, rear spoiler, and mirrors
LSA with LS3 dry sump crank
2 C5 chassis
Infinity Box CAN Buss chassis control system
C6 dash swap
Full carbon fiber rear bumper
NACA ducts for rear coolers
SpeedHut CAN Buss gauges
Flush mount front and rear glass
Things to come:
TR6060 transaxle with trans and diff cooler
C6 rear cradle
Carbon front inner fenders
Lets start with what the goal is when I'm done. Kris Horton did my exterior renderings. Ben at Street Rod Designs did the interior. As you can see from the minor body mods, I have a lot of metal and carbon work ahead of me.
On the weekends I knock out the big projects on the car at work since I live in an apartment and have no where else to work on it. Lets start with those. After lots of measuring I found that it was possible to put the C5 chassis into my car if I made my own frame and make it 3.5" longer. I bought 2 frames, one had front damage and the other was perfect. I had to make new rails and I was able to stuff them into the outer rocker panels.
Lets knock out the small projects I mainly tackle during the week after work at the shop.
Lets start with the door handles. I'm running C6 latches so I have touch button handles. I needed a recess for them so I pounded out some metal and planshed it.
I wanted to tuck the rear bumper, but I didn't like the body lines with the small bumper so I made my own.
Now that I had the shape I wanted I finished it and painted it so I could make a mold from it.
After all of that I could pull my carbon fiber bumper from it.
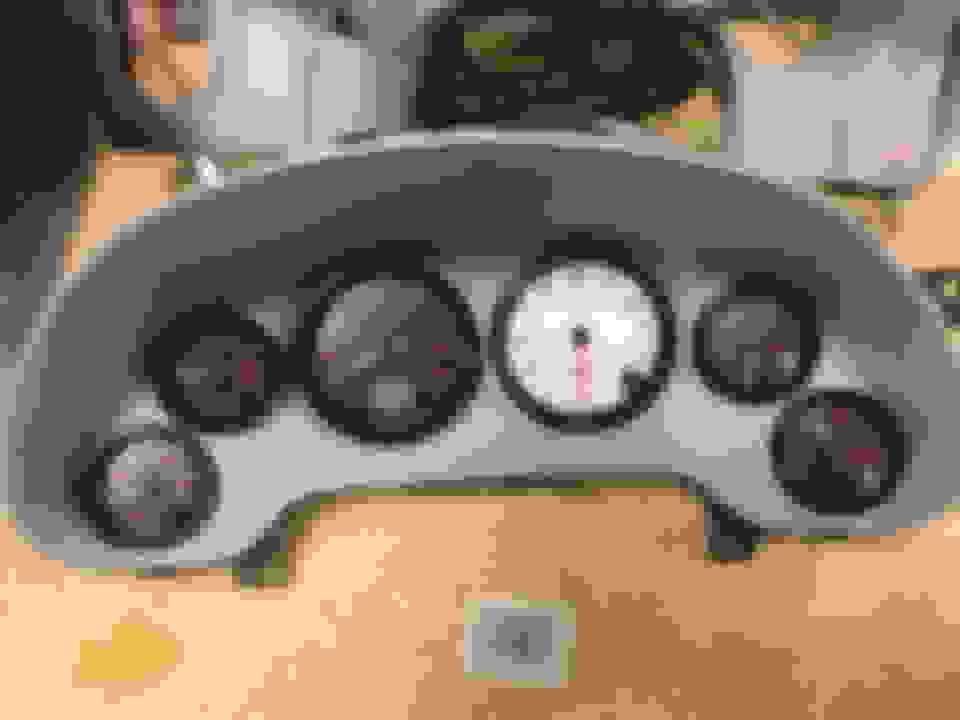
Because its generic looking and easy to make look like it belongs in any car I went with a C6 dash because it fit and was cheap. However nothing worked since I'm not running a factory control system. I started with the bezel and the non functional buttons. I needed to put 2 more gauges somewhere and though that'd be a great place for them. Then wrapped it in carbon. It will get a Matte paint finish.
With the bezel out of the way I needed some gauges. I used a C6 cluster and cut everything out. I laid out the gauges then cut angle rings to angle them like a C6. I used a T shirt and epoxy to get the shape then wrapped that in carbon. It will also get a Matte paint finish.
With two of the major parts done and ready for paint it was time for the center console. I decided on a double din radio, Dakota Digital HVAC controls and my power window switched on it. I had to fiberglass the hole from the factory then I bonded the din frame in. I also bonded in the access cover. It also got covered in carbon and will be a matte finish.
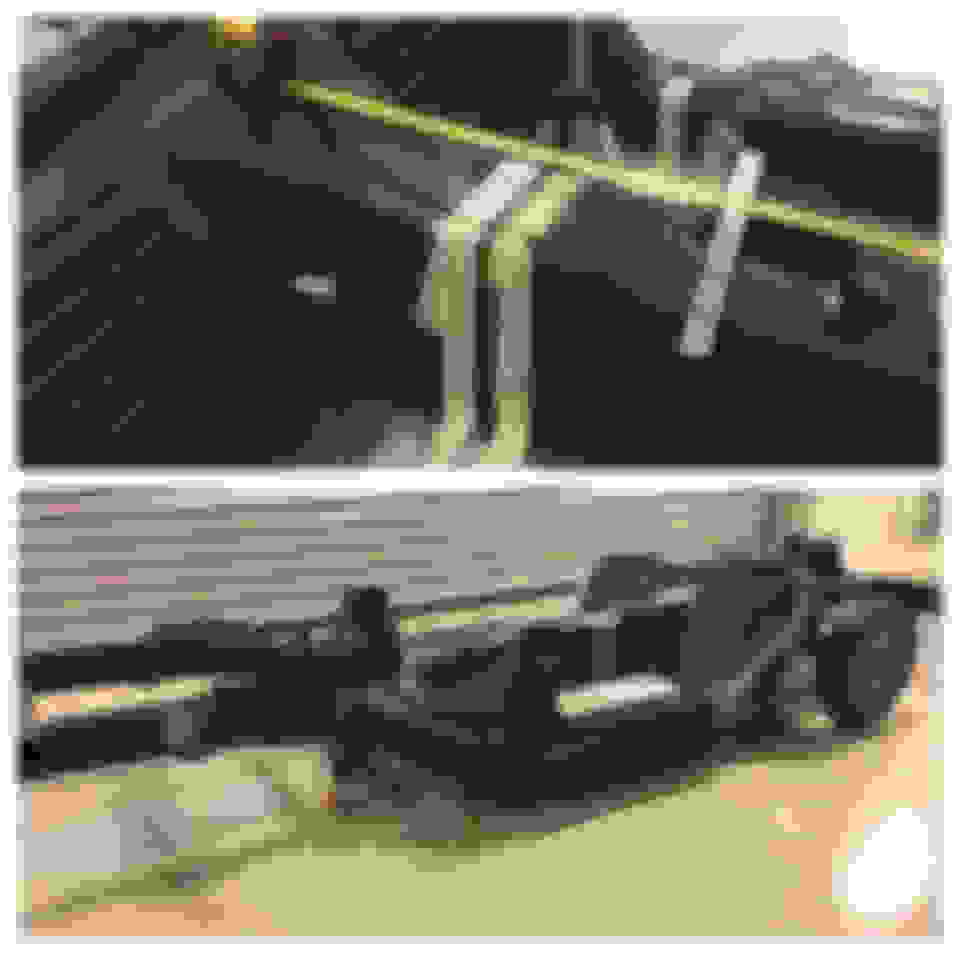
Needing to mount the C5 pedals for the booster and slave I made a metal copy of the factory fiberglass composite firewall.
On my Anvil carbon mirrors I added a little safety with some LED turn signals.
I think that about does it for the most part. I'll keep this thread up to date as I progress with the car.
You've got some mad skillz. Post lots of pics. I love the stance!
Thanks guys.
Right now the bottom of the rocker is right about 5.75� in the back and a little lower in the front. Which is a lot where a vette frame is if you measure to it and not the body penals. It�s as low as I can go as anything lower and the tires will hit the hood hinges.
Awesome work! I hope you plan on pics thru the whole process.
PS-Very impressed with your wheel tubs and floor. Looks as nice
as a chassis shop would do
Jimmy
Awesome work! I hope you plan on pics thru the whole process.
PS-Very impressed with your wheel tubs and floor. Looks as nice
as a chassis shop would do
Jimmy
I have a lot of pictures of the build. I just touched on the big stuff to get up to speed. I normally have a few more pics when I do updates. I normally get to work on it on Saturdays I don't have to work.
Thank you, I'm just as impressed with how the tubs came out too, it was my first time using an english wheel to shape anything.
This is awesome! I'm currently putting a corvette drivetrain into a '74 Toyota Hilux (I have a thread on here as well), but mine has a lot less carbon fiber and nice looking things. Although, after seeing your carbon work I now want to get off my *** and make some small stuff to learn. Beautiful work, you clearly have an incredible eye for shaping things.
This is awesome! I'm currently putting a corvette drivetrain into a '74 Toyota Hilux (I have a thread on here as well), but mine has a lot less carbon fiber and nice looking things. Although, after seeing your carbon work I now want to get off my *** and make some small stuff to learn. Beautiful work, you clearly have an incredible eye for shaping things.
I saw it. Pretty cool swap.
The carbon is the easy part I'm finding. The hard part is making the buck perfect and then making a mold then making that perfect. If you get those two things right the carbon is just the reward for the hard work. Now if you just want to do a carbon overlay, thats pretty easy to. Whats hard about that is carbon fabric doesn't stretch or form like fabric and is hard to lay if you have lots of angles to work with. If its just a flat surface all you do is prep the base with black paint, coat in epoxy, lay some fabric then wet out the carbon, add a second and maybe 3rd coat of epoxy, wet sand then clear coat. Its time consuming, but not hard.
Thats something I don't have any pictures of. I have the stock M12 C5Z transaxle that I'm not going to use now. The suspension is stock right now since no fab work will be needed for it. My currant plan is C6 rear cradle with a C6Z transaxle (because of the trans and diff coolers) with offset mounts to move it forward, C6 bell housing and a early C6 torque tube to try and make up the 3.5" difference in wheel base hopefully without having to buy a lengthened torque tube. I'll be running coil overs and possibly T1 sways as I liked them on my C5Z.
Looks great so far! Am I seeing correctly that you made a mold for the bumper to make it out of carbon, but just did carbon overlays on the interior pieces? Just curious, because if you have a mold of that C6 instrument cluster surround you could sell some or sell the mold pretty easily.
"I used a T shirt and epoxy to get the shape then wrapped that in carbon" - that is boss-level stuff going on!
I might have to print that on a t-shirt
Originally Posted by 001pewter
Gonna look great when you get finished
Thanks guys.
Originally Posted by PCMusicGuy
Looks great so far! Am I seeing correctly that you made a mold for the bumper to make it out of carbon, but just did carbon overlays on the interior pieces? Just curious, because if you have a mold of that C6 instrument cluster surround you could sell some or sell the mold pretty easily.
Correct, I built the bumper with scrap steel then shaped it with body filler to make my mold buck. The interior pieces are overlays after I modified everything to what I wanted. I didn't make a mold for that stuff so that I wouldn't have to deal with the mounting part of it as it just snaps in place like factory.
Update: I didn't feel like I got a lot done Saturday since it took longer than I hoped it would, but I got the tin work finished up on the trunk metal and its ready to get epoxied. After that it will be ready to weld in for good.
On the bottom side I got the support welded up and it really stiffened up the metal and took the rattle sound away when knocking on it. Now its more of just a thud.
Oh, I also threw a 335/25-20 under the back of the car. It will physically not fit because of the upper control arm. If I cut the quarters and moved it out then it would. I have to assemble the front end and see if a 315 on a 19x10 will clear. If I have to cut the front fenders to fit even a 295 then I'll have to also cut the rear to match.
Lots done Saturday. Seat montes are done, factory corvette floor cut and fit ready for finishing. The cut sections will be bonded back together and then they�ll all be sealed with 12k carbon.
AC mounted and fit the old firewall bracket fit the new chassis better than I thought it would. Lots of clearance everywhere for ducting and electronics.
I got started on the new firewall with a bunch of thinking and drilling out spot welds. I have a good plan in mind for it to tie everything together and keep the wipers out of the car and not totally have engineer something to make them work.
 05-03-2019, 06:18 PM