Front Fender inner lip - C2 '66
 10-24-2009, 10:48 AM
#1
Burning Brakes

Thread Starter

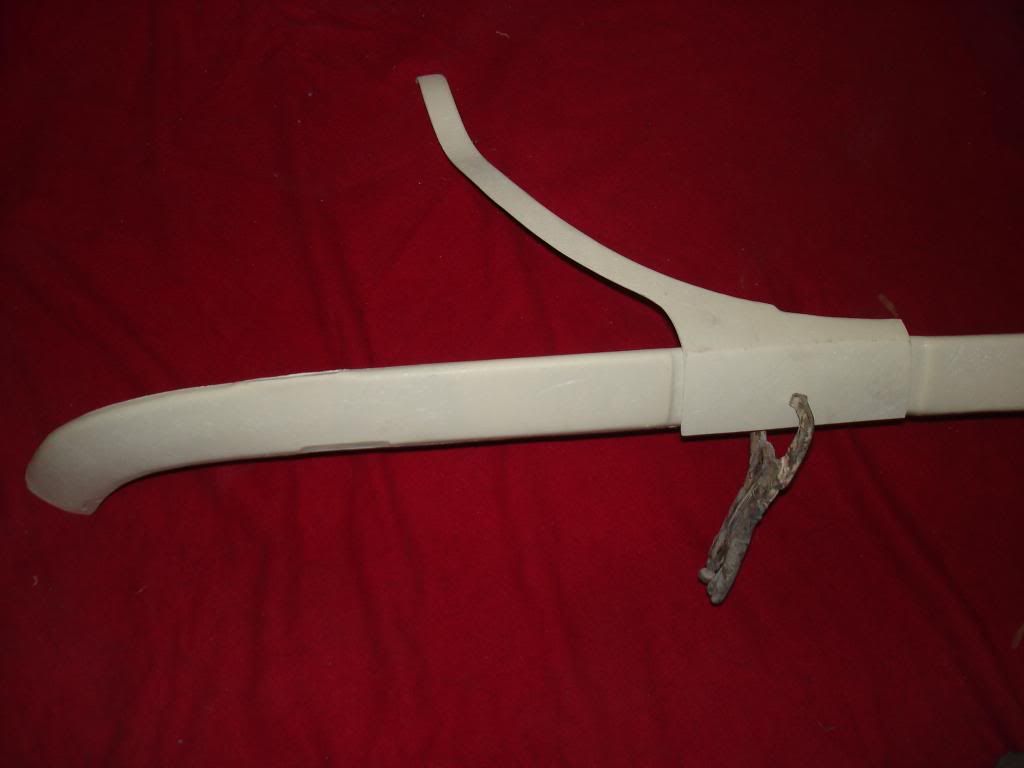
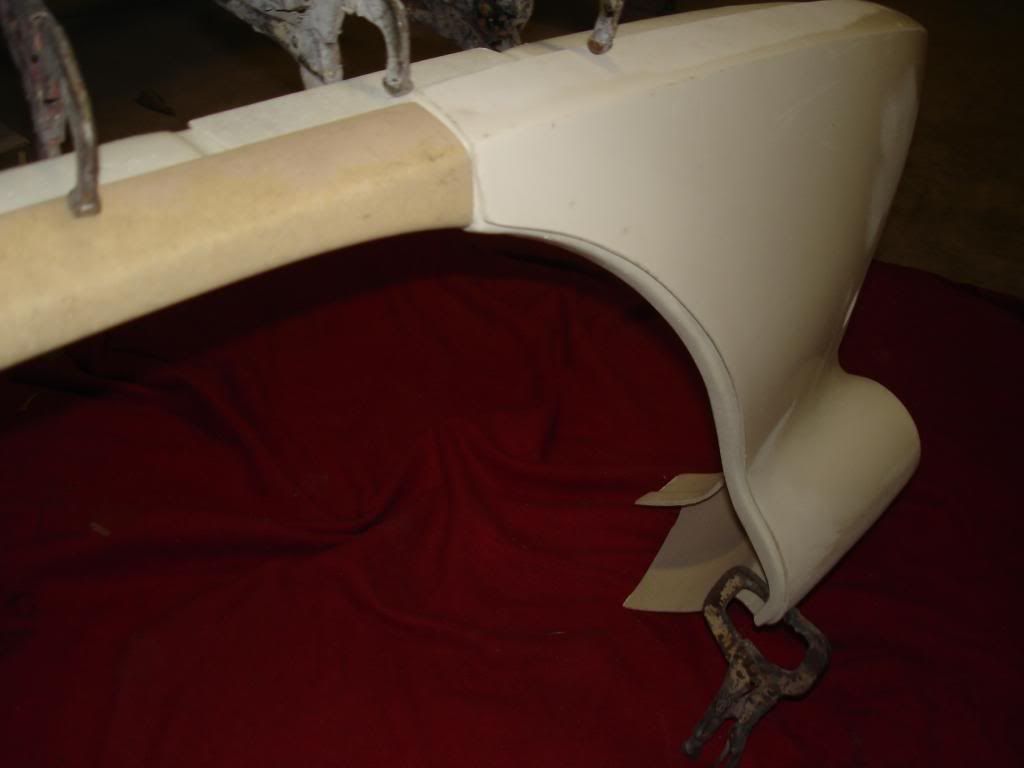
Guys, help me out. I’m doing some work on the '66 preparing for a paint job and I need to know what the inner lip of the front fenders is supposed to look like. The PO did crappy repairs on both front fenders. He also apparently thought bondo was great stuff and laid down mounds if it filling the inner fender lip cavity (over an inch thick in some places  ). After several hours and some choice swearing, I managed to remove the bondo using a heat gun and dental picks so now I can see the original damage.
I have to decide whether I do the glass repair myself or leave it for the body shop.
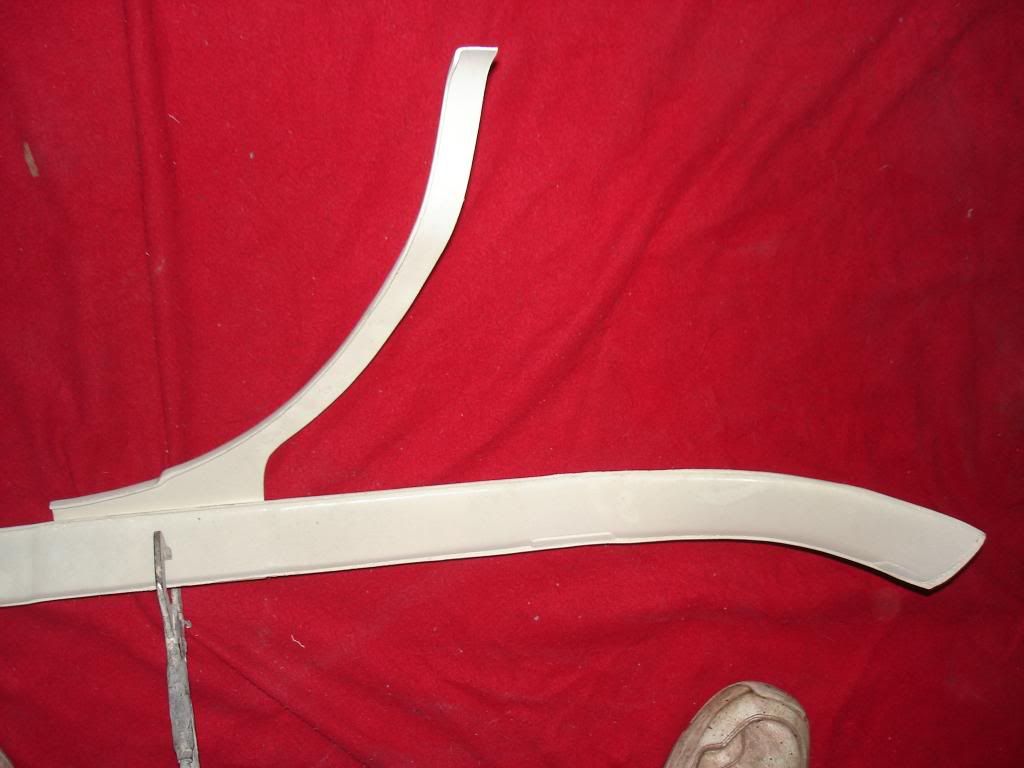
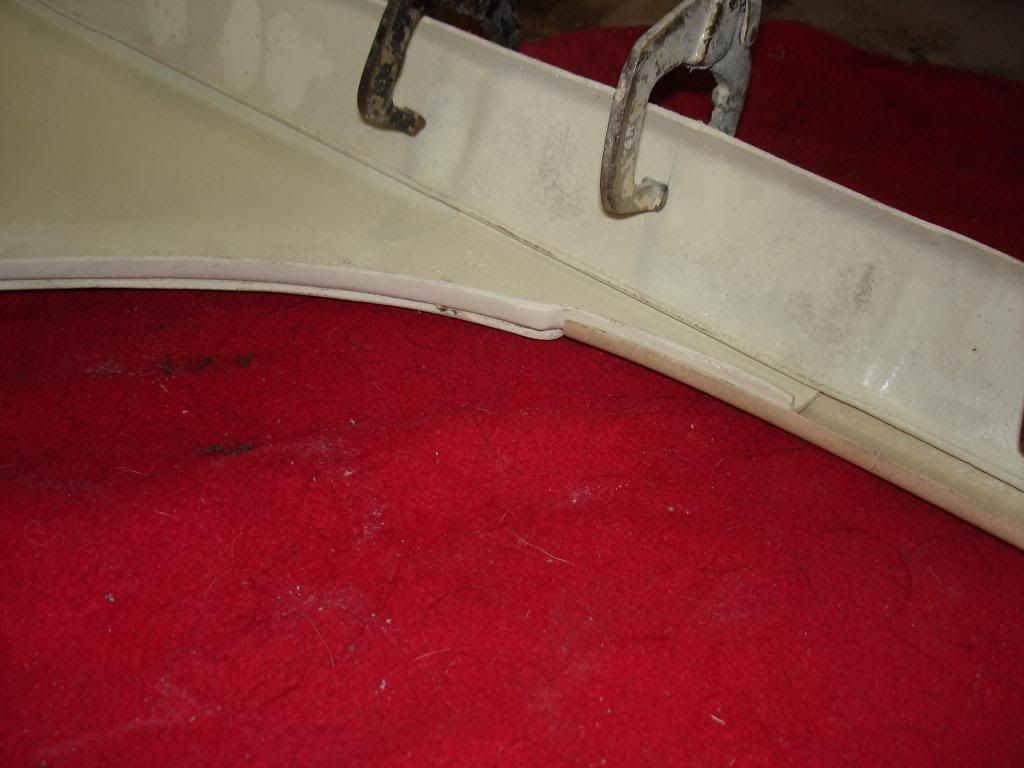
There’s a second lip inside the outer lip on the front curve of the fender (under the bonding strip). It’s on both sides of the car but they’re different so I can’t tell what was original. Does anyone have a pic?
Thanks as always.
Joe
This is a sample of what I had to remove:


This is what's left:

). After several hours and some choice swearing, I managed to remove the bondo using a heat gun and dental picks so now I can see the original damage. I have to decide whether I do the glass repair myself or leave it for the body shop.
There’s a second lip inside the outer lip on the front curve of the fender (under the bonding strip). It’s on both sides of the car but they’re different so I can’t tell what was original. Does anyone have a pic?
Thanks as always.
Joe
This is a sample of what I had to remove:
This is what's left:
 10-24-2009, 03:42 PM
#2
Le Mans Master


That second lip is the bonding strip. The bonding strip forms the lower portion of the lip on the parking light panel. It was not installed quite correctly at the factory, but that is typical.
10-26-2009, 07:45 AM
#3
Burning Brakes
Thread Starter
Thanks wombvette, I need to find a car locally so that I can see some details. My picture doesn't show it but I'm missing a 4 inch section of the lip on the right fender and the parking light bonding strip seems like it should have filled the missing section but it's off by 1/2 inch. ....something ain't right. I don't think the driver's side is correct either but I'm going to look again.
Thanks
Thanks
Last edited by JoeCool66; 10-26-2009 at 05:50 PM.
10-26-2009, 09:54 AM
#4
Le Mans Master
Thanks wombvette, I need to find a car locally so that I can see some details. My picture doesn't show it but I'm missing a 4 inch section of the lip on the right fender and the parking light bonding strip seems like it should have filled the missing section but it's off my 1/2 inch. ....something ain't right. I don't think the driver's side is correct either but I'm going to look again.
Thanks
Thanks
10-26-2009, 01:59 PM
#5
Burning Brakes
Thread Starter
I don’t think these were ‘factory’ because my car had been punched in the nose in some point in its life and there had been other repairs. The bondo material used was similar. I may be wrong but I hope I’m not… had it been original I would have left it and hated the whole situation. Thanks for the feedback.
Joe
Thanks for the feedback.Joe
 10-27-2009, 11:32 AM
#7
Burning Brakes
Thread Starter
PERFECT!!! Thank you so much that is just what I needed. I need to crawl under there again and reexamine what I’ve got. I know it’s a bit different than your pictures. Your pictures show that everything fits together nicely if someone is taking the time to do it right. 
I’m planning on repainting the car in the next couple of months so I’m doing some repairs & prep work now. I may also strip the car so if I do repairs, I don’t care about the paint.
Looks like to make it perfect, I’ll need to have the BS removed and rebonded….not something I would do myself. I need to talk to the paint/body guy that will be doing my car because there were some other issues I was going to have him address. Let me see what he says.
Plan B would be for me to so some fiberglass repairs to improve what’s there. The outside of the fender (painted areas) look great...it’s only inside the wheelwell that you see issues. My fixes would not be original but my car is a driver and I think I can do a decent job.
Your pictures helped a lot…. thanks
12-29-2009, 11:25 AM
#8
Burning Brakes
Thread Starter
Thought I would follow up on my progress…
Thank you wombvette, your pictures were invaluable. I also found a midyear at my local shop that was original/unmolested and did some close inspections.
I decided to tackle this repair myself. Not a major repair but I found it challenging. I wanted to make it as close to original as I could and I think I came pretty close. I think to make it perfect I would have had to replace the dog-leg bonding strips and I didn’t think it was worth going that far (car is a driver).
Someone had actually cut and re-bonded the dog-leg BS strip and had done a terrible job. I ground everything down and reformed the inner edge of the dog-leg. I then used metal strips as forms for a new inner lip on the fender. I tinted the resin at an attempt to better match the existing glass… it’s close but luckily this will get a light shot of blackout later.
Several issues here.. some of the previous bondo was applied in an attempted to ‘fix’ a crack in the fiberglass. I repaired this by finding the crack and grinding a V to give more surface area and adding a layer of new glass.
A lot of sanding and shaping… a lot!! I matched the thickness of the existing glass and I even added a little bump where the bonding strips overlap. I did both sides since both had issues…one had the broken dog-leg and the other had most of the inner lip wiped out (too wide a tire I‘m guessing).
I came out pretty good (if I say it myself). It ‘feels’ right when you run your hand along the lip. An experienced hand can sense there has been some work there but overall it’s decent and a heck of a lot better.
Thanks for all the support and guidance…. This place rocks!!
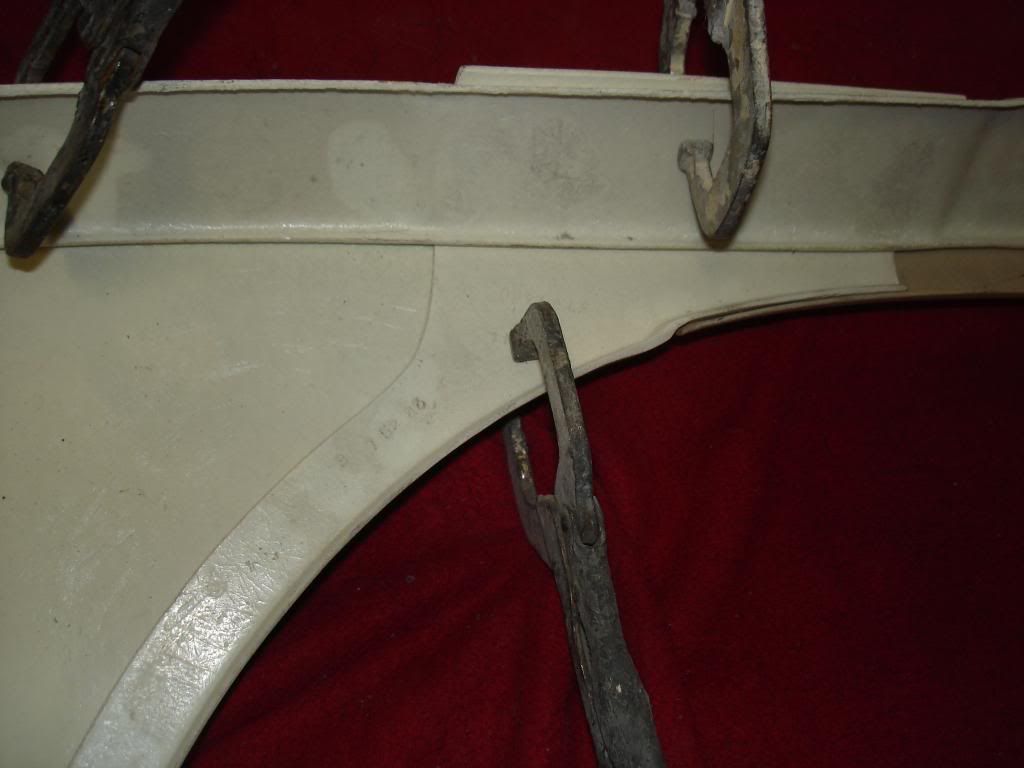
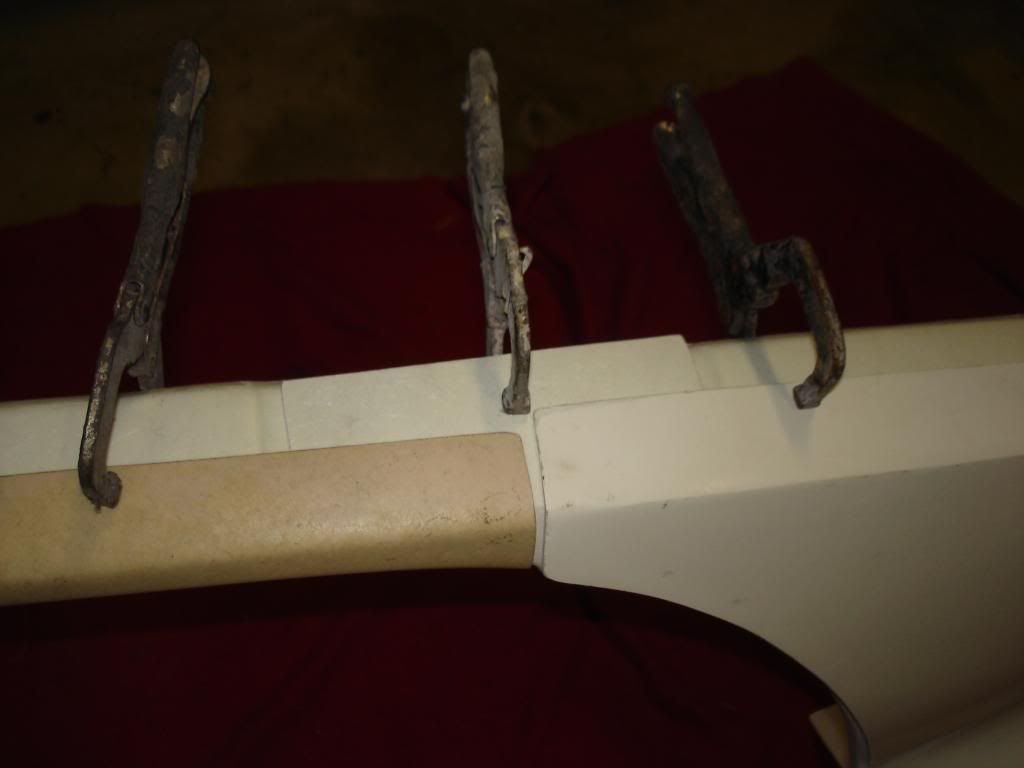
Here’s a good shot of the dog-leg strip. This is what was under layers of goo…. WHAT A MESS!!

Everything ground away …

Small forms used to set the general shape


Final results…

Thank you wombvette, your pictures were invaluable. I also found a midyear at my local shop that was original/unmolested and did some close inspections.
I decided to tackle this repair myself. Not a major repair but I found it challenging. I wanted to make it as close to original as I could and I think I came pretty close. I think to make it perfect I would have had to replace the dog-leg bonding strips and I didn’t think it was worth going that far (car is a driver).
Someone had actually cut and re-bonded the dog-leg BS strip and had done a terrible job. I ground everything down and reformed the inner edge of the dog-leg. I then used metal strips as forms for a new inner lip on the fender. I tinted the resin at an attempt to better match the existing glass… it’s close but luckily this will get a light shot of blackout later.
Several issues here.. some of the previous bondo was applied in an attempted to ‘fix’ a crack in the fiberglass. I repaired this by finding the crack and grinding a V to give more surface area and adding a layer of new glass.
A lot of sanding and shaping… a lot!! I matched the thickness of the existing glass and I even added a little bump where the bonding strips overlap. I did both sides since both had issues…one had the broken dog-leg and the other had most of the inner lip wiped out (too wide a tire I‘m guessing).
I came out pretty good (if I say it myself). It ‘feels’ right when you run your hand along the lip. An experienced hand can sense there has been some work there but overall it’s decent and a heck of a lot better.
Thanks for all the support and guidance…. This place rocks!!
Here’s a good shot of the dog-leg strip. This is what was under layers of goo…. WHAT A MESS!!
Everything ground away …
Small forms used to set the general shape
Final results…
Last edited by JoeCool66; 12-29-2009 at 11:35 AM.
12-30-2009, 09:43 PM
#9
Le Mans Master
Yea, They missed the position of that B/S at the factory, made your job harder because of the mismatch. Someone tried to rectify the problem some time ago with that lower dog-leg piece.
Good job with the repair.
Good job with the repair.
08-06-2014, 11:37 AM
#10
Melting Slicks


Member Since: Oct 2000
Location: Brentwood Tennessee
Posts: 2,409
Received 0 Likes
on
0 Posts
Cruise-In II Veteran
Cruise-In III Veteran

what exactly does the factory goo look like inside the fender well. I have a bunch of white something that ran down on the lip of the fender. my buddy thinks its factory...
08-06-2014, 06:10 PM
#11
Race Director


it all depends
Factory is black or darn near it, reddish brown, green....and the white stuff you have is not factory...depending on where it is dripping down.
The factory used seam sealer which is close to white...but I do not about what you have going on...not enough specific information in you post.
DUB
08-08-2014, 11:12 AM
#12
Melting Slicks
Member Since: Oct 2000
Location: Brentwood Tennessee
Posts: 2,409
Received 0 Likes
on
0 Posts
Cruise-In II Veteran
Cruise-In III Veteran
You did not state what year you are asking about.
it all depends
Factory is black or darn near it, reddish brown, green....and the white stuff you have is not factory...depending on where it is dripping down.
The factory used seam sealer which is close to white...but I do not about what you have going on...not enough specific information in you post.
DUB
it appears to have dripped down on the lip on the inner side of the fender from possibly the seam where the fender is put together in the bonding strip areas. its a good bit of stuff. you can feel it when running your fingers along the inner fender lip etc...
Last edited by zeus337; 08-08-2014 at 11:16 AM.
08-09-2014, 05:31 PM
#13
Race Director
sorry 1966 and it is white hard substance
it appears to have dripped down on the lip on the inner side of the fender from possibly the seam where the fender is put together in the bonding strip areas. its a good bit of stuff. you can feel it when running your fingers along the inner fender lip etc...
it appears to have dripped down on the lip on the inner side of the fender from possibly the seam where the fender is put together in the bonding strip areas. its a good bit of stuff. you can feel it when running your fingers along the inner fender lip etc...
A good photo of it would be greatly helpful.
DUB
08-11-2014, 11:13 AM
#14
Melting Slicks
Member Since: Oct 2000
Location: Brentwood Tennessee
Posts: 2,409
Received 0 Likes
on
0 Posts
Cruise-In II Veteran
Cruise-In III Veteran
I will try to get a pic soon
My friend workin on the car says it is more of a off color white that appears to actually come out of the seam where the fender was put together. it appears to be original and just excess running out of the bonding seam.
My friend workin on the car says it is more of a off color white that appears to actually come out of the seam where the fender was put together. it appears to be original and just excess running out of the bonding seam.