When you click on links to various merchants on this site and make a purchase, this can result in this site earning a commission. Affiliate programs and affiliations include, but are not limited to, the eBay Partner Network.
The color is getting closer....tint...shoot a test panel and allow it to dry...check it and repeat the process. With the weather here being so 'jacked-up' right now...I do not feel comfortable shooting test panels when it is cold and rainy/humid.
I know the weather is going to get much better soon...( God I hope so ..this cold/damp weather makes everything go much much slower)...and when the temps are more consistent..I am sure that the process will be able to go into high gear. Progress has been made...but it is still not quite to my liking. I am so darn picky about stuff like this.
DUB
What your doing, at least for me , is a tougher job than just having to go and paint something!
I've seen panels that were simply sprayed at different times from the same gun / same paint and they still could all be different! And the only variable being the humidity in the air !
Course here in Florida none of the rules seem to apply!
I'm confident that it will be perfect when your done !
That is all I can hope for. And I do agree...getting the color right can take more time that shooting the paint on the panel...by a huge difference.
And compounding it that these bumpers are going to be butt-matched...makes it even worse due to the opportunity to blend the paint is not possible.
DUB and I talked about the very thing Ray mentioned regarding paint color vs. heat and humidity at go-time...that's why once we get a color match we are both happy with, I will need to pick a day where the weather is as close to dead-nuts-on as possible to the weather at the time DUB shot the test spray to achieve that perfect match. Fortunately for me, I have the option to be available at any time to lay the paint.
I spoke to DUB this last Thursday and he is getting closer to a match on the paint...the problem for him has been that Mother Nature is not cooperating with the temps and it has been too cold for him to shoot the sprayouts for comparison to the fuel door lid. As soon as the weather turns the corner he will be able to make more progress on the mix. The process he must go through to make this paint match is a time consuming and tedious one at best...and that's when everything goes exactly as he needs it to. This spring has been cold both in NC and here in IN...it's been everything BUT paint weather.
Be patient folks, we WILL get there...you have our words on it! Thanks to all who are following this thread and for the kind words!!!
The color is being walked closer to the best match possible. This orange is not as easy as it may look for mixing a color for a 'butt-match'. If I was going for a 'blendable match'...I would have been done along time ago. I should know something more by Monday or Tuesday...if all goes well.
This is being mixed as a single stage so the possibility of a clear coat effecting the end result is taken out of the equation.
Because for those who may not believe it....clear coat can change a color and make it go darker.
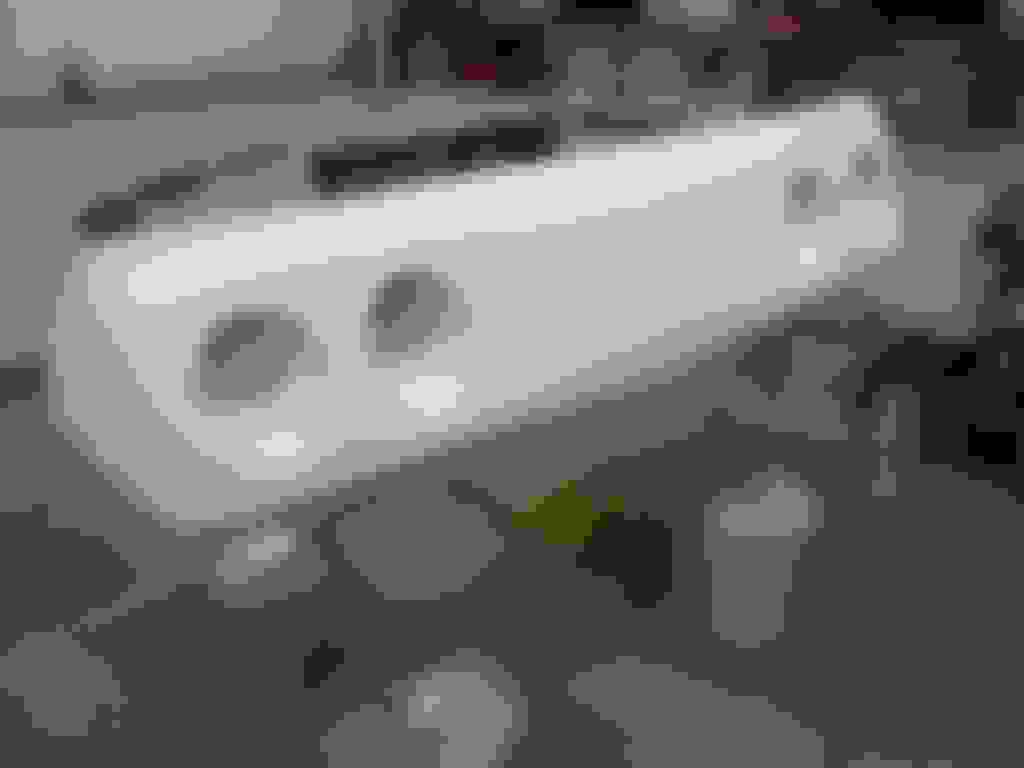
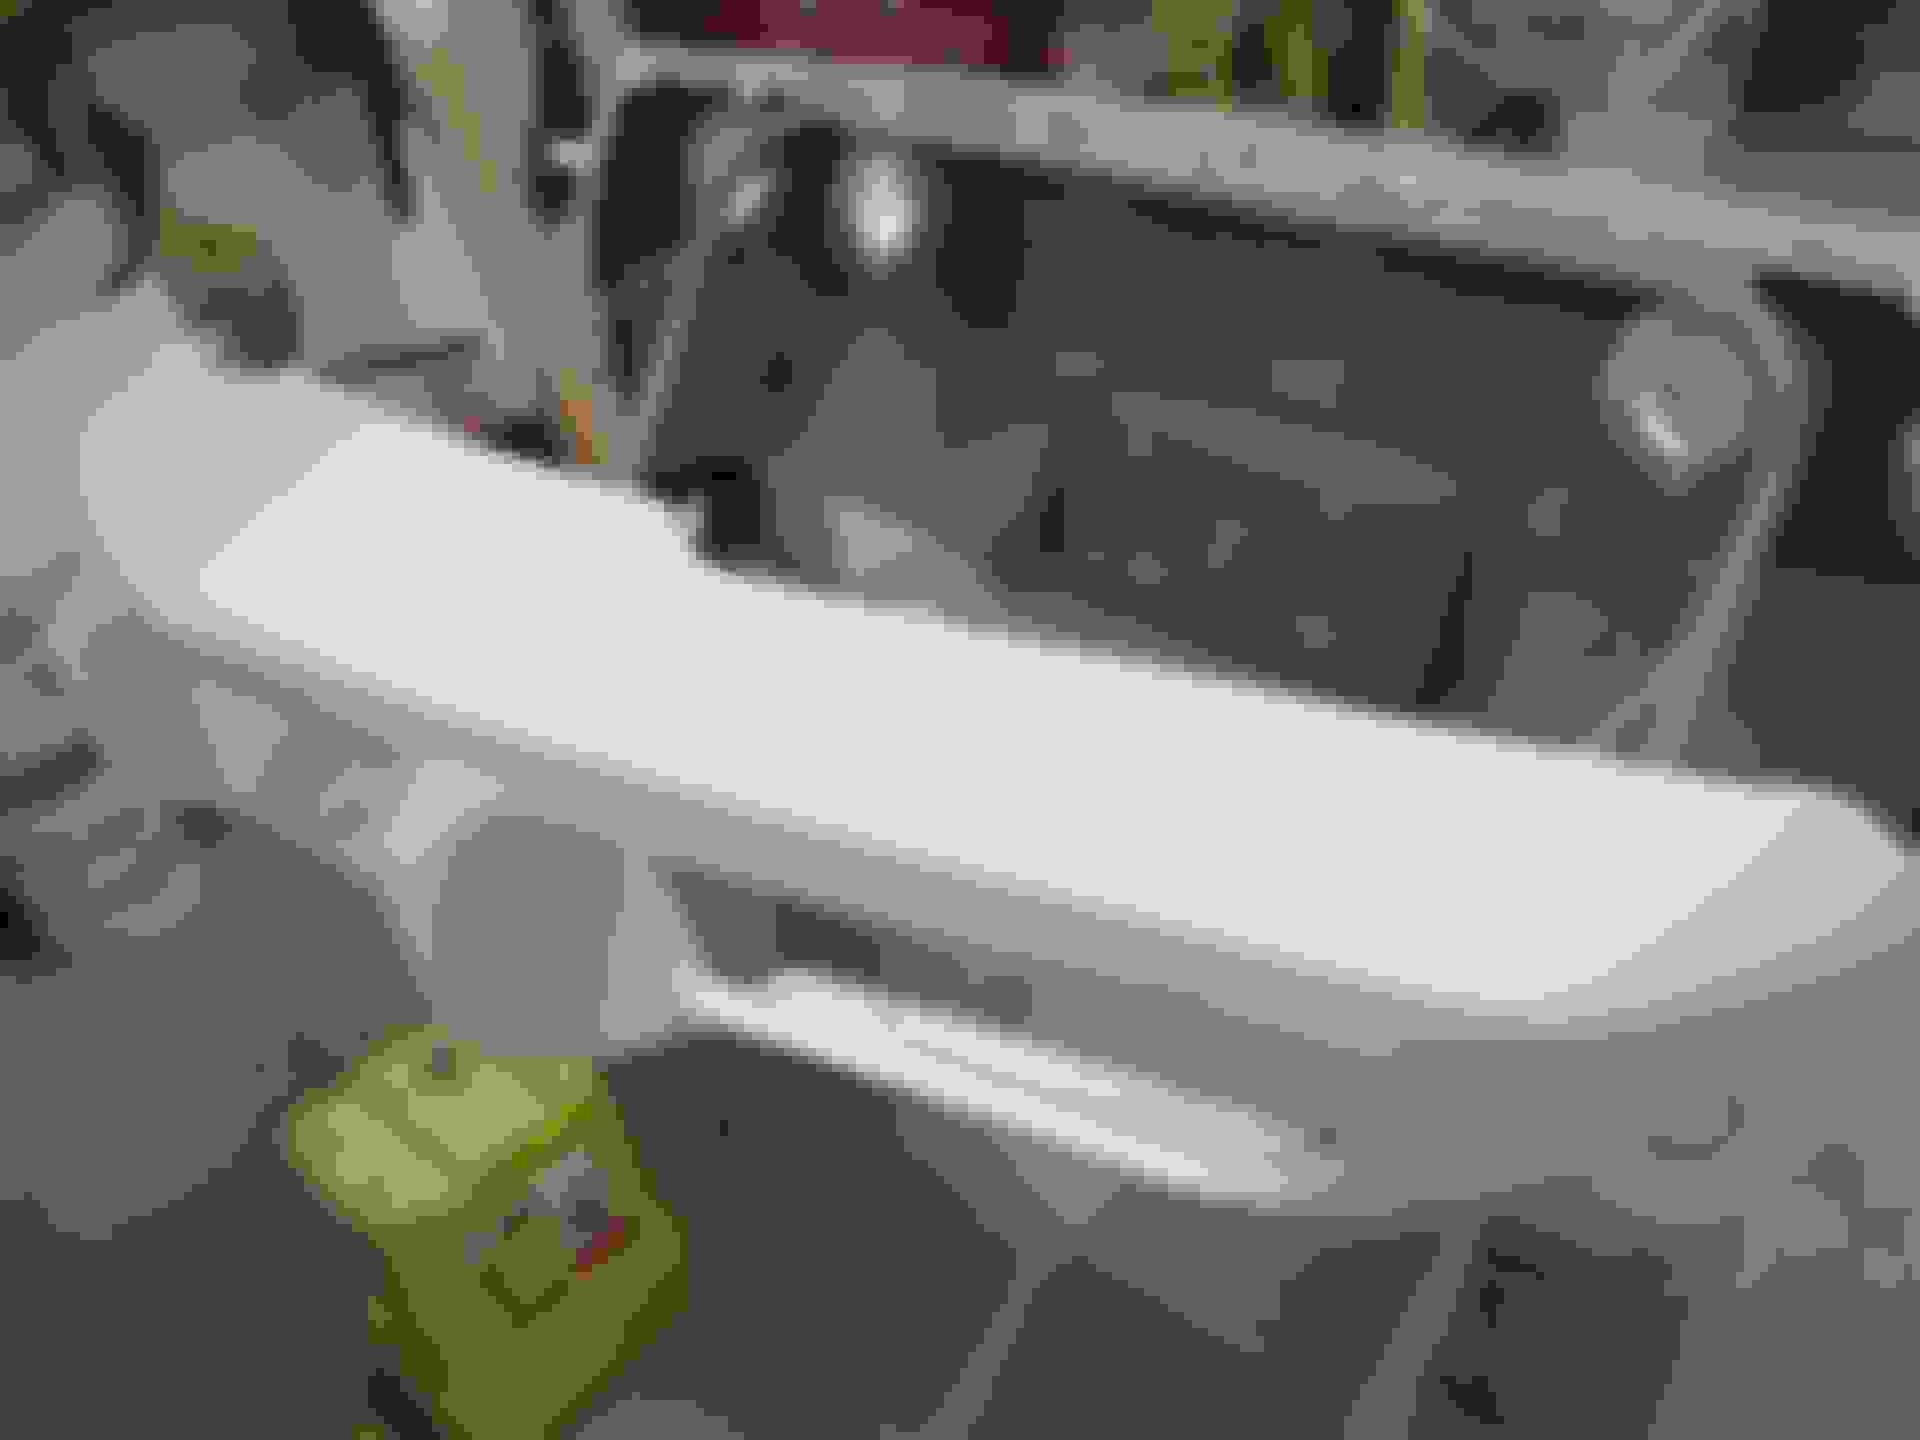
We now have more forward motion! Now that the weather has finally broken, I am able to enter the last leg of this project. I have been waiting for favorable temps to spray the epoxy primer. Yesterday it happened. I shot the epoxy in the afternoon and let the primer cure until today. After wetsanding, I discovered some areas that were not acceptable, and reapired them. After the repairs today, I laid 2 coats of 2K and set the covers out in the sun to bake a little. Below is that progress....
These two are of the bumper covers after final bodywork and sanding...ready for Epoxy:
Next are the covers right after being shot with 2 coats of Epoxy:
Here they are after wetsanding. The front bumper cover got my seal of approval. The rear did not, and below you can see the areas I was unhappy with, and where those final repairs took place:
After a final sanding and inspection with wax remover they were ready for the 2K. Below are the covers basking in the sun with their 2 coats of 2K. To note: The Epoxy primer is white, and the 2K is buff colored (although they seem to appear white in the pictures)
TOMORROW IS PAINT DAY!!!
As I mentioned earlier in this thread, DUB took on the daunting task of mixing the color for the car. We spoke several times through this process, and from our conversations I gained a new knowledge as to exactly what goes into making a custom color formulation. I will not cover that process here as that topic could be an entire thread unto itself...and would be one which DUB would need to host...but needless to say, what may seem like a "simple" task of mixing colors to come out with the final product, is anything BUT simple. I appreciate that now!
After getting the mix dead on and to his satisfaction, he sent me the paint and associated activator and hardener needed fo the job. In addition, he also sent the spray-out cards he used in "walking" the color to his final satisfaction of having a dead on match to my fuel door.
Below are the pictures of the spray-out cards mounted on the roof of the car, in the sun, to illustrate what is meant by walking the color. I am also including a shot of the card with the toners on it that were used to formulate the final mix. The first card is the toner card. Subsequent cards are numbered 1-5, with #6 being the final color.
When looking at the cards below, look at the color on the card compared to the rear section of roof behind the t-top. Viewing from this perspective removes the "line" of the card, which can trick the eye and cause the comparison to be deceiving.
One more wet-sand in the morning and these covers will come to life with color!
I have a question for you, did you use the reinforcement on the front bumper that is behind the bumper retts and license plate or did you leave it out ???
I'm doing the same job on my 76 front bumper cover like you...
I have a question for you, did you use the reinforcement on the front bumper that is behind the bumper retts and license plate or did you leave it out ???
I'm doing the same job on my 76 front bumper cover like you...
By the way nice work !!!
Thanks
Ulf
HI Ulf,
Thanks for the compliment!
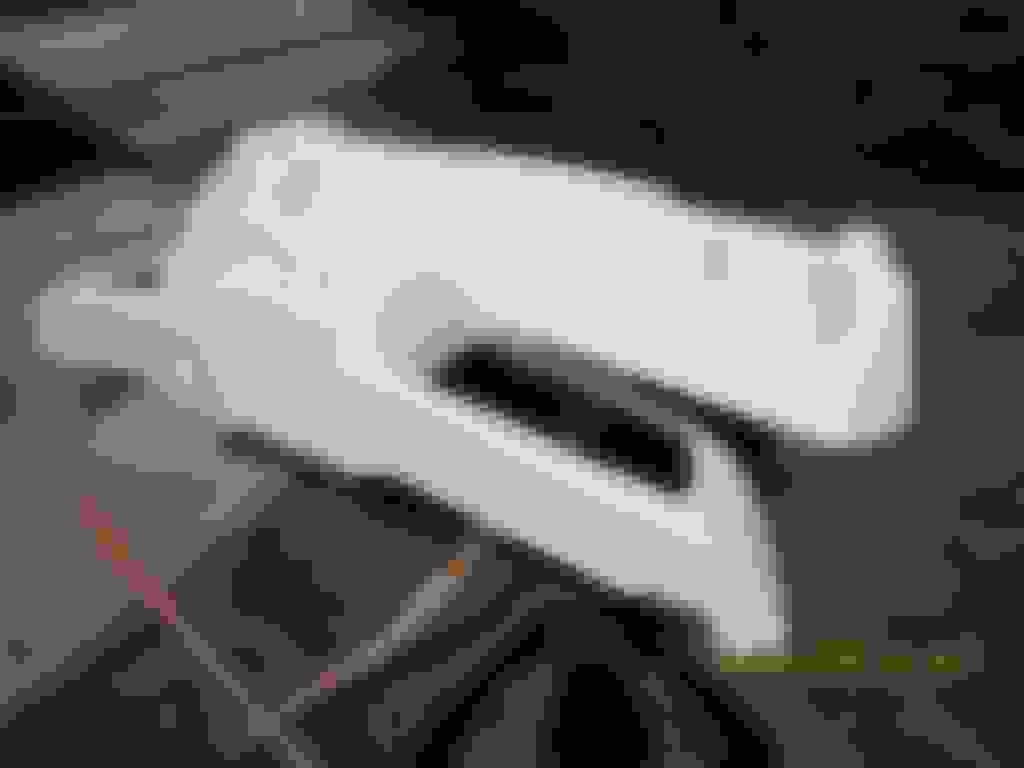
I am using the rear reinforcement for the front bumper. To get proper fitment of the fiberglass cover I did need to make some slight modifications to it, such as some trimming. This was needed (at least in my case) to enable me to make the bumper cover fit so that it would install by merely setting it into place without any effort. The fit is so nice that I can install it with 4 finger tightened nuts and it looks like it is secured with all 14. I will be leaving that heavy steel license plate mount off though. I cut 2 square holes in the front to accommodate the white plastic license plate push nuts, and one round one for the original round license plate bumper. I believe my decorative front plate will look much nicer flush mounted than it would on the bulky front plate mount assy. I will post pictures once everything is painted and mounted.
I am using the rear reinforcement for the front bumper. To get proper fitment of the fiberglass cover I did need to make some slight modifications to it, such as some trimming. This was needed (at least in my case) to enable me to make the bumper cover fit so that it would install by merely setting it into place without any effort. The fit is so nice that I can install it with 4 finger tightened nuts and it looks like it is secured with all 14. I will be leaving that heavy steel license plate mount off though. I cut 2 square holes in the front to accommodate the white plastic license plate push nuts, and one round one for the original round license plate bumper. I believe my decorative front plate will look much nicer flush mounted than it would on the bulky front plate mount assy. I will post pictures once everything is painted and mounted.
Thanks for looking in!
Dave
Using all of the impact structures when doing a job like this is WISE!
Although is much easer to take off parts because they are getting in the way... trimming on rubber/plastic or adjusting parts so the fiberglass bumpers will fit is actually the only way I do it. It may take longer but it also has to so with safety.
Now common sense does come into play when modifying a part. Cutting it too much ...or in the incorrect area can weaken it so much that that modification was not the right thing to do. And if a person is modifying a part and questions what they are about to do...that is telling them that they might want to seek out professional advice.
And that is for those people who care about safety structure. Many do not.
I am using the rear reinforcement for the front bumper. To get proper fitment of the fiberglass cover I did need to make some slight modifications to it, such as some trimming. This was needed (at least in my case) to enable me to make the bumper cover fit so that it would install by merely setting it into place without any effort. The fit is so nice that I can install it with 4 finger tightened nuts and it looks like it is secured with all 14. I will be leaving that heavy steel license plate mount off though. I cut 2 square holes in the front to accommodate the white plastic license plate push nuts, and one round one for the original round license plate bumper. I believe my decorative front plate will look much nicer flush mounted than it would on the bulky front plate mount assy. I will post pictures once everything is painted and mounted.
Thanks for looking in!
Dave
Dave, thanks for your help I really appreciate it.
Using all of the impact structures when doing a job like this is WISE!
Although is much easer to take off parts because they are getting in the way... trimming on rubber/plastic or adjusting parts so the fiberglass bumpers will fit is actually the only way I do it. It may take longer but it also has to so with safety.
Now common sense does come into play when modifying a part. Cutting it too much ...or in the incorrect area can weaken it so much that that modification was not the right thing to do. And if a person is modifying a part and questions what they are about to do...that is telling them that they might want to seek out professional advice.
And that is for those people who care about safety structure. Many do not.
DUB
DUB, I thank you for your information, I'm going to do my best to use all the safety reinforcements to keep my car as safe as possible...
Very interesting thread. Do you feel the thickness of these fiberglass bumpers is equivalent to the rest of the car, and therefore when finished will have the same structural integrity as the rest of the car, and therefore have ZERO waviness, look solid like rest of car?
My Trueflex bumpers have been very disappointing in this regard and wondering what I can do about it.
Last edited by Torqued Off; 05-02-2018 at 06:21 PM.
All I know and can express is how I will only install rigid fiberglass bumpers. I was dong it the way I showed in the thread way before someone thought of the 'flex' style bumpers.
I have my opinion of what I think of the flex bumpers...and it is not a good one.
But even with the rigid fiberglass bumpers...if you looked at my thread...there are areas that can have air pockets....or the gelcoat is super thin.
I also know that there are times when I may want to add a layer or two of mat and resin to make the bumper a bit more solid.
I wonder if I added a couple layers of glass to the inside surfaces of the bumpers would it become rigid enough to provide a stable and solid bumper, as it would with hard fiberglass bumpers.....or is the only way to start over??
Very interesting thread. Do you feel the thickness of these fiberglass bumpers is equivalent to the rest of the car, and therefore when finished will have the same structural integrity as the rest of the car, and therefore have ZERO waviness, look solid like rest of car?
My Trueflex bumpers have been very disappointing in this regard and wondering what I can do about it.
The fiberglass bumper covers are thick enough that they do not flex when being pressed on, similar to the other body panels. As for having ZERO waviness? No. They're fiberglass, and by the nature of how they are made they are not perfect, and hence, all have some degree of "waviness". The same statement holds true for these C3's. If you find a C3 that has arrow straight panels that look as smooth as glass, it is because they were reworked to appear that way...they did not come that way from the factory. There are some degrees of waviness in every panel of these cars, and no two C3 bodies, or panels for that fact, are exactly alike. Bottom line, the bumper covers will ultimately be what you make of them, in both fit and final appearance...whether that be working them to perfection, or working them to be a perfect match for your particular car's imperfections.
As for reinforcing your Tru-Flex? Sure, you can do that...but, if you are using your original reinforcements in the front, there is the potential for running into clearance issues by adding material on the inside. My covers fit snugly over the reinforcements, and so much so that to get them to fit properly I had to do some trimming of the rubber. That may not happen to you though. If you are that unhappy with your covers and are thinking of repalcing them anyhow, try it. You have nothing to lose and everything to gain.
I wonder if I added a couple layers of glass to the inside surfaces of the bumpers would it become rigid enough to provide a stable and solid bumper, as it would with hard fiberglass bumpers.....or is the only way to start over??
By shear design and the composition of the resin in the 'flex' bumpers...They may still have distortion when they are put out in the sun and get hot. I am not a chemist but years of body work has brought me to this conclusion. Because a 1/2" thick piece of urethane would still flex to some degree.
I can not say if adding rigid resin (when cured) would counteract the flexible nature of the resin the part was made out of.
This is why I do not use the flex bumpers at all. This 'variable' is something I do not what to have to deal with. Because when I started installing the fiberglass bumpers when they came out...it was not a variable. As a matter of fact..when the fiberglass bumpers first came out...they were really thick and heavy. And they were really hard to get to work due to all of the mat and resin in the bend where the retainers would fit. Over time that has all changed.
IF resin is added to the backside of the bumper is it often times not needed on the entire backside of the bumper. As like Dave wrote. it can cause for further modification due to this added thickness. So some care and attention may be needed.
When I apply added mat and resin. On the front bumper it is usually on the inside across the top only. Due to the sides and the areas around the lower grilles and front bumpertettes..it is usually rigid enough and will not show up any major distortion that the eye can pick up. I will use both cloth and mat.
On the rear bumpers..I usually apply it between the inner taillights to strengthen that flat surface where the emblem goes.
 03-23-2018, 08:00 PM