When you click on links to various merchants on this site and make a purchase, this can result in this site earning a commission. Affiliate programs and affiliations include, but are not limited to, the eBay Partner Network.
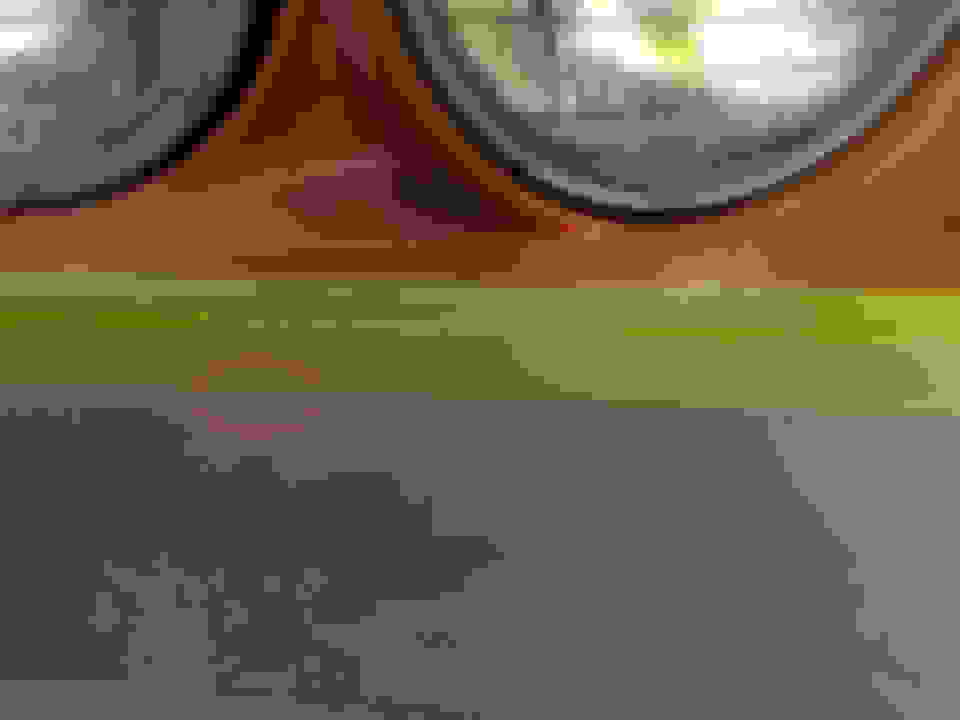
I have a 74 that I'm installing an ACI fiberglass front bumper. I tried to find some local guidance, but I've been unable...the one fellow offering to help never showed up, and after several promises, I've moved on. I need some advice on how to blend two areas on the bumper shown below. The left side is the most pronounced. (Forgive me for the big pictures....I'm having trouble figuring how to make them smaller in this post).
The transition also should move up on the bumper to match the fender. If I sand this down, I will remove most if not all the bumper I believe. You can see the VPA and the epoxy primer I covered it with year before last (I was traveling most of last year for work...never got to even run car).
What suggestions would you have to help this match? I guess I could wait and match the fender when I paint the car after some other work, but I keep thinking of the old airplane addage...."modify the cheapest part!"
I know you will need more information from me before offering assistance, but as I don't know what you may be looking for, I thought I'd get the ball rolling with these pictures and the brief synopsis.
(FYI...I'm new to body work, so the obvious might not be to me. I will be making mistakes...unfortunately in my area the local adult ed doesn't offer auto body classes, and as mentioned earlier, promised help has never shown up)
Thank you in advance to all who take the time to look!
Good evening, Dub,
This is a rigid fiberglass model. ACI p/n JBF010.
Thanks!
(I can take more pictures from different angles if you need them).
All my best,
Rob
Honestly....why are you worrying about this... if in fact....you are going to be painting the rest of the car???
You can repair it much like you planned on by blocking it all down flat to the body and then you might need to go in from the inside and laminate in more fiberglass mat.
OR...apply some VPA on the body to bring it out flush to the bumper.
The masking tape is is making it hard for me to actually see how far out the bumper is actually sticking.
DUB
Hi Dub,
This might take a while....sorry.....thanks for taking the time to help. Oh boy, the first question is a loaded one! Honestly, I'm a worry wart with this car.....I bought the car as a numbers matching driver that had won a couple local awards. I'm not a materialistic person, but since that time so many years ago, the car has been a refuge and therapy during difficult times (death of close family, attempted suicide by a child....thankfully she's OK) and I have worked on it to keep my sanity and enjoying/appreciating every detail. Things like putting in an interior, re-building the front and rear suspension, new brakes and lines, new interior, rebuilding the transmission, etc. I don't mind making a mistake....made plenty, but I know how to fix the mechanical/electrical ones. But not the body work stuff.
I'm worried because I have no idea what is right or wrong with body work as this bumper is my first foray into body work of ANY kind. As I'd mentioned, I tried to enlist help from folks but they either weren't interested, or never showed up to provide guidance (and I was offering to pay by the hour...I don't take advantage of folks). To make matters worse, I'm a perfectionist, and I don't want to mess up something by doing the wrong thing, and having to start over. I don't mind re-doing as learning, but I don't want to bubba-hack the car either. I just don't want to go so far down a road it's a total loss, thus I tend to not go far enough without guidance. This is my third attempt to get the fit just right. When I get too discouraged or frustrated, I stop for a while and then go back to it with a fresh outlook. I know hours could be saved having someone with even basic knowledge stop by for a couple hours to answer some questions, but no luck there.
Regarding the painting the rest of the car; that's complicated, too...This started with replacing the rear urethane bumper. I was going to paint the bumpers to match the (original) paint and be done! Then, once I got the old rear bumper off, I saw that the left rear quarter panel had been replaced and was poorly done. Should have been caught on the pre-buy back in 1997, but I was more Corvette-naive then, and put all my trust in the Vette specialist who did it (when I lived in WA). I went over the rest of the car with a fine tooth comb (even doing some disassembly) and found no other collision damage, and also went so far as to have the frame checked and it was perfect. I did my homework and found that ACI was the preferred supplier of bumpers, so I called them. They (thankfully!) steered me clear of "flex" bumpers and I bought their rigid fiberglass rear bumper. It fit VERY well except the left rear quarter which had almost 1/2" mismatch after pulling the bottom in as much as possible. I knew then I couldn't live with the left rear quarter and would ultimately replace it, and thus painting the whole car, but I just felt overwhelmed with ZERO experience and not wanting to mess up my car body any worse. I figured I'd fit the front bumper, epoxy prime it, do the rear quarter, epoxy prime it, and then fit the rear bumper, epoxy prime it, and by then it would be too cold to do much else so I'd do a few other things (fix A/C, replace brake fluid, replace engine mounts) and drive it a bit to keep moving parts moving before putting it away for the winter. I really have no idea how or when I'll be able to paint it...no one is interested in painting it around here unless they do everything, and that defeats the whole point of my hobby....learning and improving, and the pride in the accomplishment! I want to use modern paints, but I need to invest a lot to get the proper equipment to get a quality product without poisoning myself. I suspect it will take more time than this short summer (I lost a friend due to complications from isocyanate car painting with only a carbon respirator...what a terrible way to go).
OK, sorry to digress....at this point, the front bumper was falling off, so I went back to ACI and bought the rigid front bumper. You probably wouldn't recall, but based upon your thoughtful suggestions, I ended up sending the bumper I got back to ACI due to poor fit on my car and got another from a different mold that fit very well from what I understand. ACI were the consummate professionals and I am forever grateful for their help, understanding, and assistance (and yours as well).
Now to the present....I'm going to replace the left rear quarter next, and then fit the rear bumper to a properly fit left rear quarter, but I figured I'd get this front bumper done after two years of stop and start, and what I learn and gain in experience will help with the left rear quarter. So, for no real reason other than the front fenders and clip are original, I figured I probably shouldn't modify them (and that old adage from my other hobby...airplanes...."modify the cheapest part"). That may not apply but I just have no way to know.
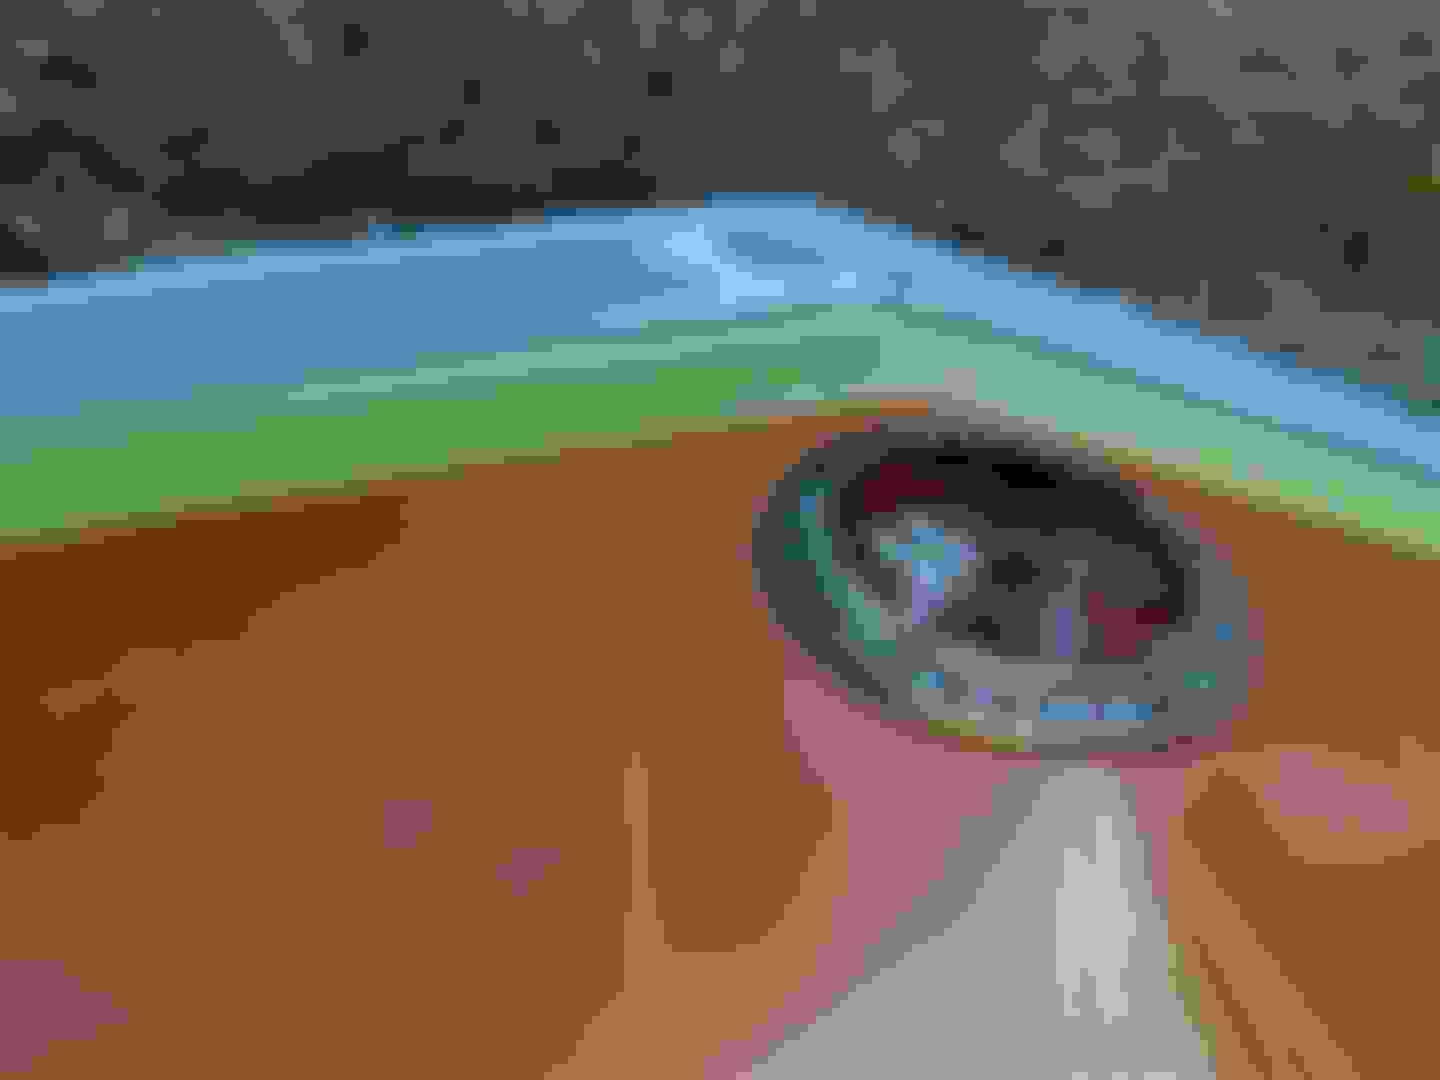
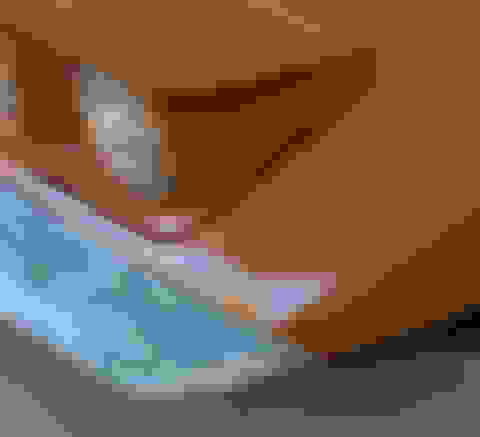
Regarding the tape, I followed your guidance from this forum and carefully butted the tape against each other on the bumper/car interface (and made sure the splice was at the "natural transitions" i.e. body lines, and made sure there were no seams or wrinkles at the interface or around the radius of the car side. Beyond that, I put two layers on and didn't worry about the wrinkles. I'll try and get you a measurement as I understand it's hard to tell from the pictures. **Just measured....about 5/64". Two layers of tape at 0.015" combined, and .063" offset as shown in the picture***
Sorry for the long drawn out soap opera, Dub, but I figured an honest representation was best. I know I can do this if I only knew what I don't know!
All my best,
Rob
(P.S. You have no idea how many times I've thought about loading it up and driving to your shop and be done with it, but that would be admitting defeat and I wouldn't have learned anything except how to give up!)
PM me if you want to talk about this. I can give you my shop number.
I am sure you have seen the thread that I did for RIGID front bumper install??
Your area of concern on this bumper is not that bad and can be repaired...obviously.
AS for the rear bumper and left quarter panel. When the time comes...I would like to see photos of it so you do not jump in and remove a part that may NOT need to be removed.
I understand about being a perfectionist...but I am also a magician also and can 'trick' the eye.
DUB
Thanks, Dub! Yes sir, I did see you rigid front bumper install post. It helps a lot. I will definitely send you pictures of the left rear quarter. I have some uploaded already. It looks like they spliced the panel in two places and used short strand glass filler to attach the panel to the inner splash shield. The lip inside the wheel well, just inside around the perimeter, is filled with something as well. The right side is much different.
I'm off to work right now, but I'll PM you today to set up a time that's convenient for you.
Once again, thanks so much for the help. I won't give up...that's why it's taking so damned long to do something simple! I just don't know what I don't know, and I'm too stubborn to stop.
Like I tell many people who call me or I write in some of my posts.
IF you want to do it...then you will. Having the DESIRE and DEDICATION and ATTENTION to DETAL to get it done is so critical due to so many problems can arise that would make many people stop and throw in the towel.
Good morning, Dub,
Your continued help and guidance is very much appreciated. Your seemingly endless patience and benevolence help us hobbyists keep these cars from the grave, despite our best efforts (as you shall see below).
I'm afraid we have a case of me being too damned thick to grasp things. I took two days off from work just to get this front bumper fitted properly, and as far as I can tell, I just wasted my time and vacation days. I'm right back to square one. I'm just not understanding something, and after 5 attempts, I feel pretty lost. This post is about the whole bumper in general, in addition to my original topic. By the way, I went and back and re-read your front bumper post again along with the notes of our conversation, and a couple times said "Ahhh, NOW I understand". So, it's a case of no matter how well you explain it, (and you do an outstanding job of explaining it, by the way) ....getting it into my thick head seems to be the problem.
I'm obviously missing something fundamental as MANY folks have posted here with their successes....I just can't for the life of me figure out what it is I'm doing so wrong. For the sake of the one or two buffoons like myself I'm going to show all my mistakes here. Hopefully they can learn from my screw ups and your guidance and avoid the unbelievably frustrating and unpleasant task this has become for me.
Style line on car and bumper so different, I think bumper would look funny if I tried to fix on bumper....but??
After hours and hours of block sanding until it matched the car, I removed bumper, cleaned up flashing, re-taped and reapplied mold release on car, and re-installed bumper only to find this....This time I actually has installed the lower valence panel before starting any of the body work because when I was troubleshooting/fact finding before doing any body work, I noticed it provided sufficient "pull down" on the front bumper to change the shape slightly...I figured that might be what I missed, but as you see below, after re-taping and with the bumper re-installed and the valence also put back, it looks just like it did a year ago before I'd given up for a while out of frustration.
This has been an ongoing problem. Bumper keeps "riding up" front of car. I've re-done this area each of the 5 times I've tried fitting this bumper. Note I'm thru the gelcoat. Nuts are not wrenched tight - only snugged enough so lock nuts will keep bumper in place.
This area looked great until I removed the bumper. Note the style line on this side is very well located between car and bumper.
That's the current status, Dub. I'm stuck and at a loss what to do. I can take more pictures if you'd like.
Sorry for not typing out answers to all of his concerns so many of you following this thread can see a reply to his concerns. But after talking with Rob...I had assured him that he is on track and that nothing is out of the ordinary.
I explained things about this process in more detail to him that shed more light on those concerns and why those feeling things that things were not coming out right. He would no longer need to be concerned about.
I am quite confident that he will succeed in this project to the high standards of excellence he is wanting to achieve.
To Dub, your kindness and consideration cannot be overstated. I truly appreciate the time, effort, and assistance you are providing so willingly. It is valued beyond measure and I thank you!
Dub took a considerable amount of his time yesterday to help me right the ship and go forward. I am not even of amateur status with bodywork, and Dub's suggestions, guidance and shared experiences were incredibly helpful. I will be applying his suggestions and shared experience today or tomorrow on my bumper and will be posting the results so that all the folks who are as utterly useless with bodywork as myself may benefit, and those with experience may get a good laugh! I went from incredible frustration, to renewed enthusiasm to continue the project after discussing with Dub yesterday.
On that note, I will also post the rear bumper (and perhaps quarter panel depending on Dub's advice) as I progress. I hope that it helps others in my same boat of no experience, but a desire to learn and enjoy a hobby.
I had tried for a LONG time (over a year) to find local folks with experience and proven results to help, and even desperately seeked them out at car shows and the like, but I couldn't get the time of day from any, and often got a smirk and a presumptuous statement or two. I posted on here, and even though he never had met me or known anything about me, Dub willingly and enthusiastically gave and gives of his time and experience to help me, and as I review the forums, see that he does so for many others. As we get busy with our projects and life in general, I think it's important to keep in mind just how unusual and kind it is for Dub to take his own time to help us, asking for nothing but updates to make sure the ship is sailing smoothly. Consider the amount of time, effort, and experience he's devoted to us, and I hope we realize how fortunate we are there's men like Dub still around.
This thanks also goes to the other unique, and all too rare, folks like Dub who are so benevolent. They could just grab a beer after work and say "sucks to be him!" but they don't. Thanks Dub, and the other few as well whom I've not met, but are out there on this forum. I also give a hearty thanks to those folks who post their trials and successes; it is most helpful as well.
THANK YOU for your kind words and all I try to do is to help. And I enjoy helping someone who is willing to try to do it...and does not throw in the towel when they get frustrated. I know you will get this...and I have no doubts about that.
Since I spoke to Dub on Saturday, I'd not had time to work on my car until tonight, where I think I made some progress. Slow, but I'm OK with that.
Dub, As you suggested, 80 grit made me feel like progress was made! All kidding aside, it was much easier to see things develop when material was being removed at a tangible rate. This first image is the driver's side, the only one I had time to work on this evening...note the witness marks on the tape where I stopped as I sanded down and got rid of the "matchbook"! Thanks, Dub! I used my longest board until I noticed I was hitting the tape in some places and not others so then I went to a smaller block to finish. Was that a good idea, Dub? I was thinking that I'll then come back and hit it with my longest board again once I remove the bumper, then and check it on the next fit up after I add the radius to the edge. What do you think? Good idea or bad? I can't believe that I would have ground away and re-started had it not been for your help, Dub!!
For comparison, here's the right side that's not been sanded yet. This is what the left side looked like! I wouldn't have expected it without your help, Dub. Thanks again for saving this newbie!
Here's the front peak. I remember now when I got the bumper, that this was high, in fact above my surround even before attaching and using the VBA. I will definitely be into the glass at the flange edge and well into it below it forward of the flange where you can see I'm already thru the gel coat. What do you think, Dub? Keep blocking it down, even if I'm cutting into the glass? Then, if thickness is marginal, come back in on the underside with 1.5 oz mat and West Systems Epoxy? (I only say West since it's something I'm familiar with, but I'll use whatever is best). You can see in this picture where the interface is level with the hood surround and then begins to slope up toward the peak. That is because I only blocked outboard of the "ramp" area after cutting into it as much as you see and figured I'd get your input, Dub, before continuing here.
In this picture , you can see how much the bumper pulled up when I snugged up the fasteners....the tape came right up with it on the right side of the picture. I was thinking I'd remove the bumper, re-tape for nice, smooth interface and no overlaps, then re-mount the bumper and get back to sanding. Good or bad idea, Dub?
Just another images to show it from another angle.
So, didn't get a lot done, but I feel I'm now heading in the right direction (or at least within 30 degrees of the right heading!!)
One final thought....I used WAY too much VPA two years ago....good lord, I've sanded most of it away. Maybe a lesson for my thick skull.....use only a little and do less sanding?
Thanks, Dub.
To all others, I hope this is helping you if you're as green a newbie as me, and for those with even an hour of body experience, I hope it's a source of entertainment!
Using a long board when blocking is fine..and if you switch to a much shorter sanding block. That is OK also. Use whatever works.
When sanding the bumper when you take it of the car ...just make sure you are aware of what you are sanding and not just sand away on it an take off more than you need....or you will be putting it back on again.
If when you set the bumper in place an have not yet begun to tighten up the nuts. IF the top edge of the bumper is flush with the top hood surround. See if when you are trying to tighten up the nuts that if you press down on the bumper if it will tighten up and NOT be higher like your photo shows. Sometimes due to the angle...the bumper can raise or ride up and cause this issue you are having.
Normally I have it so when I install the bumper I can have a little bit of downward movement...which some times I can tweak the studs in the bumper retainers or carefully file out the holes in the top retainer in the top hood surround to allow the bumper to go down that little bit.
YES...if you keep blocking on the exposed fiberglass you might need to apply some of the West Systems resin on the underside which is a very good product to use in this area. And like when we talked...applying a skim coat of VPA on the exposed fiberglass is wise so when you go to prime it...you do not run into pinholes that may be exposed in the raw fiberglass you are seeing now.
I'll try those ideas out tonight. If held in place, the bumper is OK in the center. Once I snug up the bolts along the top of the hood surround, it pulls it up. When the retainers are installed as high as possible, they have room in the slot in the bumper. They do come up hard against the fiberglass on the back side of the flange radius. Perhaps I should relieve the glass a bit? (I'm using the individual retainer bolts often sold with these bumpers).
I see where having it "naturally" down is better than hard up like I have it.
Regarding the VPA skim coat...ABSOLUTELY! I took that to heart, Dub! I was planning to do that once I got everything close. Do you think that's a good plan?
Thanks for sticking with me to see this thru, Dub!
How many plies of fiberglass mat would you recommend I use to back up where I ground down my bumper to match the car?
Thanks so much for your help....I made progress today!!! (at least I think so! )
I
*****Update - Dub, I just revisited your fine "John Lingenfelter's 1973 Corvette drag car" post and found the answer. I'll use 3 layers of mat as this repair bears a resemblance to the firewall heater patch, just a smaller area.******
All my best,
Rob
Last edited by RobfromME; 07-22-2018 at 08:12 AM.
Reason: Found answer
I believe that I've made some progress!! Thanks to your guidance and advice last weekend, I took the plunge and ground the bumper down to align the style line on the LH side to match the fender (see post 9, picture 1). I tried all week to convince myself it wasn't too bad or I'd fix it when I painted the car, but I knew better. After re-visiting the notes I took during our discussion, I had the courage to take the plunge and go after it with my angle die grinder and 40 grit wheel. I'll get some pictures posted later. As expected it cut thru the glass and I had a hole, but the remaining glass was well feathered. I also did the RH side to get it better. Plenty of glass and structure left on that side.
Following your bumper post and Lingenfelter drag car post, I backed up the hole with some aluminum tape and used VPA to get the initial blend to the car. Then, I removed it gently, feathered and leveled the VPA, scuffed up the surrounding area and put 3 layers of mat with West Systems Epoxy on the back side. I may have to grind a bit of mat away and check for air pockets, but I think it's OK. I'd rather check and make sure than risk it, though.
I also had success using less fasteners to attach the bumper. Even with the VPA that was forced in when I first fit the bumper, two fasteners...the middle ones of the three along the front under the lights....pulled everything out of place due to a flange that fit well along the top 1/4", but then curved in and forward. Leaving these two out, I was able to get a good fit every time, and the bumper is so secure I can rock the car by pulling up/down and left/right on the bumper.
I'll try and get some pictures added to this post a bit later.
Using VPA and the method you suggested, I not only skim coated the bare glass, but found that I'd made quite a dip where it was exposed a couple years ago when I started and knew even less than I do now! I was able to fix that and it's nicely faired in now. Only have the left side of center to do now.
Once again, without your help, I'd still be struggling with the simplest of things I had no clue about. I truly appreciate all the time you are taking to help me. It's made all the difference.
I can as that I know it does not matter...but I always try to use the factory style retainers when I do these bumpers due to the retainers you can buy...are not the same in my opinion due to if they are the type where each one of them needs to be installed independently.
SO...you having issues when bolting it up can possibly be attributed to that and leaving out nuts or not tighten them up so much may bee what needs to be done as long as the bumper is on there securely.
It's been a bit of a learning curve, and a LONG way to go, but thanks to your coaching and interest in helping, I feel I'm making real progress, Dub. Here's some pictures now and with commentary on each as necessary.
Referring back to Post #1, Picture 1 and 2, and Post#9, Picture 1, the LH front corner now matches the style lines much better. I'm still struggling to get the bare glass covered with a thin layer of VPA...every time I put the VPA on, I end up sanding most away trying to smooth it out and have to do it again. In picture 1 it's finally covered. Picture 3 shows there's more bare glass to skim coat the VPA. Just part of the learning I guess. You can see the numerous times I've mixed VPA by the "rings"...especially in the third picture.
And below is the RH side, which had pretty good alignment with the fender, but had numerous other issues as seen in Post #9, Picture 4. Note again, I've still got some bare glass to cover with VPA skim coat. This one I've been trying 3 times now and by the time it's smooth, the VPA is gone. Now's a good time to buy Evercoat stock; with my (lack of) skills, the price should rise drastically and there won't be any VPA with date codes less than a month old!
The center section fits great now....thanks Dub! I took off the bumper, and using Dub's methods of transferring the mounting holes to the bumper, I ensured the ovals were correctly located and at the right height. Then, I ground away the excess resin, glass etc. on the inside upper radius so that each fastener fit properly. Some parts of the radi had so much excess that I took a quarter inch off! I still has as much glass as the remaining areas, but I whacked the hell out of the bumper again in those areas with a screwdriver as Dub suggests to make sure there were no air pockets. I checked the whole bumper, but spend extra time there fully expecting troubles. The fit is now much better. I still have some exposed glass to cover and more feathering to do. Had I known what I know now after talking to Dub and reading his posts, I'd never use those damned individual fasteners that they try and sell you with the replacement bumpers. What a pain in the a$$... I'm only using them because I have them here and bought them 3 years ago when I knew even less than I know now. Save yourself a bunch of aggravation and go with the original bumper retainers!
So, the front is making progress. A little more work, but I'm going to move to the back now. I'll do the final clean up, VPA covering of the glass, etc. when I get the rear bumper done as I'm sure the same will need to be done there, and then I can use the polyester primer surfacer more efficiently and spray both at the same time.
Thanks ,again, Dub! I'll be posting my next "help!" item shortly on the LH rear quarter we discussed.
 07-01-2018, 01:41 PM