When you click on links to various merchants on this site and make a purchase, this can result in this site earning a commission. Affiliate programs and affiliations include, but are not limited to, the eBay Partner Network.
For a fresh bumper, wash it off real well with warm soapy water. Let dry completely. Mix up your urethane primer, yeah you can use epoxy too, or urethane sealer ..either. Spray on adhesion promoter... something like THIS should work. Your local paint and body store would probably have it too. Get enough on. Check it to see it's doing what it's supposed to do in terms of softening the bumper surface. Then follow up with the primer/epoxy/sealer (whichever you plan to use)
If you are going to wetsand and make the bumper 'great' then use a 2k primer. If you have the rest of your car ready to paint and gong to paint right over the bumper cover ....w/o doing any sanding work, then before you go to seal your car, apply the adhesion promoter, then apply the urethane non-sanding sealer. I suspect you'll probably put on a primer so you can work out any imperfections in the surface.???
You don't really *need* flex agent, urethanes are flexible enough to handle quite a bit of flexing. But if you use it on the primer, it will help prevent cracking a bit better under a HARD flex...like if you run into something and it gets pushed in quite a bit. I haven't used flex in a couple decades, I didn't use it on my 81's nose, nor another bumper I just did. But then I don't run into stuff either. I probably wouldn't use it (myself)...but I hate to recommend to NOT use it. If you hit something hard enough to crack the urethane paint, you'll likely have scratches and gouges to fix anyway. But like I say, if you use it on your primer...the primer ought to be uncracked under a hard flex. Paint I wouldn't use it on...due to it's affect on colors. But for SURE use adhesion promoter to soften the urethane (test it beforehand to make sure what you buy is doing the job), or the primer will eventually flake off in big pieces like those ugly bumpers you see flaking off 2" square pieces...at the parking lots you drive through ..sometimes. (a result of bad prep-work).
Let us know how it turned out
.
That should do it. IfShow is how it looks when you get it on.
so if I understand wash dry use adhesion promotor then 2k primer couple coats sand wipe and tack. then base coat red couple coats wet sand wipe and tack. then 2k clear 2-3 coats. correct? do I let the base dry completely between coats or lay a coat on then when fully covered lay on the 2nd wet?
so if I understand wash dry use adhesion promotor then 2k primer couple coats sand wipe and tack. then base coat red couple coats wet sand wipe and tack. then 2k clear 2-3 coats. correct? do I let the base dry completely between coats or lay a coat on then when fully covered lay on the 2nd wet?
Yep. All those steps except you don't need to wetsand the basecoat. I wouldn't wetsand it. The basecoat will appear a little textured at first, but you'll see it will flatten out once the solvents have flashed off (becomes 'dry'). Now.....if by chance you get some big piece of dust or a bug you have to deal with in the base ....you can lightly rub that out with a spec of water on the corner of a piece of 1000 grit sandpaper (between coats), and dry off. If you DID have a couple boogers you need to 'rub-out' after your final coat of base (and it often happens), rub out the boogers carefully as you can with 1000# and a daub of water. Then spot-spray a small amount of base over the sand scratches. You don't want any sand scratches of marks on the base before you spray the clear. Anything you see on the final coat of clear will be encapsulated under the clear ..and then you're screwed. More than likely you will need 3 coats of base depending on the lightness of primer color. A 4th can't hurt either. Depends on the paint line. The more expensive products generally cover a lot better, need fewer coats.
Clear: Use a 1.3mm or 1.4mm nozzle/cap/tip in your spray gun (preferred) for best results. If your spray gun has a larger needle/nozzle you 'can' adjust your trigger so it doesn't apply the full amount of paint. Make sure you have some form of moisture trap or water separator. Or one of those on-gun moisture traps if you don't have one after your compressor. A moisture trap should be 25' from the compressor, so the warm/moist air coming out of the compressor, has time to cool down where the moisture condenses out into droplets (and can be separated by a moisture trap/filter). A moisture trap mounted to a compressor like some guys mount them don't do any good b/c the moisture droplets and humidity contained in the warm moist air go right straight through the trap. So an on-gun separator being 25' downstream will work. If your trap IS already 25' from the compressor, then you shouldn't need an on-gun moisture filter. You may know these things ...but just throwing it out there as a reminder. Lot of guys new to P&B work overlook it.
More on Base: So...again, back to the base: let the solvents flash off ..10-15 min between coats. The base will become dull in appearance. Touch the tape nearby, it won't be very tacky, or no tack at all. After your final coat of base I wouldn't run any tack rags over it between your base and clear unless you need to (any streaks left on the base you may see under the clear ESPECIALLY with metallics). But as I said above, if you DO have a couple boogers or mosquito legs to work out, let the base dry enough so you can lightly rub out any boogers (just those spots), and then just apply a bit of base over the areas you rubbed out (if it's a solid color ...but you'll need to be more careful and spray a larger area if it's a metallic color to get the metalflake to match). Or if it's dust sometimes I very carefully roll the back of my fingernail over the dust nibs and push them down into the base. Generally speaking you'll never see that under the clear. Esp darker colors like reds/blues, etc. Harder to do with mosquito legs though!! LOL.
Before your clear.... as stated before, let the solvents flash off the base and let it dry so it's not really tacky. A slight amt of tack is ok. Usually by the time you have your spray gun cleaned (from the base you sprayed), and your clearcoat mixed up, the base will be flashed-off & plenty dry ..so it's not like you're waiting around with your hands in your pockets. Spray on 2-3 coats of clear, let the clear flash 10-12 min between coats (depending on temp/humidity). Probably 2 coats is enough if you're spraying 4:1 clear, but 3 won't hurt either. If you wait longer before the last coat of clear you'll usually get a slightly higher DOI (shine). The reason for that is a more 'dry' clear will deflect solvents out the top (which is where they're going to go anyway), not absorb them (as much). Don't spray this stuff in the sun..the panel temps will be too high for good flow-out. If the days are hot, use the right temp reducers. Respect Safety.Read Warnings & Make sure you are using a good quality *Paint* respirator and other safety products!!
If you go to Youtube ...look up PaintSociety ...he has some pretty good videos.
Yep. All those steps except you don't need to wetsand the basecoat. I wouldn't wetsand it. The basecoat will appear a little textured at first, but you'll see it will flatten out once the solvents have flashed off (becomes 'dry'). Now.....if by chance you get some big piece of dust or a bug you have to deal with in the base ....you can lightly rub that out with a spec of water on the corner of a piece of 1000 grit sandpaper (between coats), and dry off. If you DID have a couple boogers you need to 'rub-out' after your final coat of base (and it often happens), rub out the boogers carefully as you can with 1000# and a daub of water. Then spot-spray a small amount of base over the sand scratches. You don't want any sand scratches of marks on the base before you spray the clear. Anything you see on the final coat of clear will be encapsulated under the clear ..and then you're screwed. More than likely you will need 3 coats of base depending on the lightness of primer color. A 4th can't hurt either. Depends on the paint line. The more expensive products generally cover a lot better, need fewer coats.
Clear: Use a 1.3mm or 1.4mm nozzle/cap/tip in your spray gun (preferred) for best results. If your spray gun has a larger needle/nozzle you 'can' adjust your trigger so it doesn't apply the full amount of paint. Make sure you have some form of moisture trap or water separator. Or one of those on-gun moisture traps if you don't have one after your compressor. A moisture trap should be 25' from the compressor, so the warm/moist air coming out of the compressor, has time to cool down where the moisture condenses out into droplets (and can be separated by a moisture trap/filter). A moisture trap mounted to a compressor like some guys mount them don't do any good b/c the moisture droplets and humidity contained in the warm moist air go right straight through the trap. So an on-gun separator being 25' downstream will work. If your trap IS already 25' from the compressor, then you shouldn't need an on-gun moisture filter. You may know these things ...but just throwing it out there as a reminder. Lot of guys new to P&B work overlook it.
More on Base: So...again, back to the base: let the solvents flash off ..10-15 min between coats. The base will become dull in appearance. Touch the tape nearby, it won't be very tacky, or no tack at all. After your final coat of base I wouldn't run any tack rags over it between your base and clear unless you need to (any streaks left on the base you may see under the clear ESPECIALLY with metallics). But as I said above, if you DO have a couple boogers or mosquito legs to work out, let the base dry enough so you can lightly rub out any boogers (just those spots), and then just apply a bit of base over the areas you rubbed out (if it's a solid color ...but you'll need to be more careful and spray a larger area if it's a metallic color to get the metalflake to match). Or if it's dust sometimes I very carefully roll the back of my fingernail over the dust nibs and push them down into the base. Generally speaking you'll never see that under the clear. Esp darker colors like reds/blues, etc. Harder to do with mosquito legs though!! LOL.
Before your clear.... as stated before, let the solvents flash off the base and let it dry so it's not really tacky. A slight amt of tack is ok. Usually by the time you have your spray gun cleaned (from the base you sprayed), and your clearcoat mixed up, the base will be flashed-off & plenty dry ..so it's not like you're waiting around with your hands in your pockets. Spray on 2-3 coats of clear, let the clear flash 10-12 min between coats (depending on temp/humidity). Probably 2 coats is enough if you're spraying 4:1 clear, but 3 won't hurt either. If you wait longer before the last coat of clear you'll usually get a slightly higher DOI (shine). The reason for that is a more 'dry' clear will deflect solvents out the top (which is where they're going to go anyway), not absorb them (as much). Don't spray this stuff in the sun..the panel temps will be too high for good flow-out. If the days are hot, use the right temp reducers. Respect Safety.Read Warnings & Make sure you are using a good quality *Paint* respirator and other safety products!!
If you go to Youtube ...look up PaintSociety ...he has some pretty good videos.
Good luck!!
.
I truly appreciate all the tips. I dip have a quality respirator a 60 gal 2 stage compressor and a cheap spray gun! lol. I found a panel 10x10 pop up canopy at Home Depot for under 100$ im going to get and set it up in the driveway so I'll be out of direct sun and wind. will be using pig products black primer adhesion promoter and singe stage torch red paint.
went out today and washed the bumper with dawn and 5000 grit polish pad. rinsed washed again rinsed and dried. then wiped the entire bumper off with rubbing alcohol. 3000 grit pad on a few scratches and dings in the plastic everything is now smooth to the touch hopefully by next weekend ill be ready to see how badly I can screw this up!
...by next weekend ill be ready to see how badly I can screw this up!
Naaaah, you'll be fine. Sounds like you are thorough in your work and planning. Just a bunch of steps, but once you do it, you'll have them down. If you look at the tip of your spray gun, (or the nozzle ..under the cap) does it say something like 1.3 or 1.4??
Naaaah, you'll be fine. Sounds like you are thorough in your work and planning. Just a bunch of steps, but once you do it, you'll have them down. If you look at the tip of your spray gun, (or the nozzle ..under the cap) does it say something like 1.3 or 1.4??
Best of luck. Ask any more questions that come up
tip says 1.4. I actually found some omni torch red paint I bought late 2023. maybe 4 ozs and omni hardener. I think I'll try to spray the under panel that comes with the kit. completely unseen so I can hone my skills on that! lol
heres a question. for the size of the front bumper ballpark how much primer and base coat and clear would I need? will a qt of each cover a few coats of each? im thinking 3 coats of each with a rattle can of adhesion promoter to start with. just guessing 1 coat of the promoter will suffice
@Bubbagum if im trashing your thread I apologize and can start a new one. this just sorta evolved since I have little paint knowledge. just let me know
1) 2017 ...those are larger bumpers than the older C3's/C4's ...front or rear?
2) How much of the old red Omni base did you say you have left? Is it 1/2 on the bottom of the can? More/less? Is it the same color as your car (or close)?
3) Are you going to order Omni base?
I think you're going to need to order a pint of base. Esp if it's Omni. IDT a half pt (of OMNI) will be enough. Unless you have half a pint left now. Plus they can usually get a little closer color match on a pint than half a pt. But if you have half left now, yeah, probably 1/2 (of new) would be enough. Did the old red match your car perfectly? Or was that from another project?
IDK if you can even buy a pint of clear. Might as well get a quart. And a pint of activator.
If your current new bumper is really nice...like no major imperfections you think you need to deal with ....and you dont think you need to do any sanding with it (to fix anything), you *can* SKIP the sanding-primer stage. To do that you would apply the adhesion promoter, then a sealer (non-sanding) ....or if you don't have sealer, apply one med-wet coat of epoxy primer or 2k primer (thinned out). Those would be your undercoats. Let that flash off, then go right to base ...then clear. That would save you a lot of time. But if the bumper cover has a few boogers you wanted to fix, then let the 2k primer dry, wetsand ...get it nice how you want it to be. Then you can paint over that. But if you don't need to.....why do the extra work? Going straight to paint would save a day's worth of work and waiting.
1) 2017 ...those are larger bumpers than the older C3's/C4's ...front or rear?
2) How much of the old red Omni base did you say you have left? Is it 1/2 on the bottom of the can? More/less? Is it the same color as your car (or close)?
3) Are you going to order Omni base?
I think you're going to need to order a pint of base. Esp if it's Omni. IDT a half pt (of OMNI) will be enough. Unless you have half a pint left now. Plus they can usually get a little closer color match on a pint than half a pt. But if you have half left now, yeah, probably 1/2 (of new) would be enough. Did the old red match your car perfectly? Or was that from another project?
IDK if you can even buy a pint of clear. Might as well get a quart. And a pint of activator.
If your current new bumper is really nice...like no major imperfections you think you need to deal with ....and you dont think you need to do any sanding with it (to fix anything), you *can* SKIP the sanding-primer stage. To do that you would apply the adhesion promoter, then a sealer (non-sanding) ....or if you don't have sealer, apply one med-wet coat of epoxy primer or 2k primer (thinned out). Those would be your undercoats. Let that flash off, then go right to base ...then clear. That would save you a lot of time. But if the bumper cover has a few boogers you wanted to fix, then let the 2k primer dry, wetsand ...get it nice how you want it to be. Then you can paint over that. But if you don't need to.....why do the extra work? Going straight to paint would save a day's worth of work and waiting.
Does that makes sense?
1.4mm tip is fine.
1. its the front but its a zr1 style bumper so its even larger than the oem z06 I have
2.it was an 8 oz can and its about half full. to be honest I dont even know what I painted with it! I thin k I was trying to paint some z07 logos I had engraved into some wheels I had made but it wouldn't stick to the polished wheel so I gave up.
3. the paint store has both omni and ppg and other brands . I doubt ill mix the 2 cans (old/new) on the bumper but I could use the old paint to see how the pattern is out of the gun the distance from the part I need to be etc. then clean it and use the new pint /qt whatever I can get for the visible bumper
4. I have activator/hardener in a full can never opened. bought 2 only used 1 . I tried a project in the past with a c/f roof panel that was skipped off the road. sanded, epoxied and then this was when I bought the gun ,respirator and laid down 4 coats of clear on the roof. did great looked like glass then coat 4 was either to far away or I bumped the air adjustment and it laid down like a matte finish! had to sand it and do it over lol. so if I do use the omni I have the proper activator for that brand
5. washed the bumper twice yesterday and didnt have an\y scotch pads so I used a 5000 grit pad. found a few little (less than 1") spots on the front edge that had been dinged and was ragged. sanded them out entire bumper is smooth to the touch so I think its ready for adhesion promoter then on to the big show.
Did your previous color match real well? on a nose piece, you'll notice it if the color is off even a smidge. If the previous can was 'right on' you could use that as your top coat. Or test-spray the new and see how well that matches. if you already have 1/2 pint, I would think another 1/2 pint would do it. But OTOH, usually easier to get a better match on the full pint. If you think you'll ever need more... that extra would come in handy. But another 1/2 pint plus what you have should be plenty I would think. There are a lot of odd angles on a front bumper that consume paint.
4 coats seems like a lot (to me).... but if that's how you roll. I put 2 coats on my older Jetta I just sprayed. Laid them on heavy.
and spray into your hardener/activator before you put it back on the shelf ...it'll extend the life ...a lot. Years. Expensive for a weightless can of inert air, but it pays for itself pretty quick with auto paint hardeners. Well, good luck
so heres a slight ? twist to my project. all my research was for urethane paint. go to English color and they tell me after looking at the gas cap I brought in and all the paint codes etc that the paint I need is a acrylic enamel . will this change anything in the process of painting the bumper?
2k primer and activator
acrylic enamel paint ,reducer and hardner
2k clear and harder.
was told omni paint products are owned by pig and since I already had some of what I needed I went with that to keep all the paints and other additives in uniform.
They're saying your 2017 Corvette has acrylic enamel on it? That's the year of your car, right? Or did I miss something fundamental in this thread? Did it have a $1,200 paint job on it at some point? Nobody's been using A-E for years. Maybe SS urethane?? I think they've been inhaling too many paint fumes over at your local paint store. Tell them they need to improve their ventilation system ....ha ha...lol.
It 'might' be SS Urethane. You could do that too. A lot of solid-color cars are not clear-coated. But many are. Clear just gives you the ability to fix mistakes, bugs, runs, dust and whatever whereas SS you can't. You really don't want to buff SS, esp Red. It oxidizes pretty quick (gets dull).
They stopped using Acrylic Enamel in the 80's..... It's a great product ...for your mom's garden bench!. The shine usually lasts about 2-3 yrs on A-E. Ok...maybe 5 if you use a thick liquid-glass hardener. Well, then you might as well have sprayed Urethane. ...do you already have A-E paint?
They're saying your 2017 Corvette has acrylic enamel on it? That's the year of your car, right? Or did I miss something fundamental in this thread? Did it have a $1,200 paint job on it at some point? Nobody's been using A-E for years. Maybe SS urethane?? I think they've been inhaling too many paint fumes over at your local paint store. Tell them they need to improve their ventilation system ....ha ha...lol.
It 'might' be SS Urethane. You could do that too. A lot of solid-color cars are not clear-coated. But many are. Clear just gives you the ability to fix mistakes, bugs, runs, dust and whatever whereas SS you can't. You really don't want to buff SS, esp Red. It oxidizes pretty quick (gets dull).
They stopped using Acrylic Enamel in the 80's..... It's a great product ...for your mom's garden bench!. The shine usually lasts about 2-3 yrs on A-E. Ok...maybe 5 if you use a thick liquid-glass hardener. Well, then you might as well have sprayed Urethane. ...do you already have A-E paint?
.
yes the mae omni paint I had from 2023 was acrylic enamel . so they tell me. it has all the gm markings on the can and matches so I bought another pint of it and the reducer and hardener that goes with it. so I guess thats what im using. its a 2k omni 2:1 clear with a different hardener had to get another can of that as well I didnt have enough and prolly not enough to finish the job in clear at 3 coats. qt of primer and activator which I needed anyway I went.
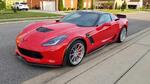
yes 2017 torch red car and color. lol tried to set up the canopy and sides today. beautiful; day got home started in my driveway and winds to mach 7 speed and just about ripped everything to shreds. so abandoned that im going to have to park the car outside remove my maxjax lift and set it up in the garage. only issue is it has to come down before I crash at 5 for work since the storms come most every nite (think half of what hit st Louis yesterday!
so yeah my simple diy is turning into a major ordeal.
im sitting here thinking about this and I think what ill do is on monday go get a qt of urethane torch red and the needed activators and hardeners. use the primer I have and if the clear I have will work ill use that its a 2k clear so it should? work. I only pid 59$ for the pint of acrylic enamel cant take it back but I really only want to do this once ion im going to do it!
I probably would...just b/c urethane is more flexible (for bumper cover). But that's me.
Save the red A-E when you buy a fire hydrant at a swap meet (for the yard)... lol. Paint keeps literally forever. I have some paint that's probably 40 years old in the can I use now and then. I have a LOT of old paint in small cans around. Every once in a while you need that color. Your $59 won't go to waste. Sometime you'll need a decent red to paint something ....and you'll have it. And by that time the same paint will be $89... so you actually have 'gamed-the-market'
I probably would...just b/c urethane is more flexible (for bumper cover). But that's me.
Save the red A-E when you buy a fire hydrant at a swap meet (for the yard)... lol. Paint keeps literally forever. I have some paint that's probably 40 years old in the can I use now and then. I have a LOT of old paint in small cans around. Every once in a while you need that color. Your $59 won't go to waste. Sometime you'll need a decent red to paint something ....and you'll have it. And by that time the same paint will be $89... so you actually have 'gamed-the-market'
no worries I hope a qt of urethane will give me the 2-3 coats I need since the acrylic was 130$ a qt. guessing the urethan is more. looks like the omni 168 hardener I have is what the urethane uses so I have a can and a half of that. .
this is what I have currently will get the omni urethane on monday
theres no going back now!! Adhesion promoter light coat waited 5 minutes tgen full wet coat waited 15 minutes then light coat 2k primer waited 15 minutes tgen full wet coat sprayed until I was out of paint in the cup. Letting it fully dry for at least a day then I’ll sand it 600/800 grit pads. Won’t do paint until next sat rain forecast every day.
if I spray tge urethane paint sat do i have to do the clear immediately after or can I wait a few days? My paint booth!!
Kudo's for getting the project moving forward. You might as well put on a mist guide-coat so you can see yow your sanding is going. You'll need to wetsand the primer to about 600# (start with 400#) before you put the paint on.
The overall finish will look a bit better once wetsanded anyway.
Kudo's for getting the project moving forward. You might as well put on a mist guide-coat so you can see yow your sanding is going. You'll need to wetsand the primer to about 600# (start with 400#) before you put the paint on.
The overall finish will look a bit better once wetsanded anyway.
I have some 600 /800 wet sand pads to use. all the primer is on and I moved out into my house. (single guy!! lol). ill let it set for a day or so and start sanding. had a few runs and a few spits but overall looks decent. found 2 spots in the curve at the headlight where the plastic has a sharp edge from the mold. guess ill have to file them down sand and repaint it in primer next weekend. my buddy always said if its perfect in primer it will be perfect in paint. if not the paint will show all the imperfections and primer is CHEAP! so thats my goal for now perfection. in primer
can I spray the paint 1 day and the clear later? or do I need to spray paint and clear all at once? I would prefer to do paint one day clean everything and then do the clear a day later if its possible
Are they're scuff pads? Or sanding pads like Ii showed above?
I would personally use sandpaper, just to 600. Scuff pads won't knock off the orange peel like sandpaper will. And you want a good adhesion... (not flaking). Don't miss one single square mm...
Are they're scuff pads? Or sanding pads like Ii showed above?
I would personally use sandpaper, just to 600. Scuff pads won't knock off the orange peel like sandpaper will. And you want a good adhesion... (not flaking). Don't miss one single square mm...
don't really see any orange peel in the primer. its a very smooth coat and few places I didnt get enough coverage will have a rough feel. a few small runs and 2 spots 1 on each side of the headlight edge that need to be filed down. thats about it.
I see orange peel all over on your close-up pics. Not cutting down your work. Primer always has texture.
Spray the bumper with a light mist coat of dark (sandable) primer (red or black color). Let dry a few hours. Then wetsand the entire bumpers with 400 grit ....until all the primer has been removed. Put a few drops of soap in your wetsanding water. The wetsanding with a guide coat is an important step. The guide-coat lets you see things you can't see. Then go over the top portions with 600#. Trust me on this one. You'll thank me when you're done. Here is what a guide-coat looks like. Hold the can further away than normal, and faster hand motion. You just want a mist.
Otherwise the texture that you can't see now will be amplified by the time you get to your final coat of paint (and will not look good). And if you spray them single-stage, you really can't do much to fix them (like you can with CC). Sure you can wetsand and buff out the texture but then you open yourself up to them becoming chalky (oxidized) over and over (have to rebuff every year).