When you click on links to various merchants on this site and make a purchase, this can result in this site earning a commission. Affiliate programs and affiliations include, but are not limited to, the eBay Partner Network.
Last April I finally decided to pull the trigger and start my dream car.
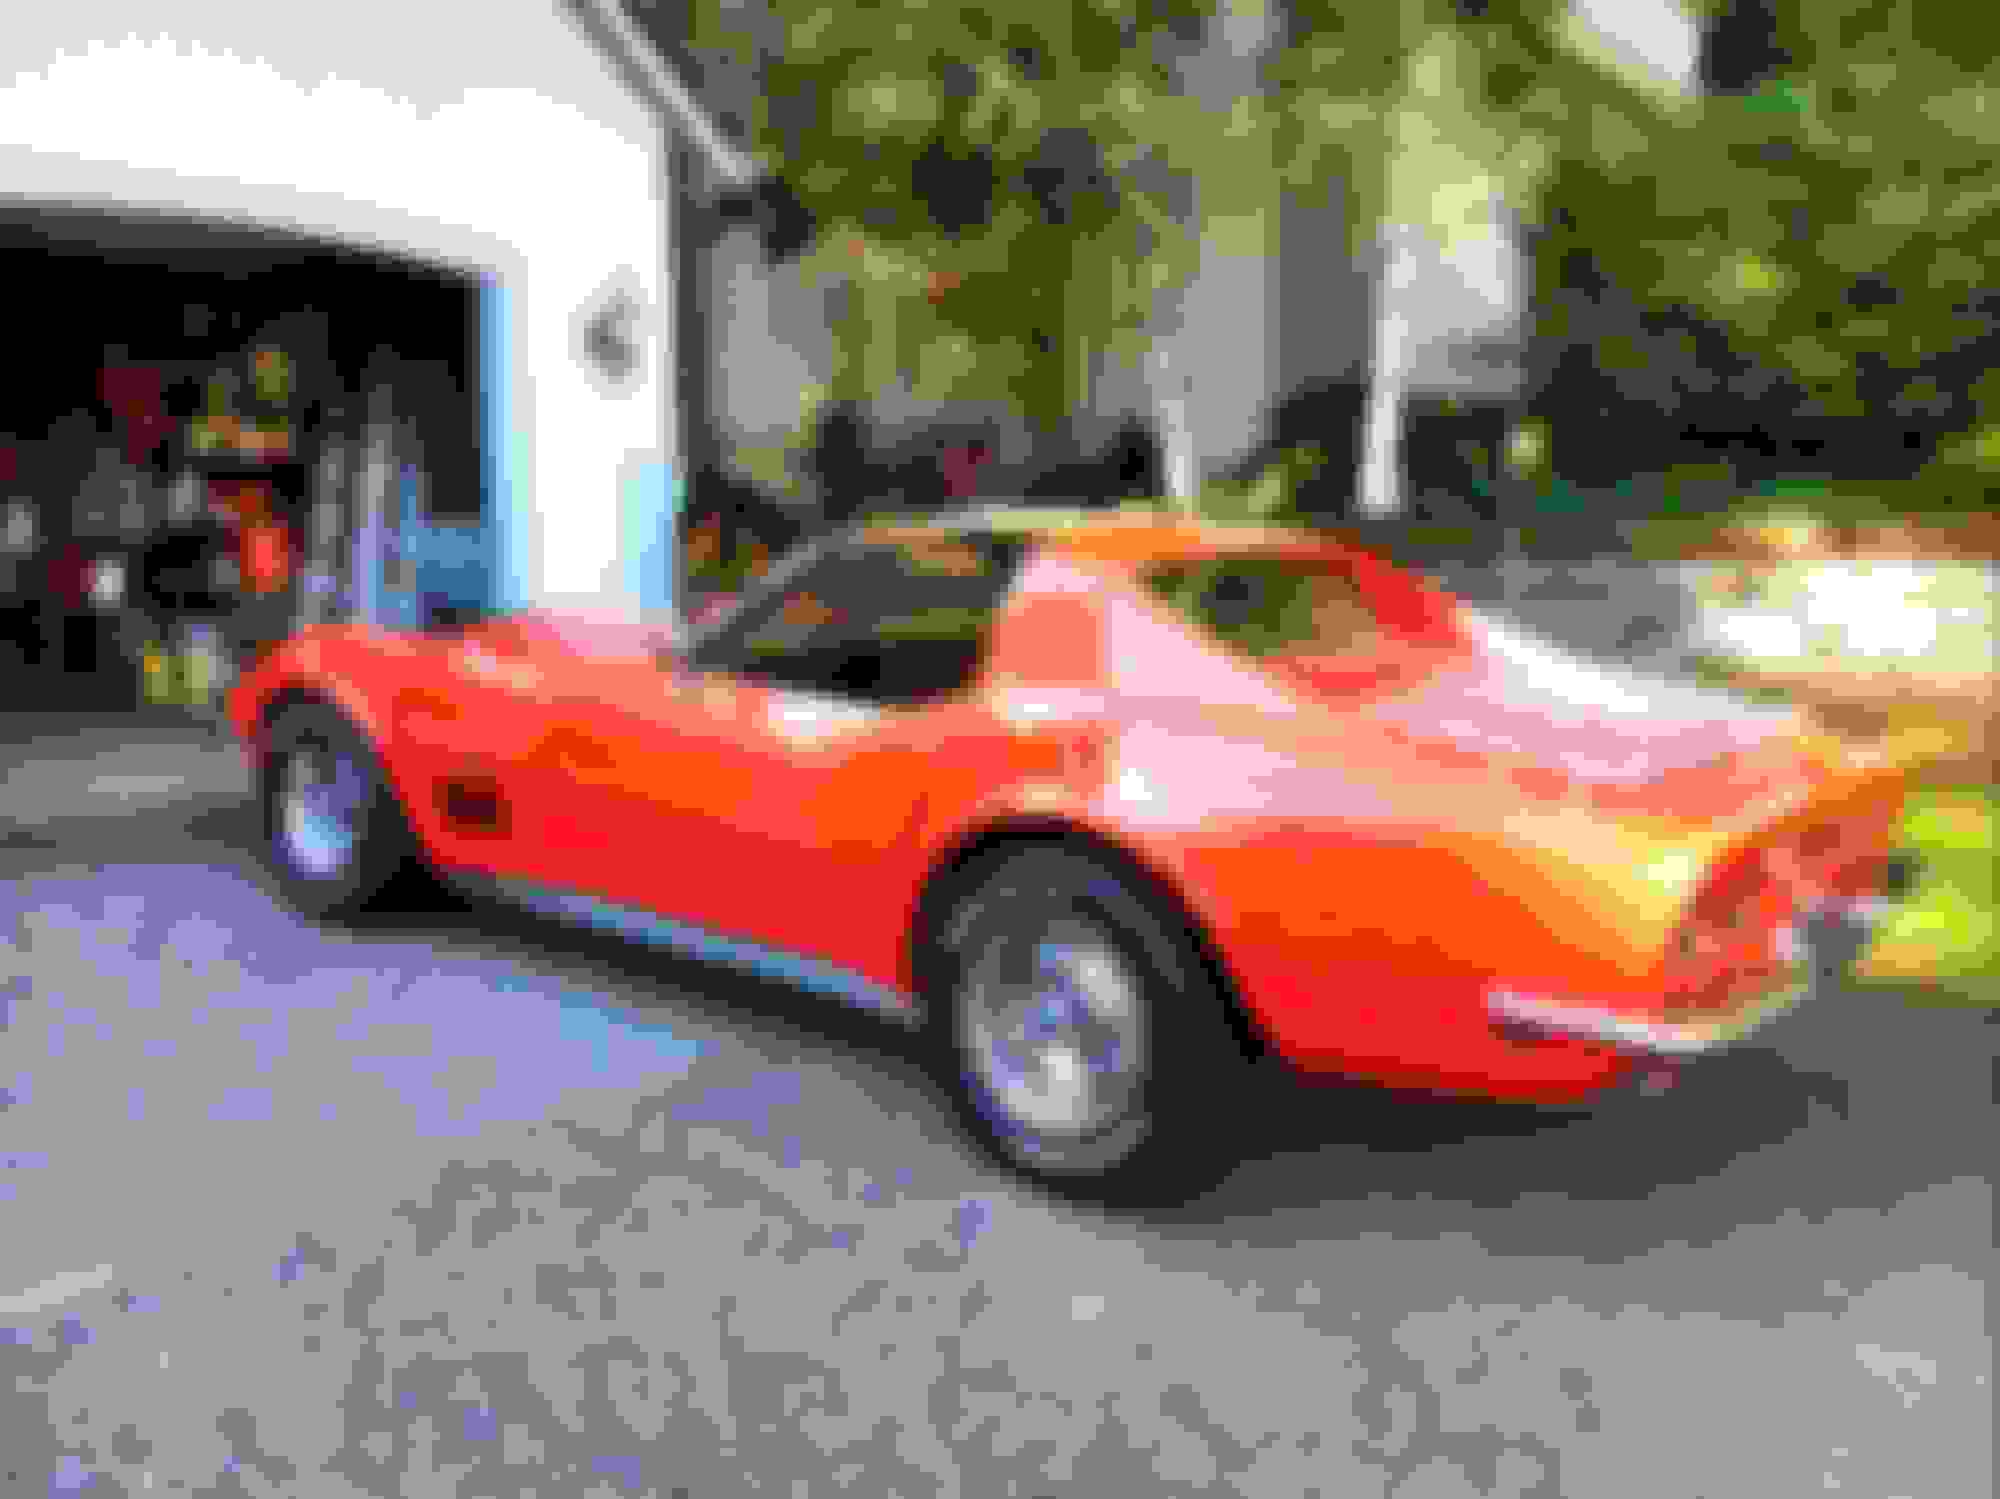
Since I was 5 I wanted a red 68 Corvette. '68 partially because it's my favorite body style, partially because that is the same year I was made!
I found the right car: Red 68, 4-speed, 454, good exterior, very good interior, and not original (since I was going to mod it, I didn't want to mess up a numbers matching car).
I created version 1 (V1) in April which was just recovering the seats and new exhaust. Then I drove it all summer. Heavily under powered and suspension was made of marshmallows, but overall I enjoyed it big time. V2 will be brakes, suspension, steering, bushings, wiring, and engine (yeah, subtle upgrade).
I'm now working on V2 this winter and I am pretty far along, but my twin bro suggested I start a thread to show what I have done and get some feedback. Thanks already for those who have helped me with some information along the way. Here are some pics of V1. I will make quite a few rapid fire posts to catch up.
And with all of those changes put to bed, I bring this thread to a close.
My build is complete. Of COURSE there will be little things here and there, but I have met my requirements (of which I DID write down at the beginning).
My goal was for the car to look fairly stock (except for the wheels) but drive like a modern, bat out of hell sports car. Mission accomplished I think?
You all have been immensely helpful throughout this entire build. Thank you each and every one who helped me.
And a big thank you to my brother Bill, even from 1800 miles away, he was my guide through all of this.
Now it is time to drive and have fun.
I will leave this thread with some shots my son took to have framed for me.
As the summer set in Seattle, I decided it was time to start the new build. I pulled it into the garage and started. First, the brakes. I upgrades to a set of 4 piston Wilwood brakes all the way around. I was a little disappointed because they still didn't quite perform like I wanted when I tested them. Thanks to the forums I figured out I hadn't had the right angle bleeding the master cylinder. Luckily my driveway is steep enough I just backed up it and parked on the hill. Bamm!!! All bled!
Then I really started exercising the old credit card and started ordering suspension. Now I know there is a lot arguing about which suspension to go with here, and I listened to all of you. Then I decided to go with what I wanted most. I went with the Sharkbite dual adjustable coil over stage II system. I was pretty impressed with it overall. They had the wrong bolts at one point but I made friends with the local hardware kingdom (It's not just a store. It's magical).
As I did the suspension, I replaced all the bushings, cleaned and painted the engine compartment, and made sure everything was clean. New steering components and ball joints.
I created version 1 (V1) in April which was just recovering the seats and new exhaust. Then I drove it all summer...suspension was made of marshmallows...
It was about this time that the family and I were going to take a Christmas Day flight to Phoenix to warm up for a week. The night before I told my wife that I almost wish I could just stay here and work on the car because it is in such an exciting stage.
Well, the next day my wife, being the caring individual she is decided we would stay here. Of course she did that by accidentally falling down the stairs and getting a spiral tib-fib fracture. Broken leg on Christmas day. On top of that, there were 5' of new snow on the ground and we live on a steep assed hill. Well, after 23 years of marriage you think you know what a person can handle. I was wrong. She was a super hero! So damn strong! Our neighbor swooped in and took us to the ER and as a family we hung out. We sent the kids down the next day and my wife had surgery 3 days later to get a rod in her tibia. I played butler all week taking care of her.
But the only bright side was that I got a TON done on the car!!!!!
So that week I cleaned up the engine bay and prepped it for brake lines and a bunch of changes.
Thanks to my twin bro for leading the way on this.
He built a kickass 67 Yenko Camaro a couple of years ago he sold at Barrett-Jackson. I definitely could not have done this without him!!!!
So then I thought back to the days of our 71 Chevelle and how we chased wiring gremlins all the time.
So I ordered a full new wiring harness from Zip. What an awesome kit! It was perfect! I will say that tearing apart the dash was the most harrowing thing I had done so far. It was damn nice to start with but so many things didn't work.
Front harness first. No problem. Just go slow. Back harness then. Surprise, those little bolts with the grounds that sheered off are actually needed! OOps. looks like new tail light housings are on the way. And while I am at it, let's make this thing more visible from the back so I put in LED tail lights and the new flasher unit. Then the dash harness which took 3 days or so on it's own. Oh yeah, a new steering column and wheel too.
After that we unit testing everything and it all checked out.
Some things I learned:
1. Don't ground the positive battery lead. Yikes and oops together.
2. Ground wires matter. Hook 'em up right.
3. Dashboards aren't quite as scary as they look (ok they are, we just made it through).
4. Pay for the nice harness and get a full light bulb set to put in.
We had pulled the motor, so I thought I would include some pics of that. It was a mess. Every bolt was loose. The water ports looked like mud. The cam was worn. And it all explained why it felt like about 200hp when we drove it. But the M-20 trans was great, so I wanted to finish that.
1) Amazon stock soared
2) We decided to go with a crate motor with a warranty and known
3) There may have been beer or martinis involved......
After much searching I decided to go to Blueprintengines.com for their aluminum head 496. I liked the way it was built and the fact that so many places used them, I decided to go for it.
After a 15 hour flight back from India with a broken entertainment system and no booze on the flight (don't EVEN get me started), I went to Barrett-Jackson with my brother. Blue Print was there and I save 10%, so what a deal!!!!
(Yes, beer was involved again).
Oh, and I got to meet Kenny Chesney. That was cool.
Last edited by scottjamison; Mar 27, 2018 at 12:12 AM.
The max torque of an M-20 transmission turned out to be 485 ft-lbs.
I would be pushing 100 over that.
So, after more research, it was off to Silversport transmissions for their Perfect Fit Tremec TKO600 5-speed kit. The has been the costliest surprise so far.
1. All new suspension
2. Wilwood brakes
3. New bushings
4. All new steering with rag joint and column
5. New brake booster and M/C
6. All new wiring
7. Tail lights and head lights
8. 5-speed trans
9. Dual disc racing clutch
So what's left? Hmmmm..... something is remaining.....
While the motor is awesome and amazing, it was a Mark VI block and that came with two unexpected features (or lack thereof).
1. No provision for a mechanical fuel pump
2. No mount for the mechanical clutch linkage
So because of those two things I had to spend another $900 on an electrical fuel pump and a conversion to a hydraulic clutch actuation.
Thee good part is that my system is now a hydraulic clutch pedal to a dual disc racing clutch to an awesome 5-apeed to a 500hp engine. But it was a pain in the butt to get that clutch master cylinder in.
But in the end it all worked out.
So this weekend we installed it.
This is amazing.
Some notes:
- New radiator with dual fans
- New 150amp alternator
- New pulleys
- MSD starter
- Hedman headers (That DID need a bit of modifying)
- We switched out the air gap manifold to a performer to make the RPM range more streetable
I think that's it
Here is the before and after. Wow what a change and double the horsepower!
Nice work! I wonder if having an "off season" would help me get a lot of those bigger jobs done. With the weather being nice for driving all year it's hard to commit to having the car off the road for long!
Thanks to my twin bro for leading the way on this.
He built a kickass 67 Yenko Camaro a couple of years ago he sold at Barrett-Jackson. I definitely could not have done this without him!!!!
That's one good looking individual! (Says the twin brother)
So then I thought back to the days of our 71 Chevelle and how we chased wiring gremlins all the time.
So I ordered a full new wiring harness from Zip. What an awesome kit! It was perfect! I will say that tearing apart the dash was the most harrowing thing I had done so far. It was damn nice to start with but so many things didn't work.
Front harness first. No problem. Just go slow. Back harness then. Surprise, those little bolts with the grounds that sheered off are actually needed! OOps. looks like new tail light housings are on the way. And while I am at it, let's make this thing more visible from the back so I put in LED tail lights and the new flasher unit. Then the dash harness which took 3 days or so on it's own. Oh yeah, a new steering column and wheel too.
After that we unit testing everything and it all checked out.
Some things I learned:
1. Don't ground the positive battery lead. Yikes and oops together.
2. Ground wires matter. Hook 'em up right.
3. Dashboards aren't quite as scary as they look (ok they are, we just made it through).
4. Pay for the nice harness and get a full light bulb set to put in.
Just like my Camaro, AAW puts some dang nice wiring harnesses out!
WOW! What a great build and a great thread....I love the fact that the thread got right to the chase and mostly finished it, vs waiting months/years for updates.
Looks like you guys did a great job on everything. You'll love driving it with the 496.... So much torque/power at any rpms...
BTW, if you need more hood clearance(which I think you will), get a repro LT1/427 air cleaner from any of the vendors for about $70. It has a 2" drop base, and the wing nut area is more recessed so you can shorten your stud and drop the wing nut much lower and fit flush with the top of the lid.
Designer Imagines A Corvette That Looks More Like a Corvette Than the Corvette
Slideshow: A Jaguar designer's personal project imagines what a modern front-engined Corvette might look like if Chevrolet revisited the golden age of the Stingray.


 looks like new tail light housings are on the way. And while I am at it, let's make this thing more visible from the back so I put in LED tail lights and the new flasher unit. Then the dash harness which took 3 days or so on it's own. Oh yeah, a new steering column and wheel too.


