C5 C6 Corvette: How to Remove Rear Sway Bar
Removing the factory rear sway bar is a very simple and quick procedure that can be done by the most novice mechanic with only basic hand tools. Learn how to remove it here.
This article applies to the C5 (1997-2004) and C6 Corvette (2005-2013).
At some point in the ownership of your Corvette you may find it necessary to remove the rear sway bar. If you add an aftermarket exhaust, you will need to temporarily move it out of the way to complete your install. Perhaps you will want to put a larger, stiffer sway bar on, requiring you to remove the factory piece. You may even desire to run without it at track day to see if your car corners better, especially in wet track conditions. Regardless of the reasons, removing the rear sway bar is easy, free and only requires common hand tools.

Materials Needed
- Low profile jack, jack stands (or ramps)
- Torx 45, 6mm, 18mm, 15mm wrench
- 18mm socket
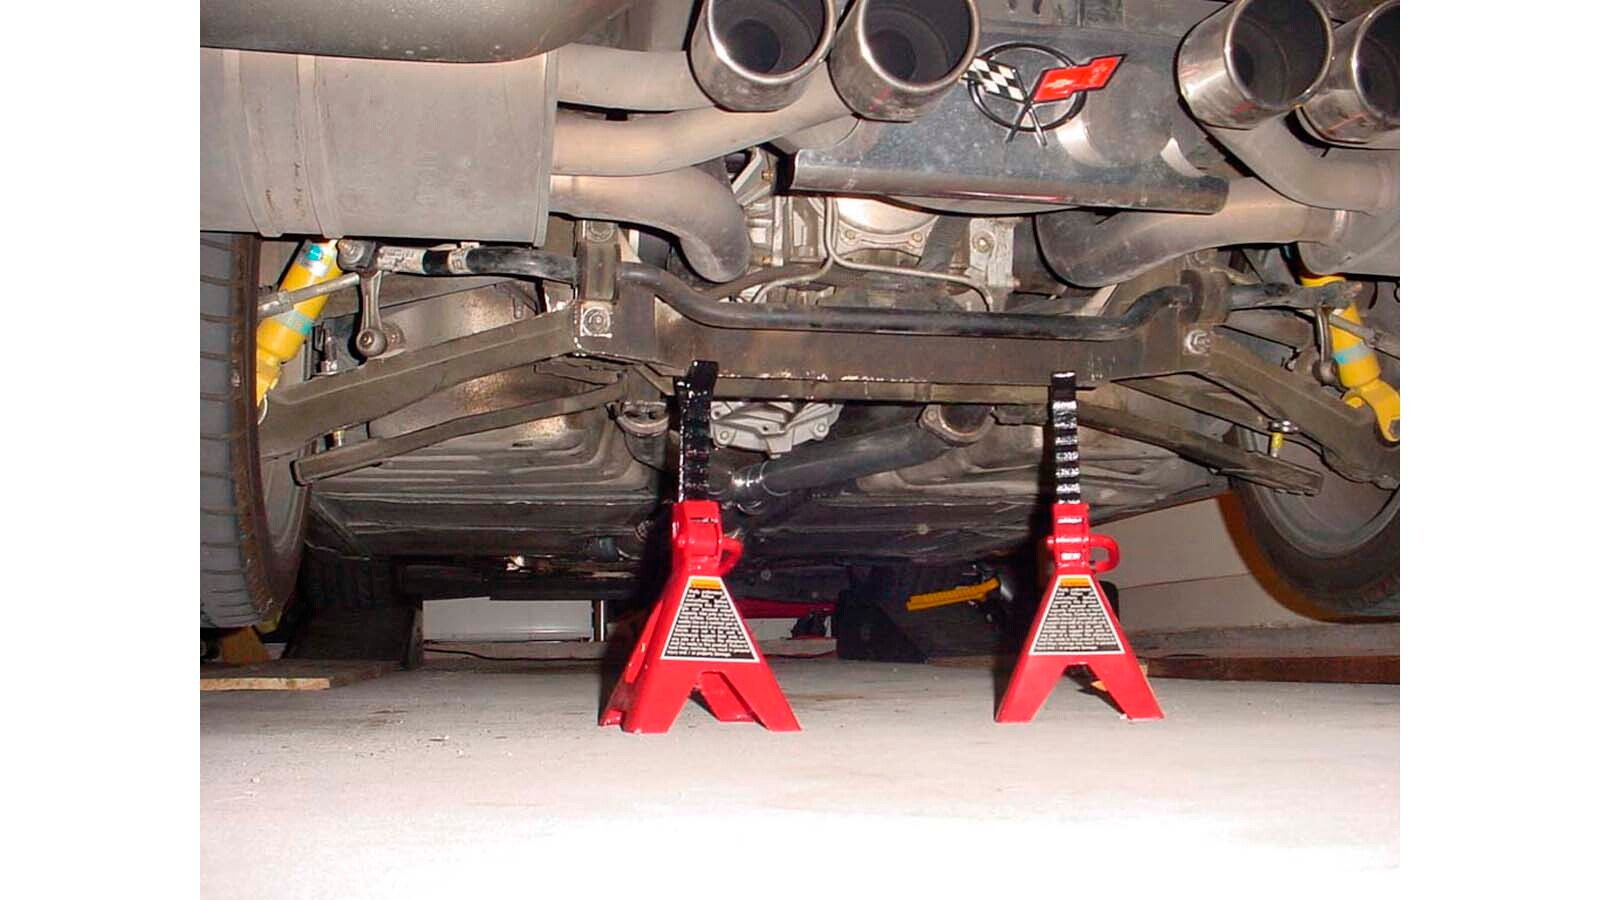
Step 1 – Raise and support rear of car
Although it is entirely possible to remove the rear sway bar without raising the car, it is advised that you do raise it to allow yourself room to work safely. Using your low profile jack and the factory recommended jacking points, lift the rear of the car and secure properly with jack stands. You could also back the car onto jack stands to create sufficient room to work safely. View the related article below for more information.
(Related Article: How to Jack Up Your Vette - CorvetteForum.com)
Step 2 – Remove the sway bar
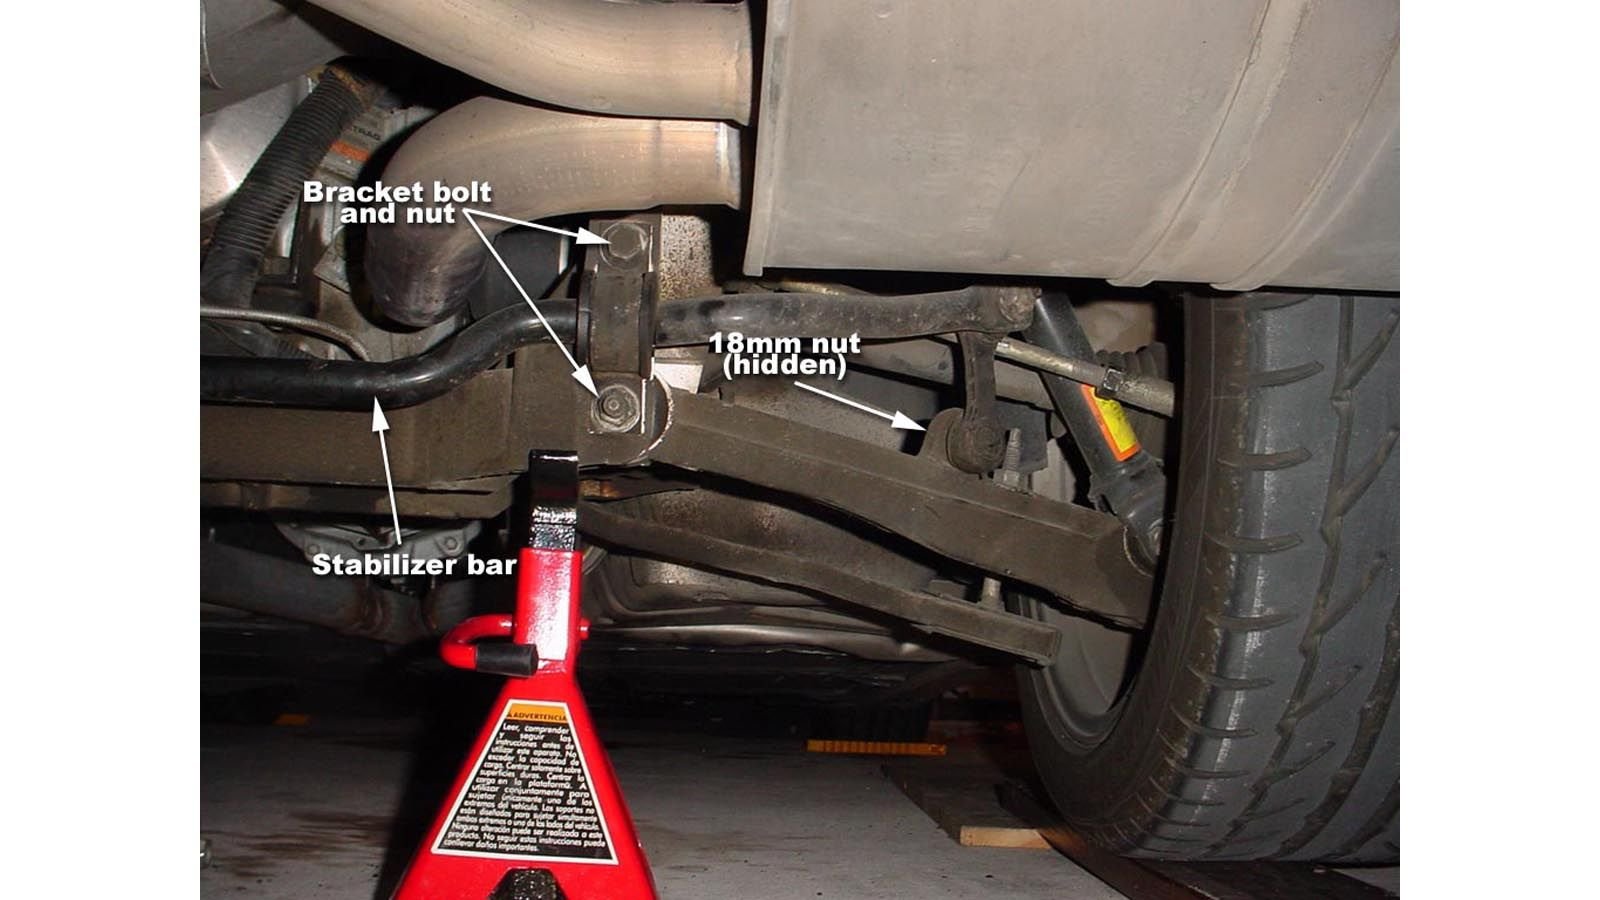
Begin by unbolting the bottom nut on the endlinks, using either a Torx 45 or 6mm wrench to keep the nut from spinning and an 18mm wrench to loosen the nut.
Next, remove the two bolts going through the bracket securing the sway bar to the rear crossmember. The bottom bolt actually has a nut on the back that you'll have to use a 15mm wrench on to keep from spinning, and your 18mm socket on the front to remove. The upper bolt will simply require your 18mm socket to loosen and remove. Once you have unbolted the endlinks and two bolts from the bracket, repeat the same procedure on the other side. At this point the entire sway bar should easily be removed from the car. Be sure to keep and label all hardware in case you find you wish to re-install everything at a later date or even add a larger sway bar in the future.
Related Discussions
- How to Remove/Replace Rear Sway Bar: C7 Specific (Very Similar) - CorvetteForum.com
- C6 Discussion: How to Remove Rear Sway Bar - CorvetteForum.com