Corvette: How to Not Ruin Your Clutch
It takes a great deal of persistence, effort, and determination to ruin a Corvette's clutch. This article discusses both the worst way to treat a clutch and the best way to maintain it.
This article applies to the C6 and C7 Corvette (2005-2015).
Automatic transmissions keep improving. Once a limiter of gas mileage, primarily because of fewer gear choices, the Corvette’s latest eight-speed transmission, according to Chevrolet, “offers drivers the comfort and drivability of a true automatic transmission, as well as lightning-fast shifts and manual control for track driving.”
Even though manual transmission models for the 2014 and 2015 model years now only comprise 35% of sales, Chevrolet is obviously in no hurry to phase out what they proudly call a “true three-pedal manual transmission.”
But even if seemingly behind the times now, it’s obvious to Chevrolet that Corvette owners still want a manual transmission of the traditional, three-pedal variety. Why? Probably because they like the mechanical interaction and level of control that can only be offered by shifting their own gears. However, because the transmission is being 100% manually controlled, the risk of human error is always present. Everyone makes mistakes every now and again; even very experienced manual transmission drivers can miss or grind a gear, slip the clutch, or completely botch a down shift.
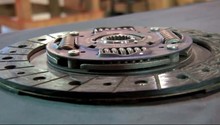
This brings us to the best way to ruin your true three-pedal manual transmission’s clutch. In a word, “burnouts.” Optimally, burnouts are achieved by turning off the Traction Control System, revving the engine up, popping the clutch to get the tires spinning, and then standing on the brake pedal with your left foot while keeping your right foot on the gas. The goal being that since the front brakes do the majority of the braking, the rear wheels will overpower the rear brakes and keep the tires spinning while the front brakes hold the car in place, allowing you to spin the rear tires into a smoke show.
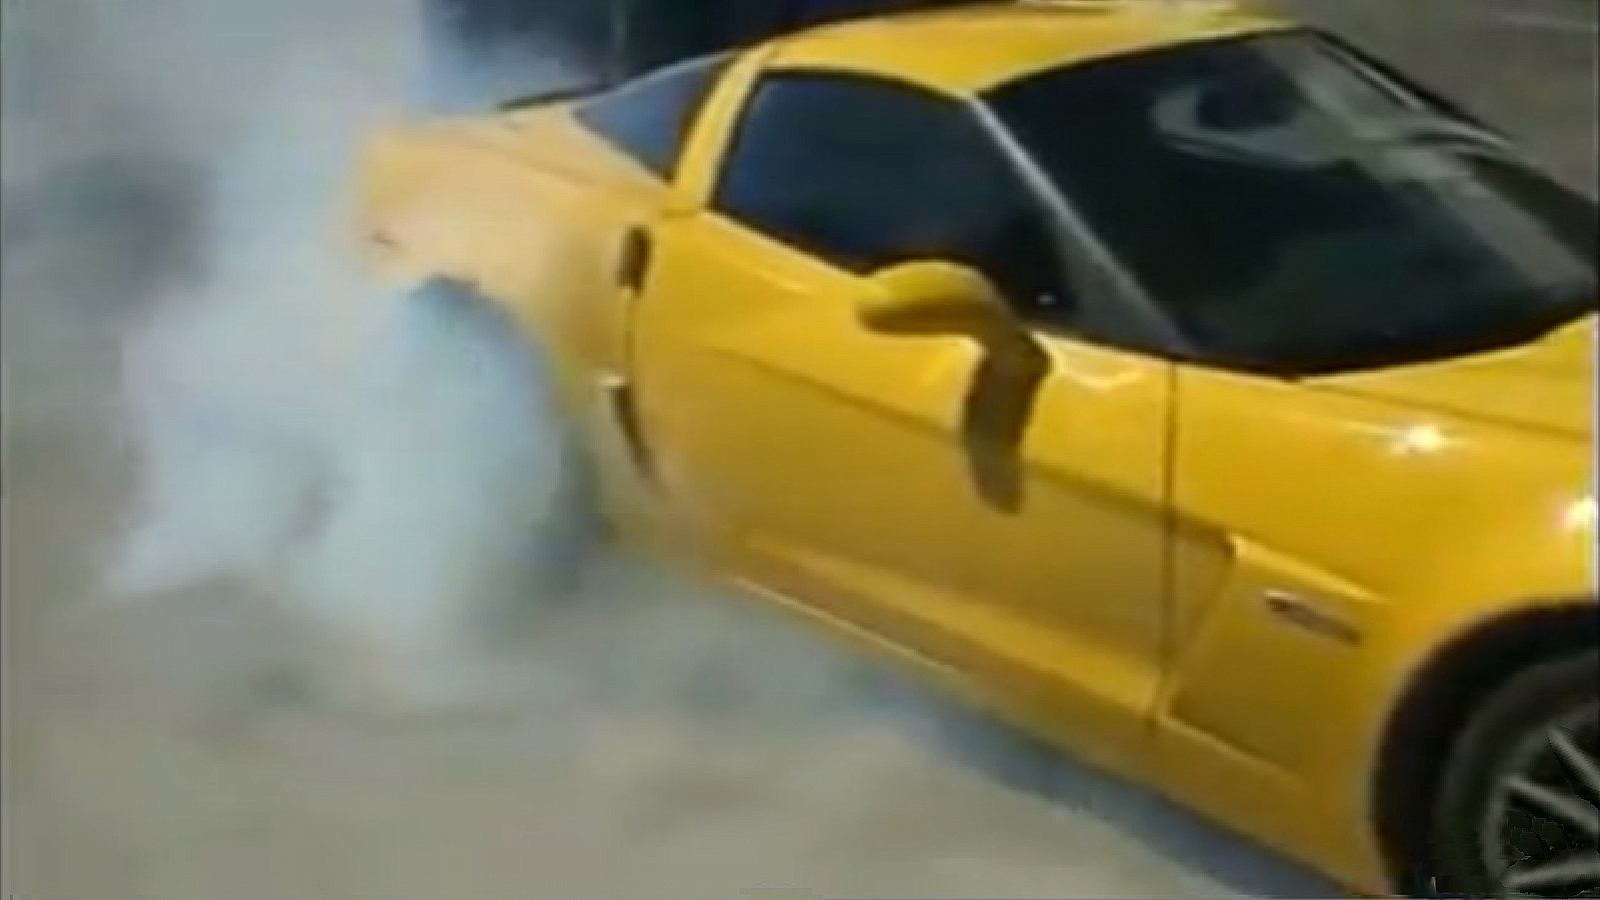
The strain on the clutch happens in the moment where the clutch is dropped from the high RPM to get the burnout started. Also, once the burnout is going, because you're stationary, it's putting a lot of load on the engine and transmission, which will cause temperatures to raise. Overheating a clutch is possible, causing a soft spongy pedal, poor performance, and the increased likelihood of slipping.
So now the question becomes, how does one not ruin their clutch? Few enthusiasts have looked into clutch and performance driving issues as deeply as Ranger Acceleration; what follows is a summary of what has become to be known as the “Ranger method” of clutch maintenance.

Materials Needed
- Large syringe or turkey baster
- Some lint-free paper towels or clean shop cloths
- One to two quarts of Super DOT 4 brake fluid
- An empty receptacle for the waste brake fluid
Step 1 – Monitor the behavior of your clutch pedal
The clues that a clutch may be in trouble center around the operation of your clutch pedal. Warning signs are when it:
- Becomes hard
- Becomes soft
- Is slow to return (“lazy”)
- Hangs up mid-way, or
- Stays on the floor.
The cause of these problems can vary across the board, but typically most can be traced back to the condition of the clutch fluid. Clutch fluid can suffer from three issues, two of which are the same issues brake fluid suffers from (which makes sense, because clutch fluid IS DOT 4 brake fluid). These include:
- Water contamination, often from condensation that can occur during heat-up/cool-down cycles
- High heat generated from aggressive driving
Plus one issue that brake fluid typically doesn’t suffer from:
- Infiltration of clutch dust, which is extremely abrasive
The bottom line is that by keeping your clutch fluid fresh and clean, you can prevent the occurrence of all of these clutch pedal woes.
(Related Article: C6/C7 Corvette: How to Bleed Hydraulic Clutch System - CorvetteForum.com)
Step 2 – Monitor the condition of your clutch fluid
Aggressively driven cars can generate excessive amounts of clutch dust. If this abrasive dust is allowed to accumulate in the clutch fluid, it will eventually damage the seals in the hydraulic system, which can eventually lead to fluid leaks, clutch component damage, and ultimately transmission failure.
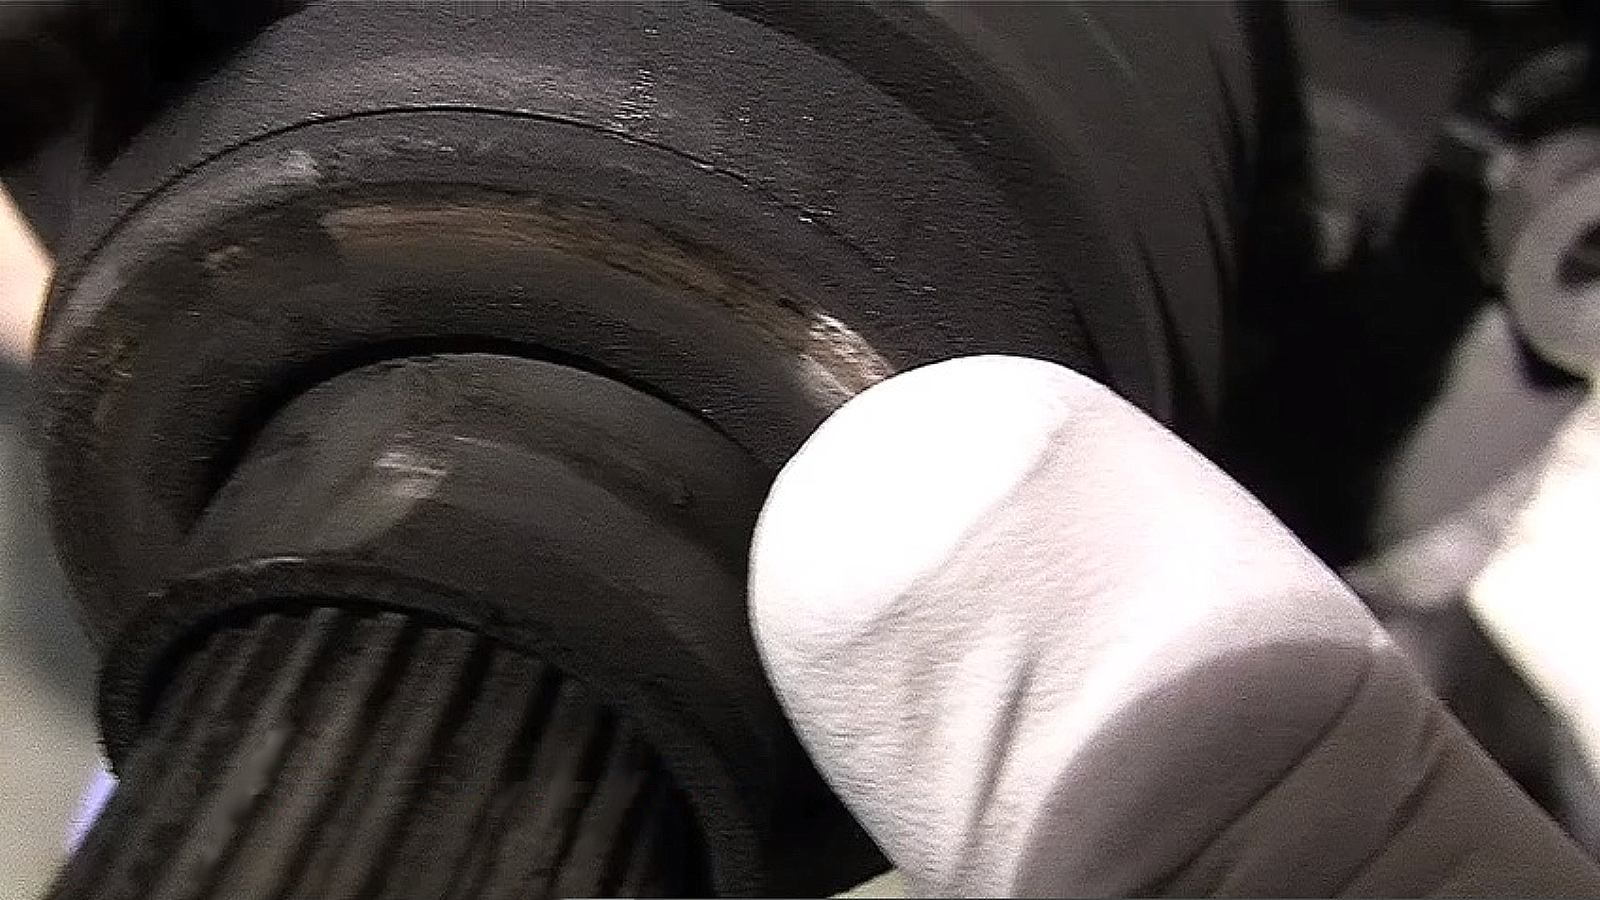
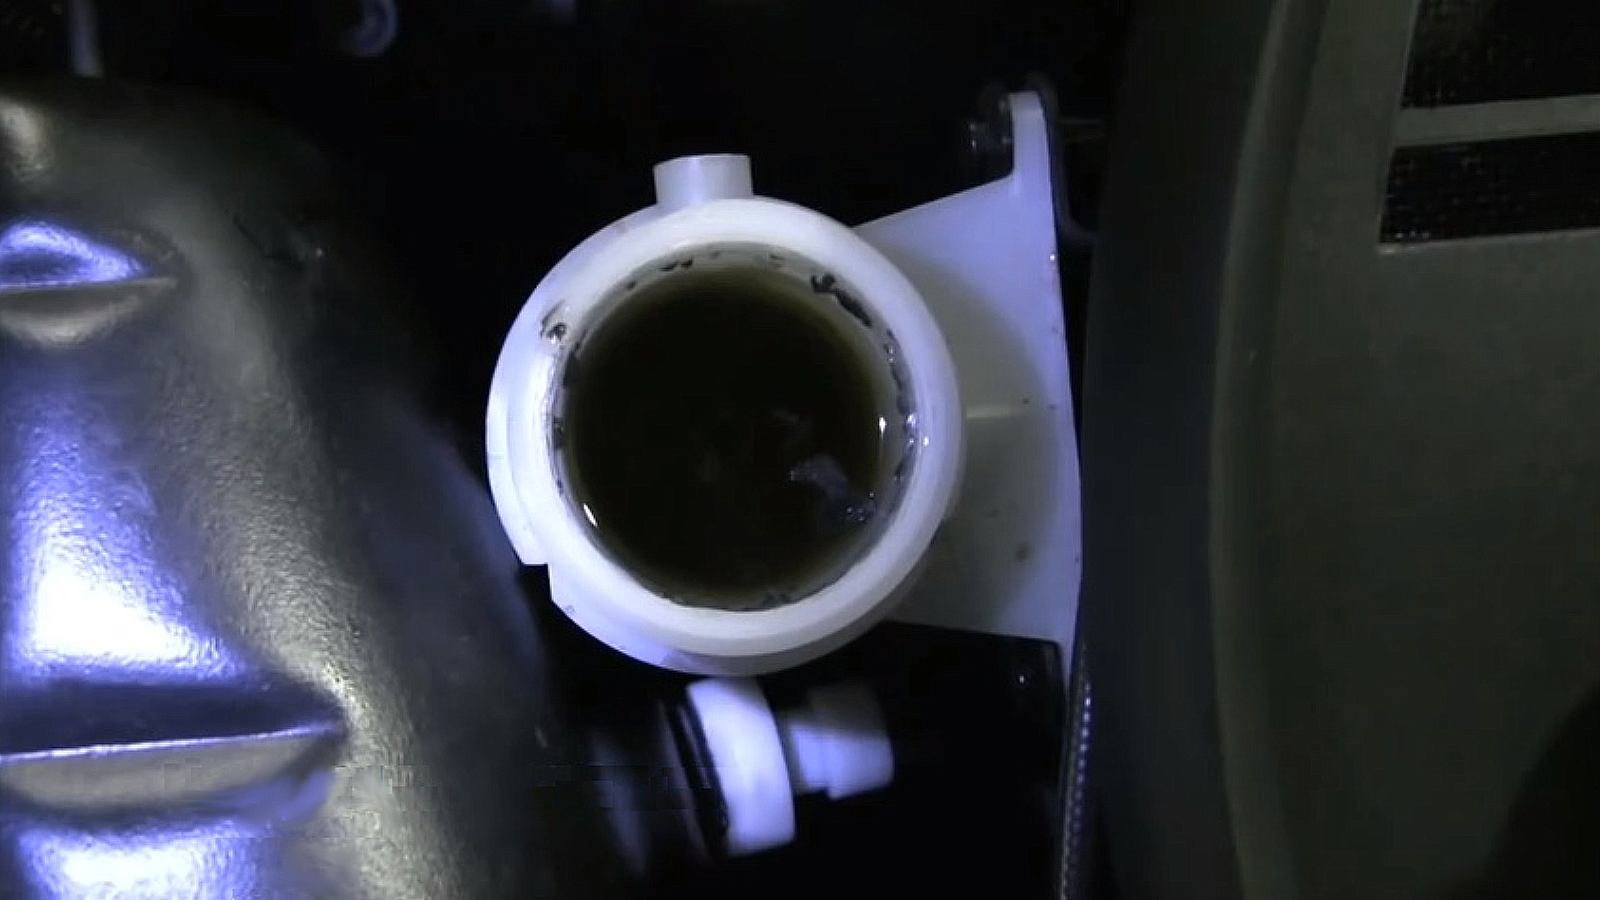
The most obvious indication that clutch fluid has deteriorated is when its color changes from clear, or transparent, to a murky dark — or worse yet, an opaque black.
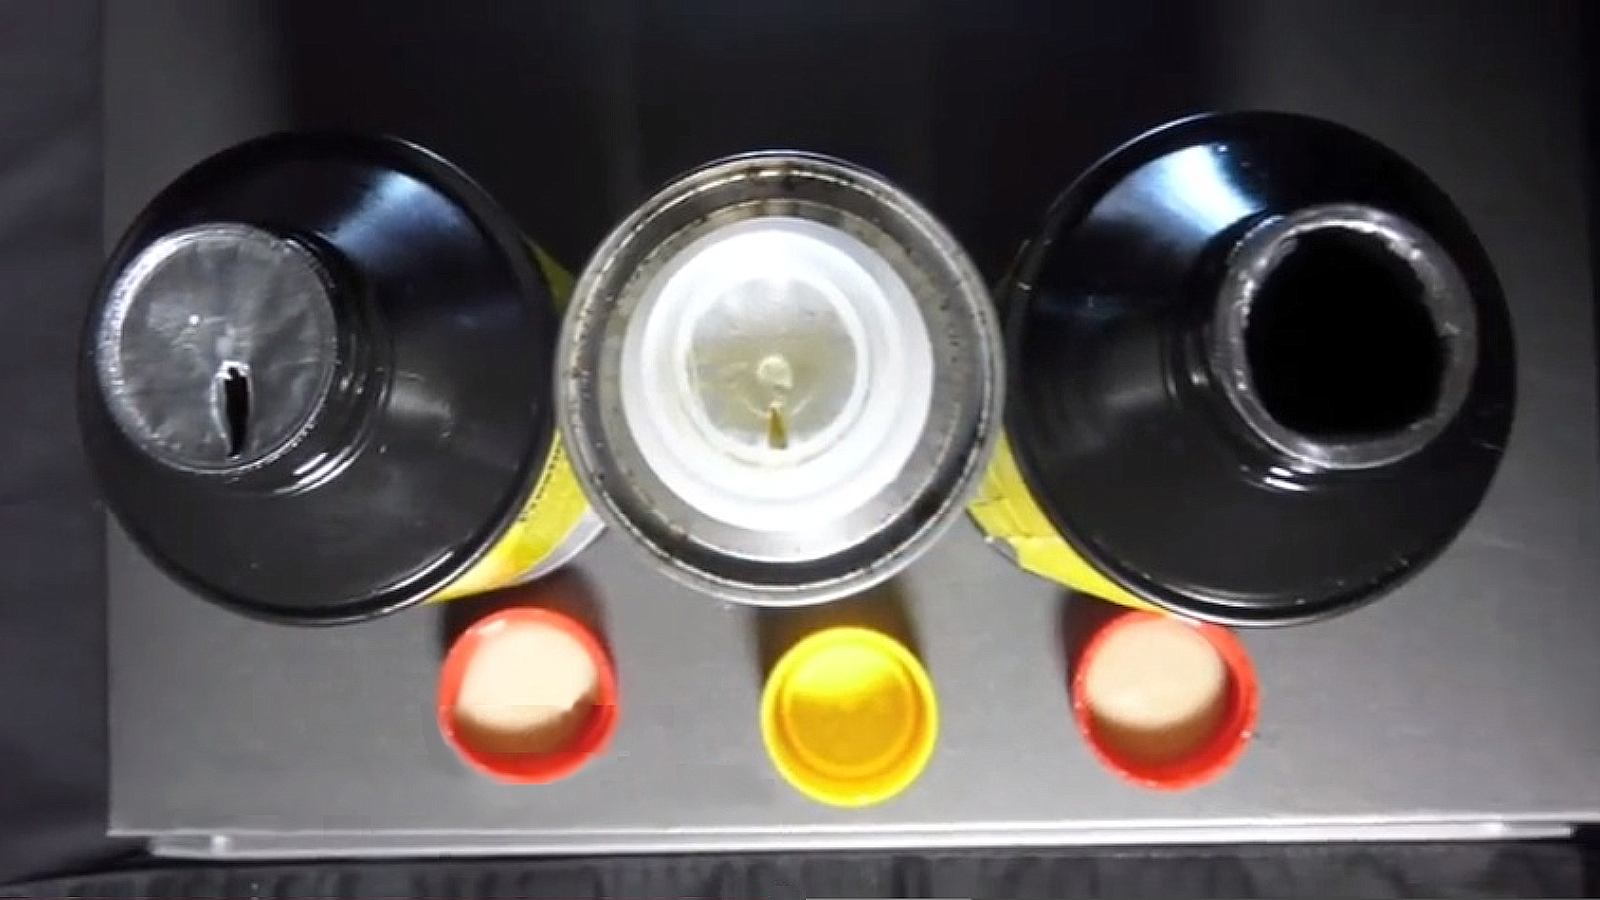
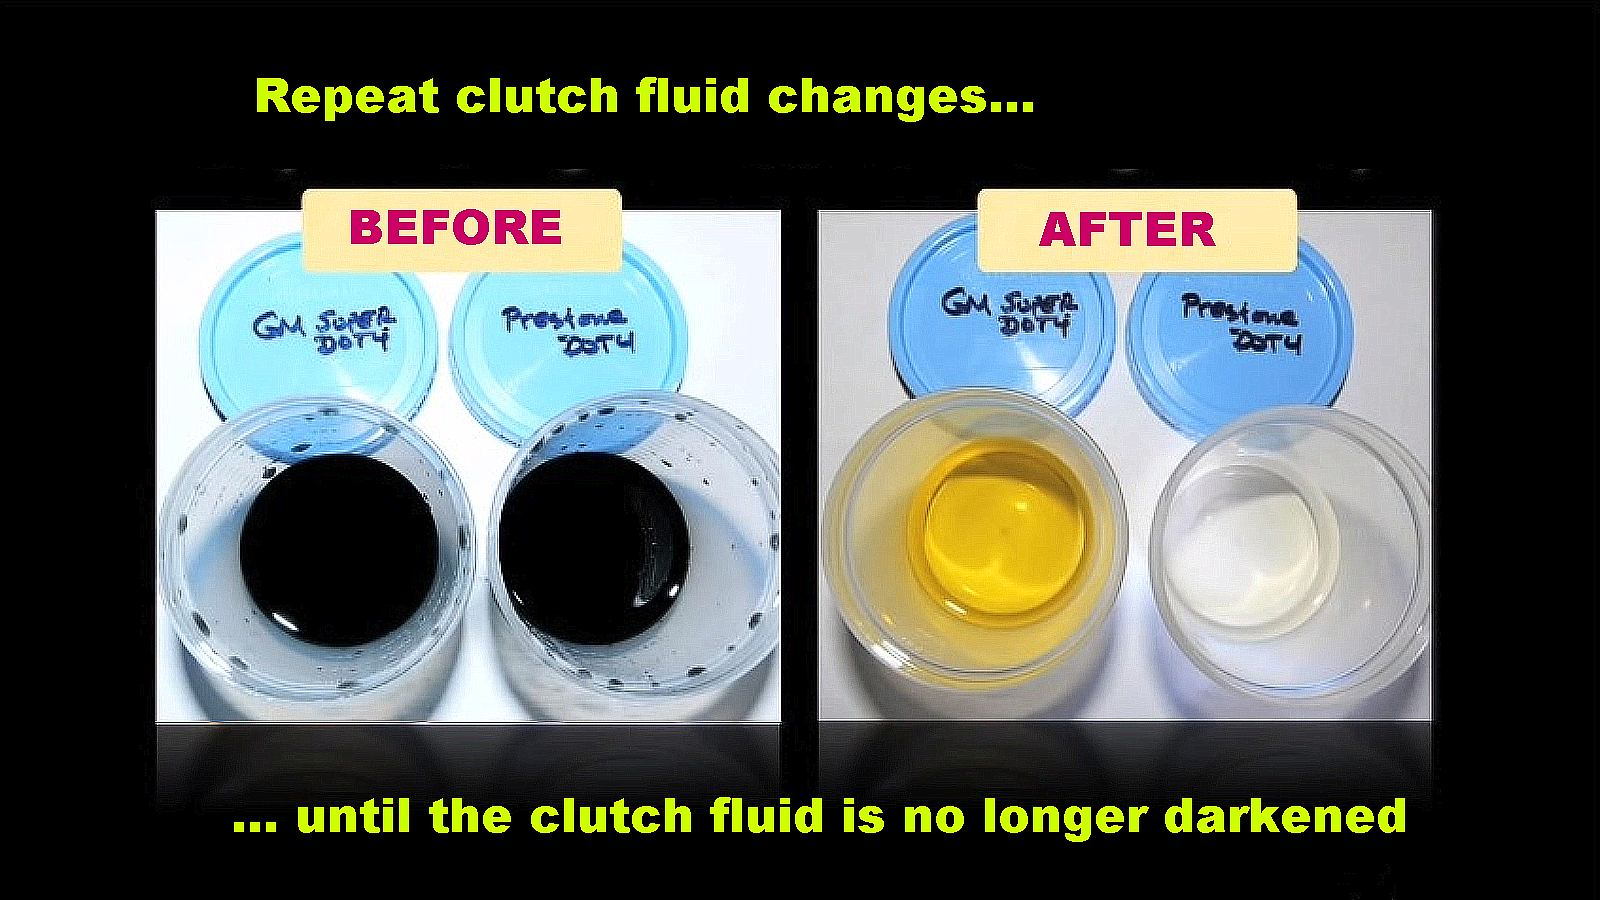
Vents located at the bottom of the bell-housing help keep the clutch cooler by providing air flow, but also help to circulate clutch dust during performance launches and shifts. Inside the bell housing, clutch dust inundates the slave cylinder (clutch actuator) to eventually get past one or more hydraulic seals and contaminate the clutch fluid. Figure 4 below shows new clutch fluid on the left, and the clutch fluid after only six launches and 18 high-RPM shifts on the right.

The more aggressive your driving is, the more clutch dust will infiltrate your clutch fluid.
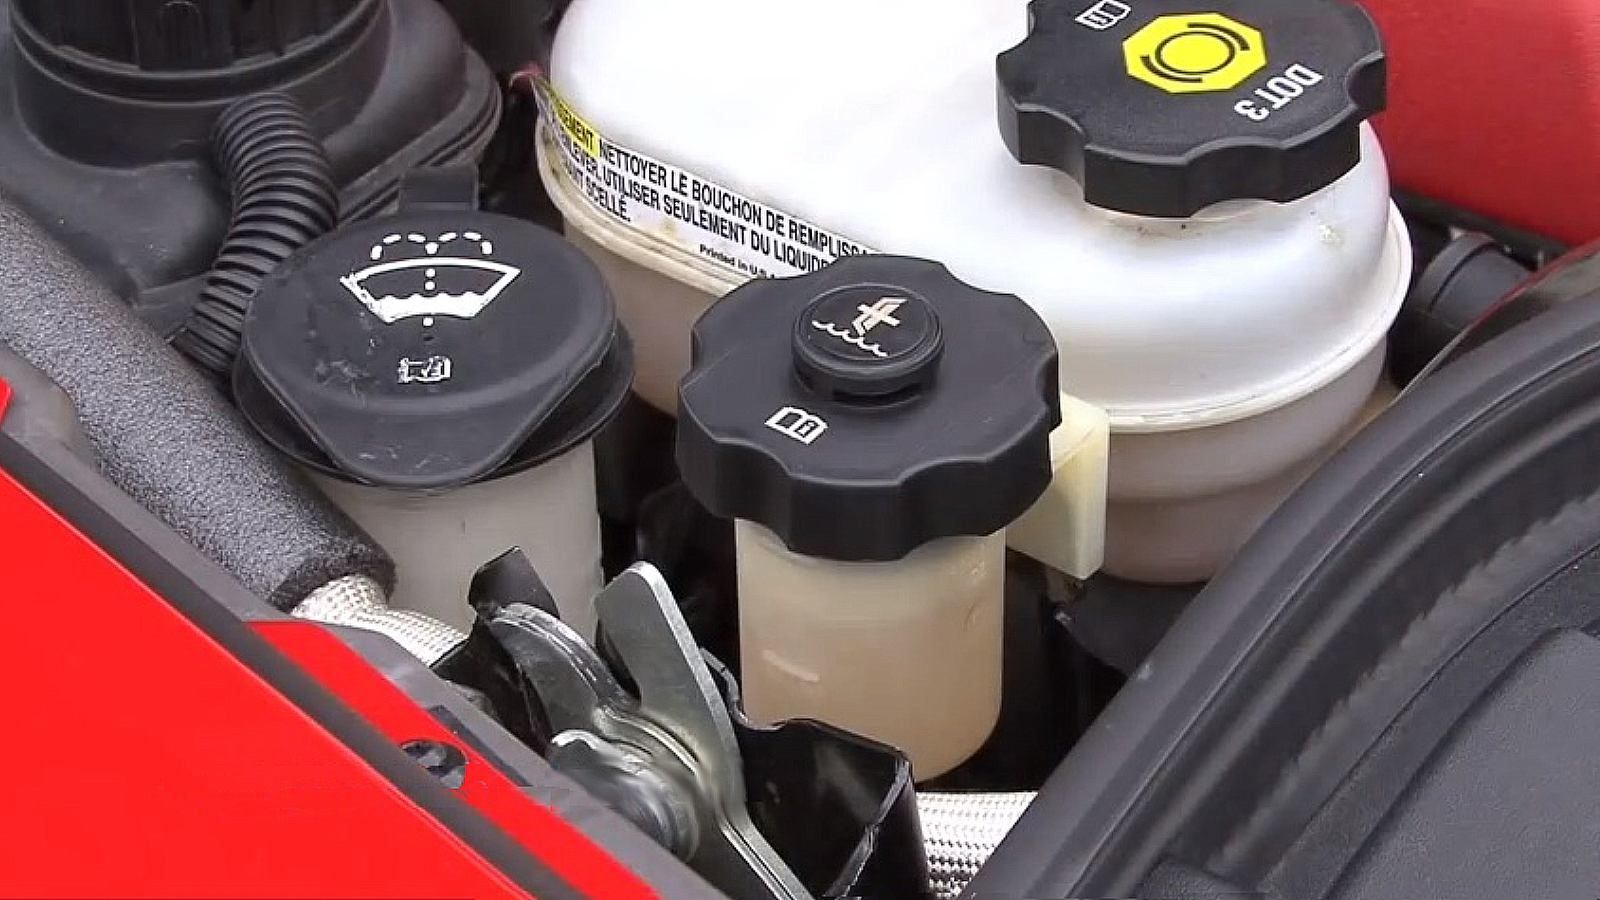
Step 3 – Replace the dirty clutch fluid in the reservoir with clean clutch fluid
With a large syringe or turkey baster remove the clutch fluid from the reservoir.
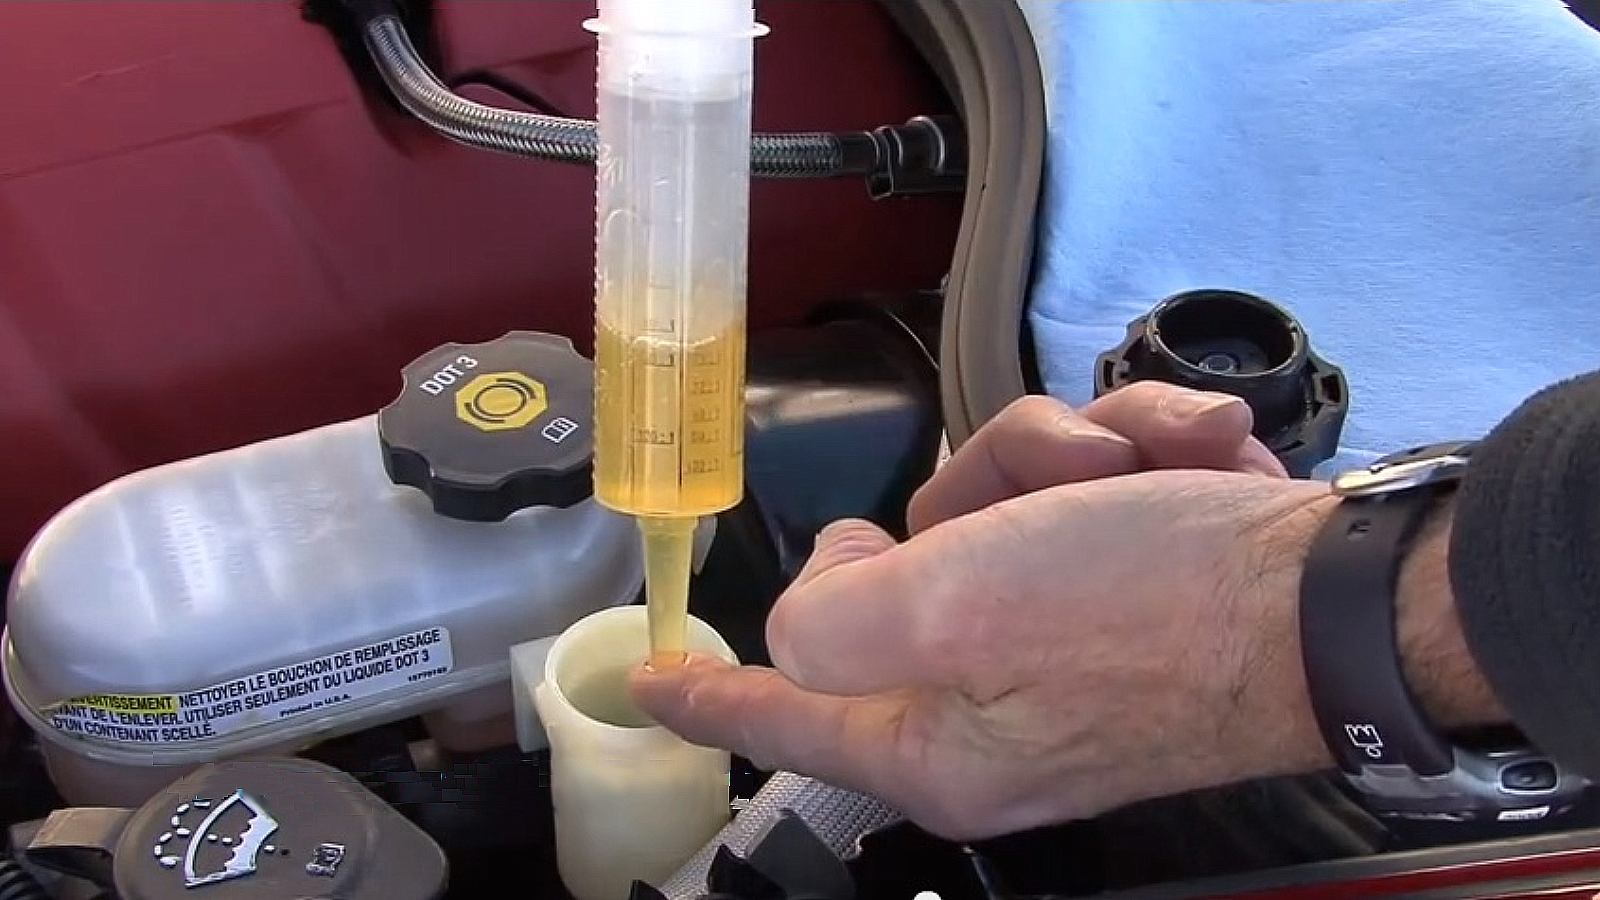
Express the dirty clutch fluid into an empty container for proper disposal.

A cut slot in the bottle seal gives a precise pour and helps keep moisture out.
Using low-lint paper towels or clean shop rags, swab out any debris in the clutch fluid reservoir.

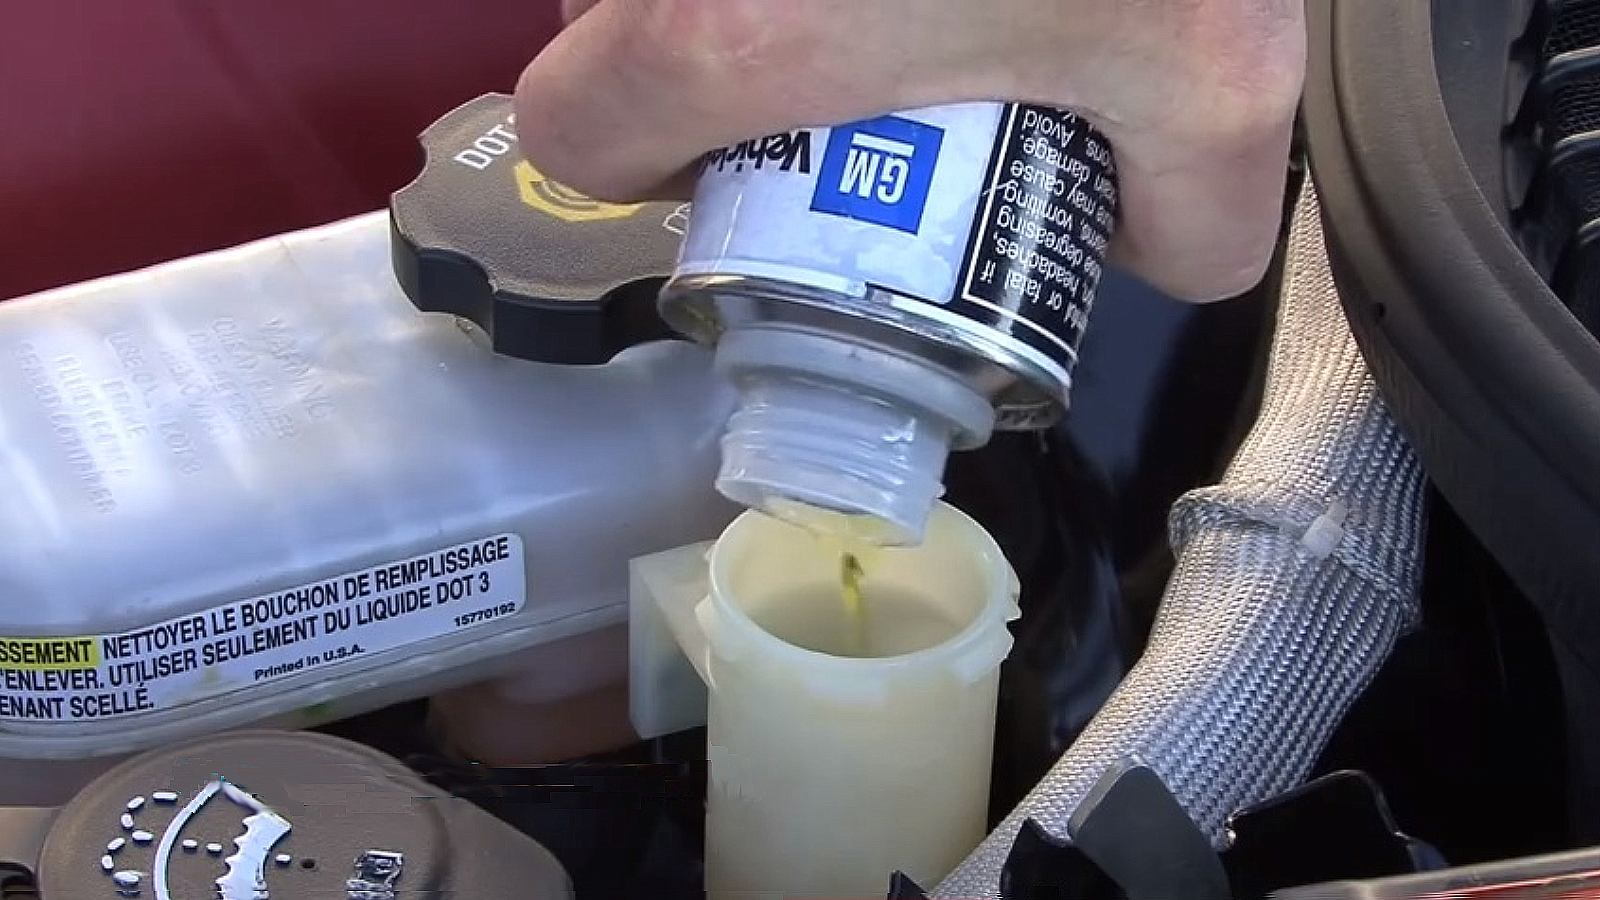
Refill the reservoir with new clutch fluid.
Clean the clutch fluid reservoir cap, and ensure that the expanding diaphragm contained in the cap has no holes or tears in it. Be sure not to damage its emergency vent designed to contain overpressure.
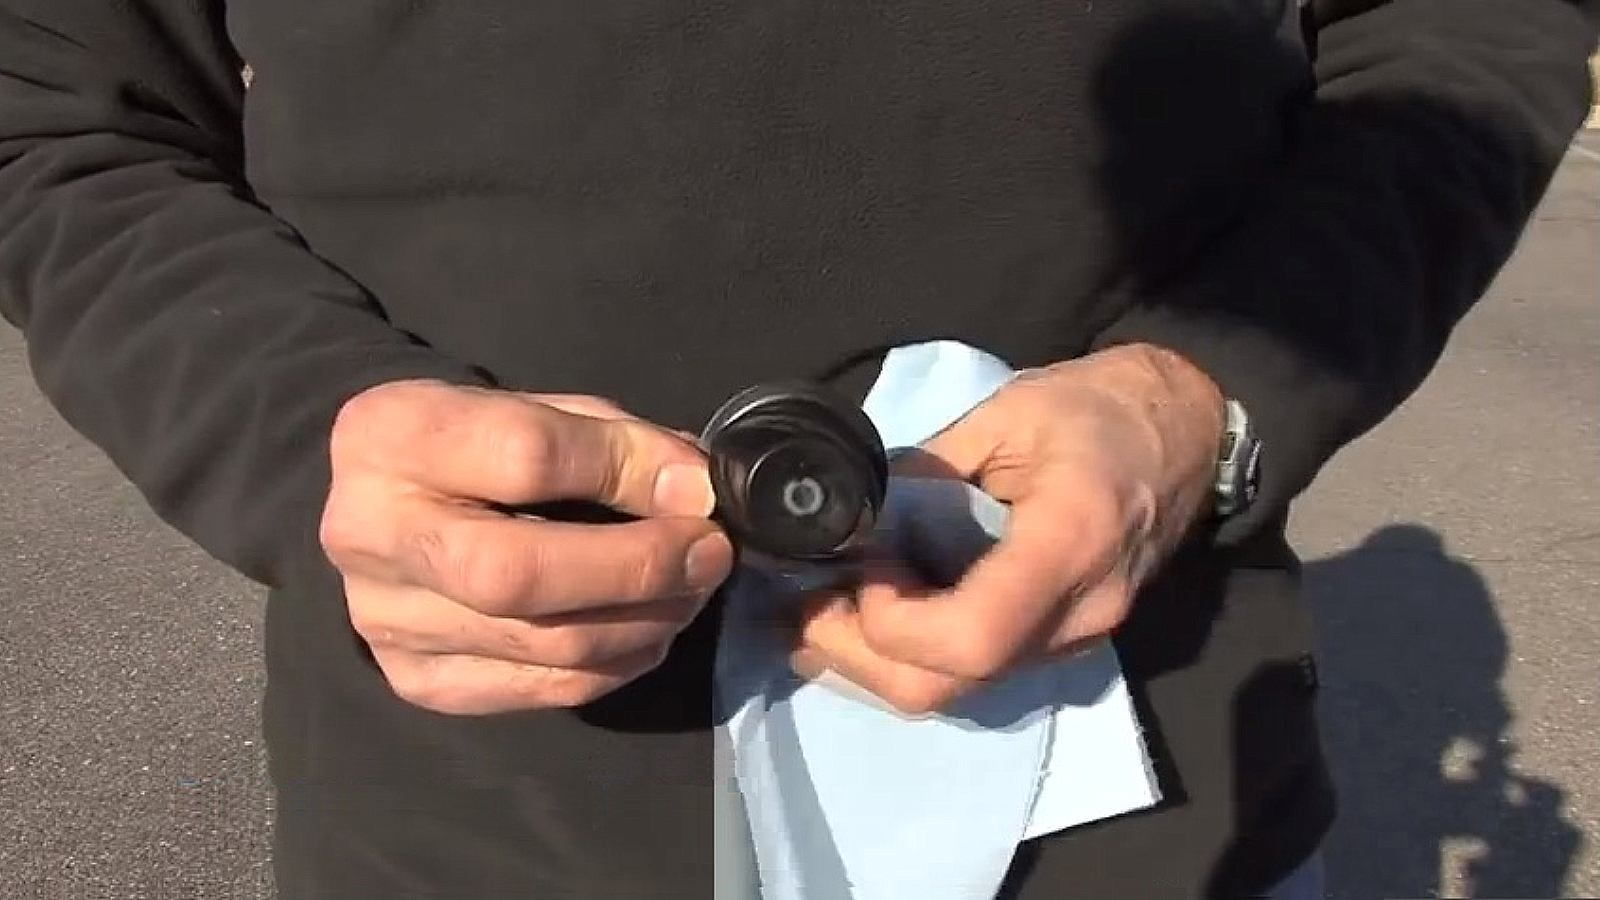
Make sure the cap clicks on tightly when you replace it to ensure a proper seal.
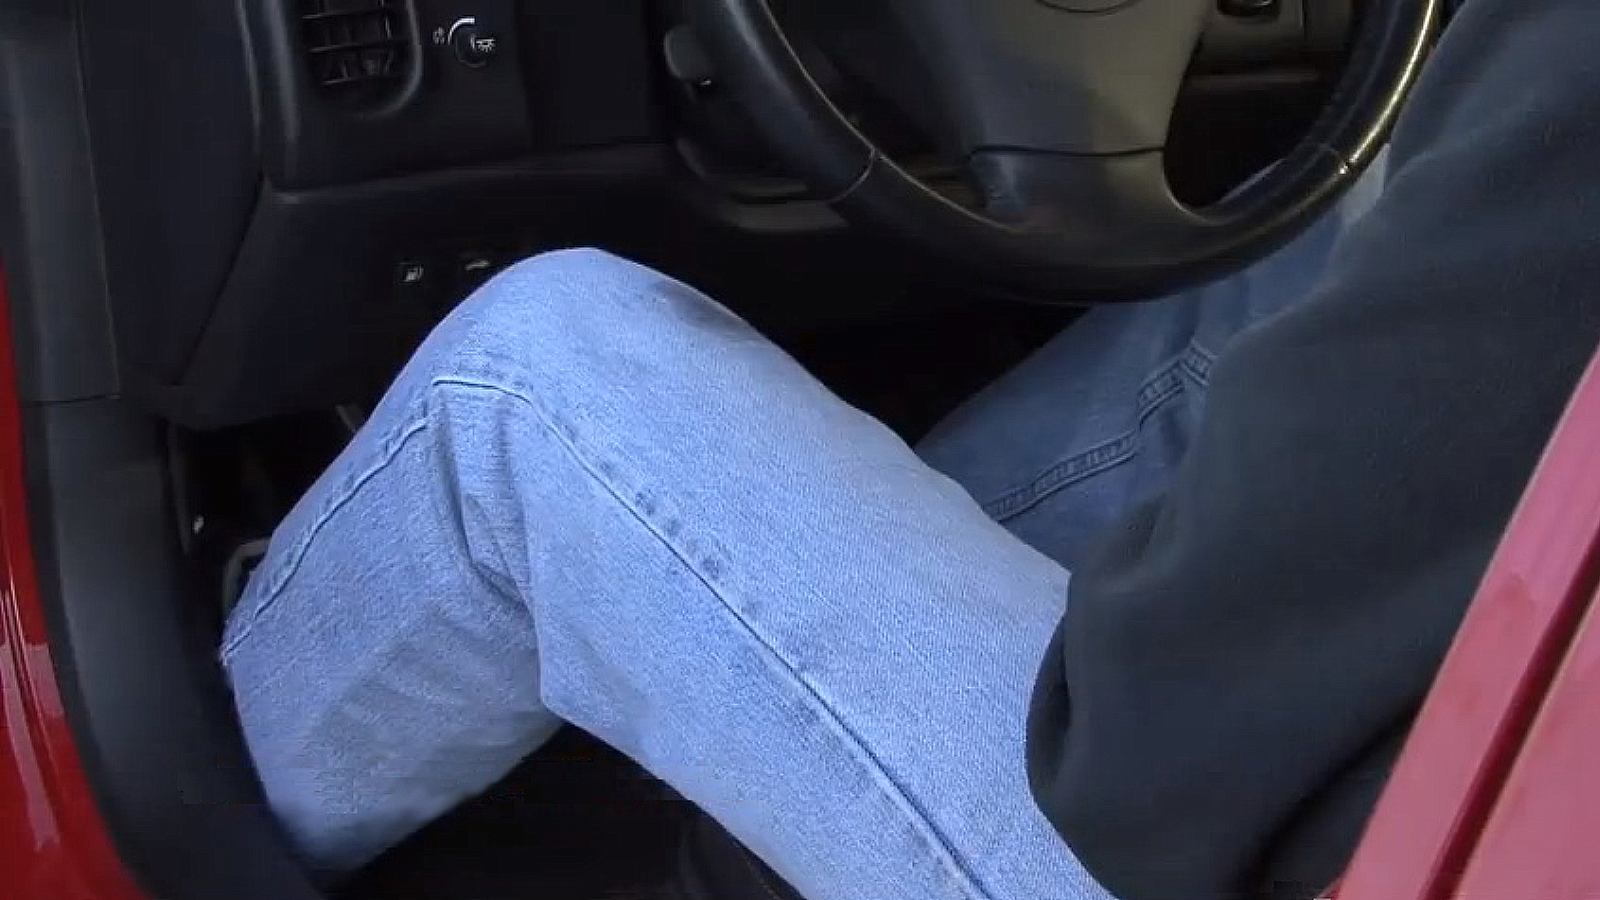
Then, distribute the clutch fluid by pumping the clutch pedal 30 times or so.
Reinspect the fluid. The goal is to have clear or colorless fluid, as shown on the right. Repeat the procedure of drain, refill, pump, and inspect until the fluid passes your cleanliness inspection.
While getting the clutch fluid clean the first time may take some time and effort, keeping it clean is quick and easy. Check the condition of your clutch fluid regularly. If you do a fair amount of performance driving, it’s really not that unreasonable to check it at each gasoline fill up.
While the Ranger Method will not fix a faulty clutch, it does have a proven track record for helping to prevent clutch problems.
Related Discussions and Site
- Sticky Clutch Issues - CorvetteForum.com
- Clutch Maintenance - CorvetteForum.com
- Take Care of Your Clutch—The Ranger Protocol - Rangeracceleration.com
- Clutch Fluid Change-Out Schedules - CorvetteForum.com
- Clutch Slipping - CorvetteForum.com
- Clutch Pedal Issues (C5) - CorvetteForum.com
- Preventing and Curing Clutch Issues - CorvetteForum.com
- Clutch Pedal Issues (C6) - CorvetteForum.com