
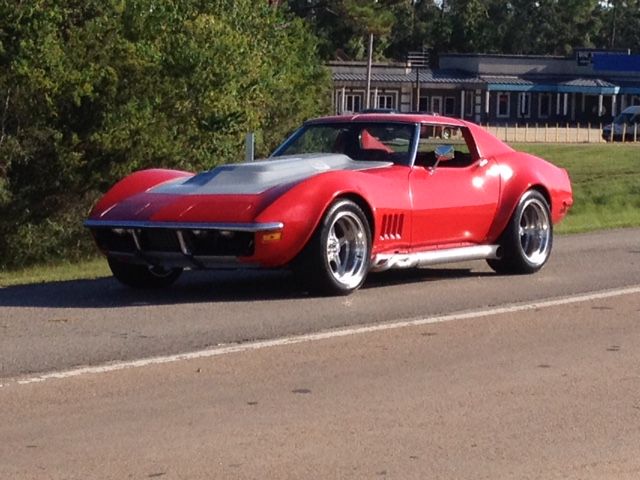
72 Vert Lite RestoMod Project
 06-20-2016, 01:27 PM
#161
Pro

Thread Starter
Just like every thing else, once I start taking stuff off I can't leave well enough alone. I have decided to paint inner doors also. I will be using Eastwood's epoxy primer as the base and the factory code sunflower yellow from Automotive Touchup. It comes in a shaker can so I'm curious to see how it turns out. I figured I can't hose things up too bad since it's the inner part of the door and will be covered up by the door panel. So if looks like crap it won't hurt to bad.
 06-20-2016, 01:36 PM
#162
Pro
Thread Starter
So I began disassembling the driver side door and I found several surprises...one good and one not so good. First, I discovered that someone has already replaced the regulator and the motor on that side. Second, this car's door mirror must have been hit or knocked off the door at some point cuz the glass under it is gone. There was some sort of backer plate used to mount the mirror. I will attempt to repair the glass in that area instead of using the backing plate so stay tuned.
06-20-2016, 03:31 PM
#163
Safety Car

So I began disassembling the driver side door and I found several surprises...one good and one not so good. First, I discovered that someone has already replaced the regulator and the motor on that side. Second, this car's door mirror must have been hit or knocked off the door at some point cuz the glass under it is gone. There was some sort of backer plate used to mount the mirror. I will attempt to repair the glass in that area instead of using the backing plate so stay tuned.
I bought dual mirrors and am nervous about installing the now non existent passenger side mirror because there isnt a plate there.
I recently used the eastwood epoxy primer on my whole car followed by mp243 poly filler primer and the expoxy went on very well with a cheapy throw away purple harbor freight gun (not the gun im painting with)
Last edited by augiedoggy; 06-20-2016 at 03:44 PM.
06-20-2016, 04:57 PM
#164
Pro
Thread Starter
Are you sure the backerplate is not factory because my 74 has one behind my door skin and the door skin is fine?
I bought dual mirrors and am nervous about installing the now non existent passenger side mirror because there isnt a plate there.
I recently used the eastwood epoxy primer on my whole car followed by mp243 poly filler primer and the expoxy went on very well with a cheapy throw away purple harbor freight gun (not the gun im painting with)
Good to hear about your experience with the primer. I've used it on other pieces with great results.
06-22-2016, 02:32 PM
#165
Pro
Thread Starter
After thinking about the door repair (rearview mirror mount) a bit I'm actually thinking about re-skinning the door rather than spend a bunch of time trying to repair that hole. Logic is that there doesn't seem to be enough glass above the damaged area and the window trim to actually make an adequate repair. If anyone has re-skinned a door I'd love to hear about it.
Make more sense to re-skin or repair?
Make more sense to re-skin or repair?
Last edited by Ranger24; 06-22-2016 at 02:32 PM.
06-22-2016, 03:50 PM
#166
Safety Car
After thinking about the door repair (rearview mirror mount) a bit I'm actually thinking about re-skinning the door rather than spend a bunch of time trying to repair that hole. Logic is that there doesn't seem to be enough glass above the damaged area and the window trim to actually make an adequate repair. If anyone has re-skinned a door I'd love to hear about it.
Make more sense to re-skin or repair?
Make more sense to re-skin or repair?
makes maore sense to replace the door than reskin to me but thats just by looking at door prices...
Last edited by augiedoggy; 06-22-2016 at 03:51 PM.
06-23-2016, 12:18 PM
#167
Pro
Thread Starter
I can say on my door those 2 larger holes appeared to be what was used to attach the plate to the skin and the smaller holes were for the bracket screws going to the plate... my plate stays in place as these bigger holes appear to be full of epoxy for the backerplate...
makes maore sense to replace the door than reskin to me but thats just by looking at door prices...
makes maore sense to replace the door than reskin to me but thats just by looking at door prices...
06-29-2016, 01:48 PM
#168
Pro
Thread Starter
I finally got both inner doors prepped, masked and sprayed on Sunday. I was quite impressed with how they turned out. However, even though the color was factory code there is a difference between that and the exterior color tone. Not to concerned since most of it will be covered by the panel.
Next up is to install new parts...love this step in the process.
Next up is to install new parts...love this step in the process.
06-29-2016, 01:52 PM
#169
Pro
Thread Starter
Started adding parts on Monday. The weather stripping is a real pain...not because of the stripping but because of the adhesive. That stuff can get away from you if not careful.
Everything looks so much better now.
Everything looks so much better now.
07-10-2016, 05:07 PM
#170
Pro
Thread Starter
Installing the new side mirror presented a challenge but I came up with a solution. I could not, with the gasket that was provided, get the mirror to set correctly...it would move around a bit. I made a second gasket out 1/16th piece of rubber and cut slightly smaller than the plastic gasket.
Once I put everything together it fit nice and snug now.
Once I put everything together it fit nice and snug now.
09-22-2016, 05:12 PM
#171
Pro
Thread Starter
So I've decided to begin the painstaking task of preparing the body for a new paint job. However, I would like some input from the folks who have worked with glass etc.
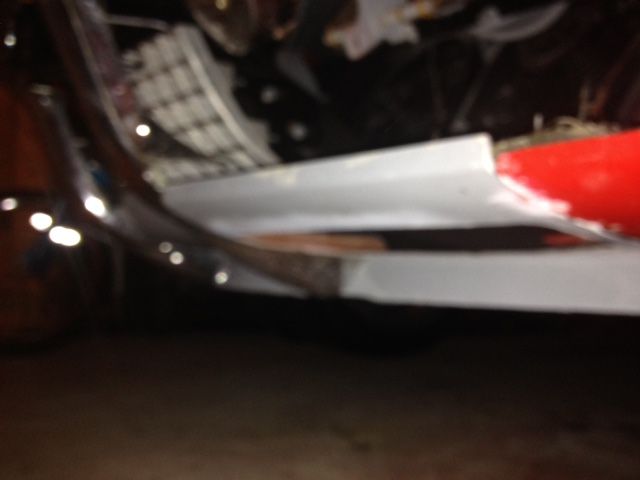
I'm attaching several photos of the nose section where the bumper bolts come through as well as the lower valance. You will see in these photos that there are several cracks near the bolt hole. It does not appear that they penetrate through the body. On the driver side there is a crack that does penetrate and travels all the way to the marker light.
The lower valance is chewed up from the middle of the spoiler to the driver side fender so I think I'm going to need to replace that entirely vs. trying to repair it. Seems like it would be easier but would like some feedback from the pros.
My other question is about the fenders. Will be easier/more cost effective etc. to fix those cracks? Or should I venture into replacing the fender sections entirely?
09-22-2016, 09:31 PM
#172
Pro

Ranger, Having just completed all the fender flares, I put the bumper on and tightened the bolt a little to much. I put a small crack in my fiberglass already. Resto modding it, I may go bumper delete and fill in the mounting holes. I eventually am going with Lemans headlights. I replaced my valance. Like yours, it was pretty smashed up. There is a bonding strip connecting the valance to the fenders. I cut my fenders off, so the new valance went against fresh and clean glass. I trimmed the valance to the correct length and used a clamp to hold the two together. Then I laid fiberglass on the back side. I still need to finish the glass work and fill in the crack with filler. Just remember to put your chrome trim on and mock it up before permanently glassing in. This will assure no offset trim fit when re-assembly after paint. It was a no brainer to me for $100.00 for a new valance versus trying to repair the original one. Snapped a few bad pictures as the car is in the garage. Got to get it all painted now.


Last edited by rajin cajin; 09-22-2016 at 09:35 PM.
09-22-2016, 09:57 PM
#173
Pro
My other question is about the fenders. Will be easier/more cost effective etc. to fix those cracks? Or should I venture into replacing the fender sections entirely?
I'm no pro. But a fender replacement ended up being a major undertaking for me. A few things to consider. The new fender will probably be short where it meets the bonding strip right in front of the door. That will have to be built up by hand. That also means the door is coming off. That's no big deal if you are repainting and doing door jambs and such (as the doors would come off anyway). I fought for days and days to get the door back on and straight. The horizontal bonding strip (about 4-5 feet of it) can be filled with filler. I hand laid in fiberglass mat (wanted to do it right). I guess that is the right way (even though I dug out some putty filler in the original bonding strip channel). Then you have to re-bond the inner fender wells to the fender. The fenders are glued on. Forgot how much the 2 part epoxy tube was running (but its not cheap). Then you need the gun (let me know and Ill loan you the one I bought). If it were me, I would cut out those little cracks, bevel back the fiberglass and lay in new glass. Is it the right way (I have no idea), but it would save a ton of time and money. Which leads me to the next question, Are you doing the glass work or farming it out??
I'm no pro. But a fender replacement ended up being a major undertaking for me. A few things to consider. The new fender will probably be short where it meets the bonding strip right in front of the door. That will have to be built up by hand. That also means the door is coming off. That's no big deal if you are repainting and doing door jambs and such (as the doors would come off anyway). I fought for days and days to get the door back on and straight. The horizontal bonding strip (about 4-5 feet of it) can be filled with filler. I hand laid in fiberglass mat (wanted to do it right). I guess that is the right way (even though I dug out some putty filler in the original bonding strip channel). Then you have to re-bond the inner fender wells to the fender. The fenders are glued on. Forgot how much the 2 part epoxy tube was running (but its not cheap). Then you need the gun (let me know and Ill loan you the one I bought). If it were me, I would cut out those little cracks, bevel back the fiberglass and lay in new glass. Is it the right way (I have no idea), but it would save a ton of time and money. Which leads me to the next question, Are you doing the glass work or farming it out??
 09-23-2016, 07:05 AM
#174
Pro
Thread Starter
My other question is about the fenders. Will be easier/more cost effective etc. to fix those cracks? Or should I venture into replacing the fender sections entirely?
I'm no pro. But a fender replacement ended up being a major undertaking for me. A few things to consider. The new fender will probably be short where it meets the bonding strip right in front of the door. That will have to be built up by hand. That also means the door is coming off. That's no big deal if you are repainting and doing door jambs and such (as the doors would come off anyway). I fought for days and days to get the door back on and straight. The horizontal bonding strip (about 4-5 feet of it) can be filled with filler. I hand laid in fiberglass mat (wanted to do it right). I guess that is the right way (even though I dug out some putty filler in the original bonding strip channel). Then you have to re-bond the inner fender wells to the fender. The fenders are glued on. Forgot how much the 2 part epoxy tube was running (but its not cheap). Then you need the gun (let me know and Ill loan you the one I bought). If it were me, I would cut out those little cracks, bevel back the fiberglass and lay in new glass. Is it the right way (I have no idea), but it would save a ton of time and money. Which leads me to the next question, Are you doing the glass work or farming it out??
I'm no pro. But a fender replacement ended up being a major undertaking for me. A few things to consider. The new fender will probably be short where it meets the bonding strip right in front of the door. That will have to be built up by hand. That also means the door is coming off. That's no big deal if you are repainting and doing door jambs and such (as the doors would come off anyway). I fought for days and days to get the door back on and straight. The horizontal bonding strip (about 4-5 feet of it) can be filled with filler. I hand laid in fiberglass mat (wanted to do it right). I guess that is the right way (even though I dug out some putty filler in the original bonding strip channel). Then you have to re-bond the inner fender wells to the fender. The fenders are glued on. Forgot how much the 2 part epoxy tube was running (but its not cheap). Then you need the gun (let me know and Ill loan you the one I bought). If it were me, I would cut out those little cracks, bevel back the fiberglass and lay in new glass. Is it the right way (I have no idea), but it would save a ton of time and money. Which leads me to the next question, Are you doing the glass work or farming it out??
09-23-2016, 12:33 PM
#175
Pro
Thread Starter
Sanded and ground away some of the junk around the bolt holes to see what I'm dealing with there. There was a reasonable amount of damage on the passenger side. I had to take out a fair amount of material to see how far those cracks traced back into the glass. My concern is the gap between the fender and the hood surround right below the hole. You can that in the overhead shots I took of these areas.
Another area, that I haven't taken a photo of yet, is the edge of the fender around the wheel. Someone drilled holes in the front when they mounted an Indy spoiler, which I removed when I purchased the car.
Another area, that I haven't taken a photo of yet, is the edge of the fender around the wheel. Someone drilled holes in the front when they mounted an Indy spoiler, which I removed when I purchased the car.
09-23-2016, 05:35 PM
#176
Race Director


Your photos only show the cracks that you have shown in those photos...SO....telling you to replace fenders is not possible due to not knowing the extent of any further fender damage.
Also...in POST #171...the first photo. I can see where pop rivets have been used in place of the solid aluminum rivets in the very front of the top hood surround.
AS for your cracks..I would grind them down and get to the bottom of them....and that may cause me to go through the panel. I am not worried about that. I just want to grind and taper these cracks back so i them can either laminate in mat and resin or use VPA for the repair.
KEEP IN MIND...IF this car is still factory correct. The outer bumper bolt holes you are dealing with now...is where GM also had the bonding strip stop. And this bonding strip is REALLY thick the end where these bolt holes are located., IF you look from the backside ...and/or underside...you will see how the bonding strip is about 1/2'' thick there. AND...this bonding strip is also FLAT....so your steel bumper brackets that go there tie in the front end has a good flat surface to seat against.
If you are not aware...there is a steel bracket that bolts to the steel reinforcement that is being held in with those pop rivets I mentioned...and this bracket goes over to these holes you are dealing with...and then the weird shaped 'U' bracket that goes on the end of the frame extension also goes there with a long bolt.
DUB
09-23-2016, 06:48 PM
#177
Team Owner

Member Since: Sep 2006
Location: Westminster Maryland
Posts: 30,173
Likes: 0
Received 2,878 Likes
on
2,515 Posts

Hi R,
Here's a photo of that area with the paint removed.
Note there's a bonded joint between the hood surround and the fender at that corner.
Perhaps this will help!
Regards,
Alan
This is a no hit car.

Here's the corner from below with the 2 small bumper brackets in place.
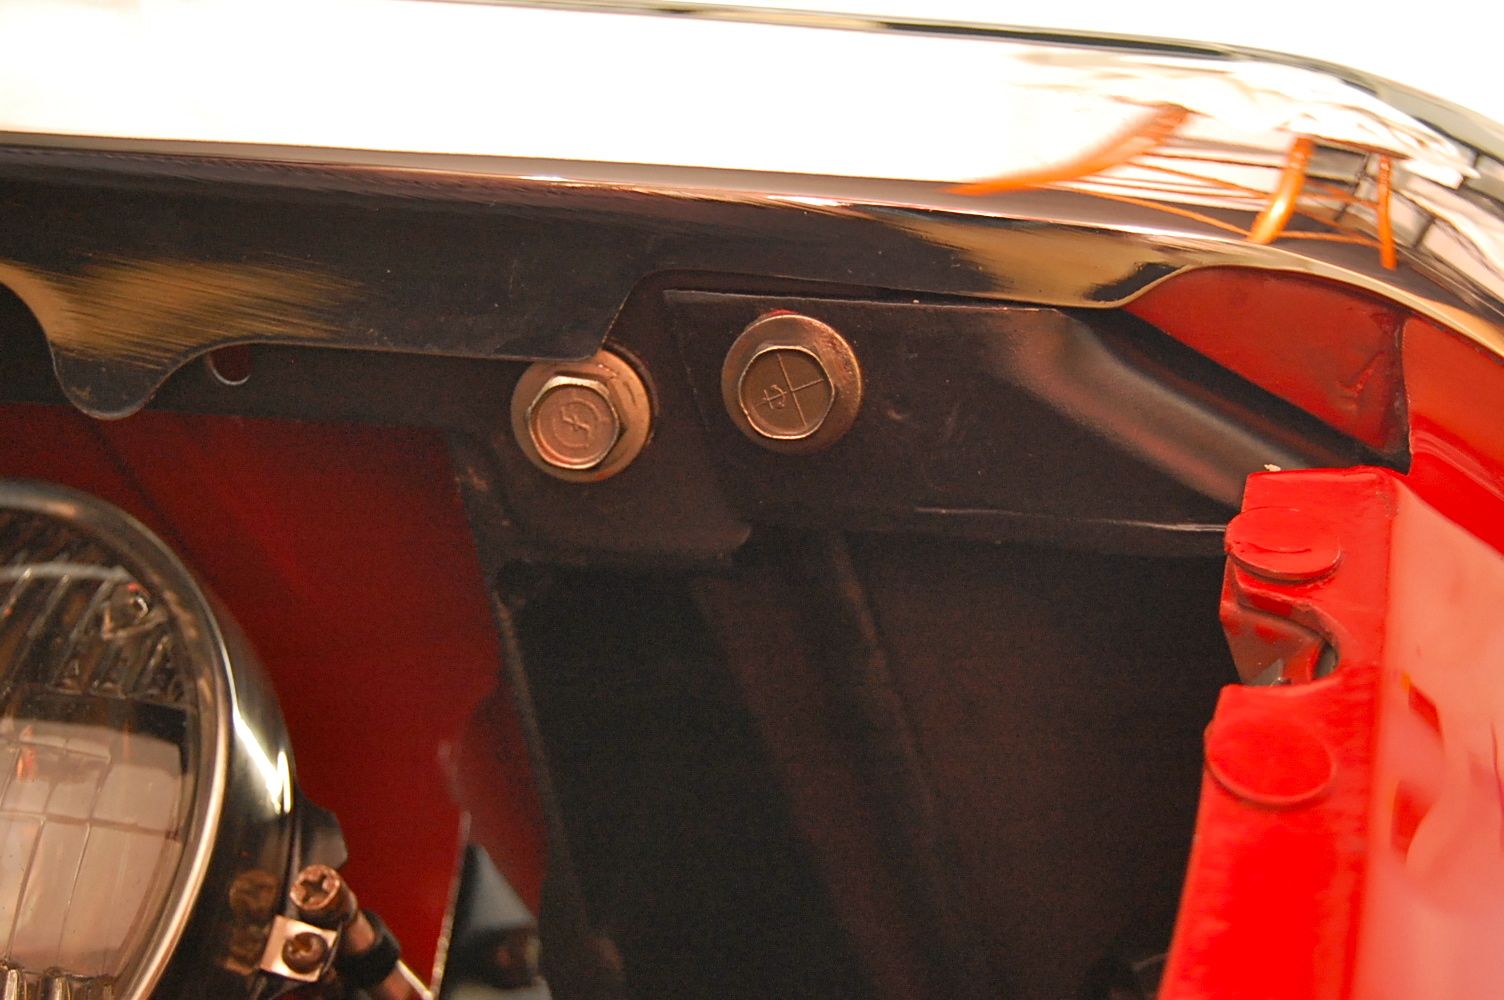
You can see the extent and importance of the bonding strip.
Here's a photo of that area with the paint removed.
Note there's a bonded joint between the hood surround and the fender at that corner.
Perhaps this will help!
Regards,
Alan
This is a no hit car.
Here's the corner from below with the 2 small bumper brackets in place.
You can see the extent and importance of the bonding strip.
09-25-2016, 09:20 AM
#178
Pro
Thread Starter
Your photos only show the cracks that you have shown in those photos...SO....telling you to replace fenders is not possible due to not knowing the extent of any further fender damage.
Also...in POST #171...the first photo. I can see where pop rivets have been used in place of the solid aluminum rivets in the very front of the top hood surround.
AS for your cracks..I would grind them down and get to the bottom of them....and that may cause me to go through the panel. I am not worried about that. I just want to grind and taper these cracks back so i them can either laminate in mat and resin or use VPA for the repair.
KEEP IN MIND...IF this car is still factory correct. The outer bumper bolt holes you are dealing with now...is where GM also had the bonding strip stop. And this bonding strip is REALLY thick the end where these bolt holes are located., IF you look from the backside ...and/or underside...you will see how the bonding strip is about 1/2'' thick there. AND...this bonding strip is also FLAT....so your steel bumper brackets that go there tie in the front end has a good flat surface to seat against.
If you are not aware...there is a steel bracket that bolts to the steel reinforcement that is being held in with those pop rivets I mentioned...and this bracket goes over to these holes you are dealing with...and then the weird shaped 'U' bracket that goes on the end of the frame extension also goes there with a long bolt.
DUB
Also...in POST #171...the first photo. I can see where pop rivets have been used in place of the solid aluminum rivets in the very front of the top hood surround.
AS for your cracks..I would grind them down and get to the bottom of them....and that may cause me to go through the panel. I am not worried about that. I just want to grind and taper these cracks back so i them can either laminate in mat and resin or use VPA for the repair.
KEEP IN MIND...IF this car is still factory correct. The outer bumper bolt holes you are dealing with now...is where GM also had the bonding strip stop. And this bonding strip is REALLY thick the end where these bolt holes are located., IF you look from the backside ...and/or underside...you will see how the bonding strip is about 1/2'' thick there. AND...this bonding strip is also FLAT....so your steel bumper brackets that go there tie in the front end has a good flat surface to seat against.
If you are not aware...there is a steel bracket that bolts to the steel reinforcement that is being held in with those pop rivets I mentioned...and this bracket goes over to these holes you are dealing with...and then the weird shaped 'U' bracket that goes on the end of the frame extension also goes there with a long bolt.
DUB
09-25-2016, 07:19 PM
#180
Race Director
OOOPS!
VPA= Vette Panel Adhesive
http://www.evercoat.com/images/ePIM/..._1_2015_EN.pdf
http://www.evercoat.com/product-deta...ber/100880/us/
I can understand that if the car is not factory correct...but there are certain areas that SHOULD be correctly assembled and re-unforced. OR...problems MAY show up due to lack of structure and support.
DUB
Last edited by DUB; 09-25-2016 at 07:21 PM.