When you click on links to various merchants on this site and make a purchase, this can result in this site earning a commission. Affiliate programs and affiliations include, but are not limited to, the eBay Partner Network.
Just a quick question regarding my reinforcement bar at the nose. My car is a 1969. When I search through past posts, they all have 5 rivets on each side spaced equal distance. I assume my bar is original but there are 7 holes and I don't know why? four of the holes seem to be at an angle and would not mount flush with the fibreglass. Am I missing something? I want to put this back together but it was done incorrectly before and has no rivets. In fact, I had no radiator support bar or any attachements to the front frame extension which explains my nose droop.
Thanks, Pete
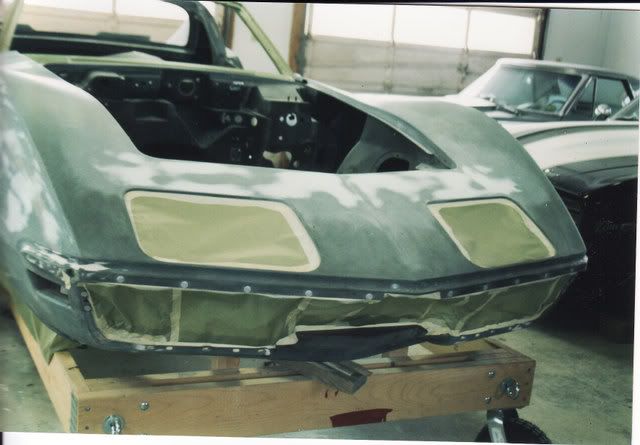
half of my hood surround front nose reinforcement bar
Paragon sells the correct solid aluminum rivets and they are 3/16' diameter shaft.
Not that you asked...but when I do these I epoxy prime the reinforcement..and then I also use an adhesive like GM did in later years to make this area stronger. When I am done...you can not tell I used an adhesive.
Alan, Thanks so much for the great picture. I wonder if my reinforcement bar is a bit of an odd ball. My build was an early 1969. I can only find pictures of early reinforcement bars on line that are re-pops and just have 5 simple holes on each side for the 10 rivets. I also noticed underneath (bottom of your reinforcement bar in your corner) you have the larger hole for the headlight mechanism and another smaller hole which I assume attaches via a bracket to the front frame extension. I wonder if my car being an early 1969 (never had a connection between the front hood surround reinforcement and the front frame extensions??? Anyone have an early 1969? Or perhaps a previous accident and an incorrect reinforcement bar was installed since I have no rivets at all. I assumed the front frame extension brackets to the reinforcement bar was installed vertically rather than horizontally if you know what I mean. The AIM pictures of that particular bracket (front frame extension to bumper and to front hood surround reinforcement) are absolute unreadable.
Thanks Dub,
I will epoxy prime it first. What length of rivets would I need, Is it all dependent on how much fiberglass I have built up? And by the way, I have been watching your thread on the Lingenfelters 1973 in paint and body section. I have just tried my first ever crack at fibreglass as before I do anything I at least need to stiffen up the front nose of the car with the number of cracks etc. I can say I have had a very mixed result but I suppose you have to start some place! I can only improve. Thanks so much for posting and all the great info you provide.
And Dub since I have been meaning to ask you a couple other questions. You may or may not recall but my door gap on the drivers side was out of wack and I had shown you pics of my control arms and you had concern that my cradle had been compromised based on my lack of shims. Well the car was nearly undriveable and wandered all over the road and it turned out that whoever tried to align it before me had no idea how to do it. A couple of the alignment specialist on here walked me through the alignment process and I now have set camber to zero and a positive caster and the car drives much better. (yes, I did use washers as my shims had not yet arrived,,, they will be replaced with the shims I now have) TAKE IT EASY ON ME,, its just my hobby, I fly airplanes for a living and only have so much time. See pics below. Anyway, that leads me to my question,
The car had been bumped up front and had been without any sort of support on the nose other than the inner fenders and rad support. There was no radiator surround "ROD" to hood surround bar in place at all and no connection of the outer bumpers or the hood surround reinforcement bar to the front frame extension. (The nose was just hanging there so to speak and riding essentially on the "front nose support horseshoe"
I really do not want (at this stage anyway) remove the entire front clip. But I am willing to tackle removing just the bonds on the drivers side and to the front inner fender to try to lift the front up just a bit. It is almost as though it was bonded after a previous repair but not very well and the nose on the drivers side only shifted down and opened up a gap on the drivers door (top front) just a bit due to improper support up front.
My plan is as follows.
1. do a little fibreglass work on nose so I don't crack it and make any more damage.
2. reinstall the front hood surround reinforcement bar and put in the correct radiator support "ROD" to hood surround reinforcement bar and correct front frame extension bits.
3. then unbond drivers side of the clip and put all the pieces in place so it sits correctly and rebond it
Is this plan feasible Dub?
I am a little hesitant to remove the front clip now. I do plan to do a full body off one day on the car but not now, I just don't have the time in my life to do it with kids/work etc.
But I do want the front to be properly supported and the door gaps to be in the ball park of where they should be so I can get out and drive the car and enjoy it a bit for a few years before going for the "ALL IN / BODY OFF" restoration
Hi v,
I'm afraid I'm no help.
My 71 reinforcement has just the 5 holes each side (From what I can feel) and doesn't have the 'divits' that your bar shows.
Hopefully someone with a 69 can offer some enlightenment.
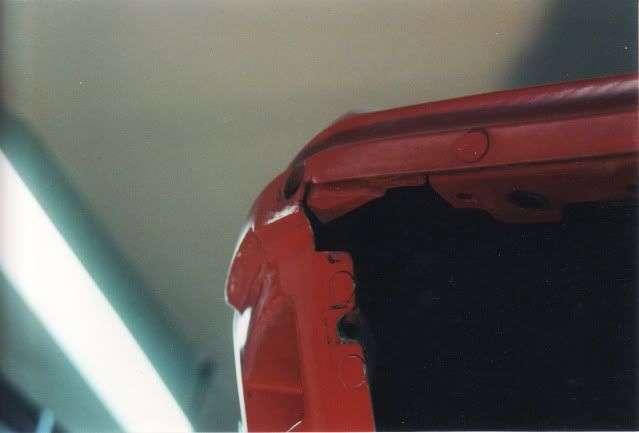
For reference here's the end of the reinforcement and 2 small brackets for the bumper connection on my 71. This is the left side. You can see the bolt goes through the 2 small bracts into the back side of the bumper.
Regards,
Alan
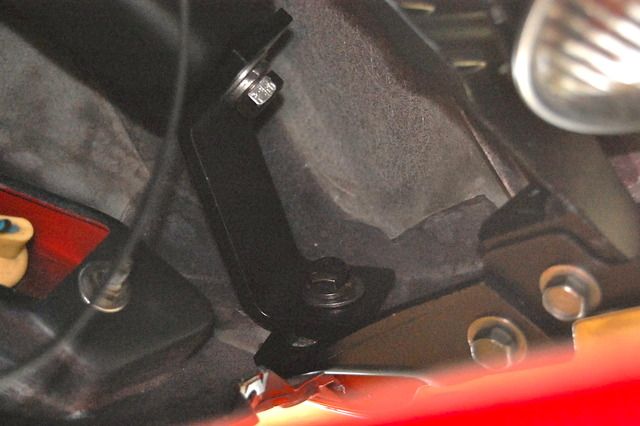
The metal reinforcement you have is NOT for your Corvette. REPEAT...it is NOT for your Corvette. This is a FACT!
This metal reinforcement made for Corvettes with urethane bumper covers.
I will post a photo of a correct one.
DUB
OK, Thanks so much DUB,, I will turf this one and get the correct one. Thank god I asked. All the vendors have very very poor pictures and it is impossible to tell what they look like!!!
Thanks, Alan great Pic.
I have all of those bits and pieces as I just purchased them, but Dub points out I need the correct reinforcement bar. With all my research, I never could have determined that without your guys help!
Thanks Dub,
I will epoxy prime it first. What length of rivets would I need, Is it all dependent on how much fiberglass I have built up? And by the way, I have been watching your thread on the Lingenfelters 1973 in paint and body section. I have just tried my first ever crack at fibreglass as before I do anything I at least need to stiffen up the front nose of the car with the number of cracks etc. I can say I have had a very mixed result but I suppose you have to start some place! I can only improve. Thanks so much for posting and all the great info you provide.
First off I am not going to tear you up...but I am going to be brutally honest...only because I want YOU to succeed and not fail like I have.
YES...we all have to start somewhere. I will write this just like I tell members who call me. PRACTICE, TEST, PRACTICE.
If you ahve never done this before..and you jump in on your car and start doing it. To me...that is insane...but people can do as they want. the reason I feel that is insane is because spending a little time practicing your laminating techniques and testing them is well worth it BECAUSE if you are laminating in cracks and have not mastered the prep and application of the mat and resin...it only seems foolish to trust your repair if you feel you are not getting consistent results.
Kinda like baking cookies....you can have a recipe and follow it...but that does not mean that a bit of 'tweaking' is needed to make sure every batch turns out prefect.
And Dub since I have been meaning to ask you a couple other questions. You may or may not recall but my door gap on the drivers side was out of wack and I had shown you pics of my control arms and you had concern that my cradle had been compromised based on my lack of shims. Well the car was nearly undriveable and wandered all over the road and it turned out that whoever tried to align it before me had no idea how to do it. A couple of the alignment specialist on here walked me through the alignment process and I now have set camber to zero and a positive caster and the car drives much better. (yes, I did use washers as my shims had not yet arrived,,, they will be replaced with the shims I now have) TAKE IT EASY ON ME,, its just my hobby, I fly airplanes for a living and only have so much time. See pics below. Anyway, that leads me to my question,
NO problems here....you had to do what you had to do. But from what I can see...some of the control arm bushings are looking rather.....crappy and worn out. 'Just saying'.
The car had been bumped up front and had been without any sort of support on the nose other than the inner fenders and rad support. There was no radiator surround "ROD" to hood surround bar in place at all and no connection of the outer bumpers or the hood surround reinforcement bar to the front frame extension. (The nose was just hanging there so to speak and riding essentially on the "front nose support horseshoe"
YES...I have encountered cars like yours with basically no supports being used.
I really do not want (at this stage anyway) remove the entire front clip. But I am willing to tackle removing just the bonds on the drivers side and to the front inner fender to try to lift the front up just a bit. It is almost as though it was bonded after a previous repair but not very well and the nose on the drivers side only shifted down and opened up a gap on the drivers door (top front) just a bit due to improper support up front.
My plan is as follows.
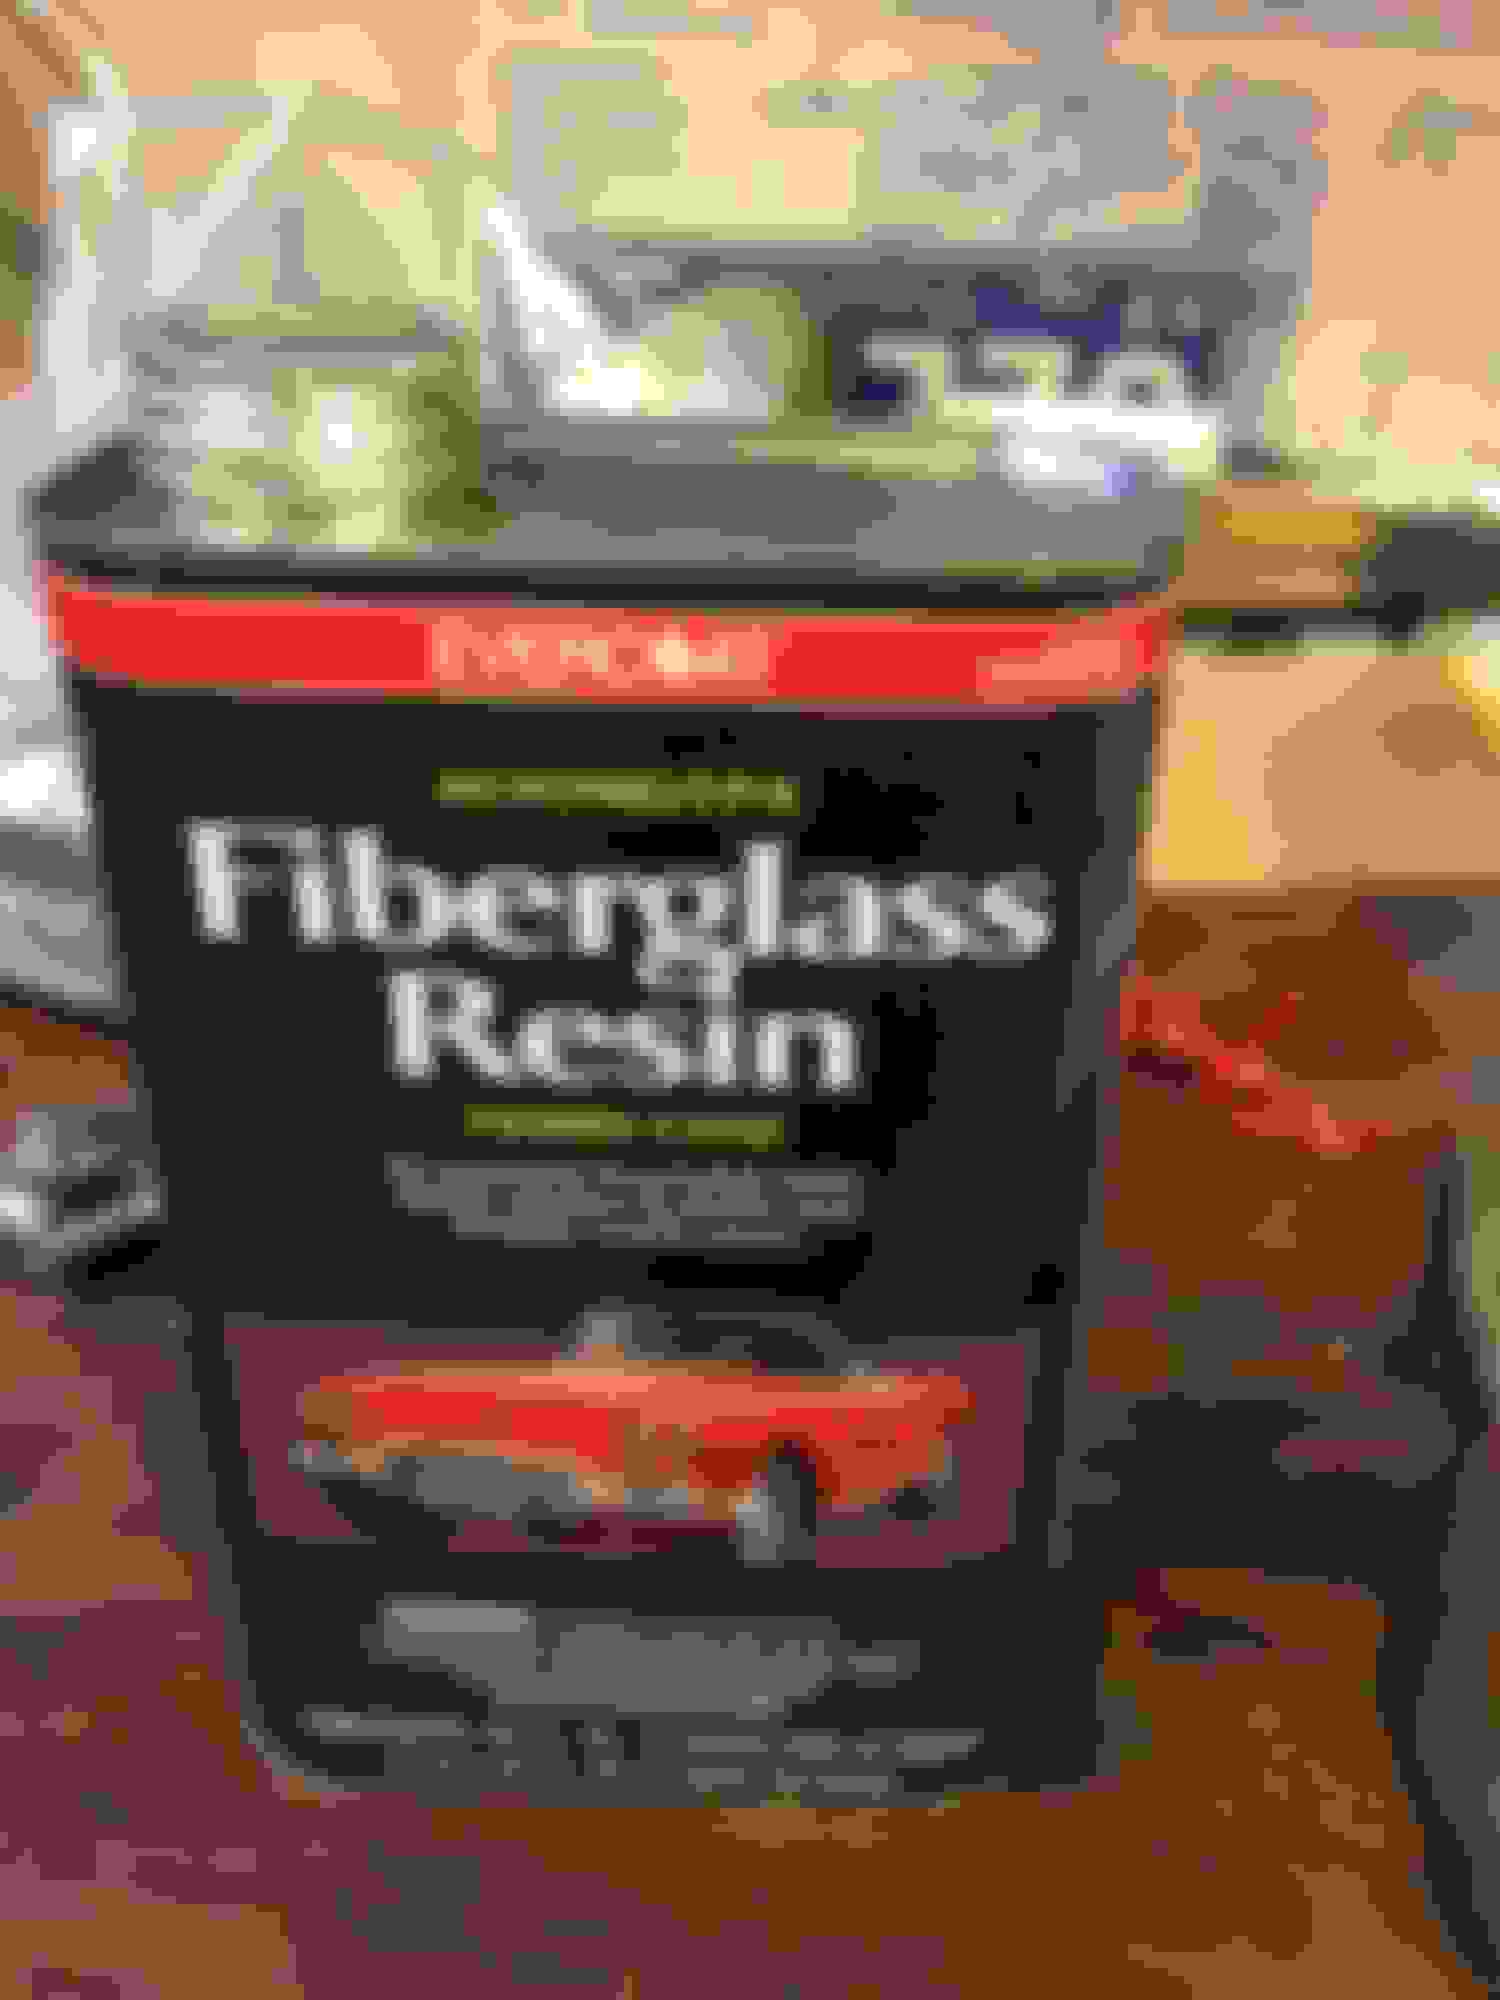
1. do a little fibreglass work on nose so I don't crack it and make any more damage. This is a good idea but you better be careful and make sure you are using the CORRECT resin for the body panel!!!!!!! Laminating resin on primer and paint is NOT a good idea and really bad habit to get into...the fiberglass MUST be clean ad prepped correctly.
2. reinstall the front hood surround reinforcement bar and put in the correct radiator support "ROD" to hood surround reinforcement bar and correct front frame extension bits.
YES...perfect.
3. then unbond drivers side of the clip and put all the pieces in place so it sits correctly and rebond it
This is where this may or may not work as planned. I would have to see how the top hood surround is bonded to the firewall plenum on the left side and see how much adhesive they used. If the idea is trying to get the top hood surround and fender to drop down. THIS can prove to possibly NOT be the way to fix this.
Knowing that the top corner of your left top hood surround is high because the molding that goes on the top hood surround there would NOW be too high of installed. (As previously discussed in the past). BUT...IF the fender is flush with the bottom horizontal edge of the door is correct the bottom of the door (as it should be)...and the door can not be raised and effect window alignments ,etc... That the top hood surround may need to be detached and the fender stays put and the top hod surround it reset.
Too many variables for me to 100% confirm this. A lot more info needed. So knowing EXACTLY what someone did in the past for a previous repair is needed.
I would advise sanding off the paint where the bonding seam is on the left side where the fender and top hood surround meet.
Is this plan feasible Dub?
I am a little hesitant to remove the front clip now. I do plan to do a full body off one day on the car but not now, I just don't have the time in my life to do it with kids/work etc.
But I do want the front to be properly supported and the door gaps to be in the ball park of where they should be so I can get out and drive the car and enjoy it a bit for a few years before going for the "ALL IN / BODY OFF" restoration
MAN...an awful lot of work to only go back in later and do it all over again. After reading this at the end of this post...Are you sure you want to go crazy on it now??? 'Ballpark'ing it is fine. but why worry about a bunch of stuff now if you plan in gettign really serious later???
Thanks Dub for your words of wisdom. Although I was very careful to get rid of all the primer and filler on the area I glassed, I did glass over top of the blue filler as I was under the impression that that stuff was the vette fill that your refer to and that you use when bonding cracks? Any sign of paint/primer other filler I removed although it is difficult to tell from my pic. I was also carful to clean and scuff but I chose one of the most difficult places to begin as the panel is so so thin and brittle at the nose.. ANYWAY, point taken, I will track down an old corvette fender from some place and start practicing!
RE the control arm bushings, I will do the control arms but they are just on my to do list at this stage
I have done the idler arm, PSCV, ball joints, wheel bearings. Just enough to do a basic alignment. I think the control arms bushings are 50 years old as the car sat idle baking in the Nevada sun for years. "crappy and worn out" is probably an understatement.
OK, I will carry on with getting all the correct reinforcement bits in place and I will sand out the area where the surround meets the top of the fender. i had not even considered the possibility that the fender and top surround are not joined correctly. Looks like more investigation is required.
It does however appear to me that the top of front door gap is too large while the bottom gap is too tight.
I hope you don't mind these questions. And thank you for the honesty. I am trying to get up to speed and skill but have bit off a considerably large project! I have been meaning to ask you these questions but am also in the middle of getting this big block to run well and not overheat! The engine has also kept me busy but getting there with the help of a good friend who really knows engines.
The scenario of where and when and how to use VPA for a crack/laminating repair depends so much on the panels rigidity. So it depends on how much you fill the crack with the VPA.
I would have to see the top hood surround with more paint removed. I am having a hard time telling if it is SMC or not.
OR I need a good clear photo of a really good cleaned off spot on the underside of the top hood surround. I need to either know what it looks like so a photo.
Because it DOES make a difference.
Look at POST #25. On how the front clip looks competently different than the doors back. Two different types of body material....which makes a difference.
Does this help? This is obviously a new hood surround that I suspect was installed some time in the mid to late 1970's but looks like it was produced in 1970.
Thanks for the great shots Dub!
I expect the correct reinforcement bar and rivets to arrive any day. Those pictures will be very helpful when I install it.
Pete

 11-25-2016, 01:03 AM