1956 to 1962 Windshield Removal & Installation Tutorial
 01-14-2014, 04:57 PM
#21
Instructor


Excellent timing and thank you. This will be complemented well by Richard Mozetta's recent efforts and work to get properly sized windshield gasket/rubber that truly fits from Corvette Rubber Co.
 01-14-2014, 05:26 PM
#22
Safety Car

Thread Starter
Here it is, all done. Put it on before lunch but took an extended lunch and helped another buddy with his '65 after that.
I still need to button up the T-bolts and side posts, and install the header trim piece.
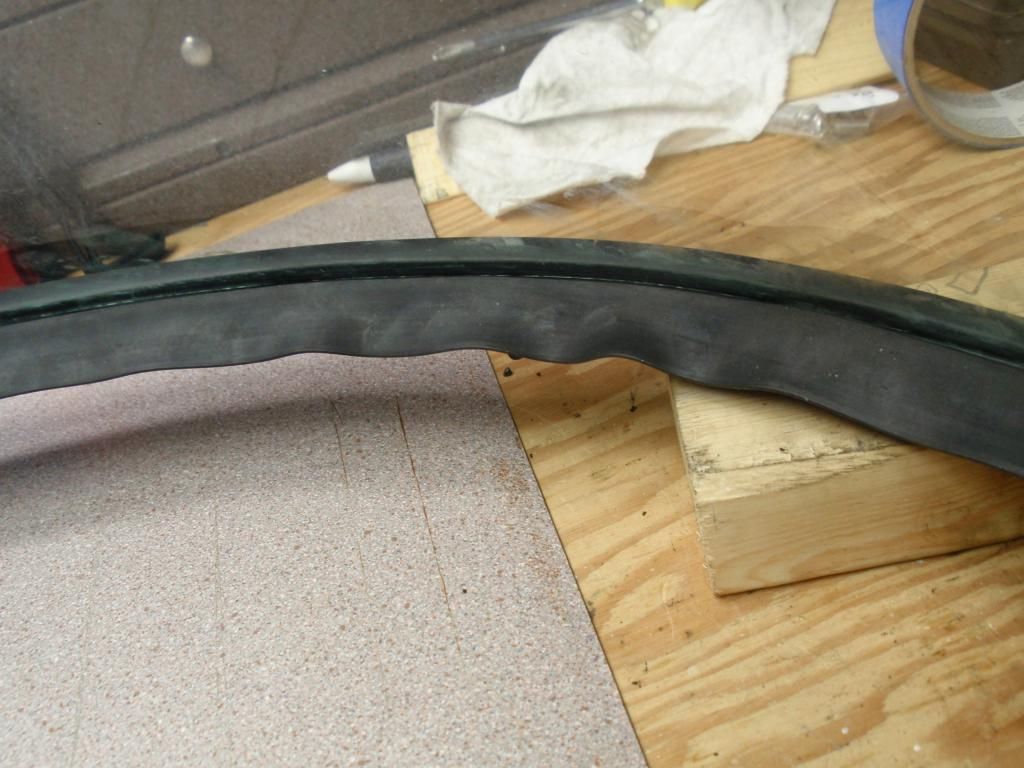
BTW, this was all re-done by me on this '61 that came in with ugly wrinkles in the lower inside corners. I got the new rubber glass weatherstrip directly from CRC(Corvette Rubber Company). See this thread for that info....
http://forums.corvetteforum.com/c1-a...ip-issues.html
The last photo is before this work, showing how badly the inner corner wrinkles were. The owner of the car came by today and couldn't believe I took the windshield assembly off just to fix the wrinkles. I couldn't deal with those uglies so off it came!
All wrinkles NOW gone with the newly fabricated rubber seal, and nice overlap now of the inside rubber flap to bottom post flange.
I guess good things come out of problem parts sometimes. I get to write it all up
Rich
I still need to button up the T-bolts and side posts, and install the header trim piece.
BTW, this was all re-done by me on this '61 that came in with ugly wrinkles in the lower inside corners. I got the new rubber glass weatherstrip directly from CRC(Corvette Rubber Company). See this thread for that info....
http://forums.corvetteforum.com/c1-a...ip-issues.html
The last photo is before this work, showing how badly the inner corner wrinkles were. The owner of the car came by today and couldn't believe I took the windshield assembly off just to fix the wrinkles. I couldn't deal with those uglies so off it came!
All wrinkles NOW gone with the newly fabricated rubber seal, and nice overlap now of the inside rubber flap to bottom post flange.
I guess good things come out of problem parts sometimes. I get to write it all up
Rich
 01-14-2014, 06:55 PM
#24
Looking forward to your final product. Just curious, are you really using the metal putty knives instead of plastic ones, (I am assuming they are for getting the seal in place).
01-14-2014, 08:17 PM
#25
Safety Car
Thread Starter
You carefully pry one edge of the trim away from the frame, then slip thin putty knives(or butter knives) along the edges and keep inserting the knives sideways along the width until it's separated. I use a narrow blade to slide sideways along the trim while adding knives behind it. The rear lip rests on the frame, but the front lip(part resting on table), has a inner lip that captures the frame edge.
It took me about 5 minutes to separate the 2 pieces.
I don't feel there is any way to install the trim/frame as a unit, that is of course, without doing some type of damage to the trim.
The last photo here is using a narrow knife to assist when installing either bottom or top frame. A little bit of the seal may protrude so a careful push of the rubber and it gets in there all the way.
Rich
01-14-2014, 08:56 PM
#26
Drifting


Rich,
You couldn't have done this a month ago??
Just kidding, looks great!
Given what it takes to do this, your detailed write up will be used by many in the future to take all of the guess work out of this job.
Tom
You couldn't have done this a month ago??
Just kidding, looks great!
Given what it takes to do this, your detailed write up will be used by many in the future to take all of the guess work out of this job.
Tom
01-14-2014, 09:13 PM
#27
Team Owner


Step #1: Buy about 50 putty knives
01-15-2014, 03:46 AM
#28
Safety Car
Thread Starter
, cuz I was too busy entertaining family over the holidays.All of this windshield stuff is you're fault!
If it wasn't for you asking about the rubber wrinkle problem on the TDB last month we wouldn't be here.
You did a great job with super details about test fitting the new design rubber.
...or steal about 50 butter knives from the kitchen drawers.
It really is amazing that the design of that trim and frame is that way. I've heard a few stories over the years how some folks destroyed the trim trying to get it separated.
 01-15-2014, 12:12 PM
#29
Safety Car
Thread Starter
Started early this AM and I couldn't stop. Finished the first revision as I feel more info is needed in some areas.
Suggestions welcome. Unfortunately I had to do it in 2 parts due to Comcast filesize and photo limitations.
Part 1 is Disassembly
http://home.comcast.net/~richmz/site/?/page/1956_to_1962_Corvette_Windshield_Frame_G lass_Removal_and_Installation_Part_1
Part 2 is Assembly
http://home.comcast.net/~richmz/site/?/page/1956_to_1962_Corvette_Windshield_Frame_G lass_Removal_and_Installation_Part_2
Rich
Last edited by rich5962; 01-15-2014 at 01:56 PM. Reason: fix links
01-15-2014, 01:10 PM
#30
Drifting
Started early this AM and I couldn't stop. Finished the first revision as I feel more info is needed in some areas.
Suggestions welcome. Unfortunately I had to do it in 2 parts due to Comcast filesize and photo limitations.
Part 1 is Disassembly
http://home.comcast.net/~richmz/site/?/page/1956_to_1962_Corvette_Windshield_Frame_G lass_Removal_and_Installation_Part_1/
Part 2 is Assembly
http://home.comcast.net/~richmz/site/?/page/1956_to_1962_Corvette_Windshield_Frame_G lass_Removal_and_Installation_Part_2/
Rich
Tom
01-15-2014, 06:48 PM
#31
Safety Car
Thread Starter
Thanks Tom, I hope it helps the DIYers as so many look for this info. I started it around 5am this morning and finished around noon.
Any suggestions feel free to tell me.
Rich
Any suggestions feel free to tell me.
Rich
The following users liked this post:
davesred57 (08-14-2022)
01-15-2014, 07:40 PM
#32
Drifting
One thing I did to make getting the washer and lock washer in place for the window post studs was to use some of the Mortite (dum-dum). I put a little on both the lock washer and flat washer and pushed it over the stud. That held them in place while I installed the nut.
Tom
Works well for speaker washers also............
01-15-2014, 09:27 PM
#35
Safety Car
Thread Starter
It's also possible that your dashpad vinyl was wrinkled underneath and the heat gun smoothed those out.
That happened on the one shown on the website tutorial when I first reinstalled it. After heating the vinyl to flatten their wrinkles, the rubber wrinkles were gone too. pics below.
Note that on Al Knoch dashpads the top front edge of the pad foam needs to be trimmed so this doesn't happen.
Rich
 01-15-2014, 11:24 PM
#37
Melting Slicks

Rich,
As we discussed earlier, I am attaching the PDF file I created from your web pages.
Thanks for your efforts in putting this information together for us. I'm sure it will be useful to anyone attempting this project.
Your time and efforts are appreciated!
Dave Z
As we discussed earlier, I am attaching the PDF file I created from your web pages.
Thanks for your efforts in putting this information together for us. I'm sure it will be useful to anyone attempting this project.
Your time and efforts are appreciated!
Dave Z


 05-05-2015, 07:47 AM
#40
Team Owner
Nice! I've got rechromed '61 windshield pillars with reinforced tabs that I have to install next winter; I'm sure Rich's document is gonna come in handy.