



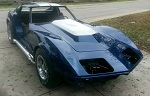




Another Vette Rod/Frame off project thread

Thread Starter
Racer


Joined: May 2007
Posts: 265
Likes: 1

KO,
I am just taking a bit of fine steel wool and then a wipe down with some paper towels. CS is water soluable so once the complete car is done I am going to pressure wash it to get any residue off and clean any dirt still on the body.
Andrew
I am just taking a bit of fine steel wool and then a wipe down with some paper towels. CS is water soluable so once the complete car is done I am going to pressure wash it to get any residue off and clean any dirt still on the body.
Andrew
Thread Starter
Racer
Joined: May 2007
Posts: 265
Likes: 1
Got some more done this weekend. Spent about 16 man-hours on the rear. Had a very odd break in the back almost like someone took an axe to it or something. More of Bubba's handiwork there too.


Anyone ever see a break like that?
Anyways, the light buckets take forever to get decent.

And the whole rear here.

And the license plate area. Lots of tiny little ridges and corners on the rear takes FOREVER to get done.

Next weekend planning to get the top hoop and the rear deck done, possibly the drivers quarterpanel too.
More to come.
Anyone ever see a break like that?
Anyways, the light buckets take forever to get decent.
And the whole rear here.
And the license plate area. Lots of tiny little ridges and corners on the rear takes FOREVER to get done.
Next weekend planning to get the top hoop and the rear deck done, possibly the drivers quarterpanel too.
More to come.
Drifting


Joined: Apr 2007
Posts: 1,892
Likes: 3
From: Springfield Illinois
Its starting to look pretty good... I feel sorry for you right now, but in the end its all worth it.
I was just curious, why didn't have the car blasted? (I believe they use ground up walnut sheels?)
I was just curious, why didn't have the car blasted? (I believe they use ground up walnut sheels?)
Thread Starter
Racer
Joined: May 2007
Posts: 265
Likes: 1
I have heard a lot of conflicting information about blasting, be it with walnut shells or with soda and the latest I have heard about getting fiberglas done with acrylic beads. Some threads say that soda blasting is very bad and that most painters won't touch a car that has been done with soda. I have no idea why.
Basically I am stripping as much as possible myself to save some $$$ on the blasting and prep at the body shop. As I understand it, there is an issue with paint compatibility between the old laquers and the new paint systems. Hey its only my time, the materials to strip the body at this point is less then $50 so why not? I am also going to be doing a lot of my own fiberglas work as well so I need a number of areas as clean as possible and stripping off the paint is a good first place to start.
82MDVette: There sure is a technique to taking a razor blade to the body. I ended up leaving a bunch of areas alone because of the curves in the body would have ended up gouging the fiberglas otherwise.
Corvette Stories
The Best of Corvette for Corvette Enthusiasts

How Much Horsepower Every Corvette Engine "LOST" in 1972
Joe Kucinski
Top 10 DOs and DON'Ts for Protecting Your Convertible Top!
Michael S. Palmer
Top 10 Most Explosive Corvettes Ever Made: Power-to-Weight Ratio Ranked!
Joe Kucinski
150 hp to 1,250 hp: Every Corvette Generation Compared by the Specs That Matter
Joe Kucinski
8 Coolest Corvette Pace Cars (and Replicas) of All Time
Verdad Gallardo
Top 10 Corvette Engines RANKED by Peak Torque (70+ Years of Muscle!)
Joe Kucinski
Corvette ZR1X Will Be Pacing the Indy 500, And Could Probably Race, Too!
Verdad Gallardo
Top 10 Corvettes Coming to Mecum Indy 2026!
Brett Foote
Top 10 C9 Corvette MUST-HAVES to Fix These C8 Generation Flaws!
Michael S. Palmer
Thread Starter
Racer
Joined: May 2007
Posts: 265
Likes: 1
Well another weekend has come and gone and I spent it stripping paint from the Vette, I have feeling in my fingers again! Woo Hoo! A big thanks to my wife who spend all day Sunday helping me "strip the mistress" so to speak. Hehe.
It was pouring rain Friday and I was worried that it was going to rain over the weekend but it turned out nice after all. Saturday was a bit hot and humid (reminds me of Montreal where I grew up) but it was bearable, Sunday was prefect weather for working on the Vette.
A word to the wise, it is not a good idea to be drinking orange juice while using CitrisStrip. Just not a good idea at all.
Anyways, We managed to get the hoop around the rear window and the back deck done. It doesnt look like a lot but it really was. The paint was really thick in the transition curve between the rear deck and the pillars.
It is also a good idea to clean off any contact cement that was used to glue on the gasket for the rear window before using the stripper. CitrisStrip turns the contact cement into a gooey, gummy mess that has a tendency to stick to just about anything and everywhere. I think I got it all off but it was a real chore.
Next weekend we are going to finish the drivers quarterpanel and then start attack all the little nasty areas we left alone, like the vents on the rear deck and the engine compartment and the passenger compartment.
Here are some pics of our progress.

looking good here.
Lots of nasty little ridges and other irregularities here, but I got them all.

More little ridges and other small areas that are annoying to do, but coming along well.

I am *N*O*T* looking forward to doing these vents on the back deck. Might save those for the media blaster.

These are the transitions I was talking about, they turned out nicely though. I didn't take a razor blade to those because I didn't want to gouge the Fiberglas. I was very careful using the razor blade I have only 2 gouges in the whole body and they are very minor.

Here is the rear window frame from the inside. The glue is off, and most of the paint too. Going to finish this next week. It is very important to get these areas ultra clean because any old glue or paint will cause water leaks later on when you glue the new seal in place.


More to come. Hope all your winter projects are coming along faster then mine is.
It was pouring rain Friday and I was worried that it was going to rain over the weekend but it turned out nice after all. Saturday was a bit hot and humid (reminds me of Montreal where I grew up) but it was bearable, Sunday was prefect weather for working on the Vette.
A word to the wise, it is not a good idea to be drinking orange juice while using CitrisStrip. Just not a good idea at all.
Anyways, We managed to get the hoop around the rear window and the back deck done. It doesnt look like a lot but it really was. The paint was really thick in the transition curve between the rear deck and the pillars.
It is also a good idea to clean off any contact cement that was used to glue on the gasket for the rear window before using the stripper. CitrisStrip turns the contact cement into a gooey, gummy mess that has a tendency to stick to just about anything and everywhere. I think I got it all off but it was a real chore.
Next weekend we are going to finish the drivers quarterpanel and then start attack all the little nasty areas we left alone, like the vents on the rear deck and the engine compartment and the passenger compartment.
Here are some pics of our progress.
looking good here.
Lots of nasty little ridges and other irregularities here, but I got them all.
More little ridges and other small areas that are annoying to do, but coming along well.
I am *N*O*T* looking forward to doing these vents on the back deck. Might save those for the media blaster.
These are the transitions I was talking about, they turned out nicely though. I didn't take a razor blade to those because I didn't want to gouge the Fiberglas. I was very careful using the razor blade I have only 2 gouges in the whole body and they are very minor.
Here is the rear window frame from the inside. The glue is off, and most of the paint too. Going to finish this next week. It is very important to get these areas ultra clean because any old glue or paint will cause water leaks later on when you glue the new seal in place.
More to come. Hope all your winter projects are coming along faster then mine is.
Last edited by VetteThunder1; Oct 16, 2007 at 01:17 AM.



Thread Starter
Racer
Joined: May 2007
Posts: 265
Likes: 1
Haven't had a chance to do much lately work been kicking me hard and all I can do is come home in the evenings and veg.
I have managed to get the body finally all stripped. Now I am working on the door sills and the engine compartment is next.
The drivers side sill turned out OK.

even the door area behind the front fender turned out OK.

Media blaster gonna have some fun with some of the areas I am leaving for them to do. Mostly gonna get the bird cage done and a few hard to reach areas. Chemical stripping is very effective and over all cheap and easy to do. It just takes a fair bit of patience and some time.
Getting ready to order some bling for the engine soon gonna have some exciting pics of that.
I have managed to get the body finally all stripped. Now I am working on the door sills and the engine compartment is next.
The drivers side sill turned out OK.
even the door area behind the front fender turned out OK.
Media blaster gonna have some fun with some of the areas I am leaving for them to do. Mostly gonna get the bird cage done and a few hard to reach areas. Chemical stripping is very effective and over all cheap and easy to do. It just takes a fair bit of patience and some time.
Getting ready to order some bling for the engine soon gonna have some exciting pics of that.


Thread Starter
Racer
Joined: May 2007
Posts: 265
Likes: 1
Its been a little while
Well, its been a little while since I posted but I have been keeping busy. Work is ramping up and is killing me we are moving the data center into a new building and management wants it done by mid Feb. UGH! Anyways, I have finished off the body and finished the 2 doors and the T-Tops. I am talking to a body shop about getting some of the work done as I just don't have the room or time to get into the fiberglas work that needs to be done.
Doors, with flares done by bubba...


All clean now..


And the T-Tops too...

Wheeled the body out a couple of weeks ago to pressure wash it.
I found that the soap feed on the pressure washer didn't work any more. So I washed it by hand and used to pressure washer to rinse it off after.


Talking to the body shop going to have them put the body on the chassis, put in a roll cage and also do the fixes to the Fiberglas.
I will be working on getting some of the other bits and peices cleaned and ready to go back into the body once I get it back.
Doors, with flares done by bubba...
All clean now..
And the T-Tops too...
Wheeled the body out a couple of weeks ago to pressure wash it.
I found that the soap feed on the pressure washer didn't work any more. So I washed it by hand and used to pressure washer to rinse it off after.
Talking to the body shop going to have them put the body on the chassis, put in a roll cage and also do the fixes to the Fiberglas.
I will be working on getting some of the other bits and peices cleaned and ready to go back into the body once I get it back.

Melting Slicks

Joined: May 2007
Posts: 3,246
Likes: 4
From: Bay Area CA


Thread Starter
Racer
Joined: May 2007
Posts: 265
Likes: 1
as is stands I am considering getting one custom made from Fuel Safe..
Check them out here... Fuel Safe Fuel Cells.
Melting Slicks
Joined: May 2007
Posts: 3,246
Likes: 4
From: Bay Area CA
If it was SCCA approved I would certainly buy it. Ideally it would be in the 20+ gallon size. Don't want to just drive from gas station to gas station...
as is stands I am considering getting one custom made from Fuel Safe..
Check them out here... Fuel Safe Fuel Cells.
as is stands I am considering getting one custom made from Fuel Safe..
Check them out here... Fuel Safe Fuel Cells.
, though I'm just trying to guage the potential market. this wouldn't fit your app, but I'm thinking about 16-17 gals, steel shell, one of ATLs super tough liners, it will be SCCA rated, at least. thanks for your input, Chris.
Melting Slicks
Joined: May 2007
Posts: 3,246
Likes: 4
From: Bay Area CA
that was my first thought, but most of the original liners are pushing 30 years, and not going to be very safe. No repos of the liner made either, just the steel shell tank.
Thread Starter
Racer
Joined: May 2007
Posts: 265
Likes: 1
I'm Back!
Work was killing me, basically from about mid-december up to last week I really didn't have much time to do anything at all.
I did manage to get a few bits and peices done however.
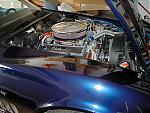
I bought some BLING for the engine from Billet Specialties, I was very very pleased with the completeness of the kit and the design and engineering that went into their TruTrack system. It took me about 3 hours from start to finish to get it all installed. The longest part was trimming the bolts and studs that were just a little bit too long.
Check out the pics...
Everything you need...

Before...

Here is the heart of the system, note the O rings to seal everything no crappy gaskets.

after that on goes the water pump and the spacers,


Then the alternator, powersteering pump and the tensioner and the water pump pulley and crank pulley. Install the belt and all done. This part took me about 30 minutes to complete.
DONE!

Work was killing me, basically from about mid-december up to last week I really didn't have much time to do anything at all.
I did manage to get a few bits and peices done however.
I bought some BLING for the engine from Billet Specialties, I was very very pleased with the completeness of the kit and the design and engineering that went into their TruTrack system. It took me about 3 hours from start to finish to get it all installed. The longest part was trimming the bolts and studs that were just a little bit too long.
Check out the pics...
Everything you need...
Before...
Here is the heart of the system, note the O rings to seal everything no crappy gaskets.
after that on goes the water pump and the spacers,
Then the alternator, powersteering pump and the tensioner and the water pump pulley and crank pulley. Install the belt and all done. This part took me about 30 minutes to complete.
DONE!