


Fender Replacement

Thread Starter
Heel & Toe

Joined: May 2009
Posts: 20
Likes: 0
I have to repace a fender on my 71. I'm just looking for and do's or dont's or any advice anyone may have. I'm debating whether do attempt it myself. I'm good with bodywork and painting on regular cars, but never tried fiberblass. Your input is welcomed.
Thanks!
Thanks!
Team Owner


Joined: Jun 2000
Posts: 38,923
Likes: 1,481
From: Southbound
Cruise-In II Veteran
http://www.glas-ra.com/home.html
Two volumes for C3s. Purchase both.
This is reasonably good if you can find a copy. It may be out of print.
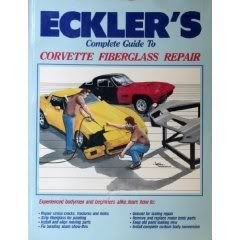
71 rear fenders are SMC; most of the rest is press molded polyester. If you purchase repair materials compatible with both types of fiberglass, you'll be fine.

Two volumes for C3s. Purchase both.
This is reasonably good if you can find a copy. It may be out of print.
71 rear fenders are SMC; most of the rest is press molded polyester. If you purchase repair materials compatible with both types of fiberglass, you'll be fine.
Last edited by Easy Mike; Jul 14, 2011 at 02:03 PM.

Melting Slicks

Joined: Jul 2009
Posts: 3,264
Likes: 3
From: Vero Beach FL
The biggest difference in doing body work on fiberglass verses steel is when you sand a steel body it stops when you get to the metal in fiberglass it just keeps going. It�s real easy to sand the edges and corners off.

Burning Brakes


Joined: Feb 2004
Posts: 924
Likes: 2
From: Kearneysville West Virginia
Do, do it yourself. Don't be in a hurry. Align and dry fit many times before you bond. Grind all bonding surfaces and keep clean. Mix materials as instructed for a given temperature, etc. Do wear all the proper safety gear, as you don't want to breath fiberglass dust, get it all over your skin, or drag it into the house after you are done. I find fiberglass is so easy to work with. Take your time and enjoy the project. I am sure you will be pleased with the results and the fact that you did it yourself.

Safety Car


Joined: Jul 2005
Posts: 3,694
Likes: 833
From: WI
You shouldn't have any trouble doing it with your skills. Once you get the new one bonded down, the rest is bodywork not unlike what you would normally do, other than a few different materials. When I first had to knock off a fender from my car, I spent weeks thinking about it, learning, etc. Heck, once I actually got to using the tools, I had it off in 15 minutes and the new one on in an hour. It gets faster from there on.
I started with the Ecklers DVD video (#2 I believe). I recommend it, even though it's kind of pricey. What I did after sanding the paint off, down to the fiberglass, was to carefully take a cut-off tool and make an incision down the length of fender at the gap where the fender and the upper surround meet. I used the technique that Ecklers promotes which is to use a wide chisel and a 4lb hammer and work your way along the incision (basically along the body seam) from one end to the other giving sharp blows. Doesn't seem like anything is happening until suddenly "thud" and the seam breaks free (just like splitting a wide section of wood). I used a toothed 2" wide cement/brick chisel that worked great. I had it anyway for other uses. Then you just remove other areas as needed. I know other guys use the heat gun method to 'soften' up the bonding agent and it seems to me that this would work better, but I haven't had a need to try it lately. So if it were me, I'd apply the heat gun method and the chisel method. Should come off pretty easily.
To install, grind down the bonding agent on the existing filler strip and get the 'right' stuff from Ecklers or another shop. I used a hand sand blaster to blast the areas where the bonding agent would adhere to on the backside of the fender. Looking at my original, it looked like the factory did the same thing to give the fender something to 'bite' to. Get it to fit like you want it, I used a couple screws in a few places to locate it where I wanted it, then using masking paper in the shape of a cone, put the bonding agent in the cone and apply the bonding agent like cake maker would apply frosting to a cake. Put your fender on and locate using a couple screws. Apply tape or use whatever clamping means you wish to clamp into place accordingly. Be careful not to clamp too thight that you get 'divits' or low spots in the new panel from clamping devices. Fill in whatever screw holes you need to afterwards. I "V'd" out the gap and applied fiberglass filler and matt along the seam to make a nice and 'invisible' repair. Then, grind/sand down as needed. Apply 2k primer and once dry, apply your filler over that and bodywork as needed like you are used to doing.
One key thing I would pay attention to if you want your final product to look 'factory' as much as possible is how the new bonding agent squished out of the seam. What I mean by that is, take a look at your panels now where they meet the body. You will see that they applied a bead of bonding agent, then the fenderd and other parts. Some of the bonding material 'squishes' out. Try to add enough, but not too much that it too squishes out on your repair, but not so much that it seems un-natural. Don't take your finger afterwards and smooth it down or it will, again, look like an aftermarket repair. Undercoat when finished.
Good luck,
Mark G
Team Owner


Joined: Sep 2006
Posts: 31,267
Likes: 4,362
From: Westminster Maryland
Hi mta,
I'd think that if you can replace the fender at the original bonding strip your job will be much easier.
Here's a couple of pictures to show the strip's location, hopefully they'll help you. Note that the front clip is really 3 main pieces... the hood surround, and 2 fenders; then the lower valance is added.
Good Luck!
Regards,
Alan
Safety Car
Joined: Jul 2005
Posts: 3,694
Likes: 833
From: WI
Alan, good comment.
Note: When I said in my above post 'make an incision down the length of the fender' I should have indicated the incision should only be about 1/8" deep. Don't cut the bonding strip. Just grind down the depth of the panel you are removing. A grinder would work also.
Mark G
Note: When I said in my above post 'make an incision down the length of the fender' I should have indicated the incision should only be about 1/8" deep. Don't cut the bonding strip. Just grind down the depth of the panel you are removing. A grinder would work also.
Mark G
Corvette Stories
The Best of Corvette for Corvette Enthusiasts

Top 10 Most Expensive Corvettes Ever Sold on Bring A Trailer
Brett Foote
10 Things Every Corvette Owner Needs (2026 Edition)
Michael S. Palmer
8 Most "Only Corvette Owners Understand" Quirks and Problems
Pouria Savadkouei
10 Reasons the C6 Z06 is Still A Performance Benchmark After 20 Years
Joe Kucinski
How Much Horsepower Every Corvette Engine "LOST" in 1972
Joe Kucinski
Top 10 DOs and DON'Ts for Protecting Your Convertible Top!
Michael S. Palmer
Top 10 Most Explosive Corvettes Ever Made: Power-to-Weight Ratio Ranked!
Joe Kucinski
150 hp to 1,250 hp: Every Corvette Generation Compared by the Specs That Matter
Joe Kucinski
8 Coolest Corvette Pace Cars (and Replicas) of All Time
Verdad GallardoPro

Joined: Apr 2006
Posts: 733
Likes: 1
From: Coquitlam British Columbia
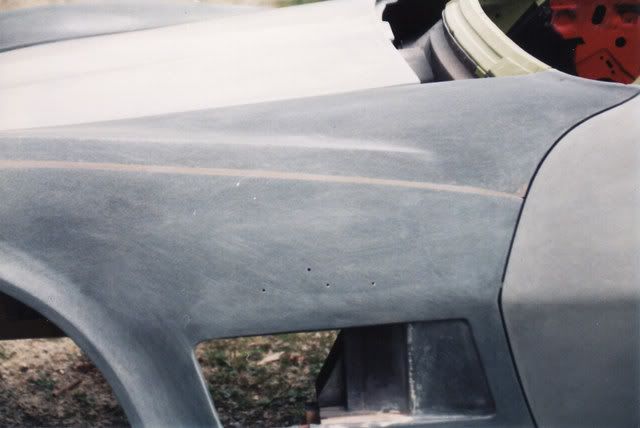
I have some pics of the rear fender replacement in my profile that may be some help. I too would recommend the books and videos that have been mentioned so far.


Glassing in the seam after bonding.


After epoxy Primer.

ikwhite
Glassing in the seam after bonding.
After epoxy Primer.
ikwhite
Melting Slicks
Joined: Jul 2009
Posts: 3,264
Likes: 3
From: Vero Beach FL
Le Mans Master

Joined: Jan 2007
Posts: 5,485
Likes: 7
From: Peekskill NY
There are some really good videos on YouTube showing body panel removal. The guy used a heat gun VERY carefully and a little bit at a time with a metal putty knife to separate the panels from the bonding strips and bird cage. Do a search. Looked really easy.
Good luck.
Glenn
EDIT: Here's the link.
http://www.youtube.com/watch?v=0E6YC5Iys_I
Good luck.
Glenn
EDIT: Here's the link.
http://www.youtube.com/watch?v=0E6YC5Iys_I
Last edited by GD70; Jul 15, 2011 at 11:57 AM.

Melting Slicks
Joined: Aug 2008
Posts: 2,200
Likes: 3
From: Lehigh county Pennsylvania
Rather than grinding the daylights out of the damaged fender, or quarter panel, or whatever, another option is to heat along the bonding strip with a propane torch. It will soften the adhesive bond. I mean really get it hot. We've used this method on big rig hoods for more than 20 years at Ryder Trucks bodyshop.
Itchy fiberglas gives me fits and the less grinding dust, the better.
Itchy fiberglas gives me fits and the less grinding dust, the better.
Team Owner
Joined: Jun 2000
Posts: 38,923
Likes: 1,481
From: Southbound
Cruise-In II Veteran
Safety Car
Joined: Jul 2005
Posts: 3,694
Likes: 833
From: WI
Yeah, I would use the heat method. Grinding makes a real mess. The other thing too, is that these SMC panels are incredibly tough. Pulling apart is very difficult, and breaking them apart is NOT easy. Better to remove in one panel. I learned some things in this thread too.
Mark G
Mark G